 |
Knowledge Base/Oracle Social Engagement and Monitoring/Oracle Social Engagement and Monitoring Documentation
Publishing and Scheduling
Publishing - VIDEO!
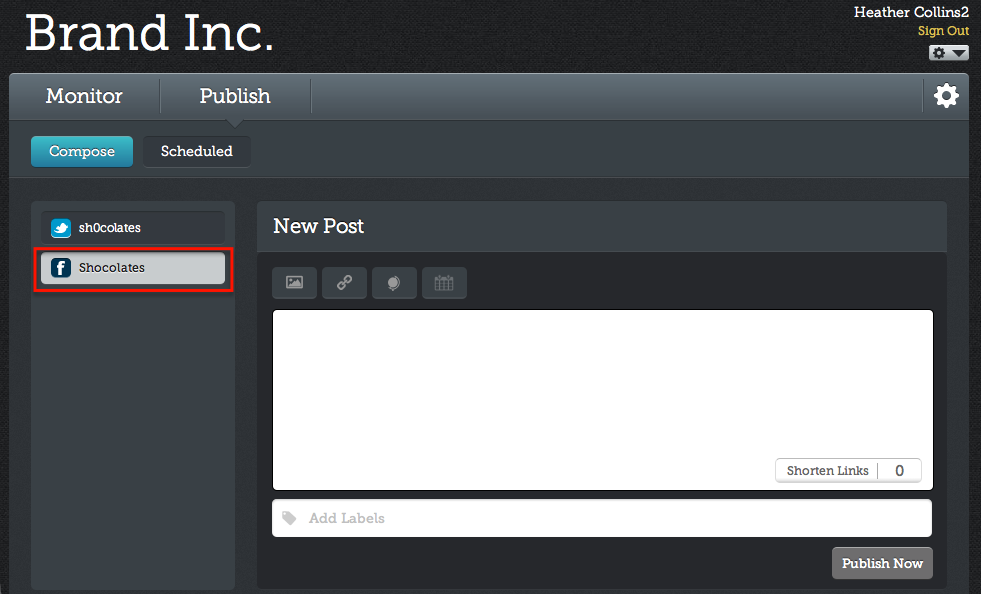
From the Compose New Message state within the Publish section you'll find your authorized channels, or Admin channels, on the left from which to choose for publishing new content. If you haven't added your channels yet, please visit our SetUp Guide to add the appropriate channels to your account and team. (Please note that anyone with access to your Conversation Suite account that has the appropriate permission will also have the ability to publish to these authorized channels.)
Publishing channel:
- Select your channel on the left. (Note: only authorized channels will appear in the list of available channels.)
- You may select multiple Facebook channels or multiple Twitter accounts at once. (Note: Twitter channels and Facebook Channels cannot be selected for publishing at the same time.)
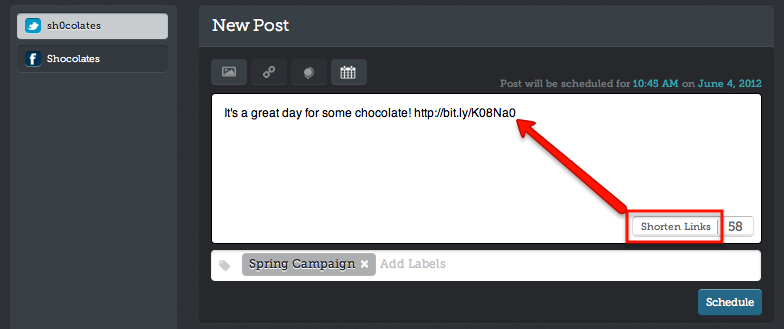
Message Copy: Enter the body of the post into the message box.
- For Twitter posts keep watch of the character count to make sure the message stays at 140 or below. (Note: The Publish Now button will be disabled if character count goes beyond 140)
- Include a link directly in your message (can also be attached for Facebook Messages, see attachments below) or use our button to save characters by shortening the link.
Attachments:
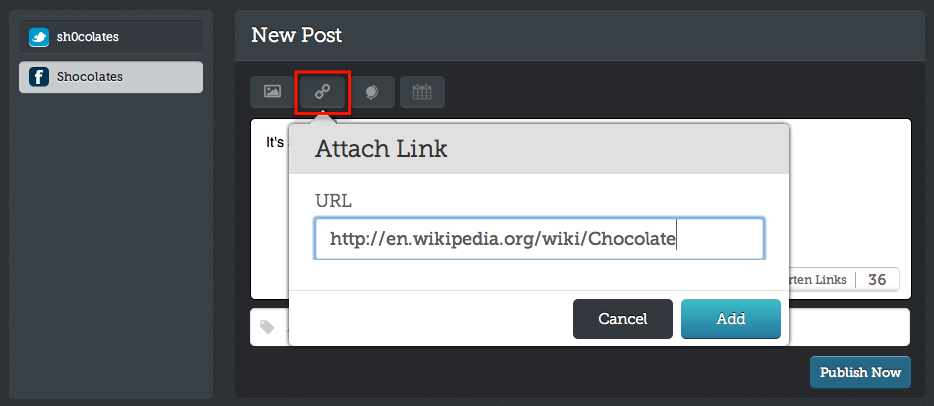
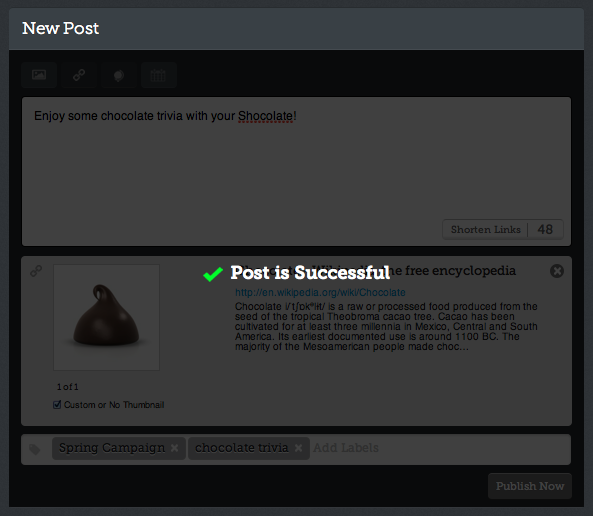
- Link - Facebook Only: Click on the Link icon above the text box. Paste a URL into the field that appears and click on Add. (Attached URLs are automatically shortened using our bit.ly integration.)
- Preview content will appear below your message including the Title of the URL, the URL itself, a description and an image. Scroll through available images to select the one you want.
- If you would like to edit the title and description, simply delete the pre-populated content and type in your own title and description in the appropriate fields.


- If you are not satisfied with the images pulled from the
URL, select the "Custom or No Thumbnail" check box below the images. Stop there to attach your link without any image. OR Click anywhere in the image space above to browse your computer for an image of your choosing. Click on Add to apply the custom image to the link.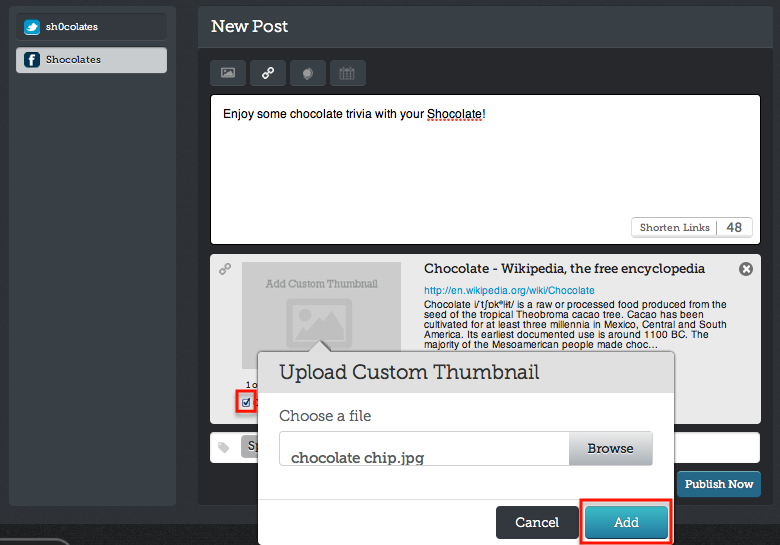
- If you are posting a link to Twitter, enter the URL in the main message box and click on the Shorten Links button. (Note: The Attach Link button will be disabled for Twitter posts.)
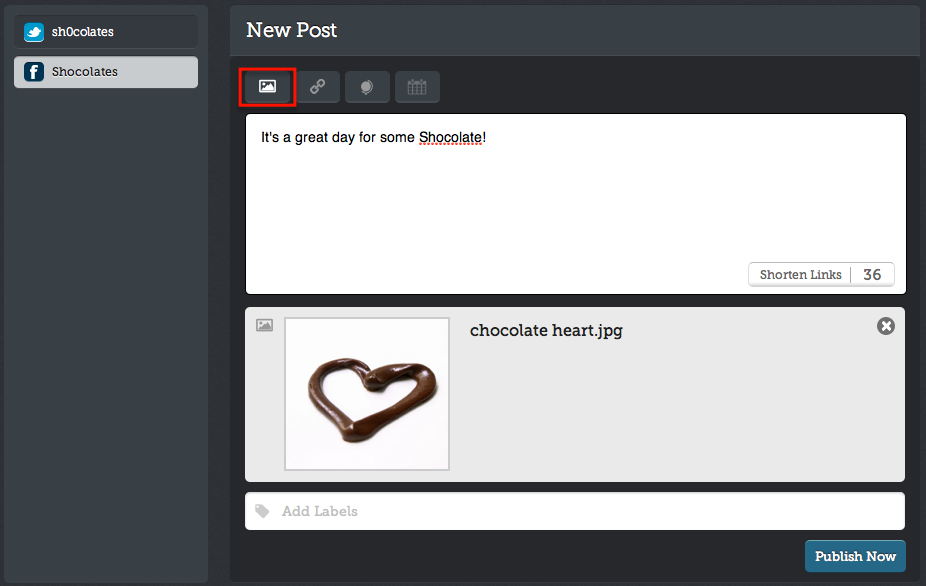
- Photo: Click on the attach image icon to browse your computer for an image that you would like to post.
- Twitter: When posting an image to twitter it will post as a shortened URL that will link to the photo you've attached using pic.twitter.com, the same service that twitter uses. Note that this means images posted to Twitter will also appear on your twitter site's Recent Images.
- Facebook: When posting an image to Facebook, the image will be automatically added to your Wall Photos Album in Facebook and hosted there. Users will be able to see it in the timeline as well as in the album and comment on the photo from either place. (Please note that only one image may be published at a time.)
- Click on the attach image icon to publish a new Album to your Facebook channel and include multiple photos. For more information go the Album Publishing section.
Labels: Add internal key words into the field below your message and/or attachment.
- Label your messages with specific terms to categorize your posts. Once it's published, navigate to the streams section and filter by this label to see the engagement with your labeled messages.
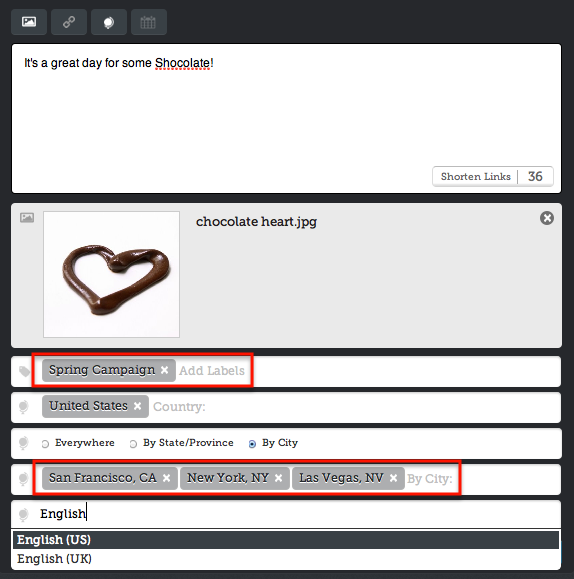
Targeting – Facebook Only: You may target your Facebook messages so they can only be viewed by users from specific countries, states/provinces, cities, and/or languages.
- Click on the Globe icon above the message box to begin targeting (make sure you have selected a Facebook channel on the left first).
- Begin typing a country, when you see it appear below the field select it. You may enter more countries to increase your targeted audience, or you can drill down further to target states or provinces, or specific cities.
- Include any languages to target users more specifically.
- Target as narrowly or broadly as you wish. A user who satisfies at least one selection in each category will be able to view the message.
- For example:
- If you have the following selections:
- Country: United States
- Cities: San Francisco,CA; New York, NY; and Las Vegas, NV
- Languages: English, US
- Then anybody from either of the 3 cities selected who also speaks English will be able to view the post. If somebody lives in one of those cities but has not included in their profile that they also speak English, they will not see the post.
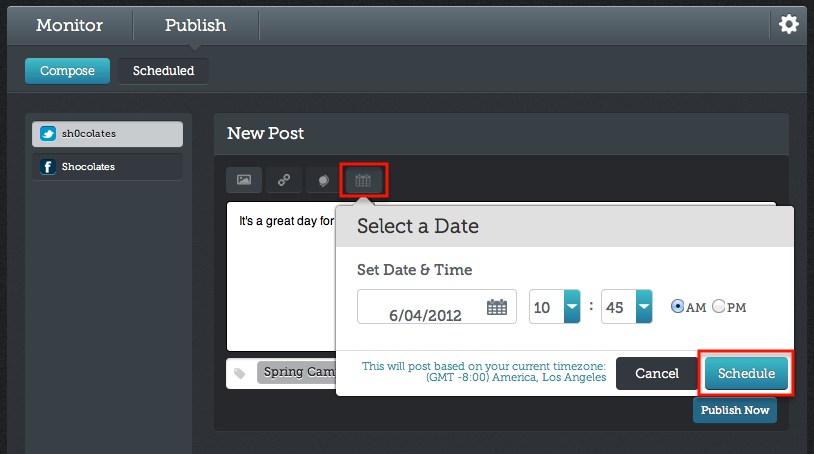
Schedule: You may pick a time in the future that you would like this message to be published.
- Click on the Calendar icon above the message box to schedule your post for a later time.
- Click into the date field to select the day you want the post published
- Select the Hour and Minute, careful to choose AM or PM correctly.
- Take careful note of your timezone as well. This is based on your browser settings so it should always know where you are and posts will be scheduled based on the timezone you are in when you schedule the post.
- Click on Schedule to finish.
Publish Now, Schedule or Submit:
- Click Publish Now to publish your post on your selected channel.
- For Facebook messages your message will be published with our default signature, or your requested Publishing Signature app that was applied to the selected channel when adding it. (Please see the Setup Guide to see how to apply a Publishing Signature to your channels if you have more than one applied to your account.)
- If you have chosen to schedule your message (see the schedule section above for more info) you will see a Schedule button to submit your message to your scheduling calendar.
- If your role allows you only to write posts but not publish them, you will not see the Publish Now or Schedule button; you will instead see a Submit button.
- Submit your post for approval from a user on your team who has publishing permission.
- Those on your team with publishing permission will be notified via email that there is a post awaiting approval. A link is provided directing the user to the post awaiting approval.
- If you are a user with publishing permission, you will see any messages awaiting approval in the Scheduled section, from there any authorized user may approve the message as is, edit the content and/or scheduled time for publication, and resubmit as an approved message.
Scheduled Messages:
- See your messages to be published in the future, or awaiting approval and take any necessary actions on them.
- Edit: Select this to make any changes to the content of the message as well as to reschedule it to another time if needed.
- Schedule: Select a new date and time for your message to be published. If the message is already scheduled, this will reschedule it. If the post is simply awaiting approval, when you select a date and time it will automatically be approved for publishing.
- Publish Now: If you need to push your scheduled message out at a different time, you can click on the Publish Now in the drop down.
- Delete: Click on the Trash icon, or on Delete form the drop down, on the right to delete the message all
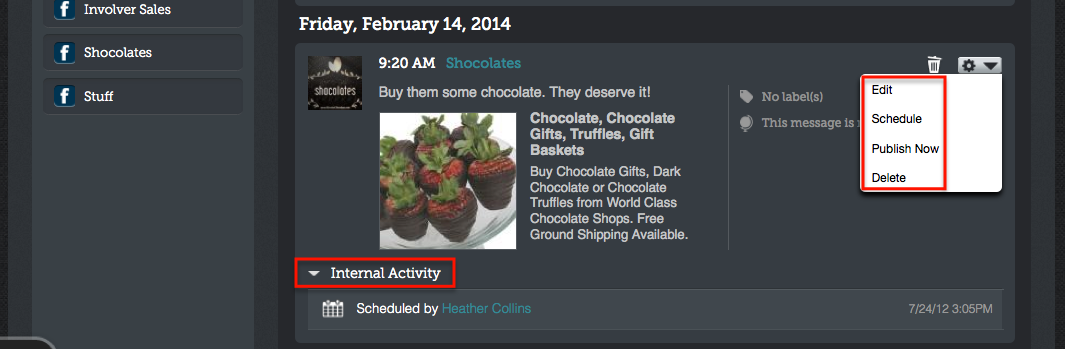
- You will also see an Internal Activity selection where you can see who has submitted, or scheduled a post that has yet to be published. After the post is published, that activity will be available in the Internal Activity section with in the message in the Monitoring Stream (see below)
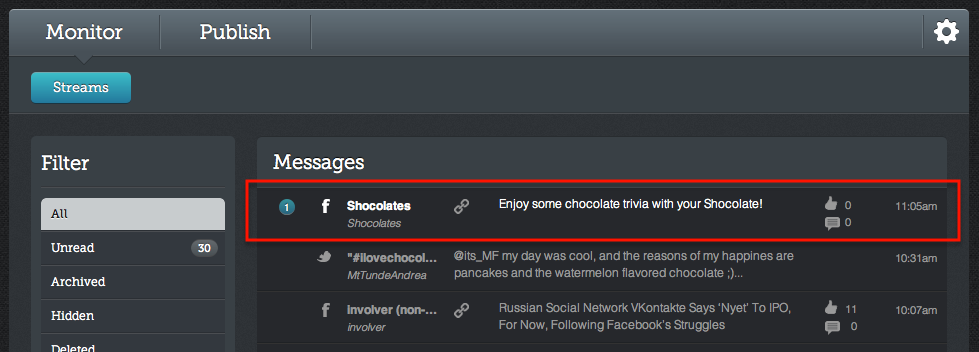
View Published Messages: To view previously published messages, navigate to the Monitoring Tab under your Streams section and select the authorized channel to view all messages.
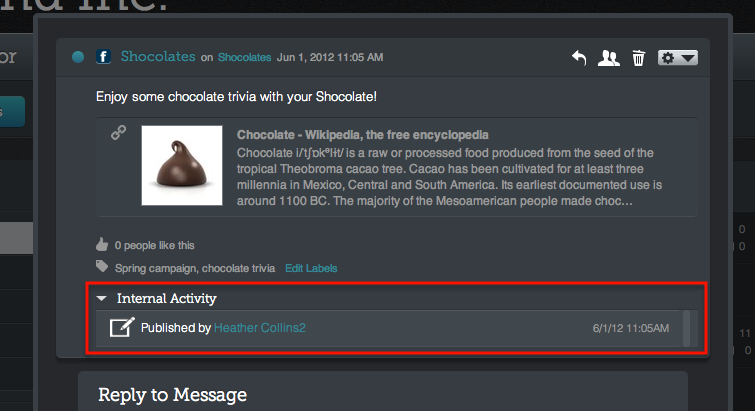 Click into the message to take any internal or public facing actions on the message. (Note: Under the Internal Activity drop down, you will see who has published this message internally.)
- All comments made to this post will display in the thread along with your original post so you can moderate and respond to this content.
Happy Publishing!
Click here to return to the main menu of Conversation Suite Documentation.