5.14.1 Managing Uploaded Files and Images
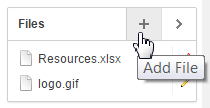
You can upload files and images to a Websheet page using the Files region. Once uploaded, you can display uploaded images within a page section or embed download links to files.
- Uploading Files and Images
Upload a file or image to a Websheet by clicking the Add File icon (+) in the Files menu. - Including a Download Link in a Page Section
You can embed a download link within a page section to uploaded files using the following syntax. - Displaying an Uploaded Image Inline
After you upload an image, you can display it within any page section of an application by embedding a download link using the following syntax. Reference an uploaded image using the image name or image alias. - Editing or Deleting Uploaded Files
Edit or delete an uploaded file by clicking the Edit File icon in the Files region.
Parent topic: Managing Annotations
5.14.1.1 Uploading Files and Images
Upload a file or image to a Websheet by clicking the Add File icon (+) in the Files menu.
To upload files and images to a Websheet:
See Also:
Displaying an Uploaded Image InlineParent topic: Managing Uploaded Files and Images
5.14.1.2 Including a Download Link in a Page Section
You can embed a download link within a page section to uploaded files using the following syntax.
Syntax:
[[ file: < file name > | < link name > ]]
[[ file: < file alias > | < link name > ]]
Syntax Examples:
[[file: myfile ]]
[[file: myfile.xls ]]
[[file: myfile | My File ]]
File Markup Example:
This [[file: parts01.xls | spreadsheet ]] documents our part numbers.
Parent topic: Managing Uploaded Files and Images
5.14.1.3 Displaying an Uploaded Image Inline
After you upload an image, you can display it within any page section of an application by embedding a download link using the following syntax. Reference an uploaded image using the image name or image alias.
Images defined for the current page are used before images associated with other pages. If image names are ambiguous, the most recently created image displays.
Syntax:
[[ image: < file name > | < properties > ]]
[[ image: < file alias > | < properties > ]]
Syntax Examples:
[[image: myimage ]]
[[image: theimagename.jpg ]]
[[image: myimage | width="600" alt="my image" ]]
Example:
This diagram [[image: diagram1]] illustrates the work flow.
Parent topic: Managing Uploaded Files and Images
5.14.1.4 Editing or Deleting Uploaded Files
Edit or delete an uploaded file by clicking the Edit File icon in the Files region.
To edit details or delete uploaded files:
Parent topic: Managing Uploaded Files and Images
