10 Developing the Calendar Page
Expand the functionality of the Calendar page to also enable users to view and manage their projects.
About This Lesson
When you used the Create App Wizard to create a calendar page, you built the calendar on the DEMO_TASKS table. Currently, the Calendar page is basically display only. You can view the names of tasks and their timeline—and that is it.
In this lesson, you learn how to make the projects displayed in the calendar interactive by configuring drag and drop functionality and linking the task names to their entry in the Maintain Project form.
Starting from here:
Basic Projects App Export - Topic 8.sqlIf you have not completed the previous lessons, you can use the appendix "Importing an Application into a Workspace" to import the above SQL script into your workspace and continue working from this lesson forward. You can find this script in the /files subdirectory of where you unzipped the .zip file accompanying this tutorial.
10.1 Hiding the Header and Border of the Calendar in the Runtime
Begin by hiding the header and border portions of the Calendar from view to streamline the display.
To hide the calendar header and border with Live Template Options:
10.2 Enabling Drag and Drop of Individual Projects
Enable drag and drop on the key columns of the DEMO_TASKS table so that your users can reposition projects within the calendar.
To enable drag and drop for projects in the calendar:
- On the Developer Toolbar, click Edit Page 6 to return to Page Designer.
- In the Rendering tree, locate the Calendar region under the Content Body folder.
- In the Rendering tree under Calendar, select Attributes.
- In the Property Editor:
10.3 Adding Links to the Calendar Page
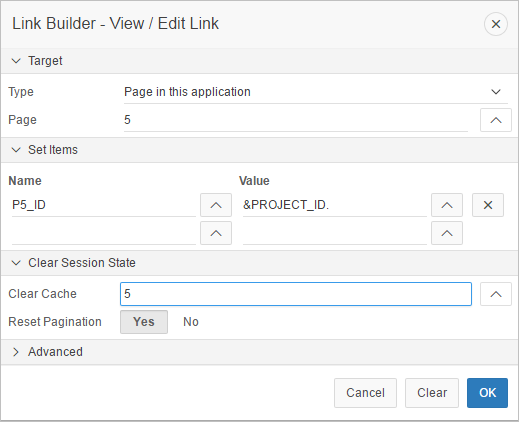
In addition to drag and drop, you can convert all the projects to links that your users can click a project, the app navigates to the Maintain Project page for that item for quicker editing.
To add a link to Maintain Project for every item in the calendar:
Review the changes to the Calendar and new functions.
-
Hover over a calendar entry to see the tooltip, which displays the Task Name, Start Date, and End Date.
-
Click on an existing calendar entry and see how the Maintain Task page appears, populated with the calendar entry details.
-
Click and hold a calendar entry and move it to a new date in the calendar and see how the Start Date and End Date for the selected Task are updated.
-
Click and hold on the end of a calendar entry and move left or right and see how just the End Date for the selected Task is updated.
-
Click the List button to see the list of events for the current month.
-
After performing a drag-and-drop operation, click on the calendar entry to check that the dates for that task have changed.
Congratulations! Your app is complete.
