9 Developing the Tasks Master Detail-Detail Regions
Add master detail-detail regions to the Tasks detail region on the Maintain Project master detail form.
About This Lesson
Previously, you added the Milestones and Tasks detail regions to the Maintain Project form to create a master detail page.
In this lesson, you learn how to add master detail-detail sub regions to a detail region. Master detail-details are basically detail regions within detail regions.
Add the To-Dos and Links sub regions to the Tasks region to query the DEMO_TO_DOS and DEMO_LINKS tables. These sub regions display additional information depending on which Task the user selects. When you are finished, your users can update as many as five different tables with this single form in your app.
Creating master detail-detail regions is very similar to creating a master detail region, so many of the steps in this lesson should be familiar to you.
Starting from here:
Basic Projects App Export - Topic 7.sqlIf you have not completed the previous lessons, you can use the appendix "Importing an Application into a Workspace" to import the above SQL script into your workspace and continue working from this lesson forward. You can find this script in the /files subdirectory of where you unzipped the .zip file accompanying this tutorial.
9.1 Creating the To-Dos Sub Region
Add the To-Dos editable interactive grid sub region to the Tasks region so that your users can easily update their to-dos for a task.
To add an interactive grid as a sub region to the Tasks region:
To make the interactive grid editable:
9.2 Linking the To-Dos Sub Region
Hide columns from display, but link them to the higher level tables so that this region functions as the detail in a master-detail relationship. Then change the Assignee column to a select list for improved usability.
To hide and link the ID, PROJECT_ID, and TASK_ID columns of the To-Dos sub region to the Tasks region:
- In the Rendering tree under To-Dos, expand the Columns folder and select the ID column.
- In the Property Editor:
- Identification: Type - select Hidden
- In the Rendering tree under To-Dos, select the PROJECT_ID column.
- In the Property Editor:
- In the Rendering tree under To-Dos, select the TASK_ID column
- In the Property Editor:
- Identification: Type select Hidden
- Master Detail: Master Column - select ID
To change the ASSIGNEE column to a select list:
- In the Rendering tree under To-Dos, select the ASSIGNEE column.
- In the Property Editor:
- Identification: Type - select Select List
- Heading: Alignment - select start
- Layout: Column Alignment - select start
- List of Values: Type - select Shared Component
- List of Values: List of Values - select TEAM MEMBERS
- List of Values: Display Extra Values - select No
- List of Values: Null Display Value - enter - Select Assignee -
9.3 Improving the To-Dos Columns
Change the Name column to a text field and the Is Complete? column to a switch for easier editing in the runtime.
Then make the audit details display only.
To change the NAME column to a text field:
To change the IS_COMPLETE_YN column to a switch:
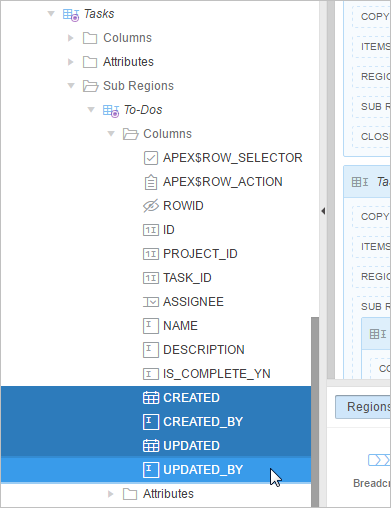
To make the audit details display only:
9.4 Creating the Links Sub Region
Create and configure the Links sub region in the Tasks region.
To add the Links sub region to the Tasks region:
- In the Rendering tree, right-click Tasks and select Create Sub Region.
- In the Property Editor:
- Identification: Title - enter Links
- Identification: Type - select Interactive Grid
- Source: SQL Query - enter select * from demo_links
- Appearance: Template - select Standard
- Master Detail: Master Region - select Tasks
- Server-side Condition: Type - select Item is NOT NULL
- Server-side Condition: Item - select P5_ROWID
To change the region to an editable interactive grid:
- In the Rendering tree under Links, select the Attributes folder.
- In the Property Editor:
- Edit: Enabled - select Yes
- Toolbar: Buttons - deselect Save
9.5 Linking the Links Sub Region
Hide columns from display but link them to the higher level tables so that this region functions as the detail in a master-detail relationship.
To hide the ID column:
- In the Rendering tree under Links, expand the Columns folder and select the ID column.
- In the Property Editor:
- Identification: Type - select Hidden
To hide the PROJECT_ID column and link it to the Tasks Project Id column:
- In the Rendering tree, select the PROJECT_ID column.
- In the Property Editor:
To hide the TASK_ID column and link it to the Tasks Id column:
- In the Rendering tree, select the TASK_ID column.
- In the Property Editor:
- Identification: Type - select Hidden
- Master Detail: Master Column - select ID
9.6 Improving the Links Columns
Change the Link Type column to a select list, update several columns with more user-friendly labels, and change the audit details to display only.
To change the LINK_TYPE column to a select list:
To update the labels for the URL, APPLICATION_ID, and APPLICATION_PAGE columns:
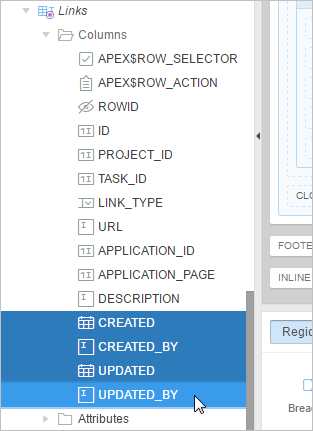
To make the audit details display only:
9.7 Adding a Dynamic Action to Enable Columns for Link Type
-
the URL of a relevant website
-
a page in the application
Currently, when your users add a new entry to the Links sub region, they can enter information into columns that may not apply, which may be confusing.
Add a dynamic action to the LINK_TYPE column so that the interactive grid displays only the relevant columns when they select the link type. You must create and define two different "True" dynamic actions to enable the relevant columns for URLs. Then, create an Opposite Action for each dynamic action to enable the Application Pages columns.
To add a dynamic action to the LINK_TYPE column for URLs:
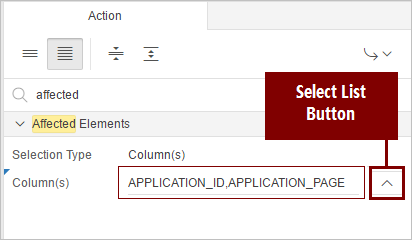
To add a second dynamic action to the LINK_TYPE column for URLs:
9.8 Adding Opposite Actions to Dynamic Actions
Include the corresponding opposite action for dynamic action types such as Show, Enable, and Expand Tree. With an opposite action, the affected elements are set one way if the Client-side Condition evaluates to True and the opposite if the Client-side Condition evaluates to False. In this case, the URL column is enabled when LINK_TYPE equals URL, and is disabled when any other link type is selected. Conversely, APPLICATION_ID and APPLICATION_PAGE are disabled when LINK_TYPE equals URL.
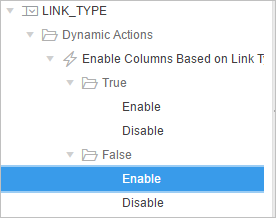
To create an opposite action for each True action:
9.9 Improving the To-Dos Interactive Grid in the Runtime
Clean up the columns in the To-Dos report by removing the audit details and reordering the columns, then save your changes to the Primary report.
To remove the audit detail columns and reorder the remaining columns:
To resize the columns:
To save the report:
9.10 Improving the Links Interactive Grid in the Runtime
Perform similar tasks to make the Links sub region consistent with To-Dos, then save your changes to the Primary report.
To remove the audit detail columns:
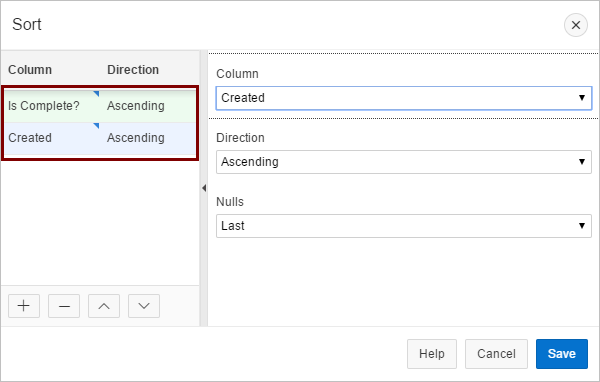
To order the report by the Created column:
(Optional) To resize the columns:
To save the report:
You have completed the Links detail sub region and fully configured the master detail-detail page.
Proceed to the next lesson.
