Creating Same As Source Assignment Rule Definitions

When defining a Same as Source assignment rule, you create an assignment rule that enables you to use a wild card for member selection in one, some or all of the destination stage dimensions. When the rule is selected using "rule selection," the dimensions marked for Same As Source would use the same member on both the destination and source stage dimensions.

Note:

The Level-0 members that are used in the Same As Source member selection within the rule must be present as Level-0 members in both the source and destination stage dimensions.

The rule that contains the Same as Source setting acts as a wildcard to pull in individual members of the selected dimension as the new destination each time you select the rule.

When the calculation script is generated, the script inserts the selected source into the rule, to create the appropriate allocation.

To create Same As Source assignment rule definitions:
  1. In an open model, from Task Areas, select Manage Allocations, then Assignment Rule Definitions.

    The Assignment Rule Definitions screen is displayed.

  2. Click Add Add icon.

    The Assignment Rules wizard is displayed.


    Use the Assignment Rules Definition wizard to select the intersection for the assignment rule.
  3. Under Browser, select the first member for the intersection.
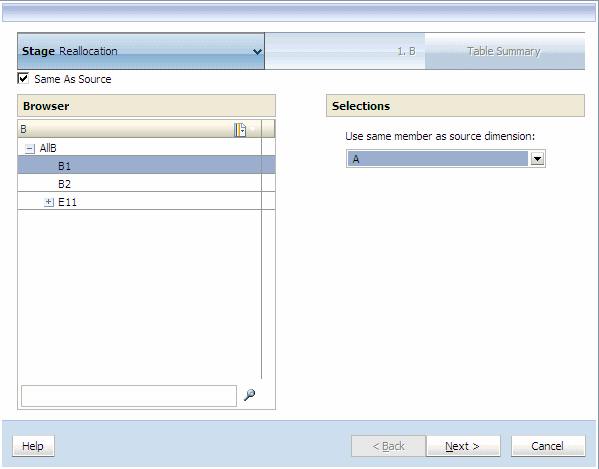
  4. Above Browser, click Same As Source.

    The Selections column of the screen is modified to display the Same as Source drop-down list.


    Use the Same As Source check box to use the same member as the source dimension for the assignment rule.
  5. Under Selections, select the dimension to be used as the source for the for the assignment rule, and then click Next.

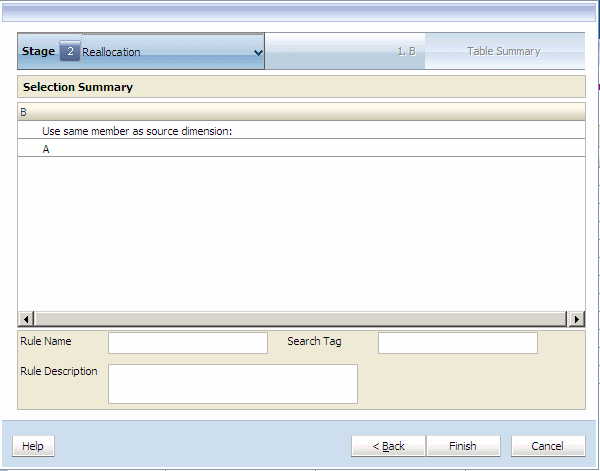
    Use the Selection Summary to review the assignment rule definition, and enter a Rule Name, Search and Rule Description.
  6. Click Finish.

    The Rule Name is added to the list of Available Rules on the Assignment Rules Management dialog box.

  7. Click Add Add to List Arrow to move the selected member to Selections, and then click Next.
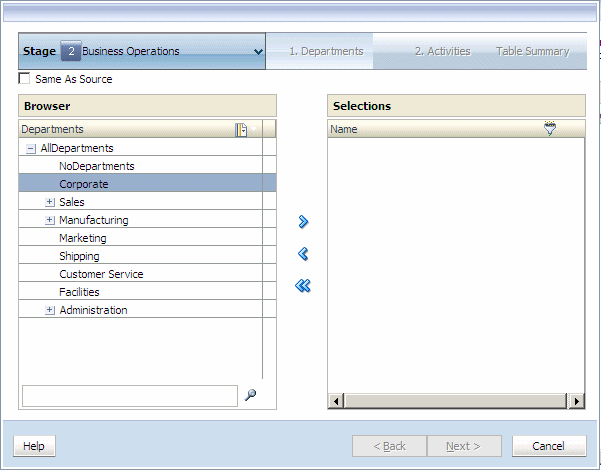
  8. Under Step 2, under Browser, select the second member of the intersection for the Destination of the assignment.
  9. Click Add Add to List Arrow to move the selected member to Selections, and then click Next. Repeat this step for additional dimensions, if required.

    When all members have been selected for the intersection, the Destination Selection Summary is displayed.


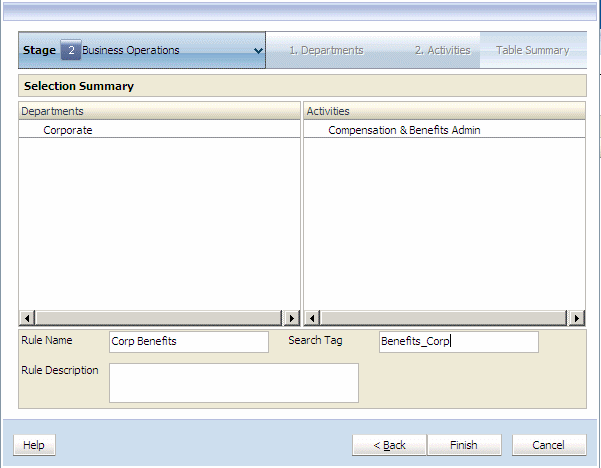
    The Assignment Rule Definition Summary table is used to view the rule, and enter the Rule Name, Search Tag and a brief description.
  10. Enter the following information for the new rule:
    • Rule Name. The rule name can contain a maximum of 80 characters.

    • Search Tag. The search tag may contain a maximum of 80 characters.

    • Rule Description

  11. Click Finish.

    The Rule Name is added to the list of Available Rules on the Assignment Rules Management dialog box.