Creating Assignments

Assignments carry costs and revenues from one intersection to another, creating a financial flow within a model.

Oracle recommends the following flow:

  1. Create all assignments for a process or allocation in sequence to ensure that all elements are captured.

  2. Validate the model structure to verify that no appropriate driver selections are missing.

To create assignments:
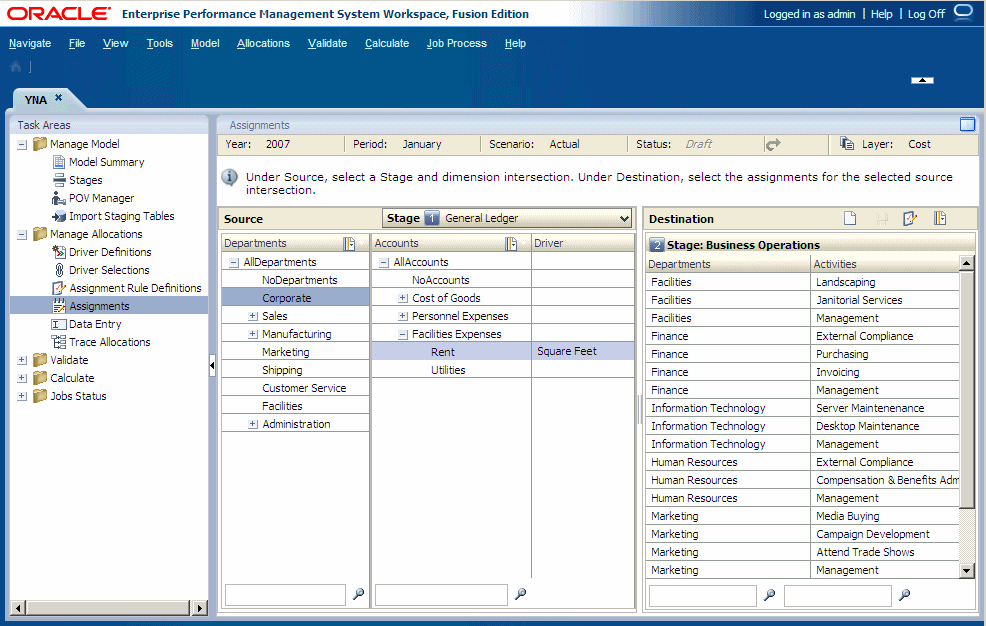
  1. In an open model, from Task Areas, select Manage Allocations, then Assignments.

    The Assignments screen is displayed.

  2. Select a POV for the selected model, and then click Go Go icon.
  3. Select a Layer.
  4. Beside Source, from the Stage drop-down list, select a model stage for the assignment.

    The dimensions and members for the selected model stage are displayed.


    The Assignments screen is used to select the stage, and Source intersection for an assignment.
  5. Under Source, select a member from each dimension to create the intersection for the source of the assignment.

    The driver is identified in the Driver column. The Destination column is populated with the dimensions and members of the destination stages.

    Note:

    To find a member in the hierarchy, type the member name in the text box at the bottom of the column, and then click Search.

  6. Optional: Under Destination, select Member Selector Member Selectorto filter the list of available destinations:
    1. From the drop-down list, select Show Alias or Show Name, as required.
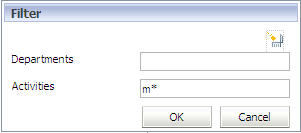
    2. Select Filter Filter icon to display the Filter dialog box.
    3. Enter the filter criteria in one or more dimensions, and then click OK.

      Enter the exact name of the required members, or use trailing asterisk (*) as a wild card to select a range of members, or a trailing question mark (?) to select a single character. For example, to find all members of a dimension that begins with the letter "M", enter "M*". Entering the asterisk before the letter does not work, for example "*M."


      Enter the filter criteria for one or more dimensions
  7. Under Destination, click Add Add icon.

    Add Destination screen is used to select the destination stage and intersection for the assignment.
  8. Under Stage, select the stage that is to be the destination for this assignment:
    • For an interstage assignment, select any stage following the Source stage.

    • For an intrastage assignment, select the same stage as the Source stage.

    Note:

    For stages that allow intrastage allocations, in which the source and destination intersections are within the same stage, the Oracle Essbase outline contains separate dimensions to store the destination intersection values. These dimension have the suffix '_intra'. For example, if the stage dimensions are OPS_Products and OPS_Activities, the destination data for intrastage allocations is stored in the OPS_Departments_intra and OPS_Activities_intra dimensions.

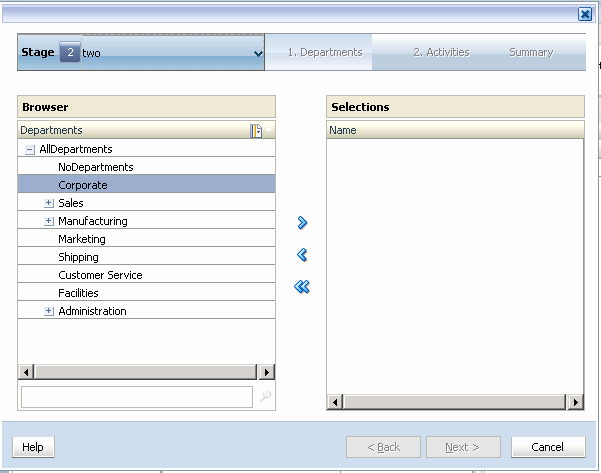
  9. Under Step 1, select the first member of the intersection for the Destination of the assignment.
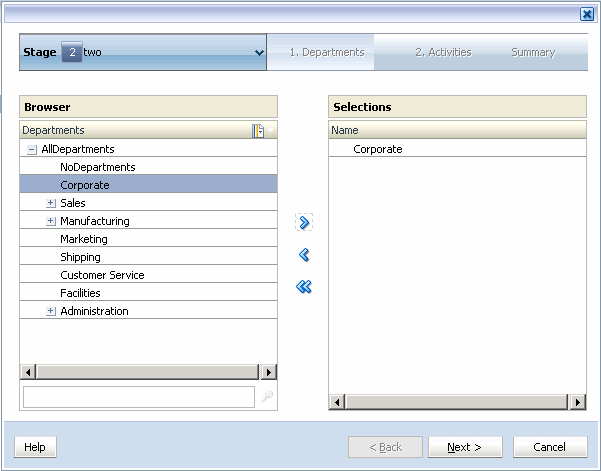
  10. Click Add Add Arrow to move the selected member to Selections.

    Note:

    To remove a member from the Selections list, highlight the member to be removed, and click Remove Remove Button. To remove the entire list, click the Remove All Remove All icon.


    Select the first member of the intersection, and use the Add arrow to move it to the Selections column.
  11. Click Next.
  12. Under Step 2, select the second member of the intersection for the Destination of the assignment, and then click Next.
  13. Optional: Repeat step 9 and step 10 to select additional members.

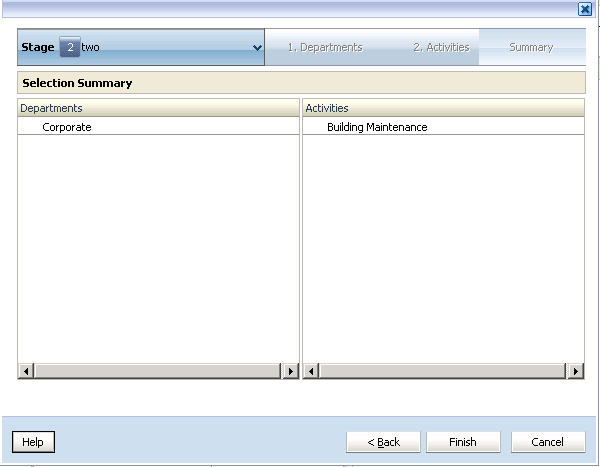
    When all members have been selected, the Destination Selection Summary is displayed.


    The Selection Summary displays the intersections that you have selected.
  14. Verify the selections are correct, and then click Finish.