Defining Orchestration Response Messages (Tools Release 9.2.5.4)
Starting with Tools Release 9.2.5.4, you can create a custom message based on success, warning and/or error status to include in the orchestration response. For warning and error messages, you can create a custom message or allow the system to generate a message based on the existing response content. You can also choose to add information about the orchestration execution to the response.
For example, when a mobile application is used to create sales orders in EnterpriseOne, the orchestration designer can create a simple success message that says, "Sales Order 123123 is successfully created.” The mobile application will easily access this message from the orchestration response and display the message to the user. Similar messages can be written for warnings and error conditions.
The following new output elements are now available in the Output tab in the Run Orchestrations window:
The characters after jde are two underscore characters.
jde__simpleMessagejde__statusjde__startTimestampandjde__endTimestampjde__serverExecutionSeconds
You can define the messages in the Define Messages tab in the Outputs and Assertions window.
The success, error, and warning messages are returned using the
jde__simpleMessage output element. When you run the orchestration,
a success message is returned if the orchestration runs successfully. An error message
is returned when the orchestration ends in an exception (500 status). A warning message
is returned when the orchestration completes successfully but warnings or errors are
returned from a form request or an orchestration step that failed, but without causing
the orchestration to be terminated due to the Continue on Error configuration.
The messages are displayed as a string value that includes newline (\n) characters to help with the readability of the content.
To define messages:
- In the orchestration design page, click the End node.
- Click the Outputs and Assertions icon.
- Click the Define Messages tab.
To define a success message:
- Enable the Success Message option.
- Enter the message in the text field next to the Success Message option.
- If you want to add a variable to your success message, click the Add
Variable drop-down menu next to the success message text field and
select the required variable.
The variable will be appended to the end of the message using the
${}notation. You can cut and paste the variable from the end of the message to anyplace in the message.
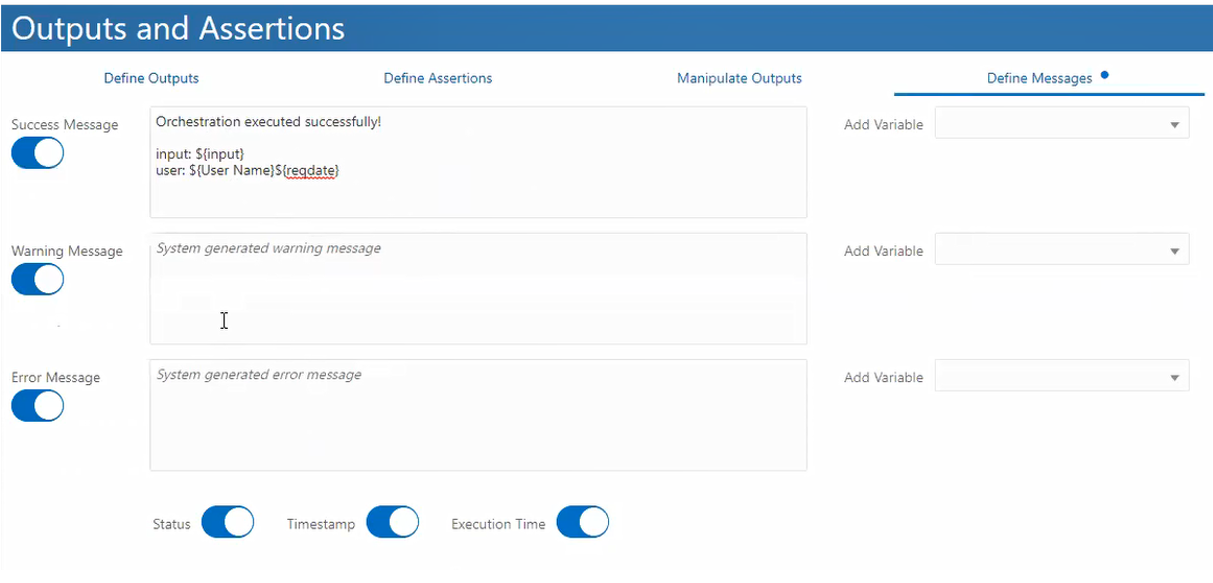
- To define a warning message:
- Enable the Warning Message option.
- Enter the warning message in the text field next to the Warning Message
option.Note: If you do not enter a customized warning message, the response contains the system-generated warning message.
- If you want to add a variable to your warning message, click the Add Variable drop-down menu next to the warning message text field and select the required variable.
- To define an error message:
- Enable the Error Message option.
- Enter the required error message in the text field next to the Error Message
option.Note: If you do not enter a customized error message, the response contains the system-generated error message.
- If you want to add a variable to your error message, click the Add Variable drop-down menu next to the error message text field and select the required variable.
- Enable the Status option to add the
jde__status elementto the output. - Enable the TimeStamp option to add the
jde__startTimestampandjde__endTimestampelement to the output. - Enable the Execution Time option to add the
jde__serverExecutionSecondselement to the output.