Creating an Autonomous Transaction Processing Instance on Dedicated Exadata Infrastructure in Oracle Cloud Infrastructure
Oracle Cloud Infrastructure supports these Autonomous Database systems:
- Autonomous Transaction Processing
- Autonomous Data WarehouseImportant: For use with JD Edwards EnterpriseOne, only the Autonomous Transaction Processing system is supported.
The Autonomous Transaction Processing system runs on:
- Dedicated Exadata Infrastructure
- Shared Exadata InfrastructureImportant: For use with JD Edwards EnterpriseOne, only the Dedicated Exadata Infrastructure system is supported.
Prerequisites
Refer to the "Prerequisites" section in this Oracle Cloud Infrastructure documentation: Creating Autonomous Transaction Processing on Dedicated Infrastructure.
You must have already created a compartment in which the Autonomous Database will reside. Refer to the module "Performing Setup Tasks in Oracle Cloud Infrastructure" of this Learning Path.
Creating an Autonomous Database Instance for Autonomous Transaction Processing Dedicated
Use one of the following two procedures to create an Autonomous Transaction Processing instance on Dedicated Exadata Infrastructure in an Autonomous Database running in Oracle Cloud Infrastructure.
You can access the Create Autonomous Database page by either of these means:
- Using Quick Actions
- Using the Main Navigation Menu
Using Quick Actions
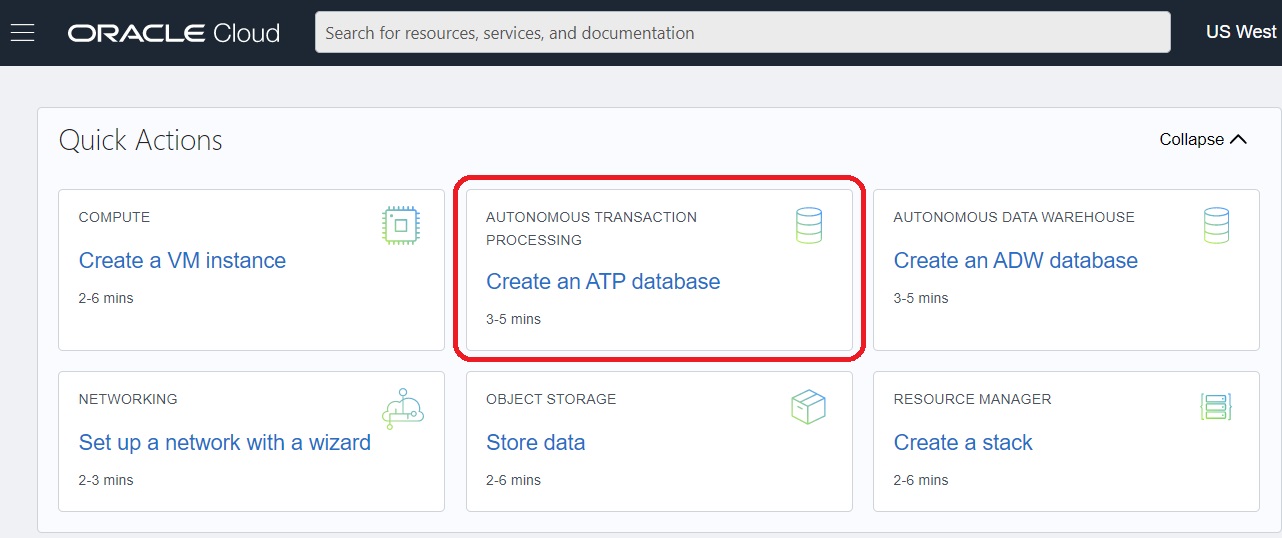
- To access the Create Autonomous Database page using Quick Actions, in the Quick
Actions section click the Create an ATP database icon. Note: The selection of Quick Actions on the main entry into Oracle Cloud Infrastructure is variable; therefore this action may or may not be available in subsequent versions of this user entry.
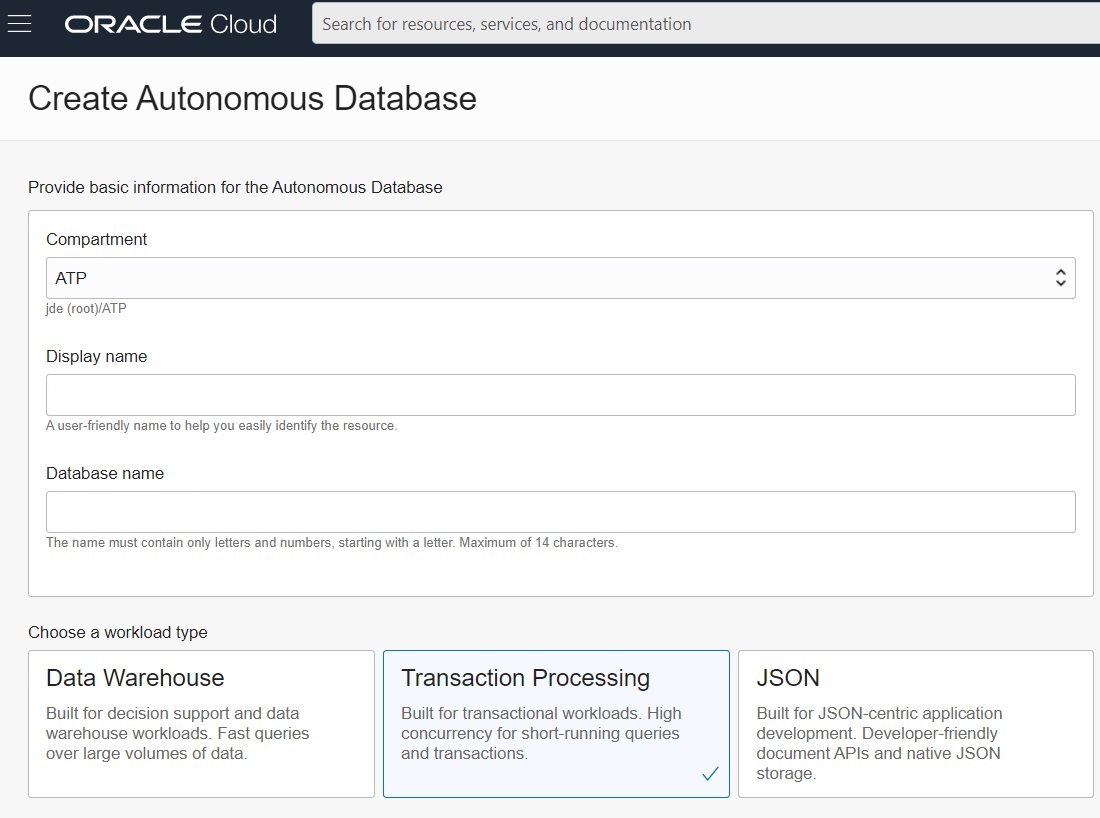
The Create Autonomous Database screen is displayed.
Note: By default, the Autonomous Database creation workflow launches in your current compartment and you can use the network and subnet resources in that compartment. Otherwise, you can use the menu in the Compartment section to choose the compartment into which you want to create your Autonomous Transaction Processing instance. In this example, the user has launched the Quick Action process from a compartment that has been named as ATP. - Click the Transaction Processing tile.
- To continue with the creation of this instance, complete the procedure described in this Oracle Cloud Infrastructure document: Creating Autonomous Transaction Processing on Dedicated Infrastructure.
Using the Main Navigation Menu
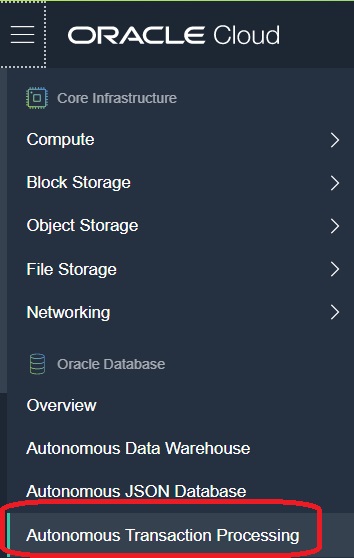
- On the Oracle Cloud Infrastructure Console Home page, click the navigation menu
in the upper-left corner and select Autonomous Transaction
Processing.
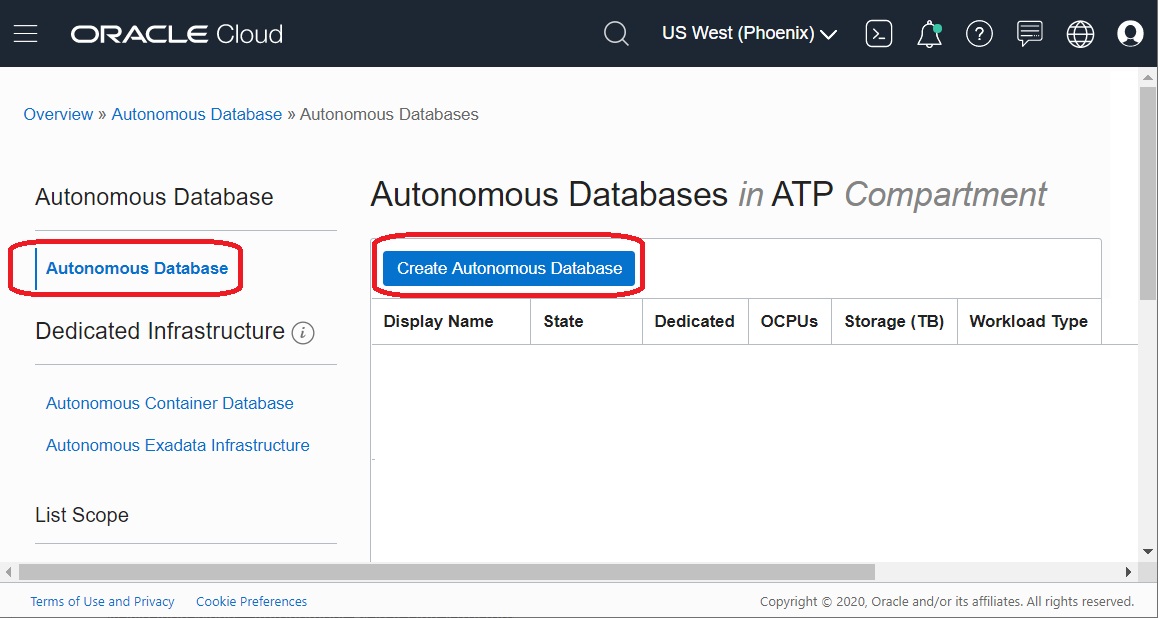
- In the left pane, select Autonomous Database, then in the right pane,
select Create Autonomous Database.
 Note: By default, the Autonomous Database creation workflow launches in your current compartment and you can use the network and subnet resources in that compartment. Otherwise, you can use the menu in the Compartment section to choose the compartment into which you want to create your Autonomous Transaction Processing instance. In this example, the user has launched the Quick Action process from a compartment that has been named as ATP.
 - Click the Create Autonomous Exadata Infrastructure button.
- To continue with the creation of this instance, complete the procedure described in this Oracle Cloud Infrastructure document: Creating Autonomous Transaction Processing on Dedicated Infrastructure.