Accessing the JD Edwards One-Click Provisioning Console
This section shows you how to access the JD Edwards One-Click Provisioning Console.
As described in the subsequent sections in this Learning Path, you will access and use the JD Edwards One-Click Provisioning Console to set up a completely functional EnterpriseOne environment by performing these three steps:
- Configure – Provide the Server Manager details.
- Orchestrate – Create the deployment plan.
- Deploy – Initiate the scripts for the automated provisioning of the JD Edwards EnterpriseOne system.
Prerequisite
- You should have a fundamental understanding of the Oracle Cloud Infrastructure. It is highly recommended that you review the extensive collateral information, including training, at this site:
- You must have a subscription to Oracle Cloud Infrastructure and and an administrator account in the platform. For more information, refer to this site:
- You must have installed PuTTY on your Microsoft Windows machine. By default, this installation includes the requisite software component called Pageant (Putty authentication agent). The program provides a Secure SHell (SSH) tunneling method for connecting to Unix or Linux machines through PuTTY.
- To access the JD Edwards One-Click Provisioning Console, you must use a supported browser. See Supported Browsers under Browser Issues.
Obtaining IP Addresses
You will need these IP addresses to complete this task:
- Public IP address of the bastion host
- Private IP address of the Provisioning Server (which also includes Server Manager)
These are the servers that were created by the Reference Architecture (OpenTofu) user interface using the Infrastructure Provisioning Console. The bastion host is the server to use as a gateway to the other servers. It is the only created server that has an external facing public IP address. The Provisioning Server (which includes Server Manager) is used to run the One-Click Provisioning Console, and it contains a pre-deployed Server Manager for JD Edwards EnterpriseOne.
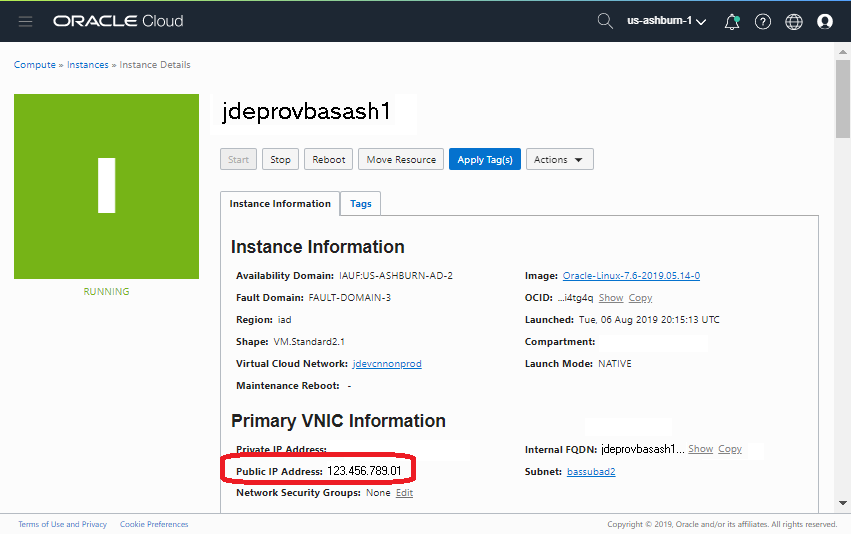
Obtaining the Public IP Address of the Bastion Host
The name of the instance for the bastion host is formed by the value you enter in the
Infrastructure Provisioning Console plus the system appended value
basxxxn
where bas is a constant
where xxx is the 3 letter abbreviation for your region
where n is the suffix of that region name.
For example, the abbreviated value for the region us-ashburn-1 is
ash1.
Therefore, if you entered a value of jdeprov in the Infrastructure
Provisioning Console as the name of the bastion server, the instance created by the
OpenTofu scripts would be jdeprovbasash1.
You can determine and obtain the public IP address of the bastion host using these steps to navigate the user interface of Oracle Cloud Infrastructure.
- Using the information above as criteria for the instance name, locate and click the instance for your bastion server for JD Edwards EnterpriseOne infrastructure provisioning.
- Obtain and record the value from the Public IP Address field.
You will need this value to access this instance.
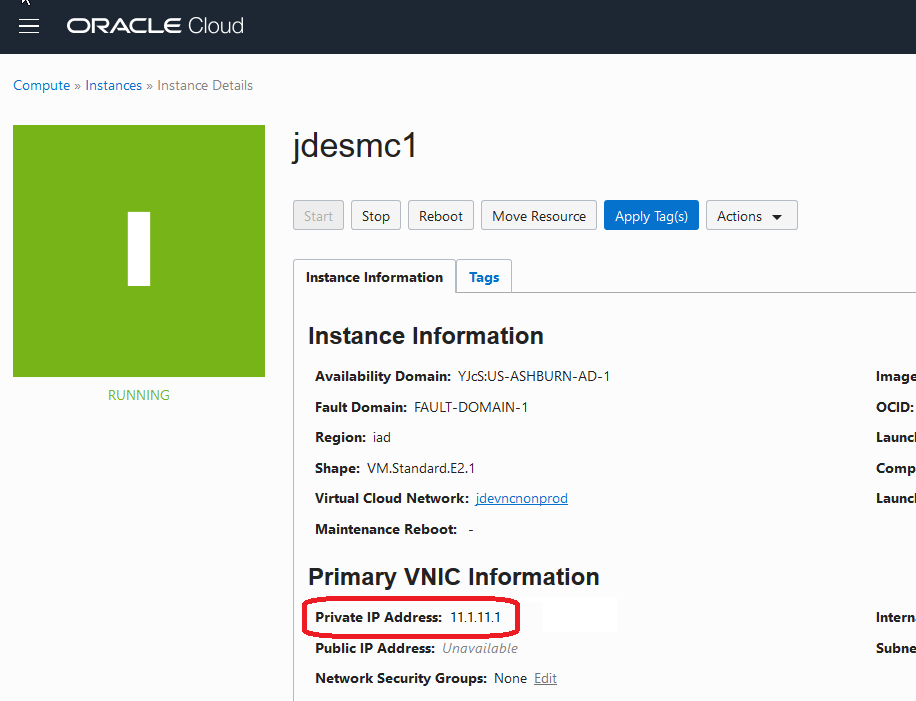
Obtaining the Private IP Address of the Provisioning Server (which also includes Server Manager)
The name of the instance for the Provisioning Server (also contains the Server Manager Console) is formed by the value you enter in the Infrastructure Provisioning Console plus the system appended value smc1.
For example, if you entered a value of jde in the Infrastructure Provisioning Console as the name of the Provisioning Server, the instance created by the OpenTofu scripts would be jdesmc1.
You can determine and obtain the private IP address of the Provisioning Server using the user interface of Oracle Cloud Infrastructure.
- Using the information above as criteria for the instance name, in the region and compartment in which you ran the first-time setup scripts, locate and click the instance for your Provisioning Server for JD Edwards EnterpriseOne infrastructure provisioning.
- Obtain and record the value from the Private IP Address field.
You will need this value to access this instance.
Connecting to a Provisioning Server in a Private Network Through the Bastion Host
To connect to a Provisioning Server in a private network, you must provide a private key. This key was converted from openssh format to ppk format in a preceding task in this Learning Path.
This procedure describes how to connect from a Microsoft Windows client to a Microsoft Windows host in a private network in Oracle Cloud Infrastructure through the bastion host that has been deployed during JD Edwards EnterpriseOne infrastructure provisioning.
- On your Microsoft Windows client, search for the Pageant application
(pageant.exe).Note: As mentioned in the What Do You Need? section above, this program is a standard component of PuTTY for Microsoft Windows.

- Start the pageant <Pageant> application to see the Pageant Key List
window.
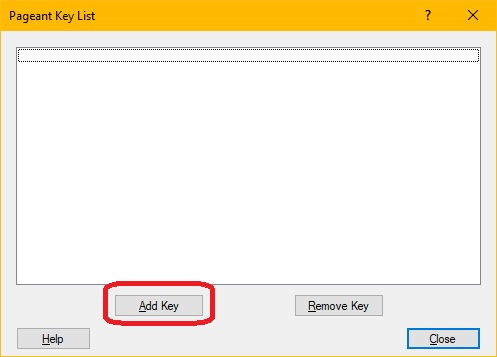
- Click the Add Key button and browse and select the private key named
OCI_Instance.ppk. This is the key that you converted to ppk format in your local
workstation in the preceding task "Converting Your Private SSH Keys to .ppk
Format" of this Learning Path.
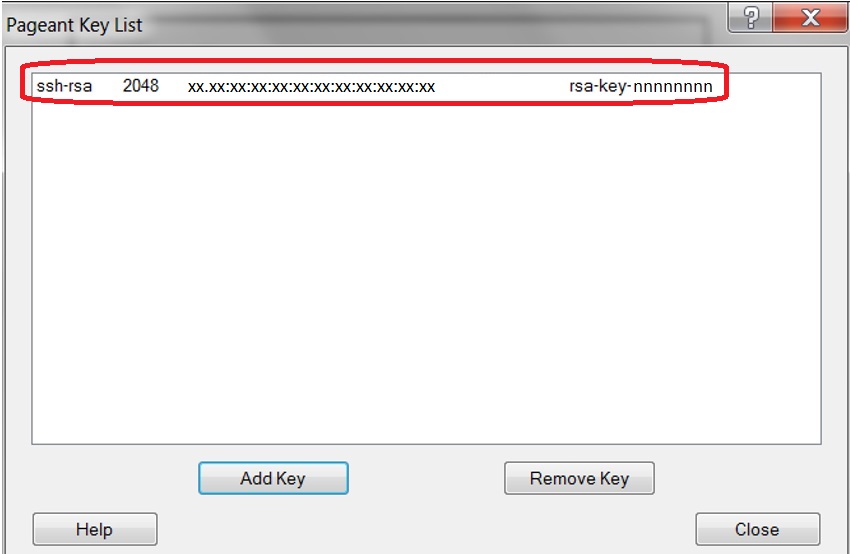
The following image shows an example of a private key in .ppk format.
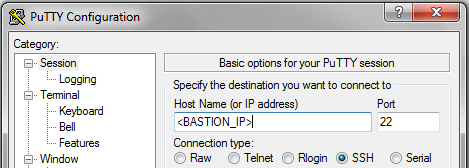
Open PuTTY and in the Host Name field, enter the public IP address of the bastion server.
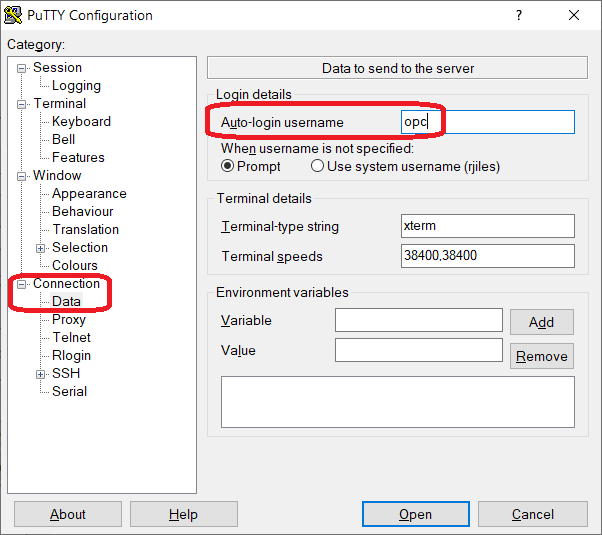
To log in to the connection, you need to log in as the opc user. Expand the Connection node and in the Data section, enter the value opc in the Auto-login username field.
-
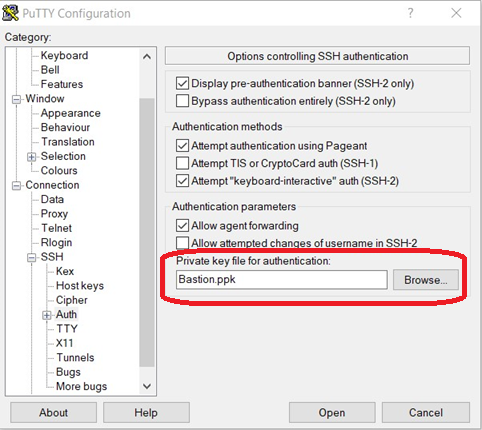
To create an SSH tunnel to the local host, in the Connection node, click SSH, and then click Auth.
In the PuTTY Configuration—Options controlling SSH authentication window, in the Authentication parameters section, ensure that the Allow agent forwarding option is selected.
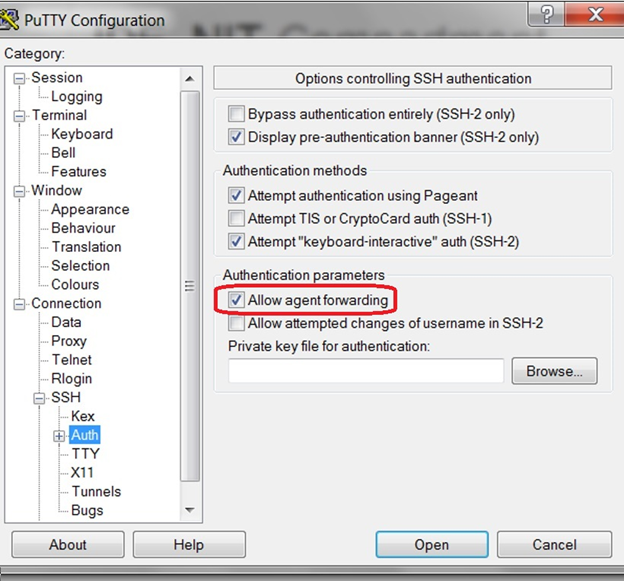
In the Private key file for authentication section, click the Browse button to select the Bastion.ppk key that you converted to ppk format in your local workstation by following the steps in the preceding OBE "Converting Your Private SSH Keys to .ppk Format" of this Learning Path.
-
To create an SSH tunnel to the local host, in the Category section, in the Connections node, click SSH, and then click Tunnels.
-
In the Options controlling SSH port forwarding section, enter a port number in the Source Port field. This can be any port <You can enter the number of any port that is free on your local machine.
In the Destination field, enter the private IP address of the Provisioning Server followed by the port number 3000.
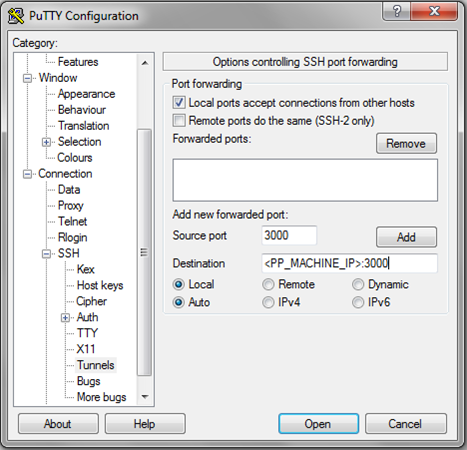
-
Click the Add button to add the port.
After you click the Add button, confirm that the IP address and port are added as shown below.

Ensure that these options are selected:
Local ports accept connections from other hosts
Local
Auto- To access the Server Manager Console running on the Provisioning Server, you
must repeat this procedure to add port 8998.
 Note: Before you proceed, as a best practice you should save this PuTTY session for future use when logging into machines in the private network known to this Bastion Host.
 - You can click the Open button to verify your settings. This step should result a successful connection to the Provisioning Server in a private network through the bastion host.
Accessing the JD Edwards One-Click Provisioning Console Using a Browser
The recommended browsers for accessing the JD Edwards One-Click Provisioning Console and the Server Manager Console, both of which are running on the Provisioning Server, are:
- Google Chrome
- Mozilla Firefox
Open the browser and connect to the URL for the Provisioning Server using this syntax:
https://localhost:3000
Where:
httpsis the only supported browser protocol.localhostis used to access the Provisioning Server with a private IP address using tunneling. The Provisioning Server will not have a public IP address.3000is the port on which the One-Click Provisioning Server is running, and which you must include as part of the address.
Accessing the JD Edwards Server Manager Console Using a Browser
You can access the Server Manager Console that is running on the Provisioning Server using this URL:
https://localhost:8998/manage