Gathering Essential Information from Oracle Cloud Infrastructure for Infrastructure Provisioning
This section shows you how to gather essential Oracle Cloud Infrastructure information for the infrastructure provisioning user that will be running the JD Edwards EnterpriseOne Infrastructure Provisioning Console.
Worksheet Table - Details to Gather
| Detail Item | Detail Value |
|---|---|
|
User OCID |
|
|
User SSH Key (PEM) |
|
|
User API Key Fingerprint |
|
|
Tenancy OCID |
|
|
Region Name |
|
| Compartment OCID |
Prerequisite
To perform the steps in this tutorial, you must have:
- Created a Linux instance for the OpenTofu staging console by following the steps described in the previous section "Creating a Linux Instance for the OpenTofu Staging Server" in this Learning Path.
- Refer to Oracle Cloud Infrastructure documentation for additional details on: Managing User Credentials.
Locating the Generated Public Key for the Infrastructure Provisioning User
From the OpenTofu staging server, use this procedure to locate the generated public key (also called a PEM key) for the user that will be running the JD Edwards EnterpriseOne Infrastructure Provisioning Console. This user can be the current user or any user that you want. If the user does not exist, create a user by following the standard procedure described in Oracle Cloud Infrastructure documentation for Create a User in Adding Users. Also refer to Oracle Cloud Infrastructure documentation for additional details on: Managing User Credentials.
- Using PuTTY, connect to the OpenTofu staging server and run this command to
generate the content of the key:
cat /home/opc/keys/ociApiKeyPublic.pem - Make a record of the output of the above command for use in a task in the next section "Adding the Public Key as an API Key for the Infrastructure Provisioning User".
Adding the Public Key as an API Key for the Infrastructure Provisioning User
Use this procedure to add the public key as an API key to Oracle Cloud Infrastructure for the user that will be running the Infrastructure Provisioning Console.
- As the user for which you generated a public key in the preceding step, log in
to Oracle Cloud Infrastructure using the following URL for the tenancy in which
you want to provisioning
infrastructure:
https://console..oraclecloud.com/#/a/"
                            format="html
For example:
https://console.us-ashburn-1.oraclecloud.com/#/a/ -
On the Oracle Cloud Infrastructure console, click the navigation menu in the upper-left corner.

-
From the navigation menu, go to the Identity section and select Users.
-
Click the link for the user which you have designated as the infrastructure provisioning user.
-
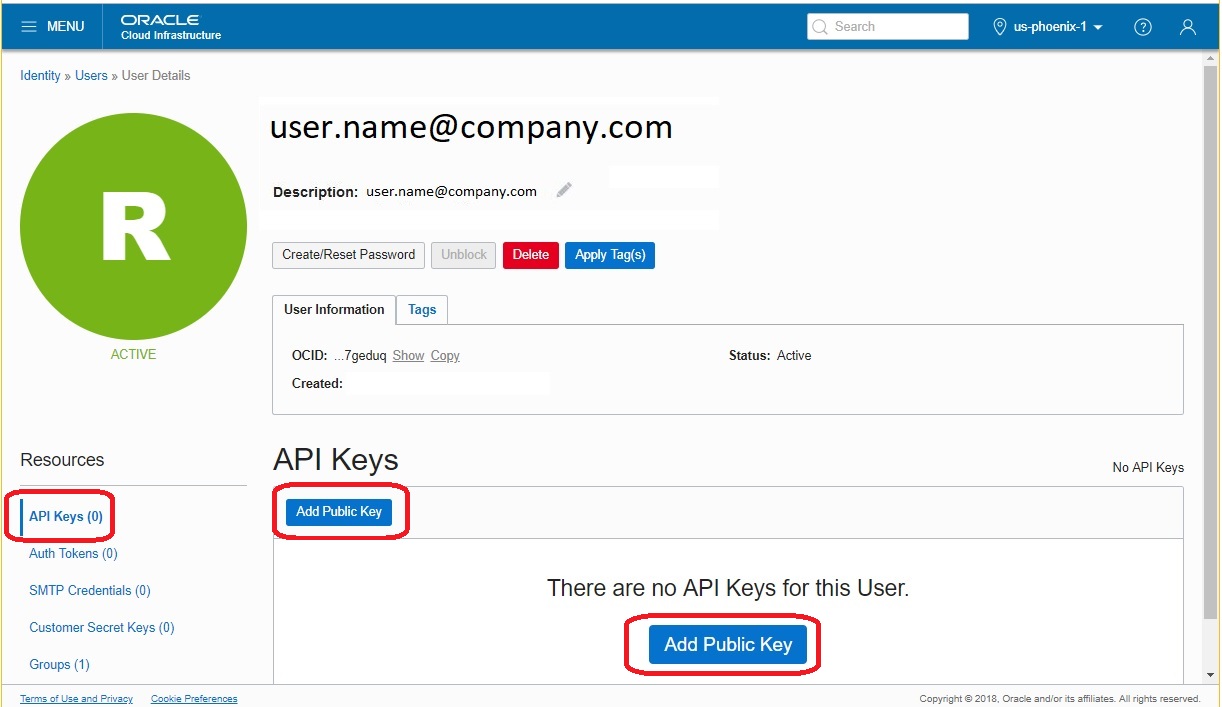
In the API Keys section, click the Add Public Key button.
-
In the PUBLIC KEY section, copy and paste the public key that you received in the previous section "Adding the Public Key as an API Key for the Infrastructure Provisioning User".
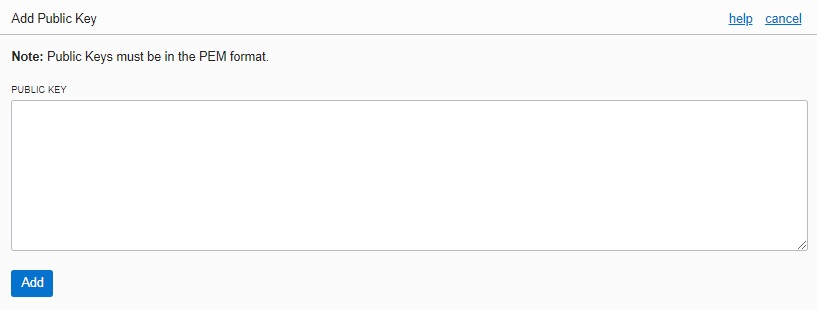
-
Click the Add button.
Locating a Fingerprint for the Infrastructure Provisioning User
After you have added the public key for the infrastructure provisioning user, the system automatically generates a fingerprint for that user and displays it on the Oracle Cloud Infrastructure interface. To locate and copy this fingerprint:
- Logged in as the infrastructure provisioning user, on the Oracle Cloud
Infrastructure console, click the navigation menu in the upper-left
corner.

- From the navigation menu, go to the Identity section, and select Users.
- Click the link for the user which you have designated as the infrastructure provisioning user.
- Under Resources, in the API Keys section, locate the Fingerprint field.
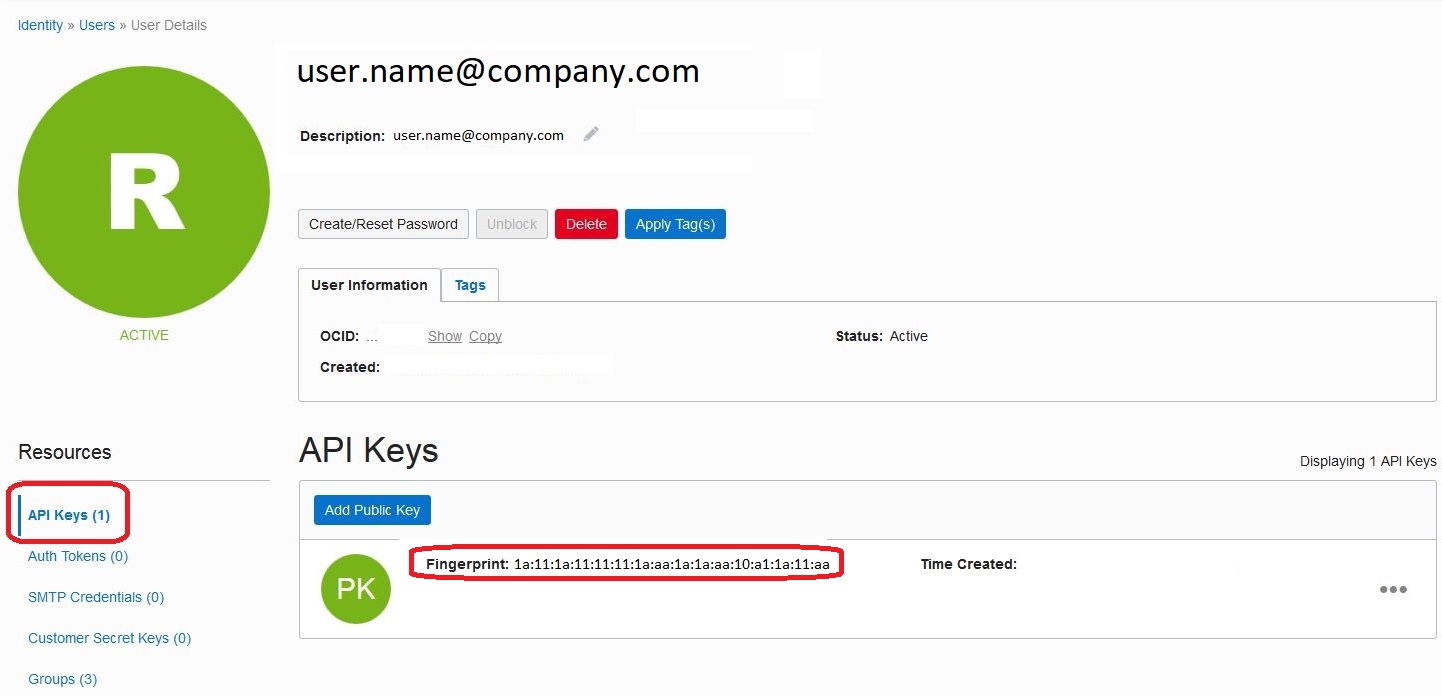
- Make a record of the fingerprint for use as an input for a subsequent task in the section "Using the Infrastructure Provisioning Console" in this Learning Path.
Determining the OCID for the Infrastructure Provisioning User
Use this procedure to determine the OCID for the infrastructure provisioning user:
- Logged in as the infrastructure provisioning user, on the Oracle Cloud
Infrastructure console, click the navigation menu in the upper-left
corner.
- From the navigation menu, go to the Identity section and select Users.
- Click the link for the user that you have designated as the infrastructure
provisioning user.
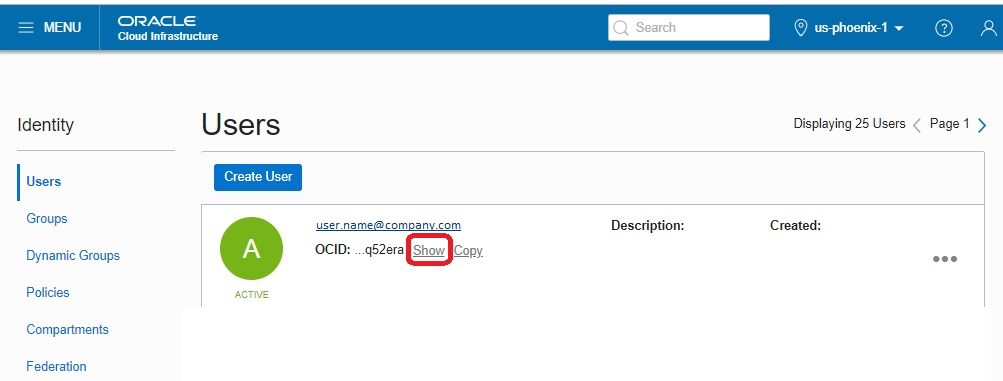
- Click the Show link to see the OCID of the selected user.
- Make a record of the OCID for use as an input for a subsequent task in the section "Using the Infrastructure Provisioning Console" in this Learning Path.
Locating the Tenancy OCID and Region for the Infrastructure Provisioning Compartment
Use this procedure to locate the tenancy OCID and region for the infrastructure provisioning compartment:
- Logged in as the infrastructure provisioning user, on the Oracle Cloud Infrastructure console, click the navigation menu in the upper-left corner.
- From the navigation menu, go to the Administration section, and select Tenancy
Information.
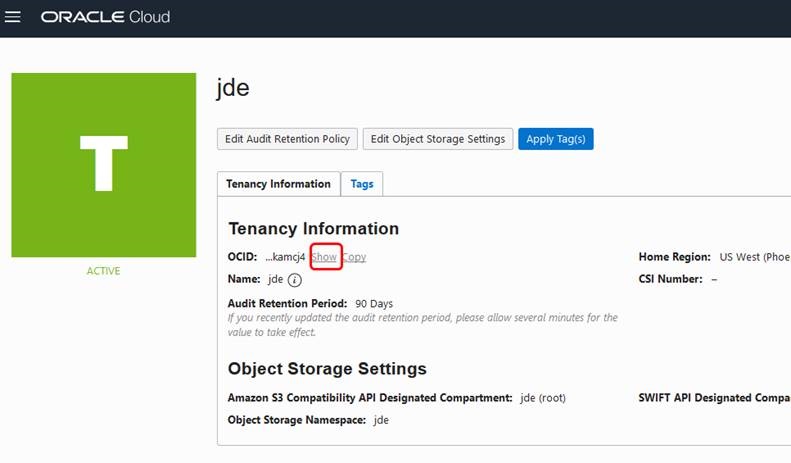
- Click the Show link to see the OCID of the selected tenancy.
- Make a record of the OCID for use as an input for a subsequent task in the section "Using the Infrastructure Provisioning Console" in this Learning Path.
- In the Tenancy Information section, also locate the region that will host the instances to be provisioned. Make a note of the region for use as an input for a subsequent task in the section "Using the Infrastructure Provisioning Console" in this Learning Path.
Locating the Compartment OCID for Infrastructure Provisioning
Use this procedure to locate the compartment OCID for infrastructure provisioning:
- Logged in as the infrastructure provisioning user, on the Oracle Cloud
Infrastructure console, click the navigation menu in the upper-left
corner.
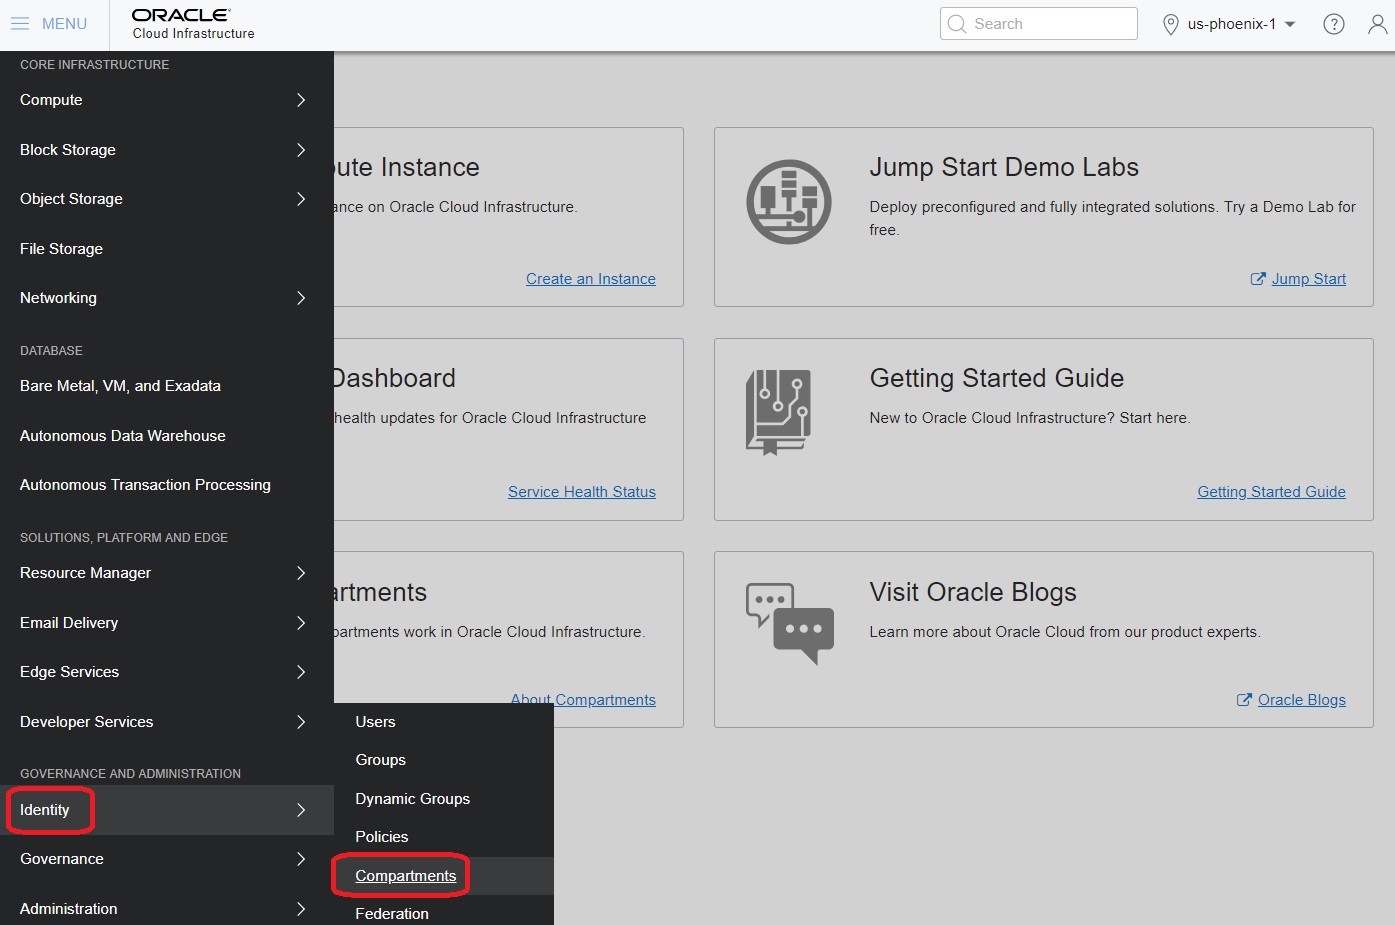
- From the navigation menu, go to the Identity section, and select the
Compartments service.

- Click the link for the compartment that you have designated as the
infrastructure provisioning compartment.
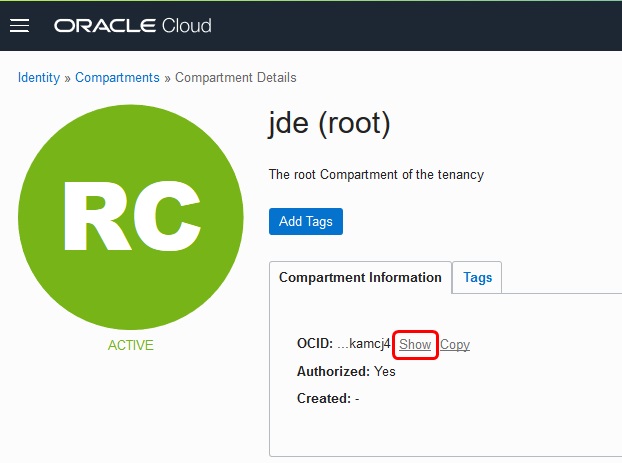
- Click the Show link to see the OCID of the selected compartment.
- Make a record of the OCID for use as an input for a subsequent task in the section "Using the Infrastructure Provisioning Console" in this Learning Path.