Performing Post Infrastructure Provisioning Tasks
This section shows you how to perform the post infrastructure provisioning tasks.
This section describes these tasks:
- Re-enabling SELINUX
- Updating the Microsoft Windows Host File for JD Edwards Enterprise Servers with Load Balancer
- Starting the Database in the Secondary Node in RAC
Prerequisite
- You must have successfully completed the deployment of an orchestration using the JD Edwards One-Click Provisioning Console.
Re-enabling SELINUX
Use this command to check the status of Security Enhanced Linux (SELINUX) on each instance that was creating by Infrastructure Provisioning in support of JD Edwards EnterpriseOne servers for logic, batch and Oracle WebLogic servers.
sudo getenforce
If the returned status is Disabled, you can re-enable the extra security restriction provided by SELINUX by modifying this file:
/etc/selinux/config
Edit the /etc/selinux/config file to change the SELINUX=setting to either of these values:
SELINUX=Enforcing
or
SELINUX=Permissive
You must reboot the machine for the change to take affect any time you change the /etc/hostname file or when you change security settings.
After the reboot is complete, run sudo getenforce to confirm that the status of SELINUX is Enforcing or Permissive, whichever you set.
-
Updating the Microsoft Windows Host File for JD Edwards Enterprise Servers with Load Balancer
You must update the host file of the Microsoft Windows with the following entry if the JD Edwards Enterprise Servers are configured with the load balancer:
<ip address of actual logic server> <virtual hostname of logic server>
<ip address of actual batch server> <virtual hostname of batch server>
For example, if the private IP address of the logic server is 10.0.0.10, the private IP address of the batch server is 10.0.0.11, the virtual host name of the logic server is logiclb and the virtual host name of the batch server is batchlb, then update the host file with the following entry:
10.0.0.10 logiclb
10.0.0.11 batchlb
Note: You must make these entries in both the Deployment Server and the Development Client.If there are multiple logic and batch servers, when you do package builds on the Deployment Server, you must further modify the /hosts file to include the private IP address of each logic and batch server. For example, if you want to deploy a package on a specific private IP address, you must modify the /hosts file to include that private IP address. For example, if you have a logic server with an IP address of 10.0.0.12 and a batch server with an IP address of 10.0.0.13, you would change the above entries (10.0.0.10 and 10.0.0.11) so that only the below entries are in the /hosts file:
10.0.0.12 logiclb
10.0.0.13 batchlb
Similarly, you will need to add entries for each additional logic and batch server for which you want to build packages.
-
Starting the Database in the Secondary Node in RAC
This section is only applicable for the Production environment, which is the only environment where RAC is enabled. By following the recommendation in this Learning Path you have previously stopped the database in the secondary node in RAC. At this point, you must start the database in the secondary node for RAC. The recommended procedure is to use a line command as shown below.
srvctl start instance -d <DB_UNIQUE_NAME> -i <DB_NAME>where <DB_UNIQUE_NAME> is the name you determined in the preceding OBE in this Learning Path entitled: Setting Up the Secondary Node.
where <DB_NAME> is name you have given the database and which is appended with a 2. For example, if you gave the database name as ORCL, then the database name in the Secondary Node is named ORCL2.
Important: At this point, both nodes of the RAC in DB Systems are running. Therefore, when transactions are submitted to the database by any JD Edwards EnterpriseOne server, the transaction can go to either node (primary or secondary). If for any reason either node goes down, the transactions from JD Edwards EnterpriseOne will be served by the node that is running. However, if a node goes down while processing a transaction resulting in the failure of the database connection, then there is a lag of operation while the system switches the transactions to the node that is running. Further, if the database is down on both nodes, and if in start up of the nodes there is a delay of more than 75 seconds, then you must manually restart both the HTML Server and the Enterprise Server after the database is properly started.Important: Disaster Recovery. If you are pointing virtual hostname of enterprise servers in hosts file to the instance in Disaster Recovery (DR) region then you may have to make additional changes described below:- Edit this
file:
C:\JDE\oracle19\product\19.0\client_1\network\admin\tnsnames.ora - Update the below bolded values for HOST= and SERVICE NAME = based on
what you have in the DR
region:
JDEORCL = (DESCRIPTION = (ADDRESS = (PROTOCOL = TCP)(HOST = jdepddb1dr.privatregsub.vcndr.oraclevcn.com)(PORT = 1521)) (CONNECT_DATA = (SERVER = DEDICATED) (SERVICE_NAME = jdepdb.privatregsub.vcndr.oraclevcn.com) ) ) - Add the host entry of the standby database host in the hosts file of your instance of Microsoft Windows. For example:
-
jdepddb1dr.privatregsub.vcndr.oraclevcn.com
To view details of the secondary node in RAC:
- On the Oracle Cloud Infrastructure Console home page, click the
Navigation Menu in the upper-left corner.
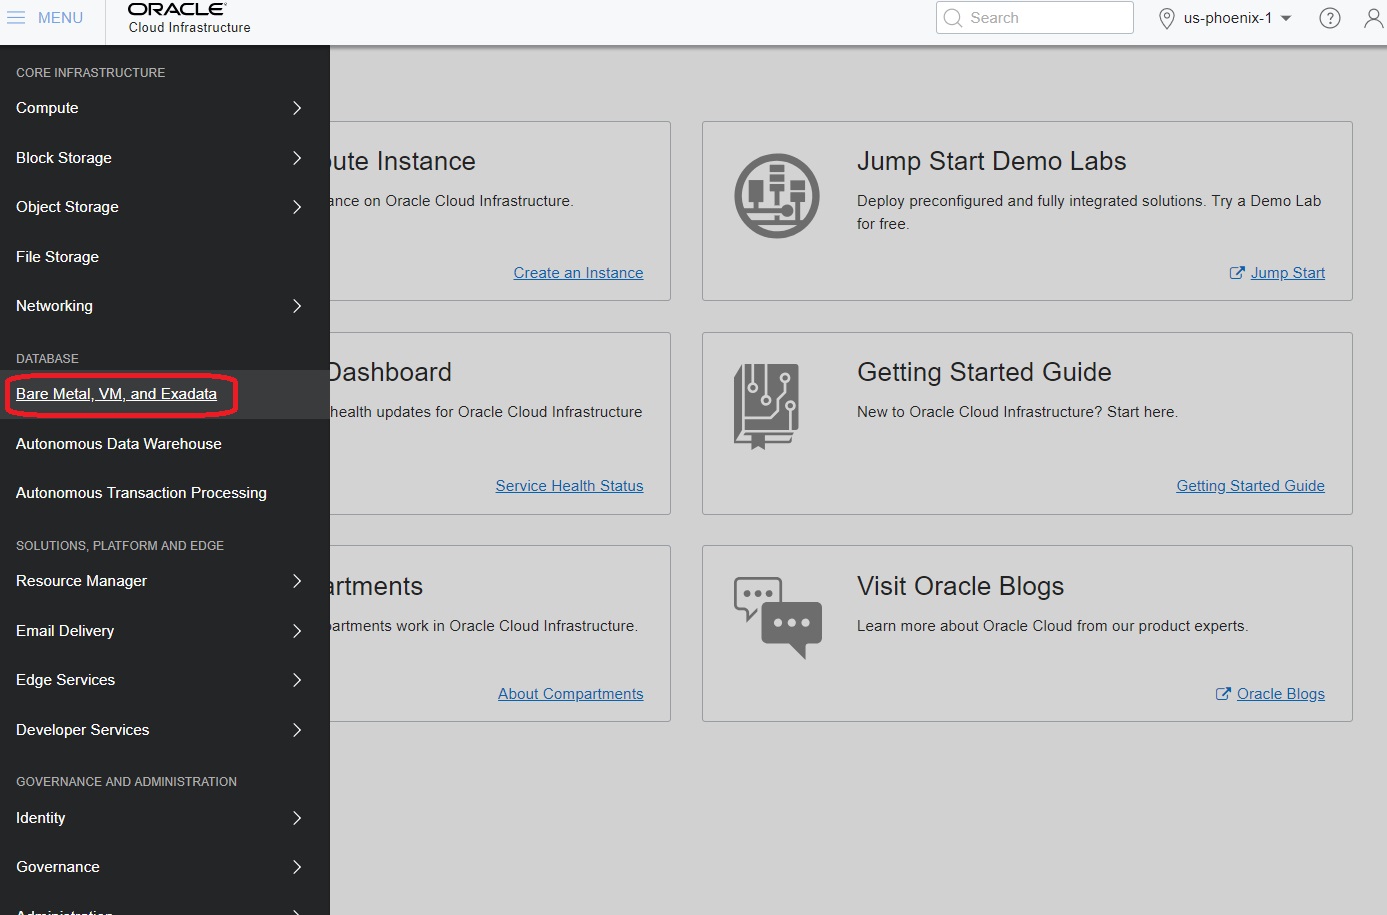
- From the Navigation Menu, in the Database section, select Bare Metal, VM, and Exadata.
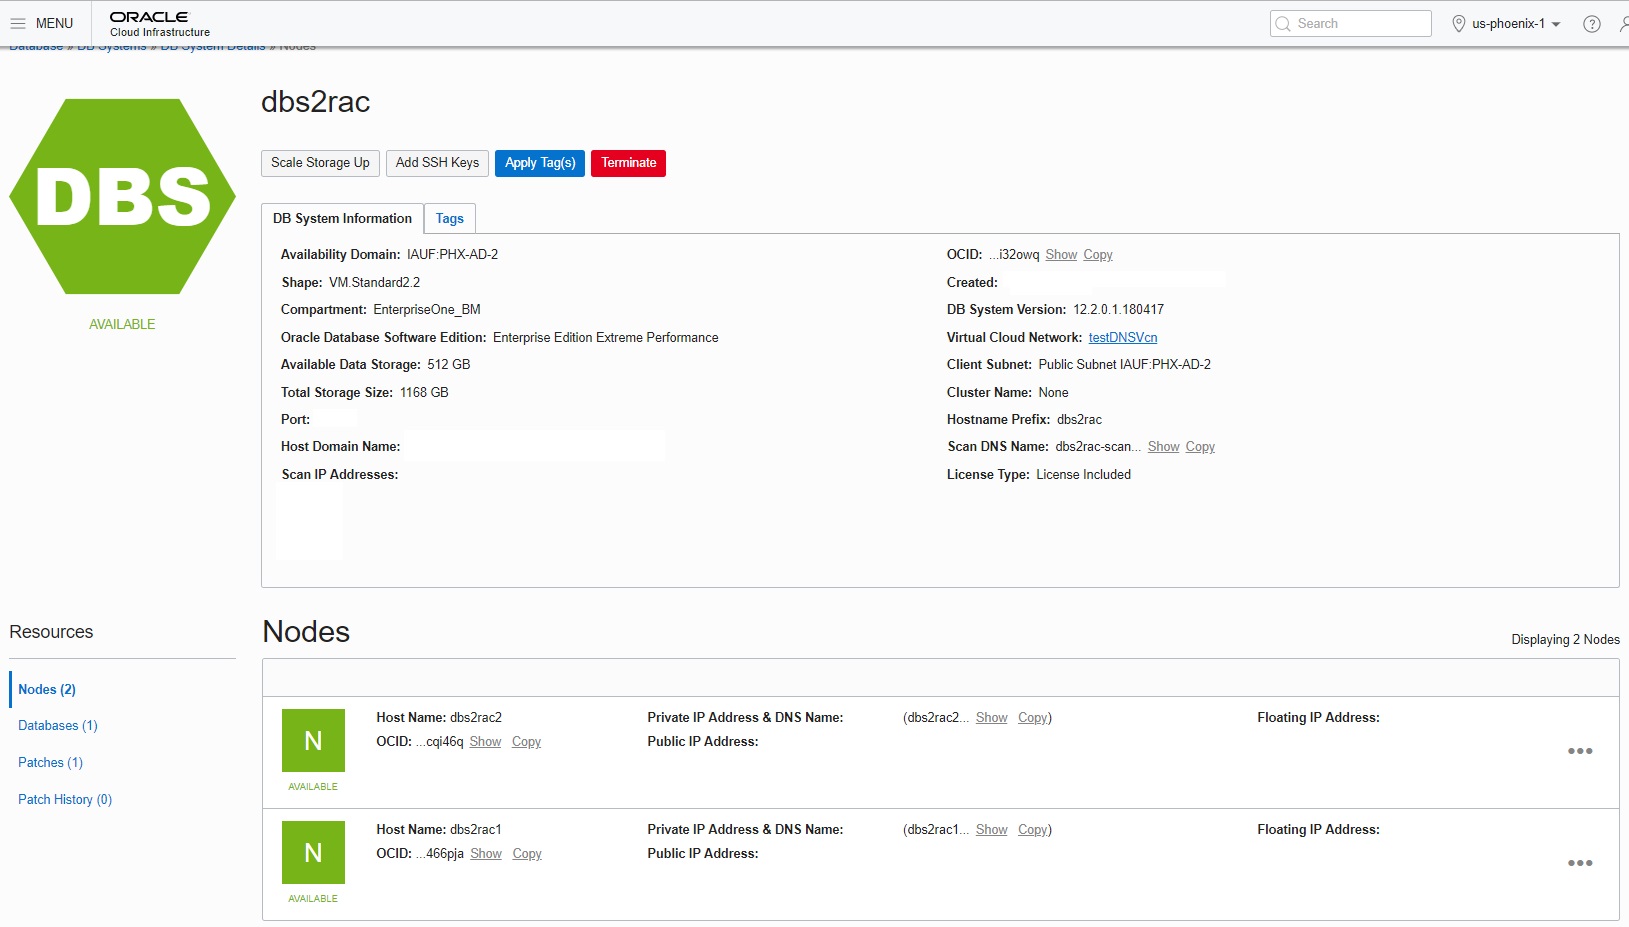
- In the left panel ensure that DB Systems is selected, and also ensure that under List Scope the applicable COMPARTMENT is selected which contains the DB System with RAC that you created.
- Click the link for your DB System with RAC.
- In the Resources section in the left pane, click Nodes.
The system displays the details of the two nodes as shown below:
- Edit this
file:
Setting up Additional Security Configurations
As part of meeting the CIS Benchmarks for secure Linux Machines, you can further secure your One-Click Provisioned Linux environments by performing the below steps:
These settings in the sshd_config file are located at
/etc/ssh.
- Disable TCP Forwarding
Edit the
/etc/ssh/sshd_configfile to set the parameter as follows:AllowTcpForwarding=no Disable Root Login
Edit the
/etc/ssh/sshd_configfile to set the parameter as follows:
Ensure that there are no other entries that might override the above settings. For the settings to reflect, restart the SSH Service using the below command:PermitRootLogin=nosudo systemctl restart sshd
Closing Port 22 on Public IP for Enhanced Security
For enhanced security, it is highly recommended to close Port 22 (SSH) in both the Security List (VCN/Subnet level) and the Network Security Group (NSG) after provisioning is complete. This minimizes potential vulnerabilities and aligns with a stronger security posture.
Follow the below steps to close Port 22 in Security List and NSG:
- Security List:
- Navigate to the OCI Console > Networking > Virtual Cloud Networks (VCN)
- Select the VCN associated with your instance.
- Open the Security List attached to the subnet.
- Locate the ingress rule for Port 22 (TCP) and delete it.
- Network Security Group (NSG):
- Navigate to the OCI Console > Networking > Network Security Groups
- Select the NSG attached to your instance.
- Locate the ingress rule allowing Port 22 (TCP) and delete it.