Balance Sheet Case Study Task: Add Calculated Columns to the Layout
To add the calculated columns, complete the following steps:
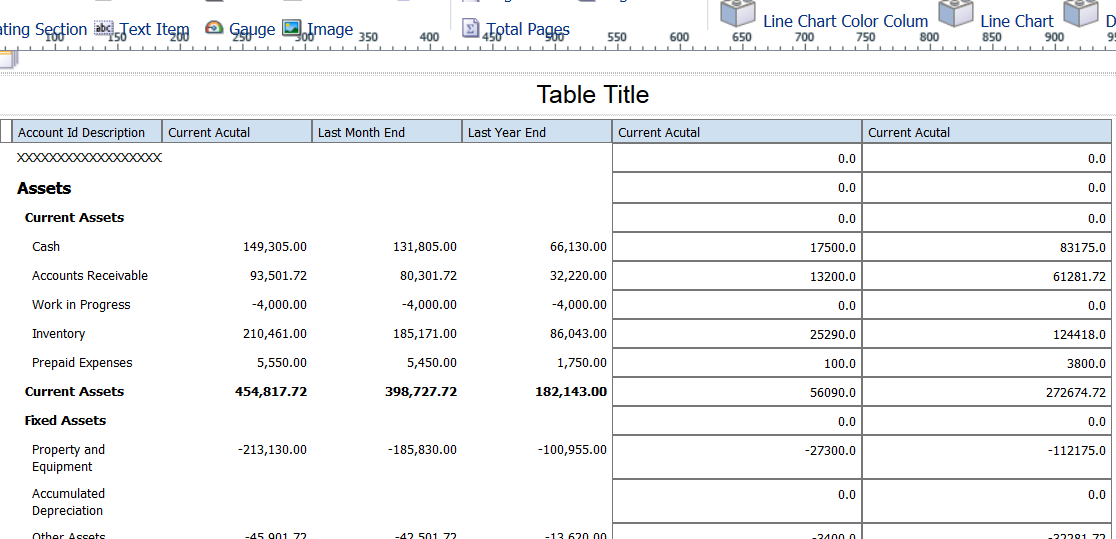
Place the Current Assets column in the grid to the right of the Last Year End column.
You placed the Current Assets column in the layout in another task. You will not change that column. Instead, you place another copy of the column in the layout so that you can perform a calculation on the column.
Select the cells in the column, and then click the Define Custom Formula icon in the Formula section of the Column tab.
In the Function window, select Subtraction.
Select the Subtrahend option.
Select Last Month End from the list for the Field option, and then click OK.
Place another copy of the Current Assets column in the grid.
Select the cells in the column, and then click the Define Custom Formula icon in the Formula section of the Column tab.
In the Function window, select Subtraction.
Select the Subtrahend option.
Select Last Year End from the list for the Field option, and then click OK.
Click the Save icon to save your layout.
After you complete the steps in this task, your statement layout should look like the following image: