Balance Sheet Case Study Task: Format the Calculation Columns
To rename the calculation columns:
Double-click in the header of the first calculation column added.
Enter Change This Month.
Double-click in the header of the second calculation column added.
Enter Change This Year.
Click the Save icon to save your layout.
To make the headers and balances in the calculation columns look the same as the columns you already formatted:
Remove the totals provided by the Layout Editor.
See Balance Sheet Case Study Task: Remove the Layout Editor Totals from the Grid.
Remove grid lines.
Change the column widths to 120 pixels.
See Balance Sheet Case Study Task: Change the Width of Columns.
Apply the column masks and format the account balances.
See Balance Sheet Case Study Task: Format Account Balances Columns.
Click the Save icon to save your layout.
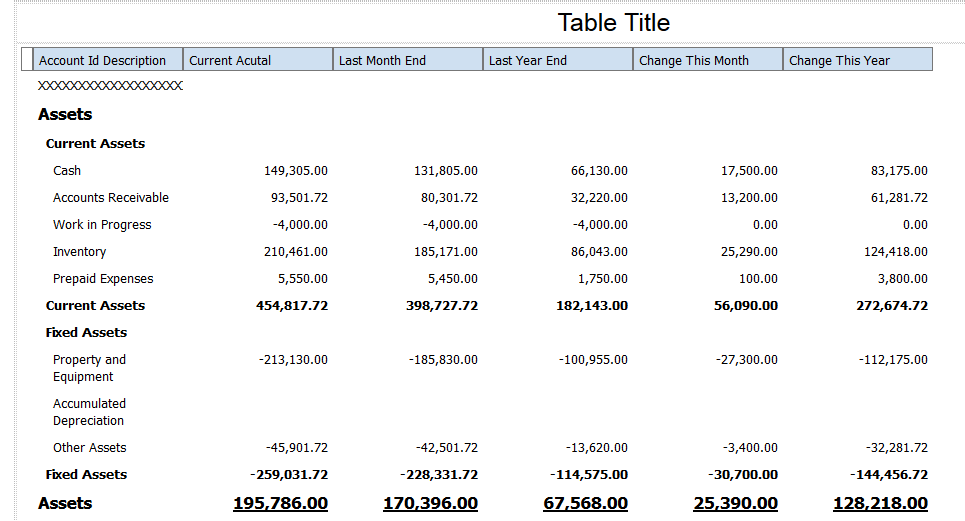
After you complete the steps in this task, your statement layout should look like the following image: