Consolidated Income Statement Case Study Task: Create Row Definitions and Add Data Selection
In this task, you will set up row definitions and add data selection to the row definitions.
To set up row definitions:
From the One View Financial Statements Setup menu (G0916), select Row Definitions.
Click Add on the Work with Row Definitions form.
In the header area of the Revise Row Definition form, complete these actions:
Enter (initials) CONSREV in the Row Definition Name field.
You can enter the name in upper or lower case; the system converts lower case to upper case when you exit the field.
Enter Consolidated Revenue in the Row Definition Description field.
Select Data from the Row Definition Type list.
The system automatically selects the Row Definition Grouping check box.
Do not deselect the check box.
Select the Reverse Sign check box for the (initials) CONSREV only.
The system will reverse the sign of the balances for the columns associated with this row.
Select Active in the Definition Status field.
In the Grouping Elements section of the Review Row Definitions form, complete the following actions:
Enter OBJ in the Grouping Element field.
Select the Return Description check box.
Selecting the Return Description check box will cause the process to retrieve the account descriptions.
Select the Enable Level of Detail Rollup check box.
Selecting the Enable Level of Detail Rollup check box enables you to roll up account balances to the level you specify in the statement version that you run. It also enables you to use the level of detail to sequence and format accounts in the Layout Editor.
Note: You must exit the grid row before the system enables the check boxes.
Click the Data Selection option on the menu bar.
On the Revise Row Data Selection form, click the + (plus sign) for the Obj Acct (Object Account) field.
The system adds the Obj Acct field to the Query Manager tab.
On the Query Manager tab, select between from the comparison type list.
In the first values field, enter 5000.
In the second values field, enter 5999.
Click Save on the Query Manager tab.
Click Cancel on the Revise Row Data Selection form.
Click OK on the Revise Row Definition form.
Using the values in the table at the beginning of this section, repeat Steps 3-12 to set up the remaining row definitions. Note that some of the fields on the Revise Row Definition form are not applicable to the subtotal row definition.
After you have entered all of the row definitions, click Cancel on the Revise Row Definition form.
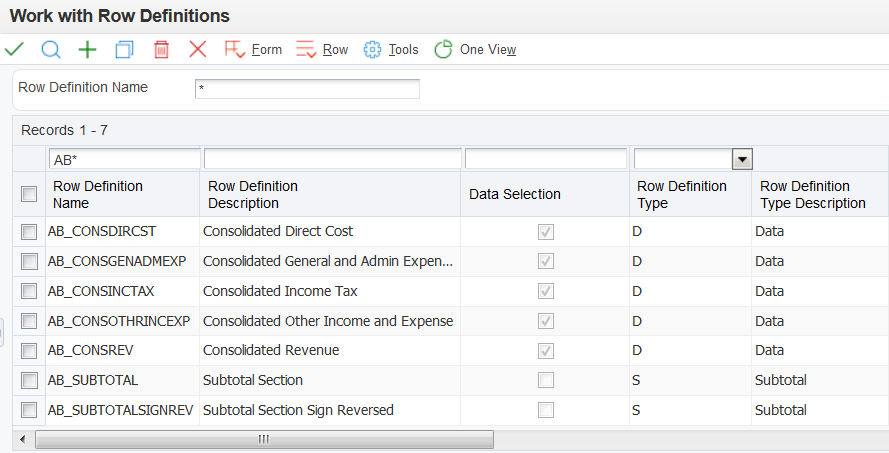
After you complete the steps in this section, you will have the following row definitions set up: