Propagating WebSphere Plug-ins
To propagate the generated WebSphere plug-ins:
Log on to the WebSphere Administrative console as described in Accessing the WebSphere Administration Console.
On the left hand navigation pane, select Servers > Server Types > WebServers.
Click the check box next to the webserver definition for which you want to propagate plug-ins.
To generate plug-ins, click the Propagate Plug-in button, which is located above the webserver definition.
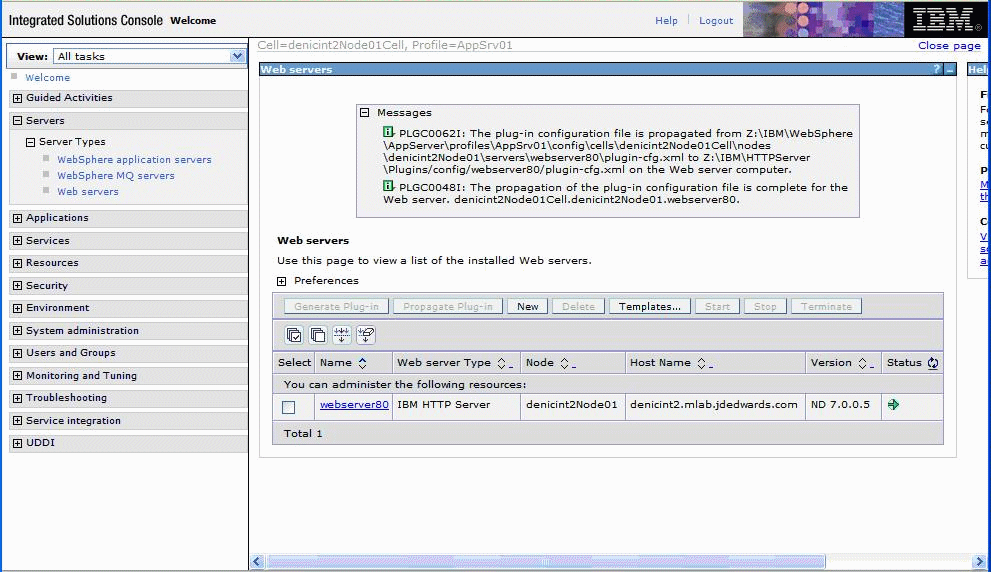
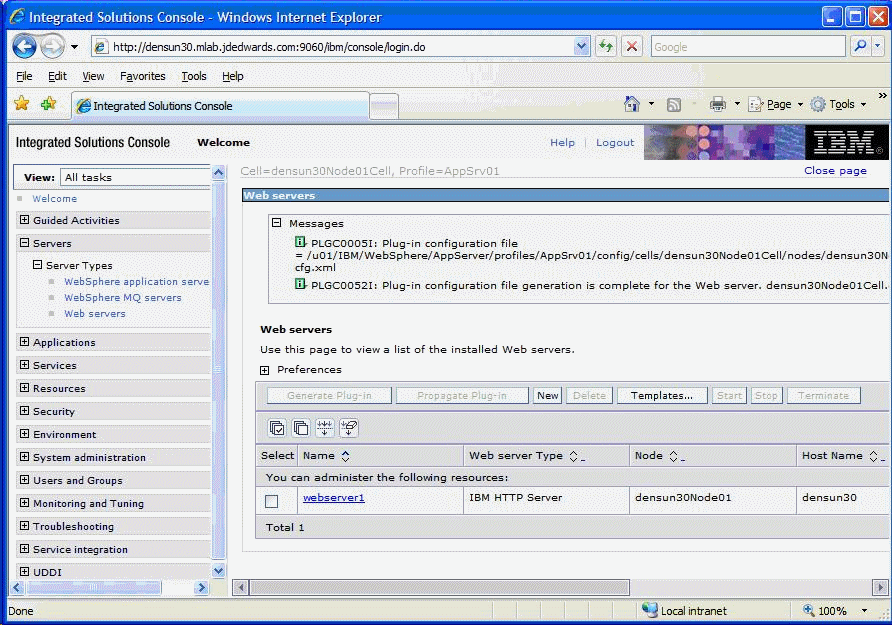
The Plug-in file plugin-cfg.xml is propagated in place, typically at this location:
x:\IBM\HTTPServer\Plugins\config\webserver80\plugin-cfg.xmlwhere
x:is the drive on which the IBM HTTP Server is installed./u01/IBM/HTTPServer/Plugins/config/webserver1/plugin-cfg.xmlA status message displays under the Web servers section as indicated in this screenshot sample:
To update (regenerate) and propagate the global web server plugin configuration:
Log on to the Deployment Manager Administration Console using the Dmgr01 profile.
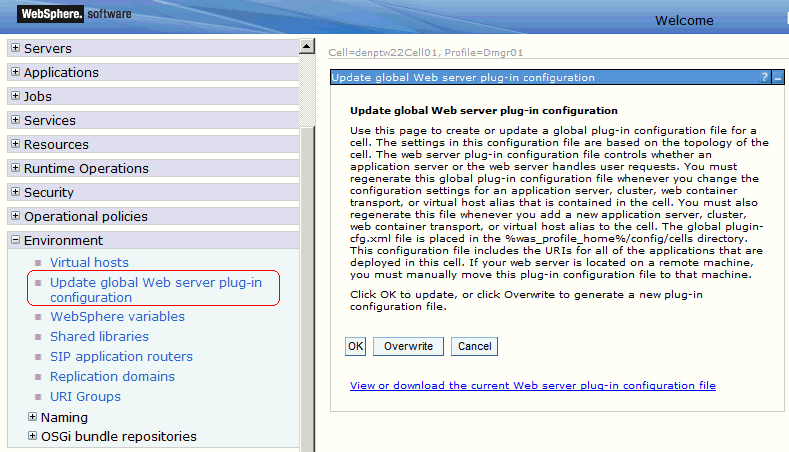
Expand the Environment node and select Update global Web server plug-in configuration.
Review the content in the right-hand pane and note the location of the plug-in file in the description. For example, the description might say:
The global plugin-cfg.xml file is placed in the %was_profile_home%/config/cells directory.
Click the OK button.