Defining Webhooks
Use the Webhook Definition page to create a webhook or edit an existing webhook definition.
Note:
You can also create a webhook by creating and invoking a REST Service Operation. For information about designing and implementing REST services, see Understanding REST Service Operations.Select , and then select Create New Webhook.
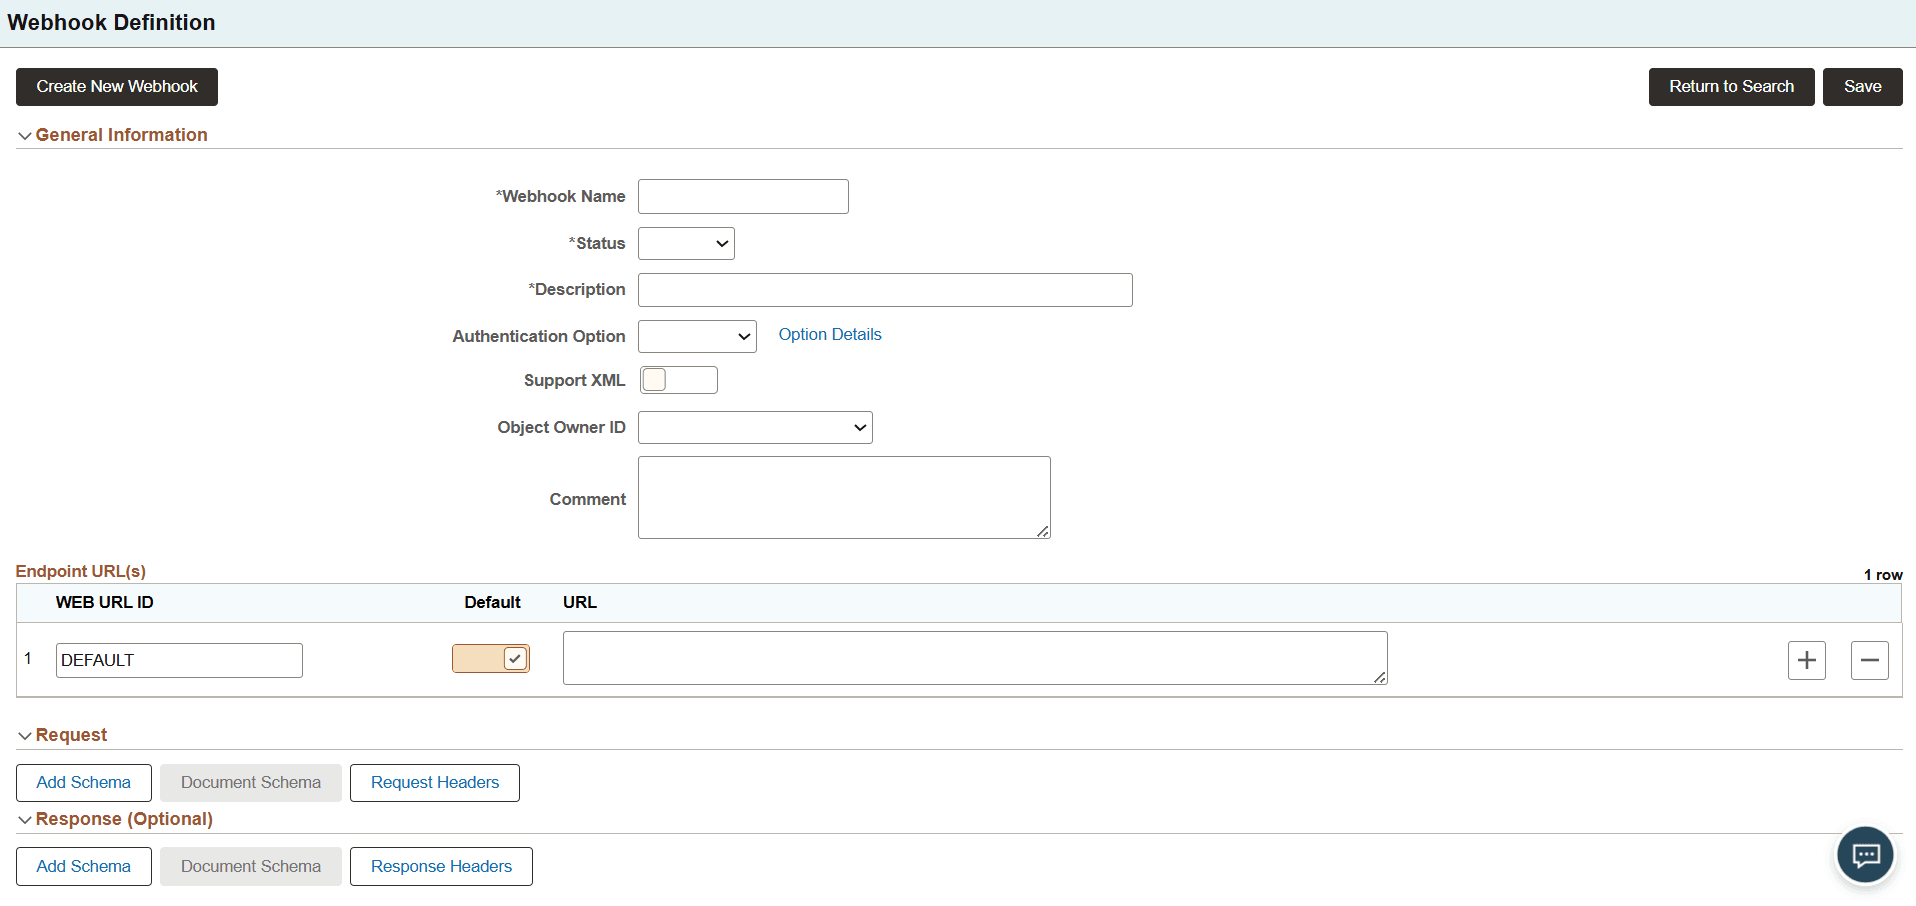
This example illustrates the fields and controls on the Webhook Definition page. You can find definitions for the fields and controls later on this page.
| Field or Control | Description |
|---|---|
|
Webhook Name |
Enter a unique name for the webhook. |
|
Status |
Select the status of the webhook definition. Valid values are:
|
|
Description |
Enter a description for the webhook. |
|
Authentication Option |
(Optional) Select the authentication method for requests sent to the webhook endpoint. Valid values are:
See Integration Broker Administration: Validating Security on Inbound Integrations. |
|
Support XML |
(Optional) Select this option to enable XML support for the webhook. This option is disabled by default. |
|
Object Owner ID |
(Optional) Select the object owner for the webhook definition. The Object Owner ID helps to determine the application team that last made a change to the webhook definition. The values in the drop-down list box are translate table values that you can define in the OBJECTOWNERID field record. |
|
Comment |
(Optional) Enter additional information or comments about the webhook. |
|
WEB URL ID |
Specify a unique identifier for the endpoint URL. Administrators have the option to change or update the WEB URL ID and add additional URLs. |
|
Default |
Select to assign the WEB URL ID as the default endpoint URL. The URL assigned with the Default checkbox enabled will be used to invoke the webhook. |
|
URL |
Specify the URL to the provider Webhook. You also have the option to add additional URLs. The WEB URL ID is initially be defined as DEFAULT. Administrators have the option to change the name. |
|
Add Schema (Request) |
Add a schema to define the request payload. |
|
Document Schema (Request) |
View or edit the request document schema. |
|
Request Headers |
Define HTTP headers to include in the request. |
|
Add Schema (Response) |
(Optional) Add a schema to define the response payload. |
|
Document Schema (Response) |
(Optional) View or edit the response document schema. |
|
Response Headers |
(Optional) Define HTTP headers returned in the response. |
Adding Schema
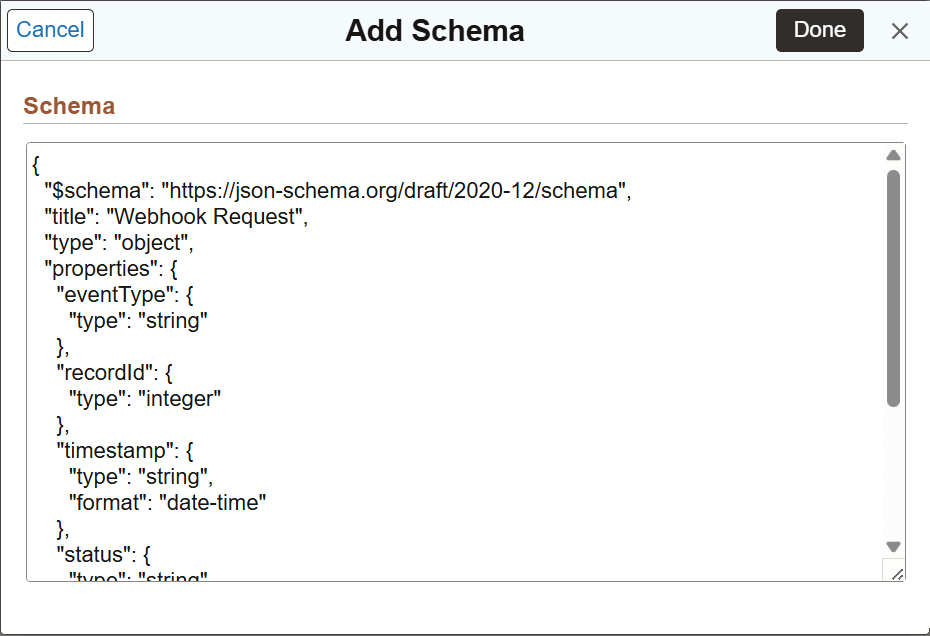
Use the Add Schema dialog box to define the JSON schema that specifies the structure of the request or response payload for a webhook. Additional text can also be added here for the end user to determine how to properly call the webhook.
The following image illustrates the Add Schema dialog box.
- On the Webhook Definition page, in the Request or Response section, select the Add Schema button.
- In the Add Schema dialog box, enter the JSON schema in the Schema field.
- Select Done to save the schema and close the dialog box.
Defining Document Schema
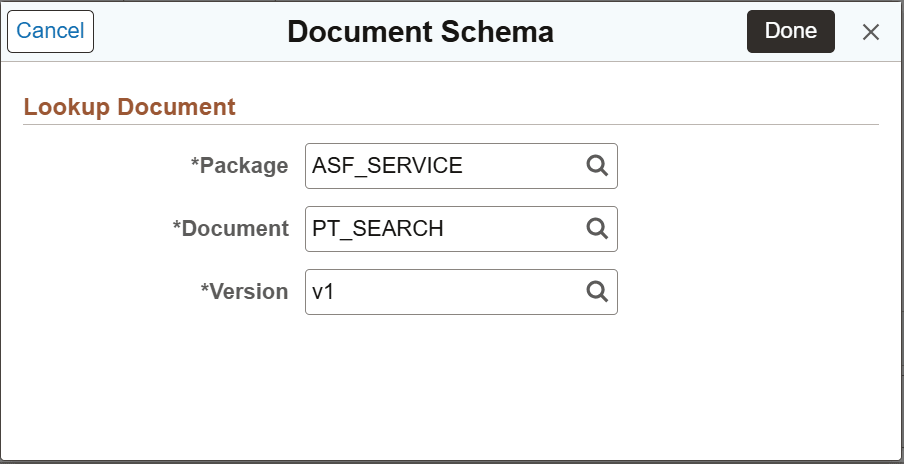
Use the Document Schema dialog box to associate an existing document schema with the request or response payload of a webhook.
The following image illustrates the Document Schema dialog box.
- On the Webhook Definition page, in the Request or Response section, select the Document Schema button.
- In the Document Schema dialog box, specify:
- Package - Select the package that contains the document definition.
- Document - Select the document definition to associate with the webhook.
- Version - Select the version of the document definition.
- Select Done to associate the selected document schema with the webhook and close the dialog box.
Defining Request/Response Headers
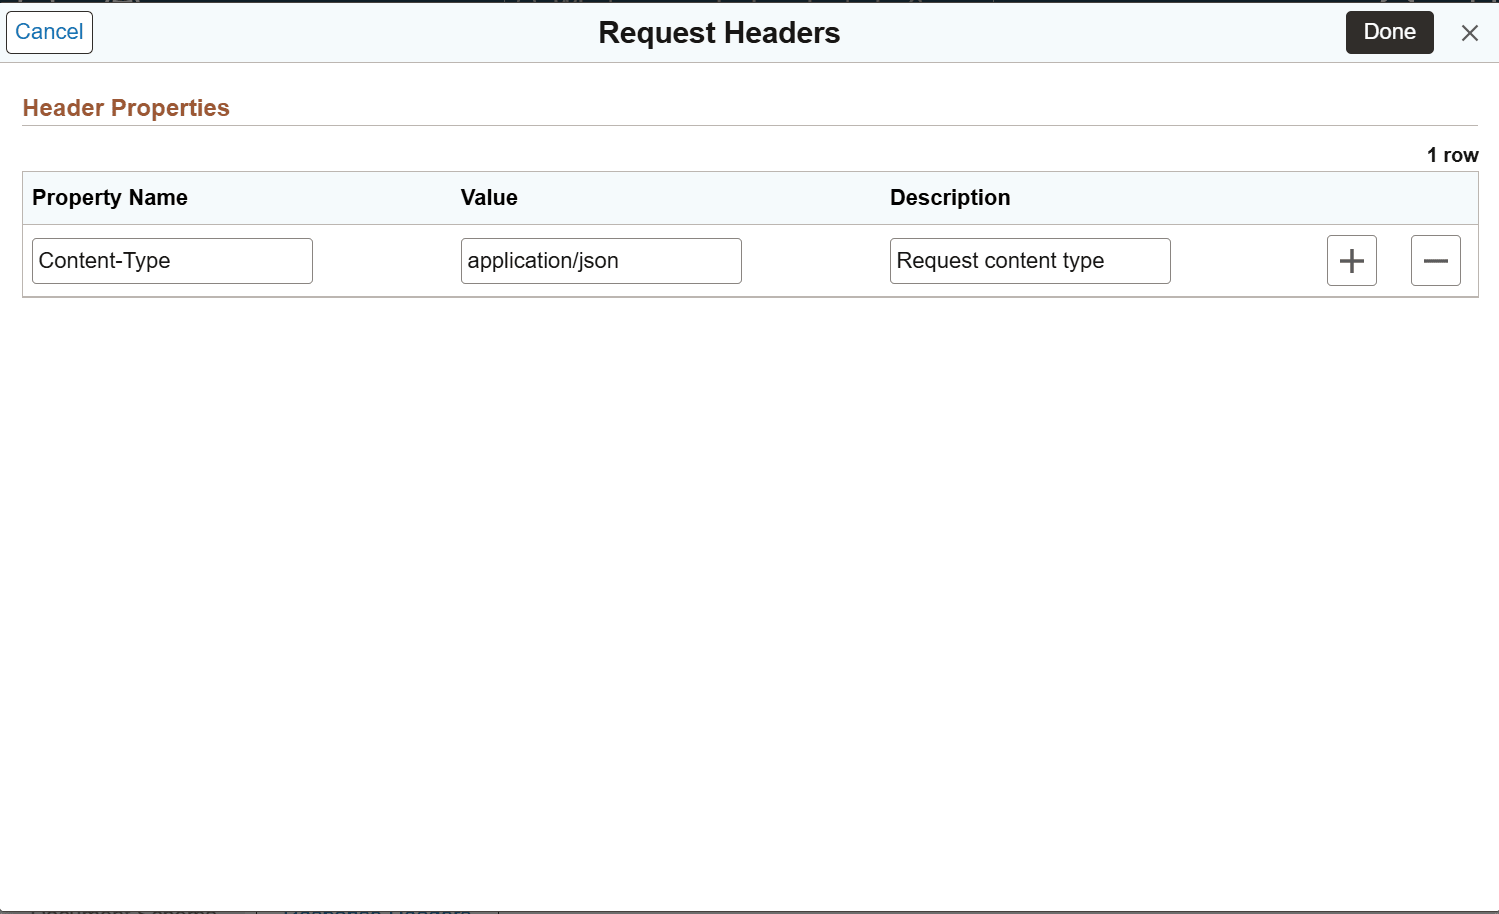
Use the Request Headers dialog box to define one or more HTTP headers to include in requests sent to the webhook endpoint. Similarly, use the Response Headers dialog box to define one or more HTTP headers to include in responses sent from the webhook endpoint.
The following image illustrates the Response Headers dialog box.
- On the Webhook Definition page, in the Request or Response section, select the Request Header or Response Header button.
- In the Request or Response Headers dialog box, specify:
- Property Name - Enter the name of the HTTP request or response header.
- Value - Enter the value associated with the request or response header.
- Description - (Optional) Enter a description for the request or response header.
- Select Done to define one or more HTTP headers to include, in requests or responses, with the webhook and close the dialog box.