Using the Routing Deployment Grids
To define routing parameters for selected services, service operations or integrations groups, use the Deployment Configuration grid (IB_INTDEPLOY2).
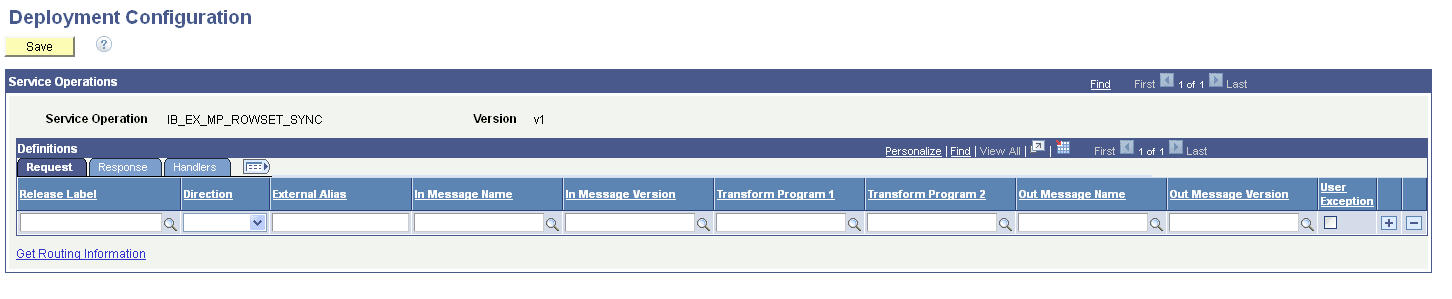
To access the grid click the Continue button after you search for and select integrations for which to configure routings. This example illustrates the Deployment Configuration grid used to define routing parameters. You can find definitions for the fields and controls later on this page.
This example illustrates the fields and controls on the Deployment Configuration grid. You can find definitions for the fields and controls later on this page.
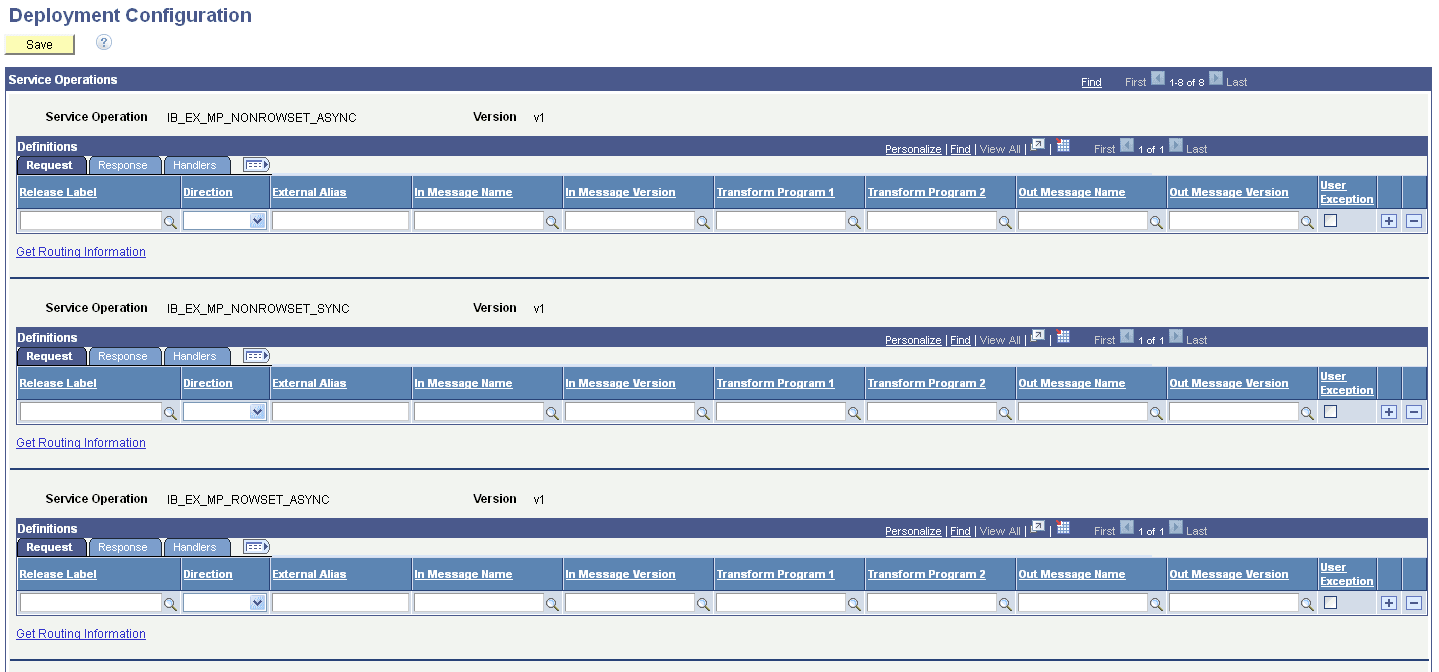
If on the Deployment Configuration page you select a service or integration group, separate grids appear on the page for each service operation in the service or integration group
This example illustrates the fields and controls on the Deployment Configuration grids. You can find definitions for the fields and controls later on this page.
You can create routing definitions for each application or patch release, or populate the grid with data from the existing routing definition in the database.
To configure a different routing definition for another release, click the Add Row button (+) to create a new row, configure another definition.
You can manually create and configure routing definitions to deploy by entering and selecting fields on the page. You can also populate a definition using the existing routing definition data defined in the Routings component using the Get Routing Information link. When you click the link the existing routing definition for the service operation appears and you can choose to populate the page with that data. Information on using the Get Routing Information link appears later in this topic.
The following fields and controls appear on the page:
| Field or Control | Description |
|---|---|
|
Save |
When you have completed configuring routing definitions on the page, click the button to save the changes. The main Deployment Configuration page appears after the save action |
|
Service Operation |
Name of the service operation for which you are configuring routing definitions. |
|
Version |
Version of the service operation for which you are configuring routing definitions. |
|
Request (tab) |
This tab features routing parameters that you configure for the request transaction. The parameters that appear in this grid are described later on this page. |
|
Response (tab) |
This tab features routing parameters that your configure for the response transaction. The parameters that appear in this grid are described later on this page. |
|
Handler (tab) |
This tab features handler parameters that you can configure for the service operation. The parameters that appear in this grid are described later on this page. |
|
Get Routing Information |
Click the link to view existing routing parameters defined for the service operation and to access the routing definition. |
The previous example shows the default view of the page. The Request tab appears in the Definitions section. Use this tab to configure routing parameters for the request transaction. Use the Response tab in the Definitions section to configure routing parameters for the response transaction.
This example illustrates the fields and controls on the Deployment Configuration grid – Response tab. You can find definitions for the fields and controls later on this page.
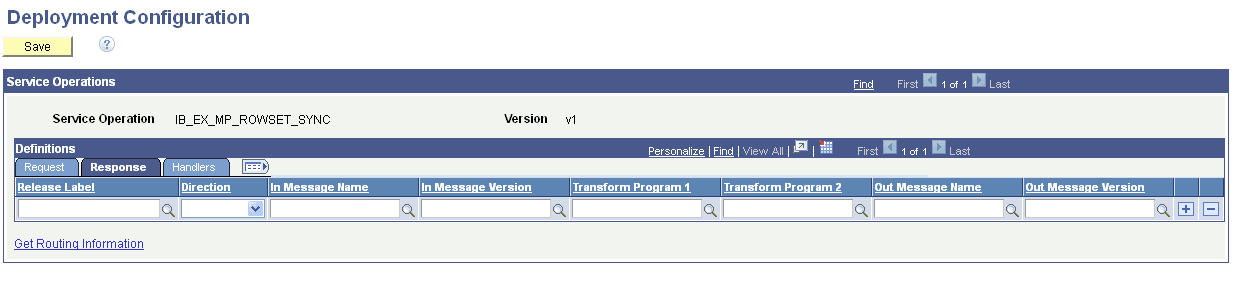
The following fields and controls appear on the Request tab and on the Response tab of the Deployment Configuration grid:
| Field or Control | Description |
|---|---|
|
Release Label |
Select the PeopleSoft application and release or patch number from the drop-down list. |
|
Direction |
From the drop-down list, select the direction of the transaction. The options are:
|
|
External Alias |
Enter the external alias name. |
|
In Message Name |
Enter the name of the inbound message. |
|
In Message Version |
Enter the version of the inbound message. |
|
Transform Program 1 |
Enter the name of transform program number one. |
|
Transform Program 2 |
Enter the name of transform program number two. |
|
Out Message Name |
Enter the name of the outbound message. |
|
Out Message Version |
Enter the version of the outbound message. |
|
User Exception |
Check the box to enable user exception handling using PeopleCode. This control appears on the Request grid only and is applicable to synchronous service operation processing only. When enabled and an error occurs you can handle any errors in the calling PeopleCode. If not enabled any errors that occur cause the program to stop. |
Use the Handlers tab to configure and populate handler metadata for the service operation.
This example illustrates the fields and controls on the Deployment Configuration grid – Handler tab. You can find definitions for the fields and controls later on this page.
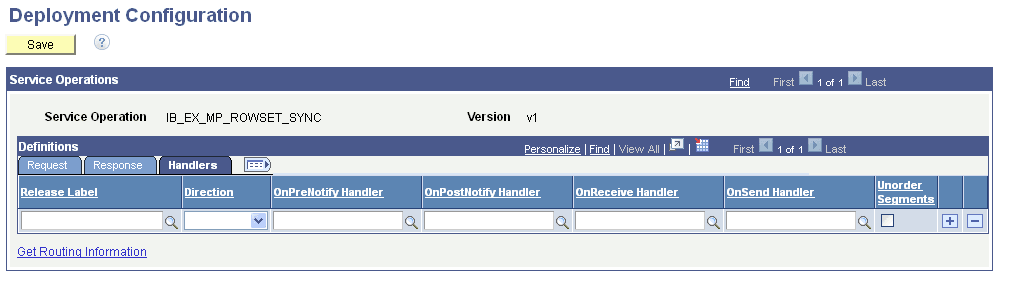
The following fields and controls appear on the Handlers tab of the Deployment Configuration grid:
| Field or Control | Description |
|---|---|
|
Direction |
From the drop-down list, select the direction of the transaction. The options are:
|
|
OnPreNotify Handler |
Enter the name of the OnPreNotify service operation handler to perform pre-processing on segmented messages. This option is relevant only when using the unordered segments option to process service operation messages in parallel. |
|
OnPostNotify Handler |
Enter the name of the OnPostNotify service operation handler to perform post-processing on segmented messages being processed in parallel. This option is relevant only when using the unordered segments option to process service operation messages in parallel. |
|
OnReceive Handler |
Enter the name of the OnReceive service operation handler to perform processing logic: To use this handler for deployment one of the following conditions must exist:
|
|
OnSend Handler |
Enter the name of the OnSend service operation handler to perform processing logic. To use this handler for deployment configuration:
|
|
Unorder Segments |
Check the box to indicate that the system should process service operation messages in parallel. To use this option the local node must be the receiving node. This option is frequently used in conjunction with the OnPreNotify handler and OnPostNotify handler to perform pre- or post-processing on segmented messages |