Setting Component Interface Permissions
Access the Permission Lists - Component Interfaces page (select and click the Component Interfaces tab).
This example illustrates the fields and controls on the Permission Lists - Component Interfaces page.
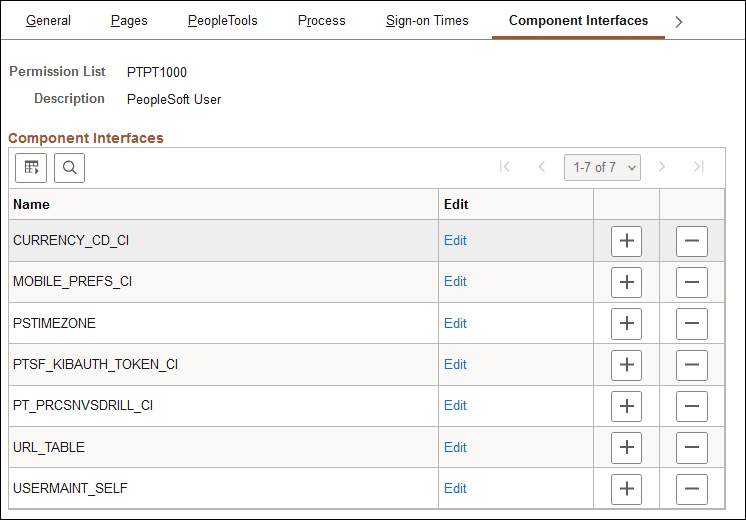
| Field or Control | Description |
|---|---|
|
Name |
Shows the name of the component interface. |
|
Edit |
Click to access the Component Interface Permissions page and grant access to a particular component interface method. |
Click the Edit button to authorize individual methods in each component interface:
This example illustrates the fields and controls on the Component Interface Permissions page.
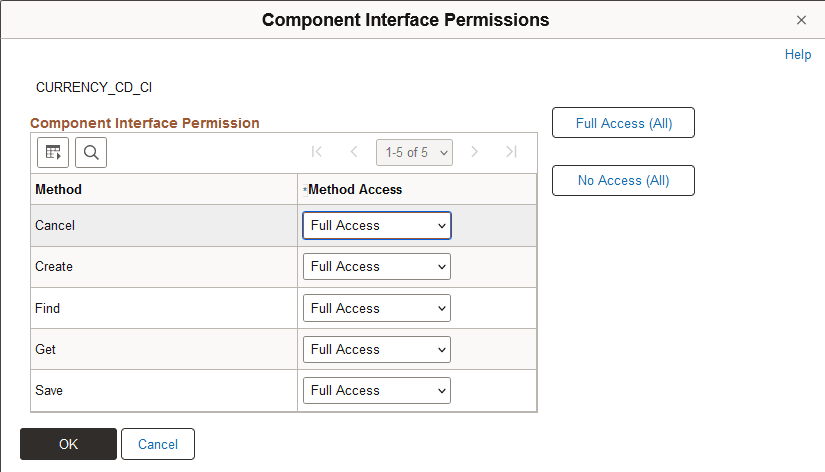
| Field or Control | Description |
|---|---|
|
Method |
Displays each method created within the component interface. |
|
Method Access |
Select from these two types of authorization: Full Access: The method is authorized. No Access: The method is not authorized. |
|
Full Access (All) |
Grants full access to all scripts listed on the page. |
|
No Access (All) |
Denies access to all scripts listed on the page. |
You grant access to component interfaces similarly to adding page access. Add a new row to insert a component interface into the definition list. You must also grant access to the component interface methods.
After adding a new permission to a component, you must delete the web server cache for users to access the component through the portal. To delete the web server cache, reboot the web server.
Note:
If more than one JVM services the web server, then rebooting the web server only purges the in-memory cache. No procedure exists to specify which JVM receives the request. For this reason, you must reboot all JVMs that service the web server.