Configure Jobs
This section covers configuring jobs and job runs in your AI Data Platform Workbench.
About Jobs
You create workflows for your data by constructing jobs.
You can track and manage all jobs in your AI Data Platform Workbench from the Jobs tab in the Workflow home page. From the Jobs Run tab you can see job history and the status of runs currently in progress.

Jobs are way of organizing and orchestrating groups of tasks as part of workflow. You can use workflows for common data processing, such as ETL workflows, Python scripting, running notebooks, and machine learning.
Jobs can vary in complexity. One job may have only a single task that runs a notebook, while another has more than a hundred tasks and nested jobs carrying out complex tasks with multiple conditions and dependencies.
Running a job starts the tasks inside with the sequences and conditions you specified. Jobs can even be nested inside of other jobs, embedding their sequence of tasks as a single node.
Every job run generates a job file that is stored in a user-specified location during job creation. This job file acts as a reference for managing and tracking job executions. You can run, schedule, and view the JSON representation of the job directly from the file in the workspace, ensuring transparency and reproducibility. This approach allows seamless job monitoring, versioning, and integration within automated workflows.
Jobs can configured to run on a calendar schedule, scheduled to run based on a cron expression, or run immediately.
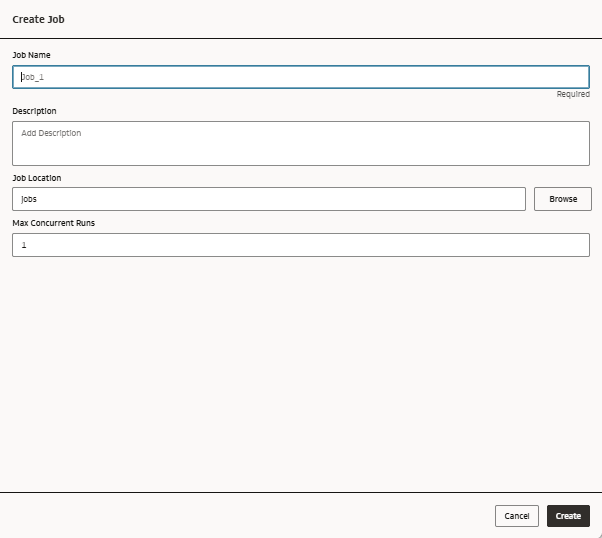
Create a Job
You need to create a job to begin using workflows in Oracle AI Data Platform Workbench.
Change Job Location
You can change the location of a job after creation.
- On the Home page, click Workflow.
- Click the job you want to change the location for.
- Click the Details tab.
- Next to Location, click Browse.
- Pick a new location for the job and click Select.
Delete a Job
You can delete jobs that you no longer need.
- Navigate to your workspace and click Workflows.
- Next to the job you want to delete click Options then click Delete.
- Click Delete.
Schedule a Job Using a Calendar
Workflow jobs can be scheduled to run on an automated basis.
- On the Home page, click Workflow.
- Click the job you want to make a schedule for.
- Click the Details tab.
- Next to schedule, click Add.
- Choose whether your schedule begins as Active or
Paused.
- Select Active if you want the schedule in effect immediately.
- Select Paused if you want to activate the schedule at a later time.
- Select the Time Zone the schedule uses as a basis.
- From Schedule Type, select Calendar.
- Select whether the schedule will be run hourly, daily, weekly, or monthly. You
need to provide additional information for Hourly,
Weekly, and Monthly
options.
- For Hourly, select the hours on which the schedule repeats.
- For Weekly, select the days of the week the schedule repeats.
- For Monthly, select the days of the month the schedule repeats.
- Enter the time of day the schedule runs. The time of day is in 24 hour format, beginning at 00:00 and ending at 23:59.
- Check the listed run time at the bottom to confirm your schedule is correct. Click Create.
Schedule a Job Using a Cron Expression
Workflow jobs can be scheduled to run on an automated basis using cron expressions to determine date and times.
- On the Home page, click Workflow.
- Click the job you want to make a schedule for.
- Click the Details tab.
- Next to schedule, click Add.
- Choose whether your schedule begins as Active or
Paused.
- Select Active if you want the schedule in effect immediately.
- Select Paused if you want to activate the schedule at a later time.
- Select the Time Zone the schedule uses as a basis.
- From Schedule Type, select Cron Expression.
- Enter the cron expression.
- Check the listed run time at the bottom to confirm your schedule is correct. Click Create.
Run a Workflow on Demand
You can choose to run a workflow job immediately.
- On the Home page, click Workflow.
- Click on the job you want to run.
- Click Run Now.
Change a Job Run Schedule
You can edit the schedule of a job run after creation to modify time, timezone, or frequency of that schedule.
- On the Home page, click Workflow.
- Click the job you want to make a schedule for.
- Click the Details tab.
- Next your schedule, click Edit.
- Modify the schedule as needed. Check the listed run time at the bottom to confirm your schedule is correct.
- Click Save.
Pause or Activate a Job Run Schedule
After setting a schedule for a job run you can choose to pause it then reactivate when needed.
Repair Failed Job Runs
You can attempt to repair a run that has failed by reviewing the timeline and details and rerunning the job with optional parameters to assist your diagnostic.
- Navigate to your workflow.
- Click Job Runs.
- Next to the failed job run, click Actions and click Repair run.
- Review the task details to determine possible causes of failure.
- Click Repair run and select which tasks to rerun.
- Add optional parameters that will only apply to this repair run.
- If you select Key/Value as the
Parameter type, click
 Add and enter parameters.
- If you select JSON, enter parameter values in the space provided.
- If you select Key/Value as the
Parameter type, click
- Click Run repair.
