11 Notebooks
This chapter provides information on using and managing notebooks in your workspace.
Develop Code in Notebooks
Data engineers and data scientists can use notebooks in their AI Data Platform as a common tool for interactively developing code and exploring data.
Oracle AI Data Platform Workbench currently supports Python and SQL languages in notebooks. Notebooks can be scheduled or configured to run as part of a workflow. To run notebooks, you need to attach a compute cluster.
Your AI Data Platform Workbench comes with integrated managed notebooks for an intuitive developer experience.
You can use the sample code in this ZIP file for examples of code you can use with your notebook.
Auto-save
Notebooks are automatically saved every two minutes.
Importing and Exporting Notebooks
You can currently import a notebook file (*.ipynb) from your local machine to your workspace.
Exporting notebooks is not currently supported.
Create a Notebook
You can create a notebook in any workspace you have administrator permissions.
- On the Home page, navigate to your workspace.
- Click Create and click Notebook.
- Fill in the name and description, then click Create.
Attach an Existing Cluster to a Notebook
Notebooks require an attached cluster to provide compute power for developed code.
Create a Cluster for a Notebook
You can create a new cluster directly from the notebook interface and attach it immediately.
- On the Home page, navigate to your workspace and open your notebook.
- Click Actions then click Create cluster.
- Select Runtime version.
- Select the driver options for your cluster.
- Select the worker options for your cluster. These options apply to all cluster workers.
- Select whether the number of workers is static or scales automatically.
- If Static amount, specify the number of workers.
- If Autoscale, specify the minimum and maximum number of workers the cluster can scale to.
- For Run duration, select whether the cluster will stop running after a set duration of inactivity. If Idle timeout is selected, specify the idle time, in minutes, before the cluster will time out.
- Click Create.
Rename a Notebook
If the name of your notebook is no longer helpful or relevant, you can change it at any time.
- On the Home page, navigate to your workspace.
- Next to the notebook you want to rename, click Actions then Rename.
- Enter a new name and click Save.
- Optional: You can also change the name of an open notebook by clicking the name and entering a new one.
Delete a Notebook
You can delete notebooks that you have administrator permissions for.
- Navigate to your workspace.
- Next to the notebook you want to delete, click Actions then Delete.
- Click Delete.
Clone a Notebook
You can clone an existing notebook to create a copy of the content of that notebook you can modify while retaining the original.
- Open the notebook you want to clone.
- In the notebook toolbar, click File then click Clone.
- Enter a new name for the cloned notebook.
- Click Browse to select the workspace folder to save the cloned notebook into. If no folder is selected, the cloned notebook is created in the same folder as the notebook you are cloning.
- Select whether to include or exclude outputs. Outputs are included by default. Clear the selection to exclude outputs.
- Click Clone. The cloned notebook is created in the workspace folder you specified.
Default Language
You can use notebooks to develop and run Apache Spark code in Python or SQL.
The default language for notebooks is Python. You can change the default language for the whole notebook or for individual cell(s) to SQL or Markdown or raw text. You can combine Python and SQL code in different cells within the same notebook.
Notebooks have syntax highlighting for Python and SQL. New notebook cells will be created based on the default language of the notebook.
Browse Resources While Editing Notebook
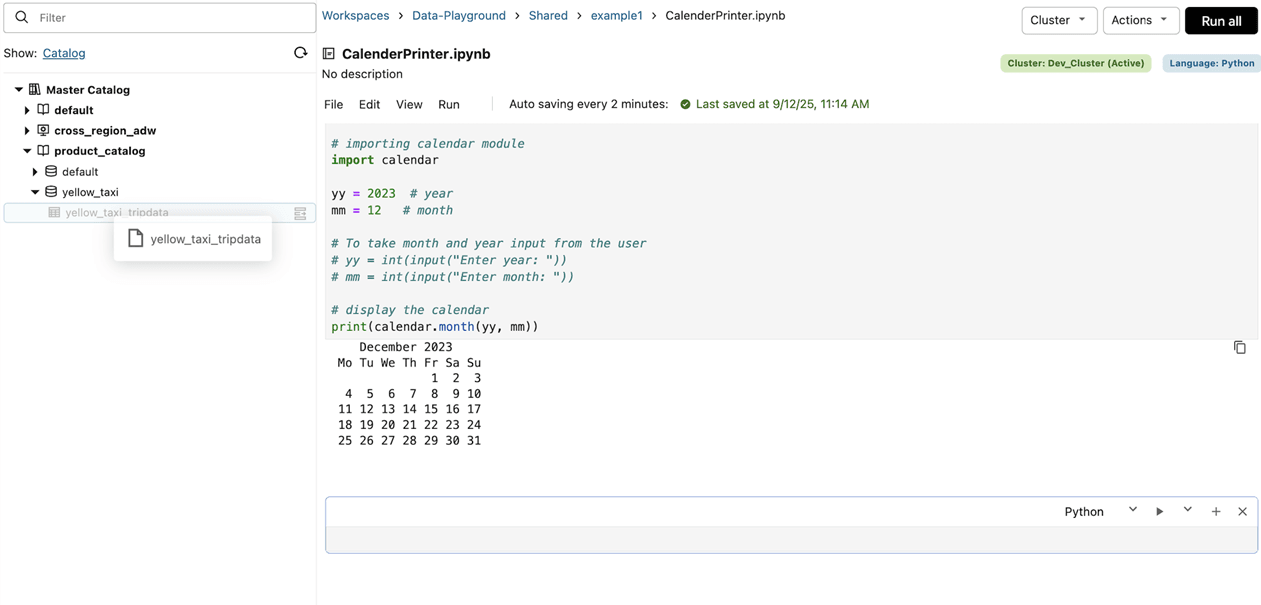
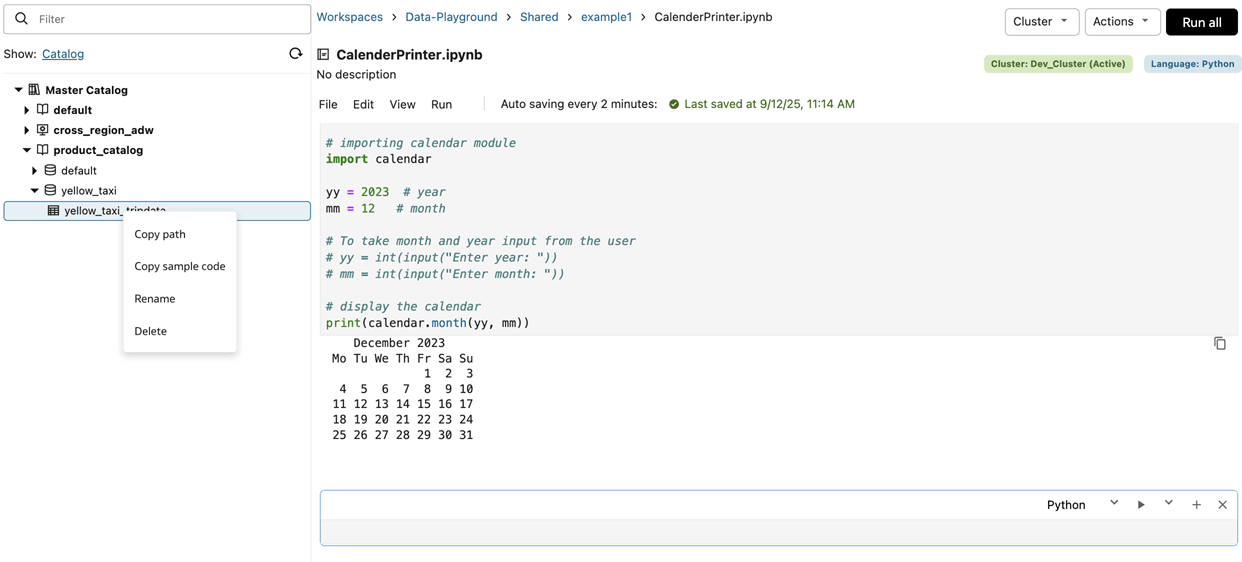
When you are in a notebook, you can browse the Catalog or workspace objects on the left side without leaving your notebook.
If you drag and drop any object from the left hand pane to the notebook, the object name or the full path is copied and pasted to the notebook cell (depending on the context).

You also have a button and context menu options available for each catalog or workspace object in the left hand pane. The context menu at the left navigation has options to copy sample code, copy name, or copy path and so that you can paste to your notebook cell.

Run Notebooks
You can choose to run code in notebooks immediately or set up schedules to run code as a workflow job.
Code can be run from a notebook using three methods: running on demand, running as a one-off manual run, or creating a scheduled notebook job. Jobs run on demand or manually are run only once. Manual job runs can be run again or later set up to run on a schedule. Scheduled job runs are automatically triggered based on the schedule you set.
Running Terminal Commands Within a Notebook
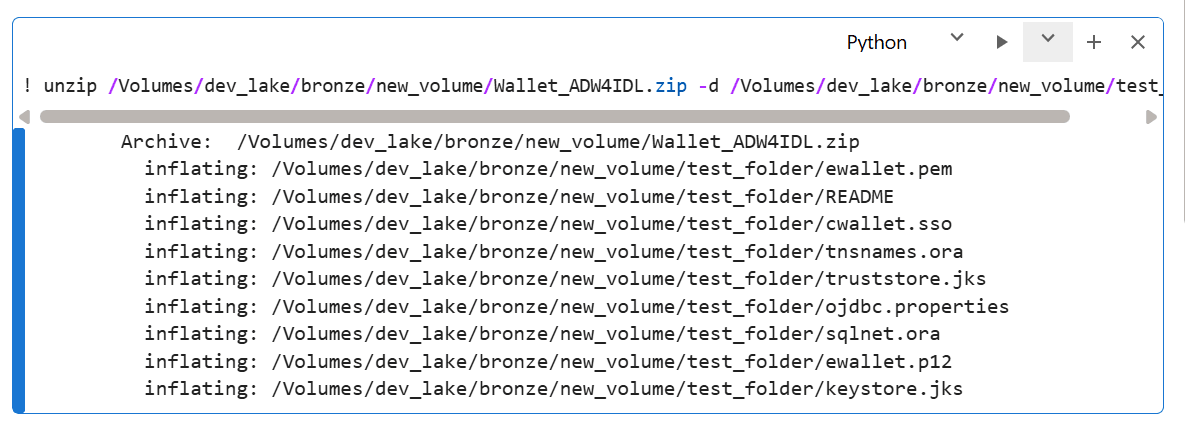
You can run basic terminal commands or shell commands within a notebook by prefixing with an '!'. For example, you can use the unzip command to extract from ZIP files in the workspace.

You can also use the subprocess module in Python for shell script execution.

You can also use native Python modules like zipfile for tasks like unzipping files as an alternative to shell commands.
Notebook Output and Results
Notebook outputs and results are visible in a new cell right after the cell with code. While the cell is in progress, you can cancel the execution of the cell.
If a notebook is run as a workflow job, the output is not visible in the same notebook. In that case the output is visible in the output area of the corresponding workflow job run.
Limitations
Currently, Oracle AI Data Platform Workbench does not have native support for pip install, CI/CD, Git, or version control systems.
Notebook Keyboard Shortcuts
You can use keyboard shortcuts to simplify using commands in your notebook.
| Windows | macOS | Action |
|---|---|---|
| Ctrl + Enter | Cmd + Return | Execute cell |
| Shift + Enter | Shift + Return | Execute cell and advance to next cell |
| Ctrl + S | Cmd + S | Save notebook |
| Ctrl + N | Ctrl + N | New notebook |
| Ctrl + Z | Cmd + Z | Undo |
| Ctrl + Y | Cmd + Y | Redo |
| Ctrl + C | Cmd + C | Copy |
| Ctrl + X | Cmd +X | Cut |
| Ctrl + V | Cmd + V | Paste |
| Ctrl + Alt + F | Ctrl + Option + F | Find and Replace |
| Ctrl + Shift + A | Ctrl + Shift + A | Insert cells above |
| Ctrl + Shift + B | Ctrl + Shift + B | Insert cells below |
| Ctrl + Alt + Up | Ctrl + Option + Up | Move cell up |
| Ctrl + Alt + Down | Ctrl + Option +Down | Move cell down |
| Ctrl + D | Ctrl + D | Delete cell |
| Alt + Shift + Enter | Option + Shift + Return | Run All |
| Alt + Shift + Up | Option + Shift + Up | Run all above cells |
Run Code from a Notebook
You can choose to run all code developed in a notebook at once, or one cell at a time.
- MacOS: Cmd + Return
- Windows: Ctrl + Enter
You can run code in a single cell by clicking the![]() Play button, or run the whole notebook by clicking
Run all.
Play button, or run the whole notebook by clicking
Run all.
- On the Home page, click Workspace.
- Navigate to your notebook.
- Click Run all.
- Check the status of your notebook job run by clicking Workflow then Job Runs.
Run Code from Another Notebook
You can use %run magic command in a notebook to include code from another notebook.
After following these steps, the notebook named called-notebook.ipynb is immediately run using your user principal (i.e. caller-notebook.ipynb) and using the attached cluster of caller-notebook.ipynb. All the functions and variables defined in called-notebook.ipynb immediately become available in the notebook named caller-notebook.ipynb.
Create a Manual Run Job from a Notebook
You can create an unscheduled job that you can run manually from code you've developed in your notebook.
- On the Home page, click Workspace.
- Navigate to your notebook.
- Click Actions, then click Schedule.
- Provide a name and description for the job.
- Click Browse and select the location to store your job. Click Select.
- Select a compute cluster from the Cluster dropdown.
- For Schedule, select Manual Run.
- Click Create.
Create a Scheduled Job Run from a Notebook
You can create a scheduled job that runs automatically from code you've developed in your notebook.
- On the Home page, click Workspace.
- Navigate to your notebook.
- Click Actions, then click Schedule.
- Provide a name and description for the job.
- Click Browse and select the location to store your job. Click Select.
- Select a compute cluster from the Cluster dropdown.
- For Schedule, select Schedule.
- Select a Schedule Status.
- Select Active if you want the schedule to be enabled immediately.
- Select Paused if you want to manually enable the scheduled run at a later time.
- Provide a time zone for the schedule to be based on.
- Select the Schedule Type.
- For Calendar, you must specify the frequency and which hours or days the schedule will repeat on.
- For Cron Expression, you must provide the schedule in the form of a cron expression.
- Check the listed run time at the bottom to confirm your schedule is correct. Click Create.
Migrate Existing Apache Spark Code to Oracle AI Data Platform Workbench
You can adapt your Apache Spark code to migrate it for use in Oracle AI Data Platform Workbench notebooks.
If you are migrating existing Spark code from other platforms, you can use the following guidelines to adapt your code for use in notebooks.
Table 11-1 Apache Spark to AI Data Platform Migration Guidelines
| Guideline | Details |
|---|---|
| Remove SparkSession creation commands | AI Data Platform Workbench automatically creates a SparkContext for each compute cluster. We recommend removing the session creation commands or replacing them with SparkSession.builder().getOrCreate().
|
Remove session termination commands, like sys.exit() or spark.stop() |
All purpose compute clusters are shared clusters, so if any users stop the SparkSession, by using sys.exit() or spark.stop() for example, the cluster needs to be restarted for everyone. To avoid disruption, we recommend avoiding those commands in the notebooks.
|