Create Source Views

Create source views as a base for model objects when you think you might want to perform subsequent changes.

Topics:

About Source Views

Source views are saved queries of data in the database. You can think of a source view as a "virtual table."

You create source views when using a single table as a source for more than one dimension table. For example, you can create source views that use the Employee source table as a source for the Employee and Manager dimension tables.

You also create source views when creating a dimension table that is based on multiple source tables, as in a snowflake source. For example, you can create a source view that combines columns from the Customer and Customer Group source tables to create a single Customers dimension table.

You can also perform pre-aggregation calculations in a source view. For example, to create an Average Revenue column that is calculated pre-aggregation, you can include the calculation in the SQL query for the view:

SELECT
  "BICS_REVENUE_FT1"."UNITS",
  "BICS_REVENUE_FT1"."ORDER_KEY",
  "BICS_REVENUE_FT1"."REVENUE",
  "BICS_REVENUE_FT1"."PROD_KEY",
  "BICS_REVENUE_FT1"."REVENUE"/"BICS_REVENUE_FT1"."UNITS" AS AVERAGE_REVENUE
FROM
  "BICS_REVENUE_FT1"

In general, create source views as a base for model objects when you think you might want to perform subsequent changes. Creating a semantic model based on source views provides greater flexibility than using source tables directly. For example, using source views makes it much easier to extend model objects, create filters, and add pre-aggregation calculations.

Add Your Own Source Views

You can add views to the source database from Data Modeler. For example, you can create a source view that combines the Brands and Products source tables to create a single source for your dimension table.

Create source views as a base for model objects when you think you might want to perform subsequent changes. You can create a view from scratch and add any column you want from other tables and views in the database. Alternatively, you can create a view by copying an existing source table or another source view.

  1. In Data Modeler, lock the model for editing.
  2. From the Database menu in the left pane, click Actions, then click Create View.

    Initially the view is empty. You can add any column you want from other tables and views in the database.

    Tip:

    To create a view from an existing source table or source view, navigate to the database object you want to copy, click Actions, and then click Duplicate.
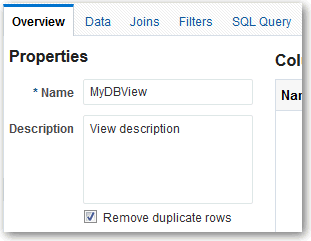
  3. In the View editor, specify a name and description for the view. Optionally deselect Remove duplicate rows if you want to include duplicate rows in the view.
  4. Add columns to the database view by dragging and dropping tables or views from the Database menu into the Columns area of the View editor.

    Alternatively, click Add Columns, select a source database table or view, select columns, and then click Add.

  5. Define aliases for columns if needed. You can also optionally move rows up or down using the Action menu for a specific row.
  6. From the Joins tab, you can define joins for the view. Click Create Join, then specify the left side table, right side table, columns, and the join type. You must include more than one source table in your view to create joins.
  7. From the Filters tab, you can define filters for the view.
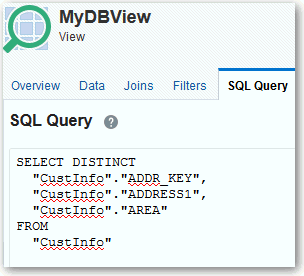
  8. From the SQL Query tab, review the code for the SQL query for the source view.

    You can edit the SQL code for the query here, but do so only if you’re familiar with SQL code. Entering invalid SQL code can produce unexpected results.

    If you do edit the SQL query directly, simple updates are reflected back in the Overview, Join, and Filters tabs and you can use these tabs to further edit the view later. For example, you can include:

    • Simple SELECT clause with aliases and DISTINCT keyword

    • FROM clause with joins

    • WHERE clause with filter conditions which combined with AND keyword

    If you use the SQL Query tab to make more advanced code changes you cannot use the Overview, Joins or Filters tabs to further edit the view. For example, if you include:

    • SQL aggregation functions, GROUP BY clause, HAVING clause

    • ORDER BY clause

    • OR keyword in WHERE clause

  9. Optional: Click the Data tab to preview the first 25 rows of data. You can also get a complete row count. It is best to view data only after defining joins between all tables for better performance.
  10. Click Save and Close.

Define Filters for Source Views

A filter specifies criteria that are applied to columns to limit the results that are returned. In other words, a filter is the WHERE clause for the view statement. For example, you can define a filter where Customer Country is equal to USA.

  1. Create a view.
  2. Click the Filters tab.
  3. Click Create Filter.
  4. In the WHERE row, first select the column for the filter. Next, select the condition, such as "is not equal to" or "is greater than".

    Finally, specify the value for the filter. You can specify a variable if needed.

  5. Optional: Click Create Filter again to add an "and" row to the filter. Specify the column, condition, and value. Repeat as needed.
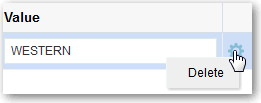
  6. To remove a row, click Actions, then select Delete.
  7. Click Save.