Add Conditional Formatting to Data

Add conditional formatting to highlight important events in your data. For example, you might want to show when occupancy rates for a rentral property meet high, medium, and low thresholds.

Note: You can only display icons and emojis in Table, Pivot, or Tile visualizations.
  1. On the Home page, hover over a workbook, click Actions (Actions menu ellipsis icon), then select Open.
  2. Click Visualize.
  3. From the visualization toolbar, click Conditional Formatting (Conditional Formatting icon).
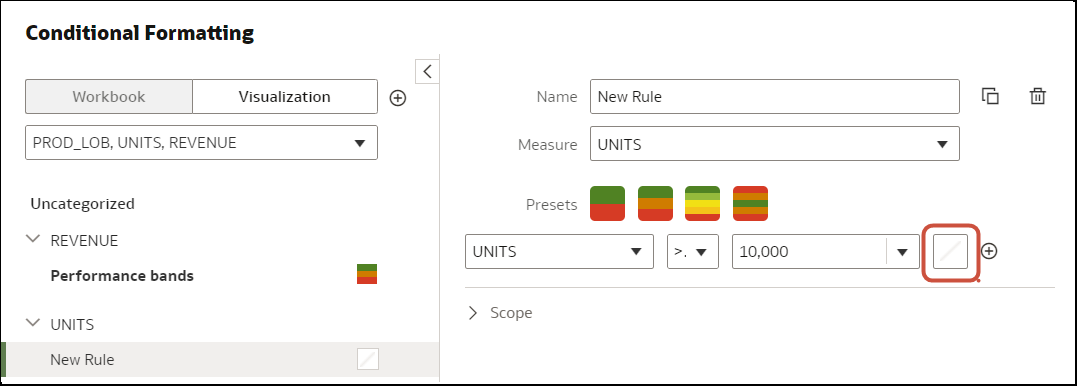
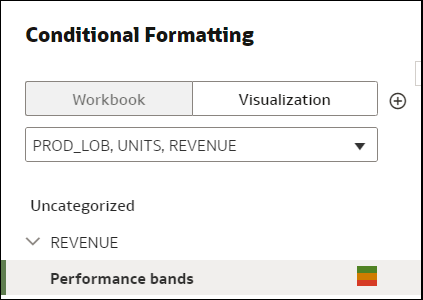
    Existing rules are listed under their target measure. Rules are displayed as 'Uncategorized' until their target measure is specified. For example, in this screenshot, the rule "Performance bands" is listed under the measure REVENUE.

  4. Click Workbook or Visualization to add conditional formatting to the whole workbook, or specific to a visualization.
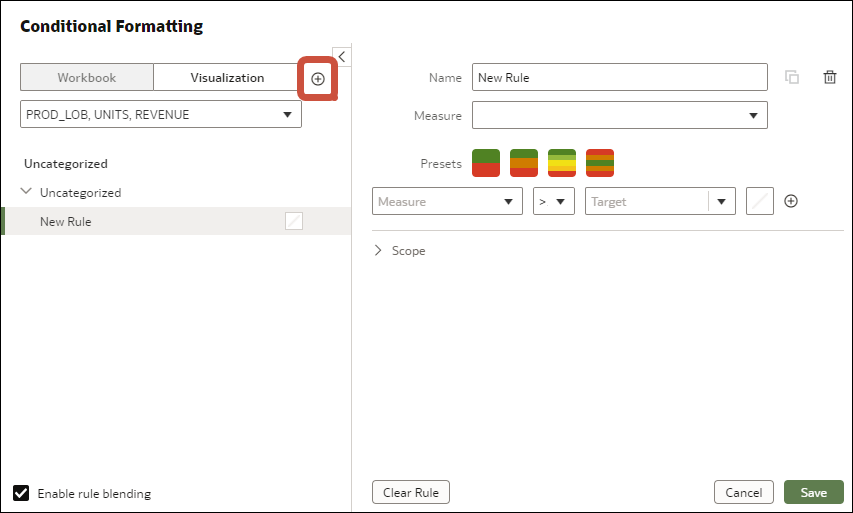
    Tip: If you need to start again, click Add New Rule.

  5. In Name, change the default name to a more user-friendly term.
  6. In Measure, select the data measure that the rule evaluates.
    For example, to highlight when revenue meet high, medium, and low thresholds, you might select REVENUE.
  7. Use the operator field and adjacent value field to specify the threshold.
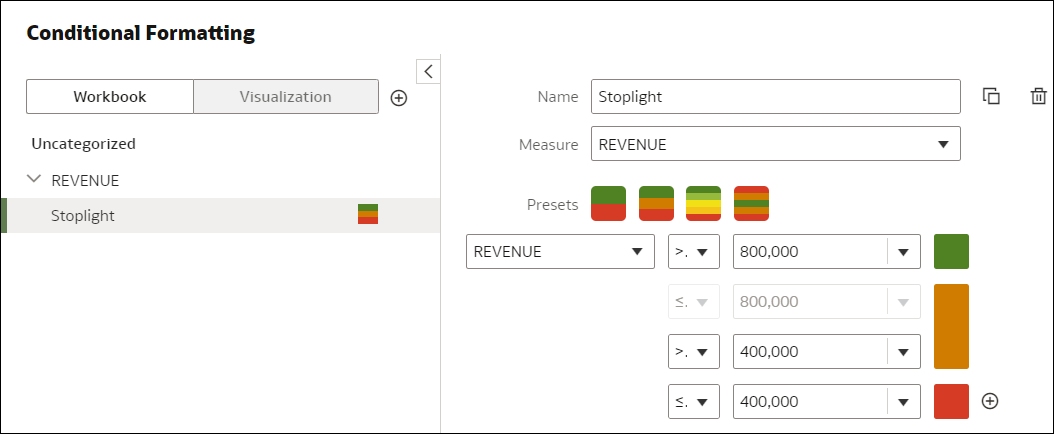
    For example, to highlight REVENUE rates greater than 1,000,000, select the greater than symbol > in the operator field and enter 1,000,000 in the value field.
    Tip: You can also create a rule by clicking one of the Presets and defining a value for each threshold. For example, click 3 Steps Threshold to create a set of stoplight thresholds.
    Description of conditional-format-example-threshold-configuration.png follows
    Description of the illustration conditional-format-example-threshold-configuration.png
  8. Click Format to configure the fill color, font, icon or emoji (tabular data), note, and legend for the new rule.
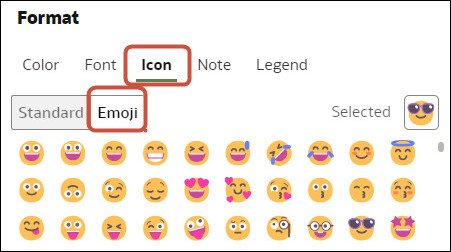
    For example, in Table, Pivot, or Tile visualizations, to display an emoji when a measure meets the condition threshold, click Icon, then Emoji, then select an emoji.

  9. To add additional rules, repeat Steps 4 to 8.
    If you're applying multiple rules to the same measure, use the grab handles to position the rules in the order you want (rules at the top activate first), and click Enable rule blending if you want to combine text font and styling but retain background color differentiation.
  10. Click Save.