Add an Assign Variables Action
You add an Assign Variables action to an action chain to map the source of some value to a variable. The variable can be used by other action chains or bound to a component.
For example, if your action chain sends a request to a GET endpoint, you can use the Assign Variables action to map the response to a page variable bound to a page component. Or, suppose you want to capture the ID of an item selected in a list. You could use a Selection event to start an action chain that assigns the selected item’s ID to a variable.
To add an Assign Variables action to an action chain:
- Open the Action Chain editor for the page.
- Create an action chain, or open an existing action chain to add the action in the editor.
- Drag Assign Variables from the Actions palette into the action chain.
You can drag the action onto the Add icon (
 ) in the action chain, or between existing actions in the chain. The properties pane opens when you add the action to the chain.
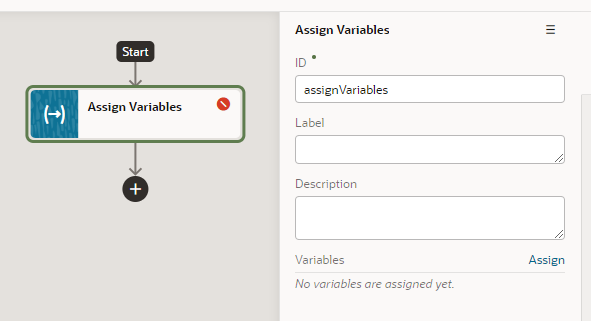
Description of the illustration action-chain-editor-assignvariable.pngThe Assign Variables action is badged with a warning icon when no variables have been assigned.
- Update the ID field in the Properties pane to make the action more easily identifiable.
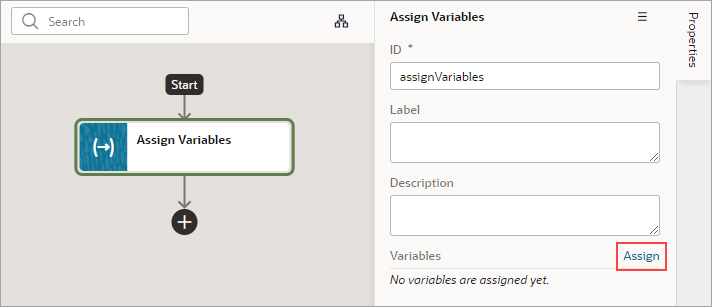
- Click Assign in the properties pane to open the Assign Variables window to map the source of the value to a page variable.
- Drag the sources of the values in the Sources pane onto targets in the Targets pane. Click Save.
Each target can only be mapped to one source, but you can use the action to assign multiple variables. For example, you might want to map a value from the Chain in the Sources pane, such as an input variable or the result of an action, to a Page variable or to the input of another action in the Target pane. When you select the variable in the Target pane, the expression editor in the dialog box displays the expression for the source.
If you need to define the variable, use the + icon to open a dialog where you can define a variable for the artifact (action chain, page, flow, or application).
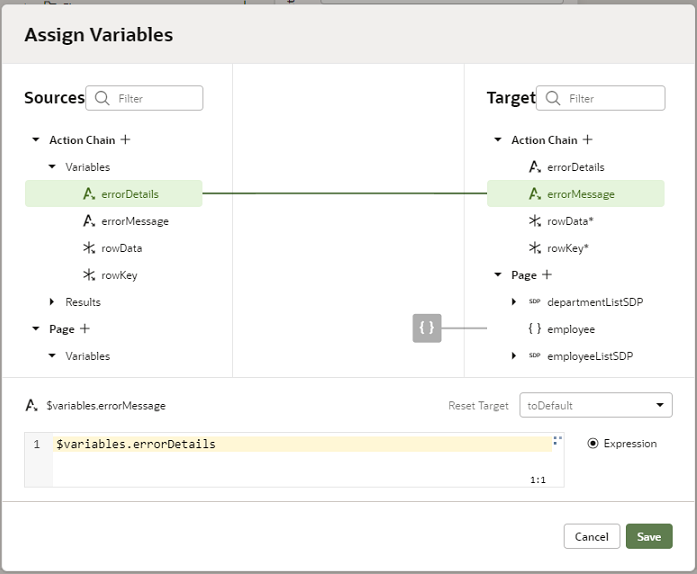
Description of the illustration action-chain-editor-assignvariable-mapdialog.png
Use Filter Builder to Create Filter Criteria for an SDP
If you're using an SDP to provide a table or list's data, and you'd like to filter out rows, you can use the Assign Variable action to create and assign the filter criteria to the SDP's filterCriterion property. For further details about using an SDP to filter a table or list's rows, see Filter Data by Filter Criteria
When the Assign Variable action's Variable property is set to an SDP's filterCriterion property, the Filter Builder appears under the Variable property for you to create the filter criterion.
- In the Properties pane, click Assign to open the Assign Variables window:
- In the Target pane, open the node for the SDP that's connected to your table or list, and select its filterCriterion property.
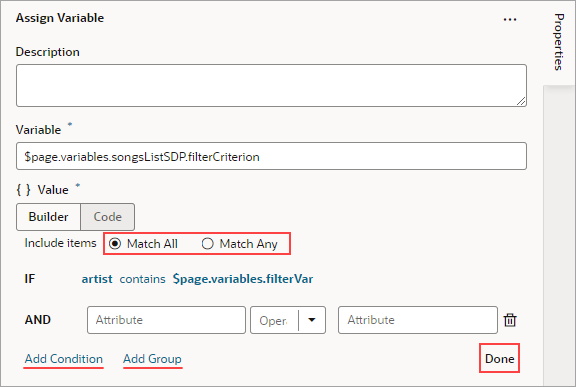
When an SDP's filterCriterion property is selected in the Target pane, the Filter Builder appears for you to create the filter criterion. Alternatively, you can expand the SDP's filterCriterion property in the Target pane and build your filter by specifying values for the
attribute,op, andvalueproperties.To directly work with the code, click the Code button. For details, see Filter Builder's Code Editor.
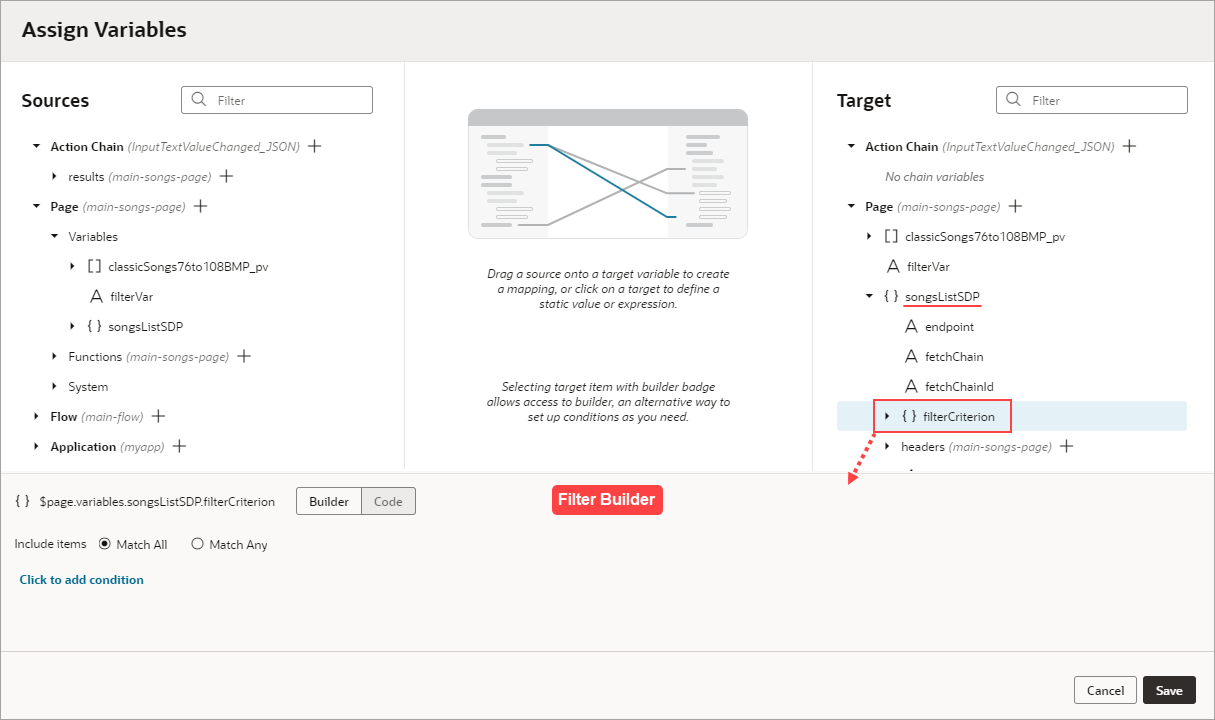
Description of the illustration filter-builder-assign.png
To use the Filter Builder to create the filter criterion for the SDP:
- Click the Filter Builder's Click to add condition link. To create the filter criterion:
- For the first Attribute textbox, enter the name of the column (record field) that you want to compare its values against the user's inputted value.
- For the Operator drop-down list, select the operator for the criterion.
- For the second Attribute textbox, select the page variable that was bound to the Input Text component.
- To add another condition, click the Add Condition link to add a condition with an AND or OR operator, or click the Add Group link to add a group of conditions that are to be evaluated together (conditions enclosed in brackets). To combine conditional expressions with the AND operator, select Match All, and to combine them with the OR operator, select Match Any:
- Click Done when you're finished.
Filter Builder's Code Editor
You can use the Filter Builder's Code tab to view and edit the filter's code. After defining a condition on the Builder tab, you will see that the Code tab contains an attribute, op and value property.
Here's an example of a filter with two conditions combined by an AND operator:
{
 "op": "$and",
 "criteria": [
  {
   "op": "$eq",
   "attribute": "name",
   "value": "{{ $page.variables.filterVar }}"
  },
  {
   "op": "$eq",
   "attribute": "id",
   "value": "{{ $page.variables.idVar }}"
  }
 ]
}- The Oracle JET operator is "
$eq" (it must include the dollar sign (“$”)). - The
attributeproperty is set to the name of the field (column) that you want to be evaluated against thevalueproperty. - The
valueproperty ($page.variables.customerListSDP.filterCriterion.criteria[0].value) is mapped to a page variable ($page.variables.filterVar) that holds the value to be evaluated against each field (column) value.
