Create a Custom Lock Page

You can create a custom page that displays when someone tries to access an application that you have locked for maintenance.

You can apply the custom page to either a visual application or an individual web application.
  • To apply the page to the entire visual application, import the file to the visual application at the root level.
  • To apply the page to an individual web application, import the file to the web application resources.

You can create more than one app-locked.html page and import each one to a different location. Any custom pages applied at the web application level will override the setting at the visual application level.

Note:

You will need to create the custom page and add it to the visual application or web application before locking the application.

Apply a Custom Lock Page to a Visual Application

You can create a custom lock page and add it to the root level of a visual application. When someone tries to access the locked application, the custom page will display.

Before locking the application, create a custom app-locked.html page, then import the file to the root of your visual application.

  1. Create your custom page and save it as app-locked.html.
  2. Add the custom page to the root of the visual application.
    1. Open your web application in the Navigator.
    2. Click Source View.
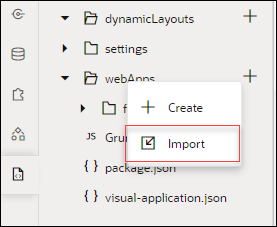
    3. Right-click the webApps directory and choose Import in the popup menu:

      Alternatively, drag the file from your local file system onto the webApps directory in the Navigator.

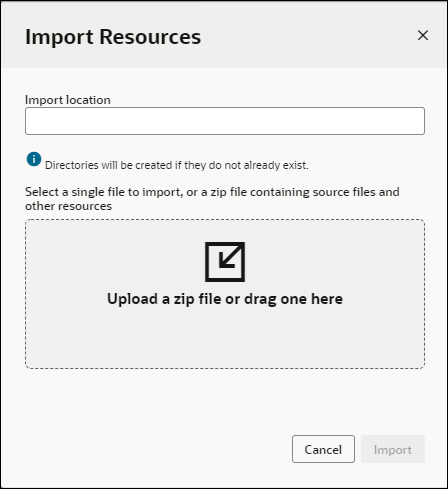
    4. In the Import Resources dialog box, remove webApps from the Import location field, then click the drop target area and navigate to the file on your local system.

    5. Click Import to import the file.
    The app-locked.html file is added to the root of your visual application.
  3. Apply the lock to your application (See Manage Your Visual Application ).
When someone tries to access the locked application, the custom app-locked.html page that you added to the visual application root displays, unless unique app-locked.html pages have been applied to individual web applications. The page at the web application level will override the page at the visual application root level.

Apply a Custom Lock Page to a Web Application

You can create a custom lock page and add it to a web application's resources. When someone tries to access the application, the custom lock page displays, overriding any page applied to the visual application level.

Before locking the application, first create the custom app-locked.html page, then import it to the resources section of your web application.
  1. Create your custom page and save it as app-locked.html.
  2. Add the custom page to the root of the visual application.
    1. Open your web application in the Navigator and locate the Resources folder.
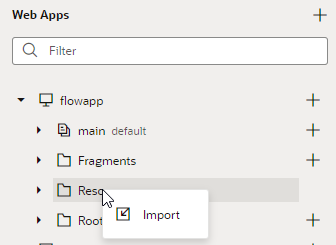
    2. Right-click the Resources folder and choose Import in the popup menu.

      Alternatively, drag a file from your local file system onto the Resources folder in the Navigator to open the Import Resources dialog box.

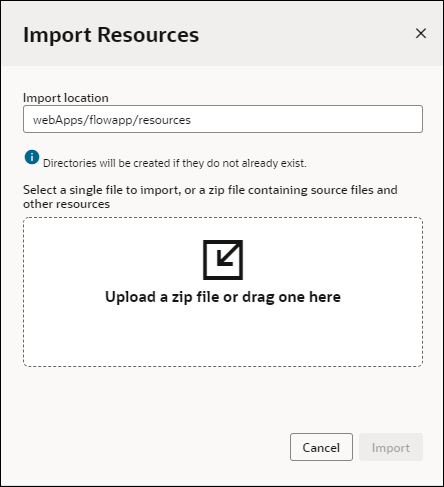
    3. In the Import Resources dialog box, click the drop target area and navigate to the file on your local system.

    4. Click Import to import the file.
    The app-locked.html file is added to the resources of your web application.
  3. Apply the lock to your application (See Manage Your Visual Application).
When a user tries to access the locked application, the custom app-locked.html page displays for this web application, overriding the page applied visual application root level.