21 Work With Business Processes
You can use business processes in your application to automate assigning tasks to users and creating task lists. After registering your business processes in your visual application, you can add UI components to your pages that start processes and that can be used to complete user tasks.
Note:
- This chapter describes working with Oracle Process Cloud Service, which is now deprecated; for details, see Deprecated Features.
- Oracle Process Cloud Service is not the same as OCI Process Automation. OCI Process Automation is a separate product.
About Using Processes in Your Application
You can create business processes to help automate tasks that need to be performed by application users. A process might include tasks such as reviewing data, approving or rejecting requests, and submitting files.
For example, completing a service or travel request is a process that might have several steps and involve several people. You can create a business process that is automatically initiated when a user submits a travel request in the application. Your process can generate the user tasks, such as getting approvals and submitting documents, and assign them to the appropriate users when they need to be performed. Logged in users might see a list of tasks they need to do or the status of their requests. Employees might see a list of requests that they submitted, and managers might see the requests that they need to approve or reject.
After you create a process in an Oracle Process Cloud Service application, you can register the process in your visual application and add code to pages in your web application to initiate the process. You can also add process actions to action chains that can be triggered by events in your application.
Add a Business Process to an Application
When adding a business process to an application, you can use business process aliases that are registered on the Process Server.
When you use an alias, the code that you add to the page refers to the alias rather than to a specific version of the process, and you can update the process version without changing the code by updating the alias in the Process Alias editor.
The process must be one that exists on the Oracle Process Cloud Service instance.
To add a business process to an application:
-
Open Processes in the Navigator. As soon as you open Processes for the first time, Visual Builder configures a Process Server.
-
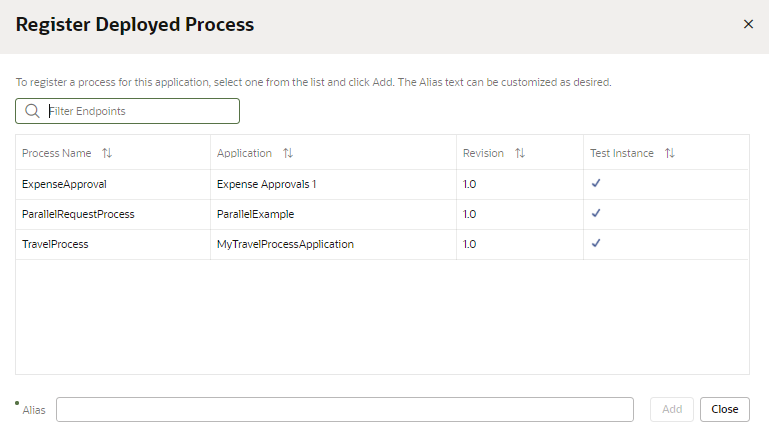
Click + Register Deployed Process to open the Register Deployed Process dialog box.
-
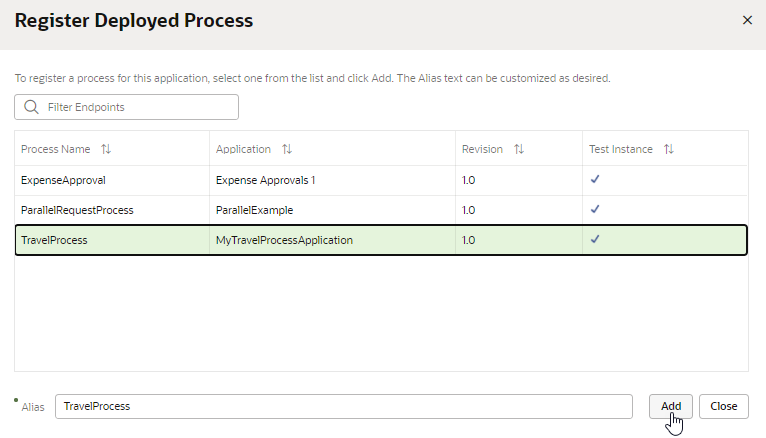
Select the process you want to add.
-
Type the alias you want to use for the process, if you want to change it. Click Add.
-
Repeat steps 2 and 3 to add aliases for more business processes. Click Close when you are finished adding aliases.
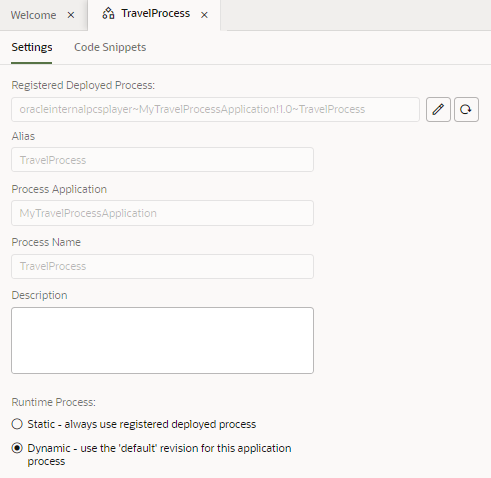
The aliases for each of the business processes that you added to your application are listed in the Processes pane. You can select an alias to open it in the editor.
Modify a Business Process Alias
A business process alias points to a revision of a process in a specific Process application registered in a test instance or a production instance.
You can use the process editor to modify the target of your process alias to point to a different process and to automatically point to a default or more recent revision instead of a specific revision.
When you are developing your application, you will want your alias to point to a process on a test instance. When you are ready to stage or publish your application, you will need to modify the alias to point to a process on a production instance.
To update a process alias:
Navigate to Your Process Instance
If you have a configured connection to a Process Server, you can use the Processes menu to navigate directly to your Process instance.
Click the menu and select Design Processes to navigate to the Process Applications tab of Oracle Process Cloud Service, where you can create, edit, publish, and test processes.
Click the menu and select Manage Processes to navigate to the My Tasks tab of Oracle Process Cloud Service , where you can complete assigned tasks.
Click the menu and select Test Connection to test the connection to your Process Server.
Add a Process to a Page
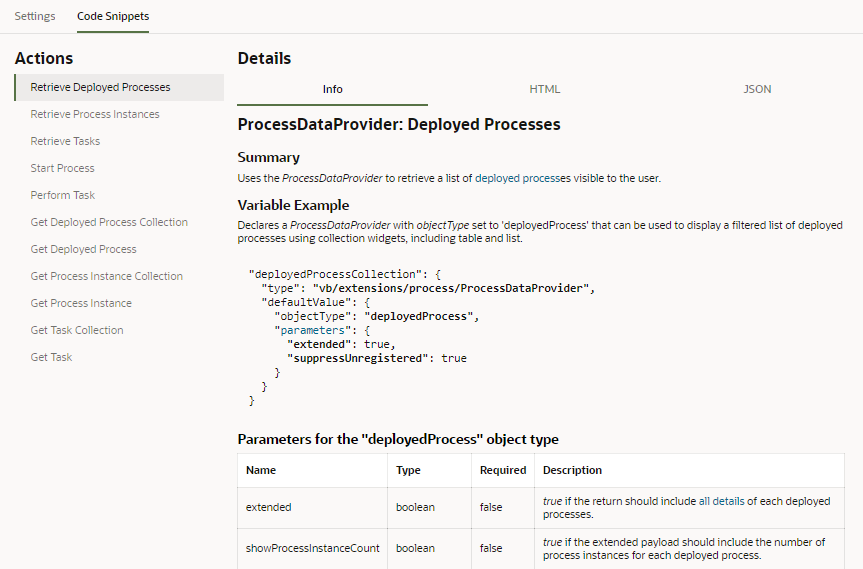
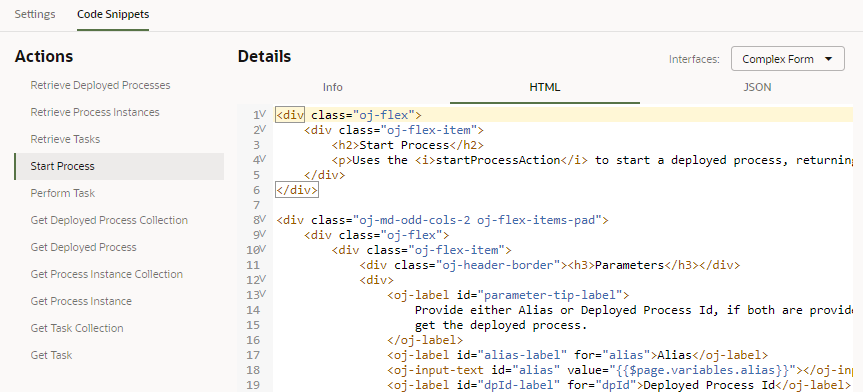
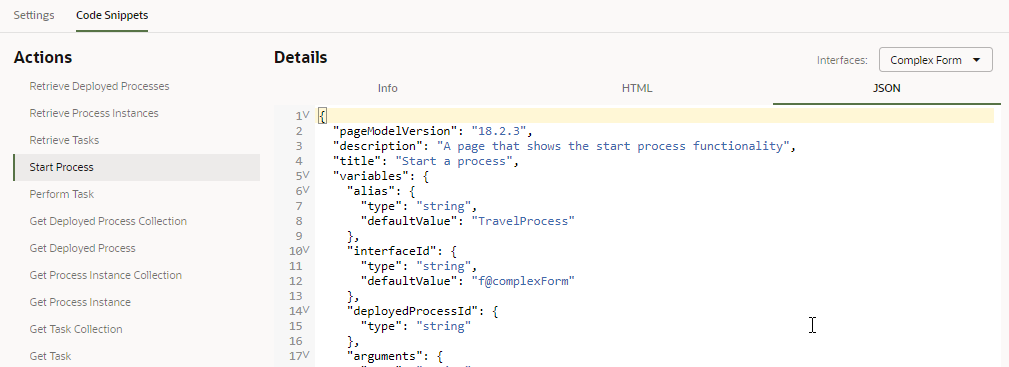
After you create an alias for a business process, you can add the code for the process by copying the process’s HTML and JSON code into the page’s source code in the editor. The Code Snippets tab in the Process Alias editor contains a description and code used for each of the process’s available operations.
To use code snippets to add a process to a page:
Code snippets are not the only way to add a process to a page. You can also display processes and tasks in tables and lists, and you can use the Add Task Actions quick start for a table or list to allow users to complete tasks.
Add a Process to an Action Chain
When you are building an action chain in the editor, you can add business process actions to the chain.
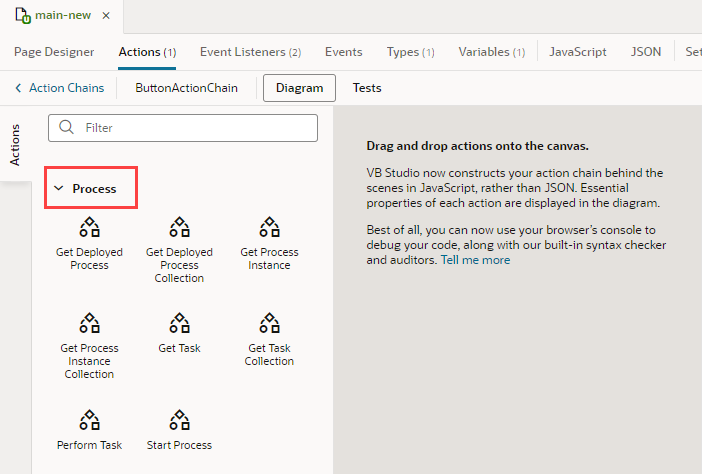
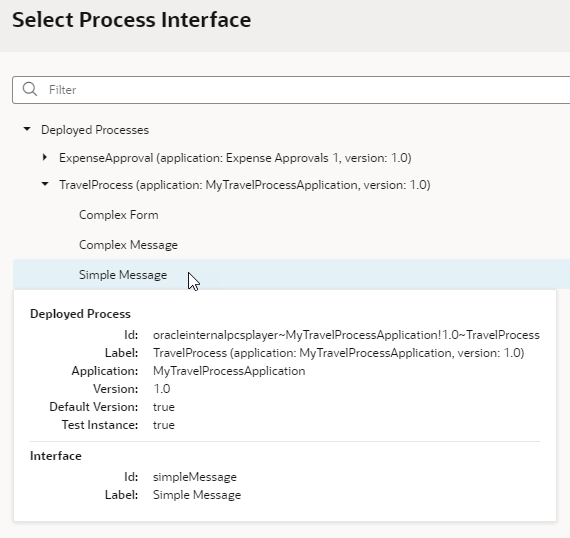
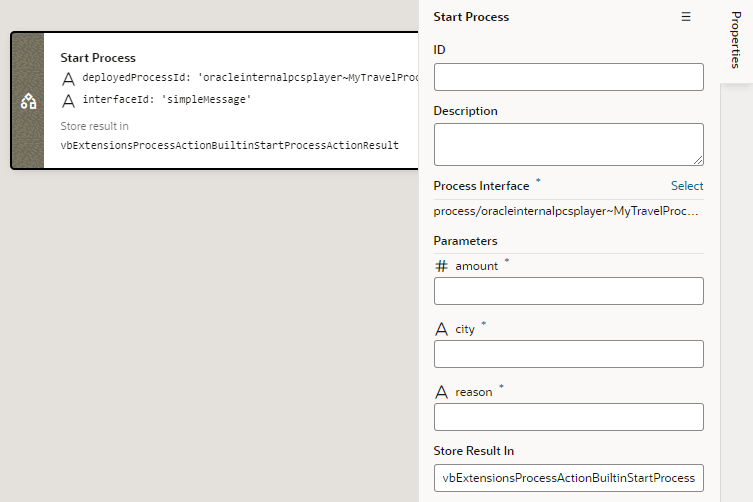
You can add process actions to an action chain by dragging the actions from the Process category in the Action Chain editor. The actions correspond to the operations described in the Code Snippets tab of the Process Alias editor. The Info tab in the Code Snippets tab contains a description of each action and its properties and parameters. A business process might have multiple interfaces. In the editor, when selecting a process, you will need to select one of the process’s interfaces, and the interface you select will determine the action parameters that you will need to specify in the Properties pane. See Visually Create an Action Chain.
To add a process operation to an action chain:
Start and Complete Processes from Visual Builder
To be able to start a process from Visual Builder, you must configure it in your Process instance to use a Message Start or Form Start event.
You can use the following kinds of start events in Oracle Process Cloud Service:
-
Message Start events with simple type parameters
-
Message Start events with complex business type parameters
-
Form Start events, which can use a mixture of types as parameters
In Visual Builder, you can map the message parameters to page variables, business objects, or service connection endpoints. You can then set up forms and action chains that execute your processes, and tables or lists that display processes and tasks. An Add Task Actions Quick Start for lists and tables allows you to add components that perform a task.
If you want to display the contents
of the message parameters that you specify, you can set up a data association for the
message in Oracle Process Cloud
Service and then use it in a description property in the
getTask endpoint in Visual Builder.
Configure the Connection to a Process Server
When developing applications that use business processes, you have considerable flexibility in configuring the settings used to connect to Process Servers and the credentials that are used when communicating with the processes on a Process Server.
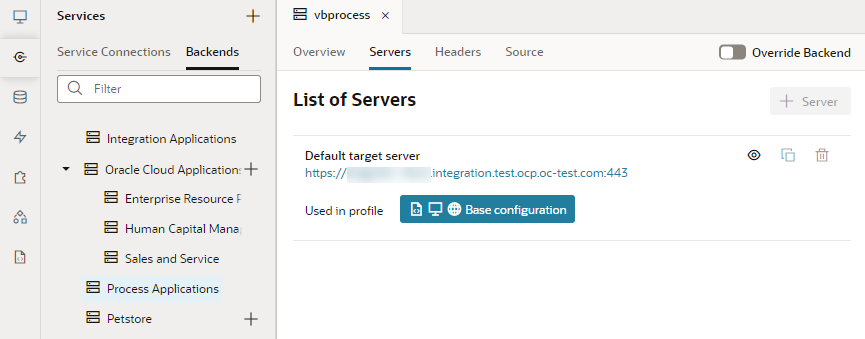
Visual Builder automatically sets up a default Process Server configuration when you create an application in Visual Builder. To see the configuration, click the Backends tab in the Navigator's Services tab. In the Backends tab, click Process Applications, then Servers. You'll see a Default Target Server, which in development mode, is configured to point to a test environment on the Oracle Process Cloud Service instance.
Note:
If you have an Oracle Traditional Cloud Account, you will see a message in the Processes browser if no instance of Oracle Process Cloud Service is associated with your instance. You will need an administrator to specify the URL of a Process Server in the Tenant Settings window before you can configure the connection between the visual application and the Process Server.When a Process-related interaction occurs (say, you clicked Processes in the Navigator and tried to register a process, or used a Process Quick Start), the Tenant settings are overridden and you'll see another target server, the Player Target Server, as shown here: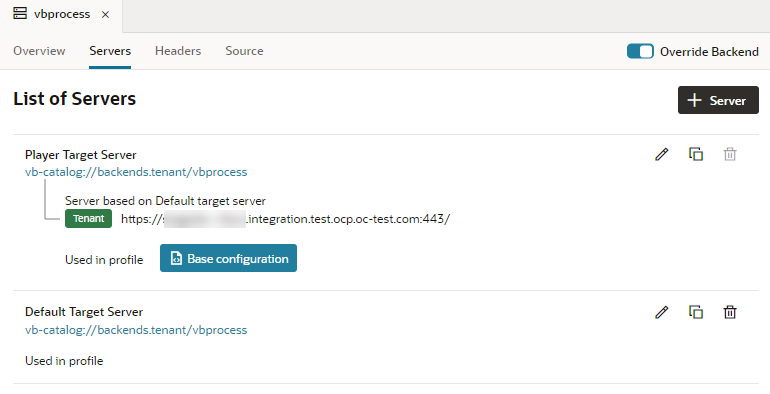
Description of the illustration process-services-vbs.png
The Player Target Server is useful when you want to "play" the process for testing, without making it live to your users.
The target server is set up in a default Application Profile. For basic information on Application Profiles, see What Are Application Profiles?
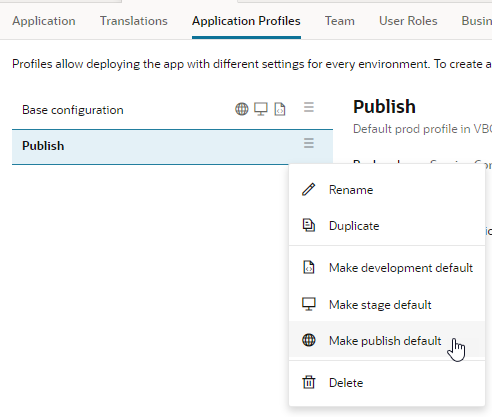
When you click the Application Profiles tab under Settings, you can see a base configuration that is set up to use the Player Target Server. This configuration is the default for the publishing, staging, and development phases of application development. 
Description of the illustration process-app-prof.png
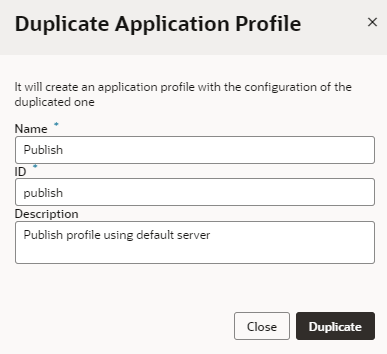
Once you finish developing your application, you'll want to duplicate the base configuration, rename it, and specify the use of the Default Target Server instead of the Player for the staging and/or publishing phases. To do this:
- Click the Duplicate button and specify a new Name and ID (for example,
Publish). - Click the Publish configuration and select Default Target Server from the drop-down list. By default, an application profile is always connected to the Player Target Server to avoid accidentally kicking off a live process.
- From the configuration's Options menu (
 ), select Make stage default or Make publish default.
Process Server Authentication Options
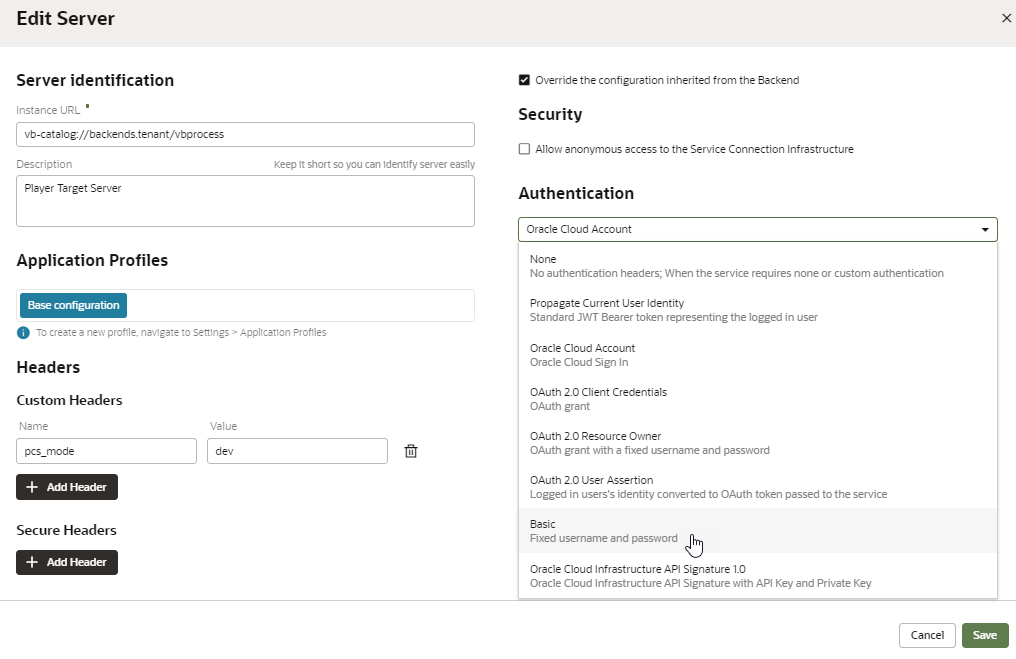
For each Process Server configured, like the Player Target Server and the Default Target Server, you can specify an authentication mechanism.
For example, you may want to specify basic authentication for development and testing, and the user's Oracle Cloud Account for the published app.
To specify authentication:
-
Click the Services tab under Settings (if you aren't already in Settings, select Settings from the top right menu).
-
Click the Edit icon next to the target server you want to edit.
-
In the Edit Server dialog box, select the authentication mechanism you want to use for that server from the Authentication drop-down list. The list has several choices, but for processes only Oracle Cloud Account and Basic are supported.
-
Click Save.
At any stage of development, a developer can choose to enable Basic Authentication and provide the credentials of a user registered on the Process server. Selecting Basic Authentication enables the developer to log in to the Process server as a different user and access processes that they would not be able to otherwise. When selected, the developer can provide the credentials of different users to access the processes available to that user. These credentials and Basic Authentication are not used when the application is staged or published.
Selecting Test Connection in the options menu for the Processes navigator will by default use Oracle Cloud Account authentication details to test the connection. This means that to test the connection your user credentials must be valid to access the Process Server.
