Create the Visual Builder Instance

You can create multiple Visual Builder instances in an OCI compartment.

If you've registered a custom hostname for the Visual Builder instance and saved the SSL certificate in an OCI Vault, then get the vault's compartment name, vault's name, and the secret key. You'll need them while creating the instance. If you haven't configured a custom endpoint, you can map it with the Visual Builder instance later.

Note:

If you want to create an instance that uses a private endpoint, see Prerequisite Steps for Configuring a Private Endpoint.

To create a Visual Builder instance:

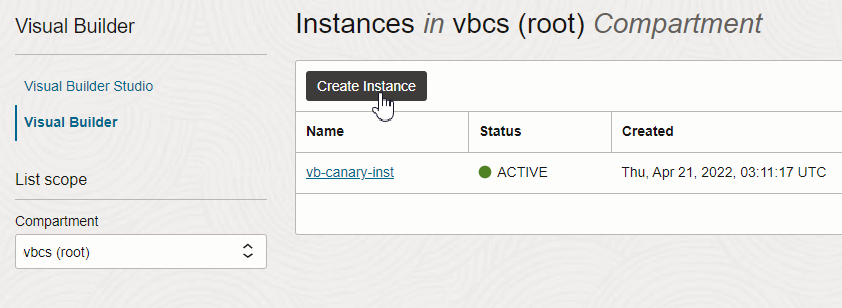
  1. On the Visual Builder Instances page, click Create Instance.

    If you need help finding the Instances page, see Signing In to the OCI Console.


    Note:

    • Before you enter the new instance's details, check if you see the Domain field. If you do, it indicates that you are signed in as a non-federated user. Sign out and sign in again as a federated user, and restart the creating an instance process.

    • If you see an IDCS Access token field, you must provide the token to create the instance.

      An IDCS access token is required, and it is typically retrieved automatically when you log in. However, if the login credentials you used do not have sufficient privileges to retrieve the access token, you will need to enter the access token manually in the field.

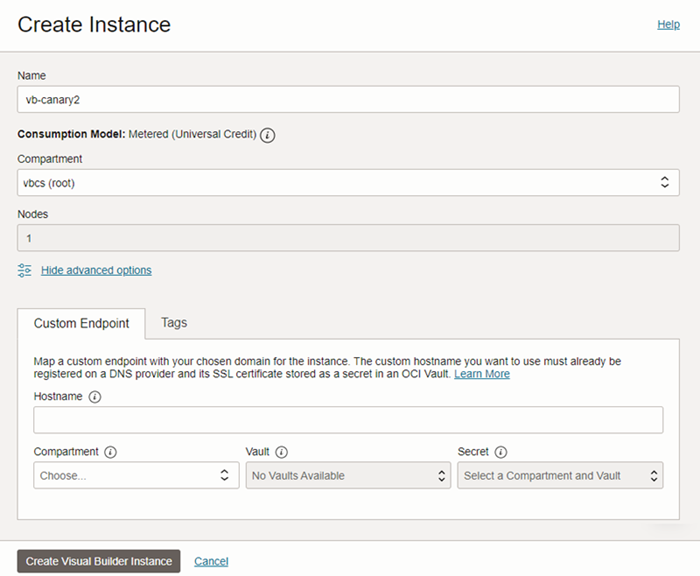
  2. In the Create Instance window, enter the Visual Builder instance's name in the Name field.
  3. In the Compartment field, select the compartment you want to create the Visual Builder instance in.
    If you haven't yet created a compartment to host the instance, see Create a Compartment for Visual Builder.
  4. Select the instance's network access.
  5. (Optional) Map a custom endpoint to the instance in the Custom endpoint pane.
    1. To map a custom endpoint to the Visual Builder instance, enter the hostname details in the Custom endpoint pane. If you haven't configured a hostname, you can configure it later and then map it to the instance later. See Create and Configure a Custom Endpoint.
      1. In Hostname, enter the custom hostname.

        The hostname must be registered on a DNS provider.

      2. In Compartment, select the OCI compartment that contains your certificate vault.
      3. In Vault, enter the OCI Vault's name.
      4. In Secret, select the secret you used to save the SSL certificate.

      Note:

      If you configured a hostname for the custom endpoint using WAF, you only need to provide the hostname. You do not need to supply the Compartment, Vault, or Secret.

      After you've created the instance, update the custom endpoint DNS record to the original instance hostname. As a best practice, update the CNAME with the hostname, or update the A record using the IP address, which you can obtain by using dig on the hostname.

    2. In Tags, enter a key and optional value. Tags enable you to track resources within your tenancy. See Resource Tags.
  6. Click Create visual builder instance.

The instance's Consumption Model is set automatically, according to the model enabled for the tenancy:

  • Metered (Universal Credits) is set for Visual Builder instances.
  • Subscription (VB4SaaS) is set for Visual Builder for SaaS instances.

    For details, see Visual Builder for SaaS.