Create a Custom HL7 Message
After you create a schema, you must create an HL7 message based on that schema for use in your integration. The message represents a specific snapshot of a schema to use in an integration. You later select the HL7 message for conversion into a supported format when you configure the healthcare action during design of your integration.
- To create a message in a project:
- In the navigation pane, click Projects.
- Click the project in which to create the message.
- Click Healthcare
 .
.
- In the HL7 messages section, click Add.
- To create a message in a standalone environment:
- In the navigation pane, click Healthcare, then HL7 messages.
- On the HL7 messages page, click Create.
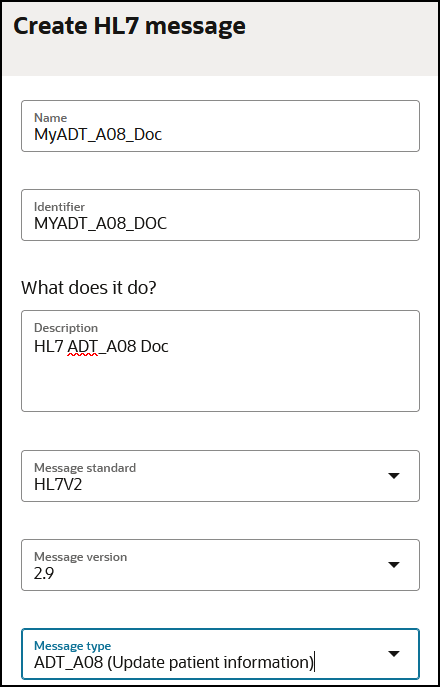
- Enter the following details to create a new HL7 message definition.
Element Description Name Enter a message name. Identifier This field is automatically populated with the message name. You can manually change this value. Description Enter an optional description of this message. Message standard View the message standard. Only HL7V2 is available and it cannot be deselected. The message standard identifies the business protocol to follow when exchanging messages between applications. Message version Select the message version. HL7 message versions 2.3.1, 2.4, 2.5.1, 2.5, 2.6, 2.7, 2.7.1, 2.8.1, 2.8, 2.8.2, and 2.9 are supported.
Message type Select the HL7 message type. The types shown are based on the HL7 message version you selected. 
- Click Create.
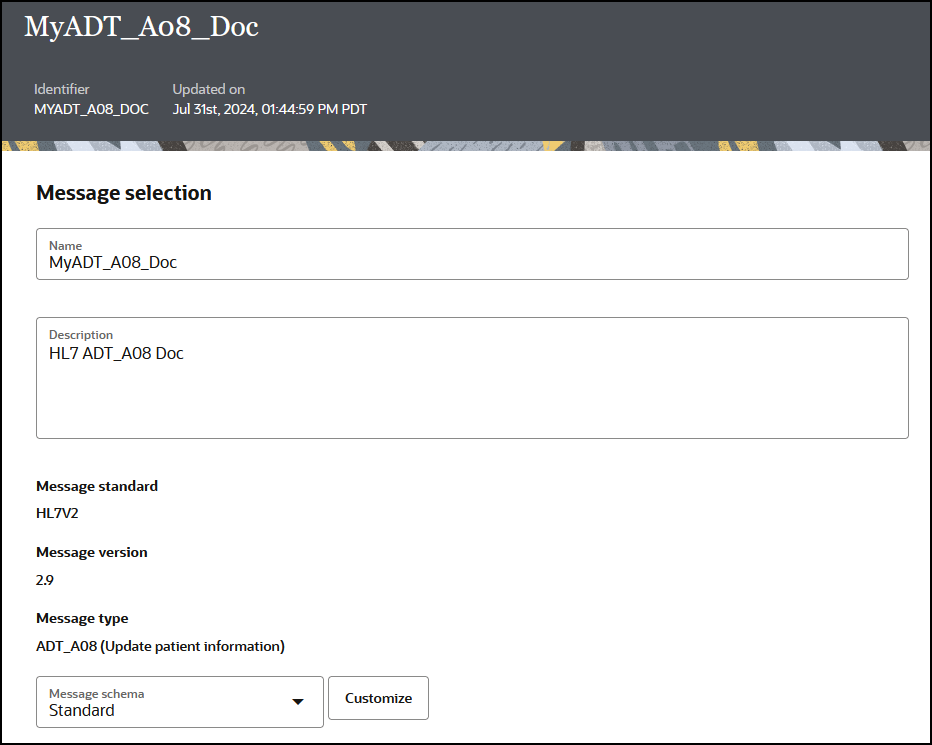
The details page for your new message is displayed.

- Note that the message version and message type values you
selected previously are displayed. These cannot be changed.
The Message schema field shows Standard as the schema type by default. If you had previously created custom schemas, they are also displayed for selection in the drop-down list.
- Select the schema to use or click Customize to display the Clone standard schema dialog to create a new schema. For this example, the schema created in Create a New Healthcare Schema is selected.
- Click Save, and return to the HL7
messages page.
If you create a document in a project, the project name is displayed in the banner. For this example, the document was created in a standalone environment (outside of a project).

The message is now available for conversion when you configure the healthcare action in an integration. See Design an Integration with a Healthcare Action.