Cut and Paste Elements in the Integration Canvas
You can cut and paste elements (actions and invokes) in the integration canvas. This enables you to move elements to other places in your integration and eliminates the need to recreate them. The cut and paste feature replaces the reposition feature in Oracle Integration Generation 2.
Guidelines
- You can cut and paste individual elements or multiple contiguous elements.
- You can cut and paste more logically complex actions such as a scope action and all the elements within its container or branching actions such as a switch action that includes multiple branching actions such as for-each actions inside it.
- You cannot cut a trigger, either individually or as part of a group of selected elements.
- You cannot cut an end node.
- You cannot cut branches from some actions, such as a routing branch in a switch action.
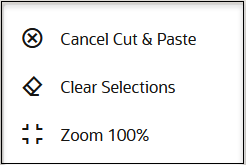
- If you cut an element and then decide you don't want to paste it,
press the Esc key or right-click anywhere in the
integration canvas and select Cancel Cut & Paste.
This cancels the cut action.

Options for Cutting and Pasting Elements
You can cut and paste elements in the integration canvas with toolbar options above the integration canvas or with inline menus.
![]()
- Select a single element or multiple elements (with the
Selection Mode
 option) in the integration canvas and click
  in the toolbar.
- Select a single element or multiple elements in the integration
canvas, then click Actions
 and select Cut for the selected element or
elements.

- Select the element either before or after the location at which
you want to paste it, then click Actions
 and select Paste, and either
Before or After (depending
on which element you selected).

-
Paste inside an action such as a scope or a branch of a switch action by clicking Actions
 and selecting Paste, and then
Into.

- Click Insert
 in the location at which to move the element, then select
Paste.

- Click Paste
 above the toolbar to paste the selected element in the appropriate
location. The selections you make in the integration canvas determine when
the toolbar options are enabled.

Example: Cut and Paste a Single Element
This example shows one way to cut and paste a single element. Other cut and paste methods are described in Options for Cutting and Pasting Elements.
- Click the element to move. For this example, a map action is
selected to move. This action enables Cut
 in the toolbar.

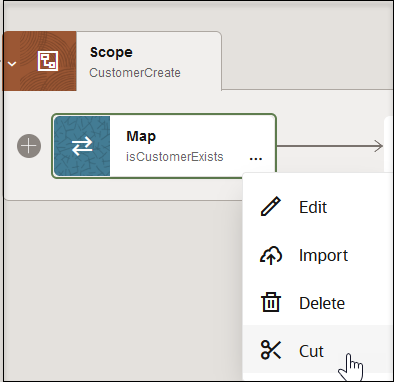
- In the selected action, click Actions
 and select Cut.

An animated dashed box is displayed around the action to cut. You cannot click inside this box and perform any actions. You can also expand the number of elements to cut by dragging the dashed box around other elements.
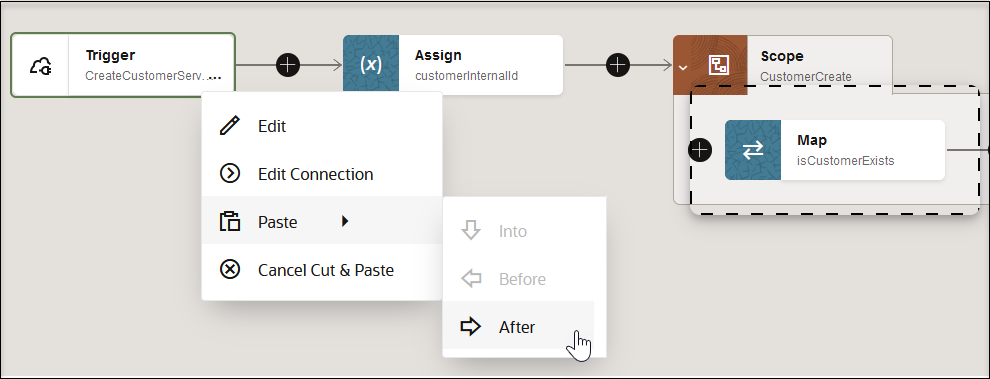
- Select the element next to where you want to paste the element.
- Click Actions
 and select Paste, then
After.
For this example, the trigger element is selected. As an alternative, you can also select the assign action and paste the map action before it. The menu context changes based on where you select to paste the element.

The map element is pasted to its new location after the trigger and before the assign action.

Example: Cut and Paste Multiple Elements
This example shows one way to use cut and paste multiple elements. Other cut and paste methods are described in Options for Cutting and Pasting Elements.
- Click Selection Mode
 in the toolbar.
- Drag your cursor around the elements to cut. For this example, a
map, an invoke, and another map are selected.

- Click Cut
 in the toolbar.
An animated dashed box is displayed around the elements to cut. You cannot click inside this box and perform any actions.

- Select the element next to where you want to paste the element. For this example, the trigger is selected.
- Paste the selected elements after the trigger in either of two
ways:
- Click Actions
 and select Paste, then
After.
or
- Click Paste
 in the toolbar, then select After.

The map, invoke, and map are pasted to their new location after the trigger and before the scope action.

- Click Actions