Use AI to Edit an Integration
You can use AI to edit an integration that was created manually or using AI. You can also incrementally edit the integration flow when creating it using AI. On the integration canvas, you can specify the purpose of the integration using natural language.
Note:
- This feature is available only in projects.
- AI features are available in select regions. See AI Feature Availability in Provisioning and Administering Oracle Integration 3.
- Decide where to start:
- Edit an existing integration:
- In the navigation pane, click Projects.
- Select the project name.
- Click Integration
 .
.
- In the Integrations section, hover over the integration to edit.
- Click Actions
 , then select Edit.
- Perform incremental updates when creating a new integration:
- Create an integration. On the integration canvas, specify what the integration needs to do.
- Click Generate the integration skeleton based on the user's goal
 .
.
- The AI creates a skeleton integration.
- Edit an existing integration:
- To edit the integration, specify the updates using natural language clearly (with details such as node names, connection names, routes, and so on), and then click Generate the integration skeleton based on the user's goal
 .
.
Note:
You should specify the node on which the edit operation needs to be performed clearly, otherwise the edit operation might not be performed correctly. You should also specify any conditions or routes clearly. Examples:- After
node_name,edit_action_to_perform.Example: After receiving order from NetSuite, add a call to Salesforce using connection
connection_nameto get order line items. Iterate over the line items and update the line item in NetSuite. - Before
node_name,edit_action_to_perform.Example: Before receiving an order from NetSuite, add a call to check the existence of the customer in NetSuite using connection
connection_name. If the customer does not exist, create the customer record using connectionconnection_name, otherwise log the customer details. - Inside
route_nameorfor_each_nameorwhile_name,edit_action_to_perform.Example: Inside the success route (the route when customer exists), add a call to get orders of the customer, and log the order details.
Repeat this step if you need to make further updates to the integration flow.
Each time you update the integration using AI, review and save the integration.
- After
- In the Create/updated integration flow option, perform one of the following steps:
- Click Accept AI generated actions
 to accept the integration flow created by AI.
The integration flow created by AI is retained and displayed on the canvas. You can modify this skeleton integration to configure the integration as needed. If needed, you can edit the connections and the triggers/invokes. You can activate the integration after you’ve configured it.
- Click Remove all AI generated actions
 to remove the integration flow created by AI.
The integration flow created by AI is removed. You can modify your request or specify a new request indicating what the integration needs to do.
- Click Accept AI generated actions
Note:
The AI might automatically configure the trigger/invoke based on the natural language text you entered. The automatic configuration of trigger/invoke by AI is designed to deliver the best possible results. It is attempted automatically, however successful configuration cannot be guaranteed in every case. For more information about automatic configuration of trigger/invoke, see Use AI to Create an Integration.Example
Let's use AI to perform incremental updates when creating a new integration. Note that you can also edit an existing integration. In this particular example, we are creating an integration and performing edits.
- Create an application integration.
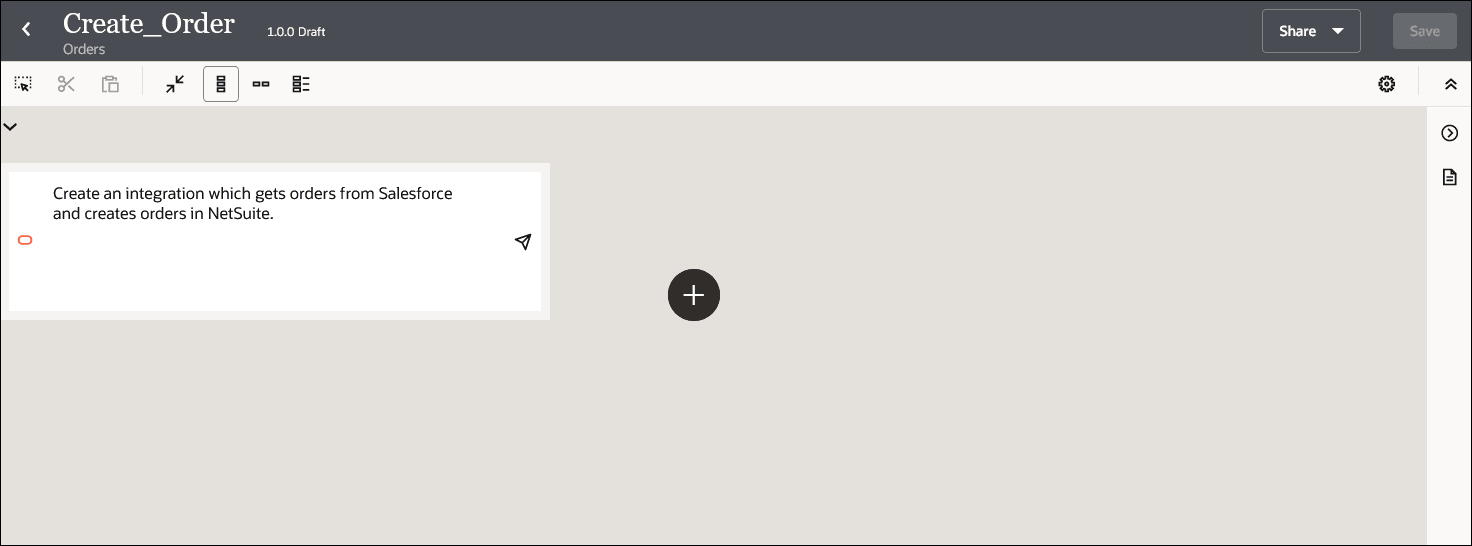
- On the integration canvas, enter the following natural language text, and click Generate the integration skeleton based on the user's goal
 .
.
Create an integration which gets orders from Salesforce and creates orders in NetSuite.
- Review and save the integration before proceeding to modify the integration flow using AI.
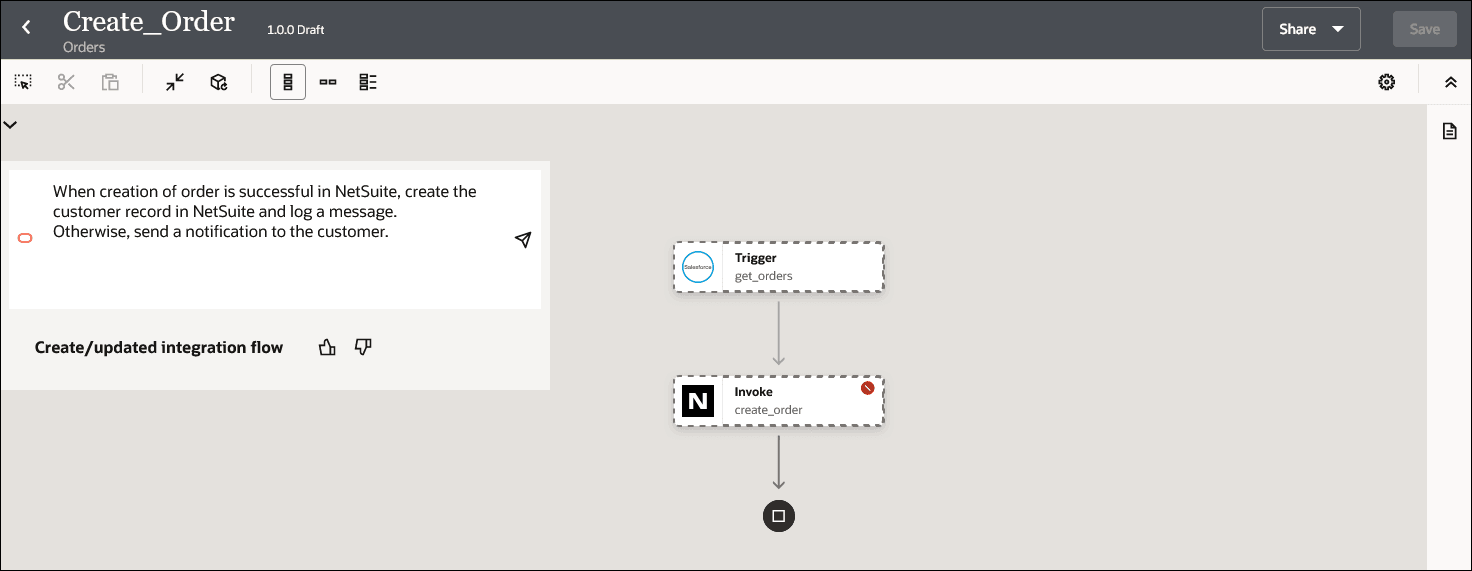
- Enter the following natural language text to edit the integration flow, and click Generate the integration skeleton based on the user's goal
 .
.
When creation of order is successful in NetSuite, create the customer record in NetSuite and log a message. Otherwise, send a notification to the customer.
- Review and save the integration before proceeding to modify the integration flow using AI.
- Enter the following natural language text to edit the integration flow, and click Generate the integration skeleton based on the user's goal
 .
.
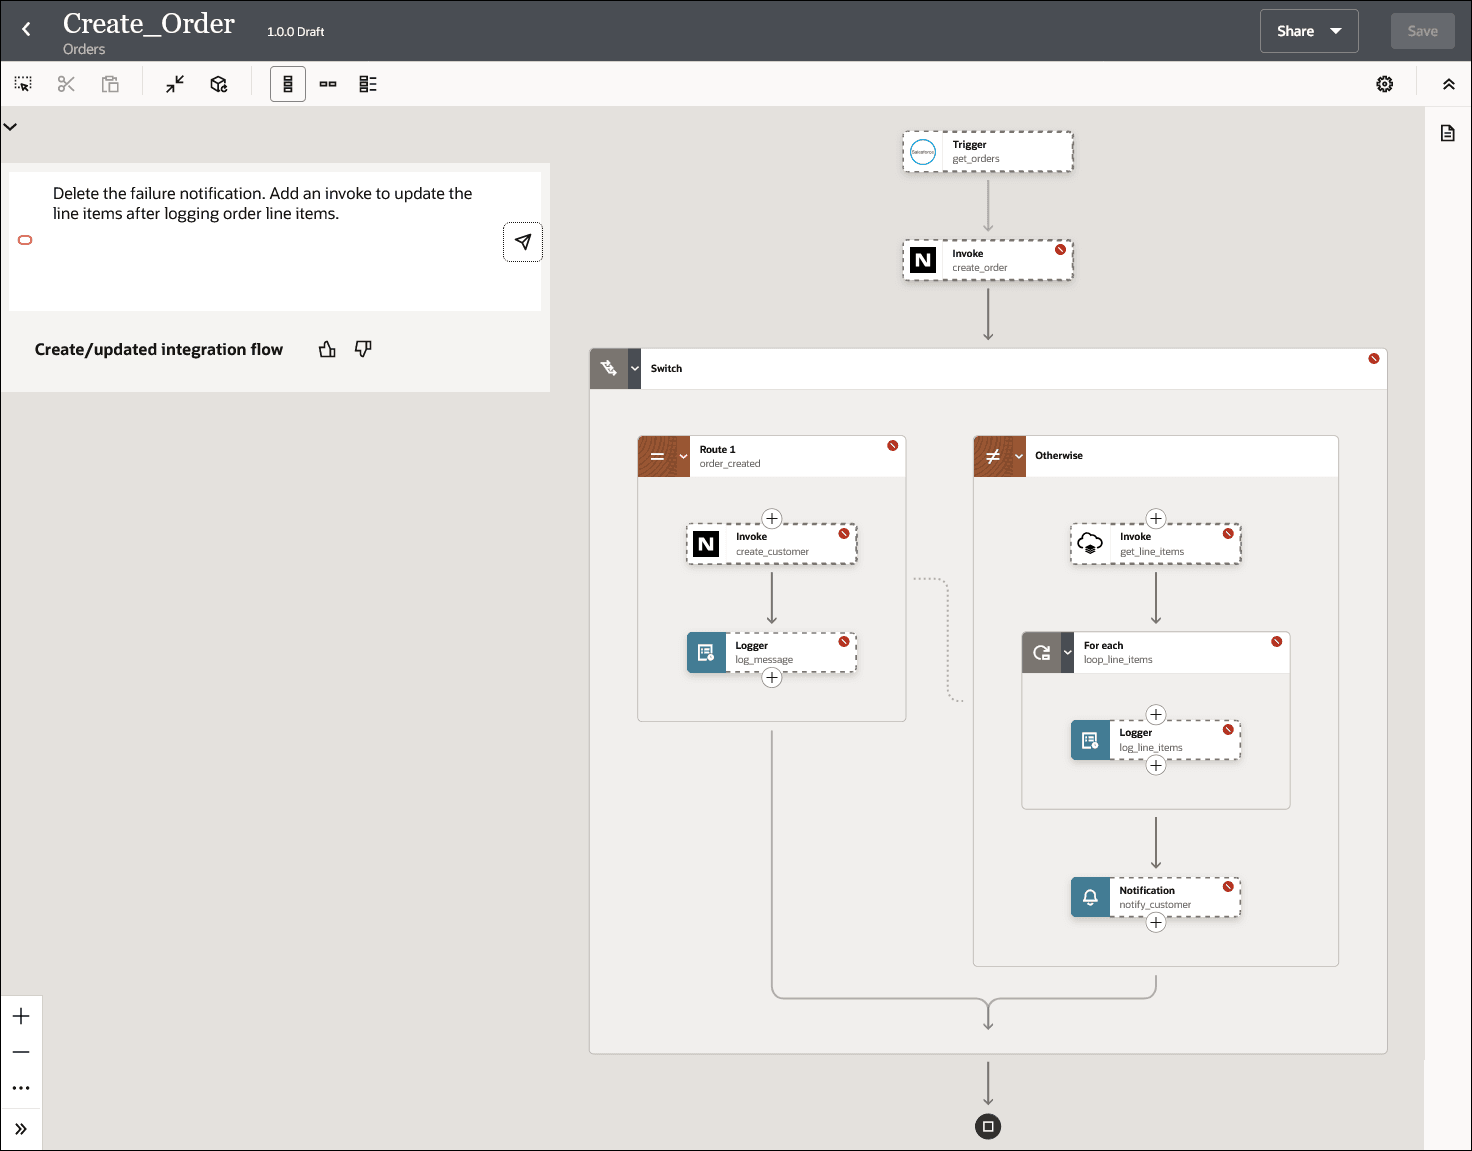
When creation of order fails, before notification, add a call to ERP to get the line items for the order as part of the failure route. Loop over the order line items and log the line items.

- Review and save the integration before proceeding to modify the integration flow using AI.
- Enter the following natural language text to edit the integration flow, and click Generate the integration skeleton based on the user's goal
 .
.
Delete the failure notification. Add an invoke to update the line items after logging order line items.
- Review and save the integration before proceeding to modify the integration flow using AI.
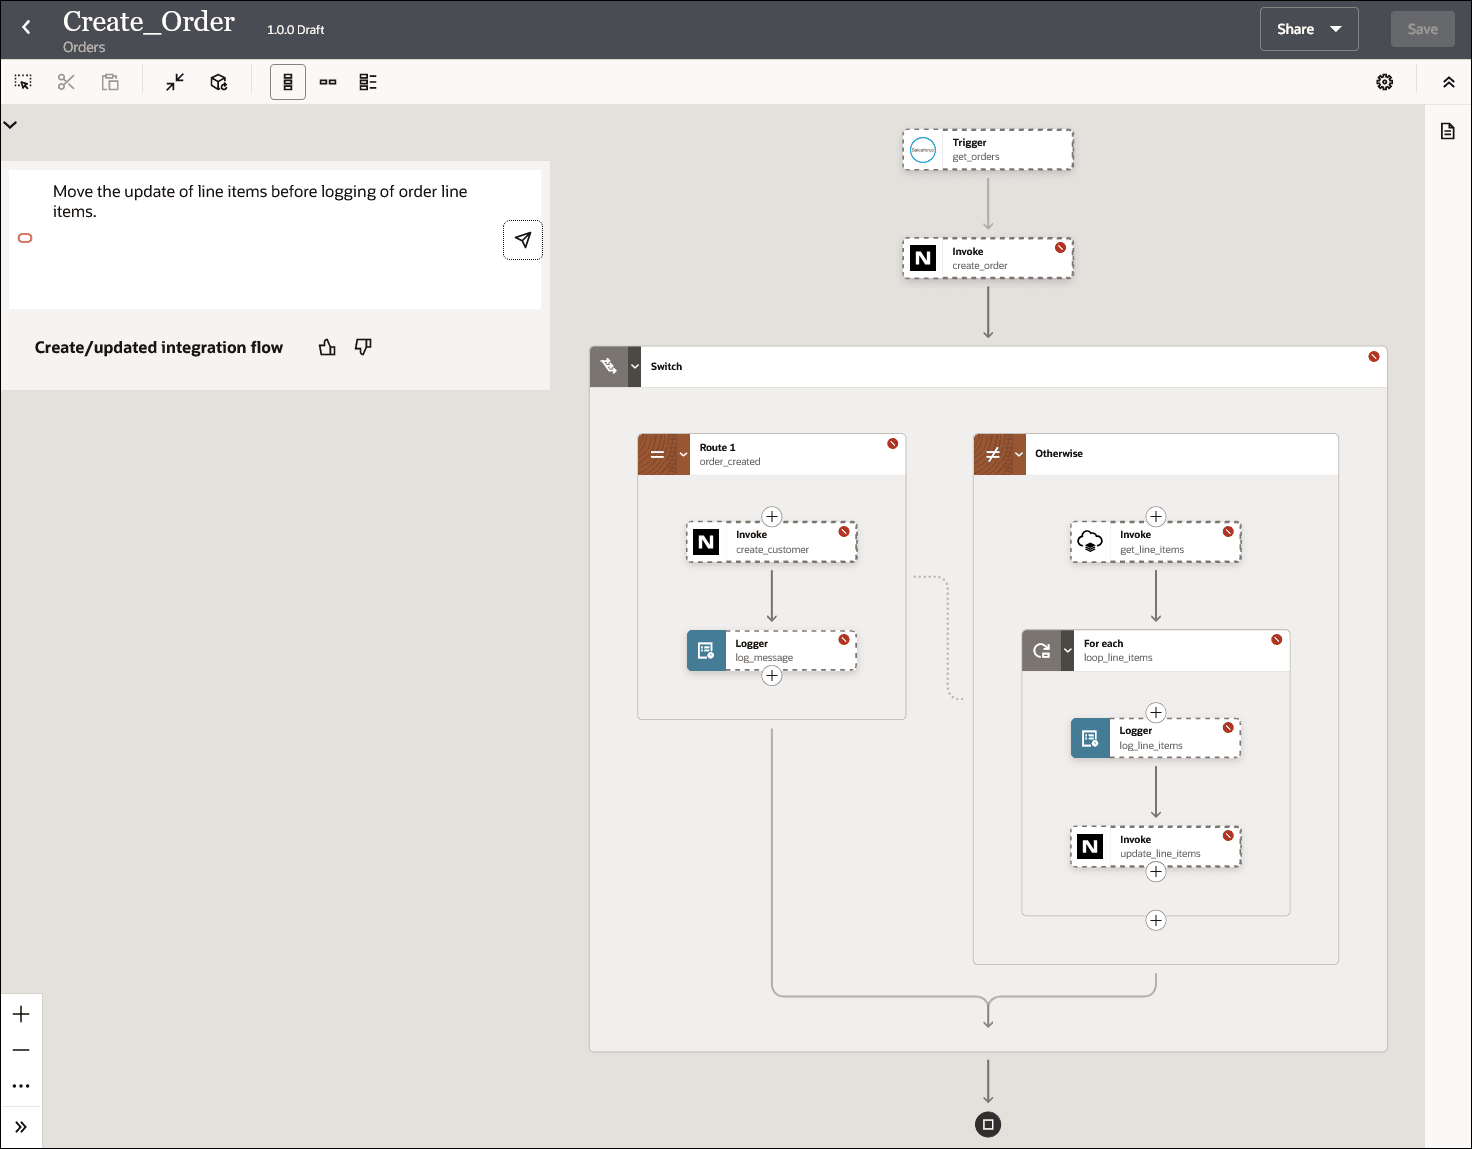
- Enter the following natural language text to edit the integration flow, and click Generate the integration skeleton based on the user's goal
 .
.
Move the update of line items before logging of order line items.
- Review and save the integration before proceeding to modify the integration flow using AI.
- Enter the following natural language text to edit the integration flow, and click Generate the integration skeleton based on the user's goal
 .
.
Replace logging of line items with note activity.
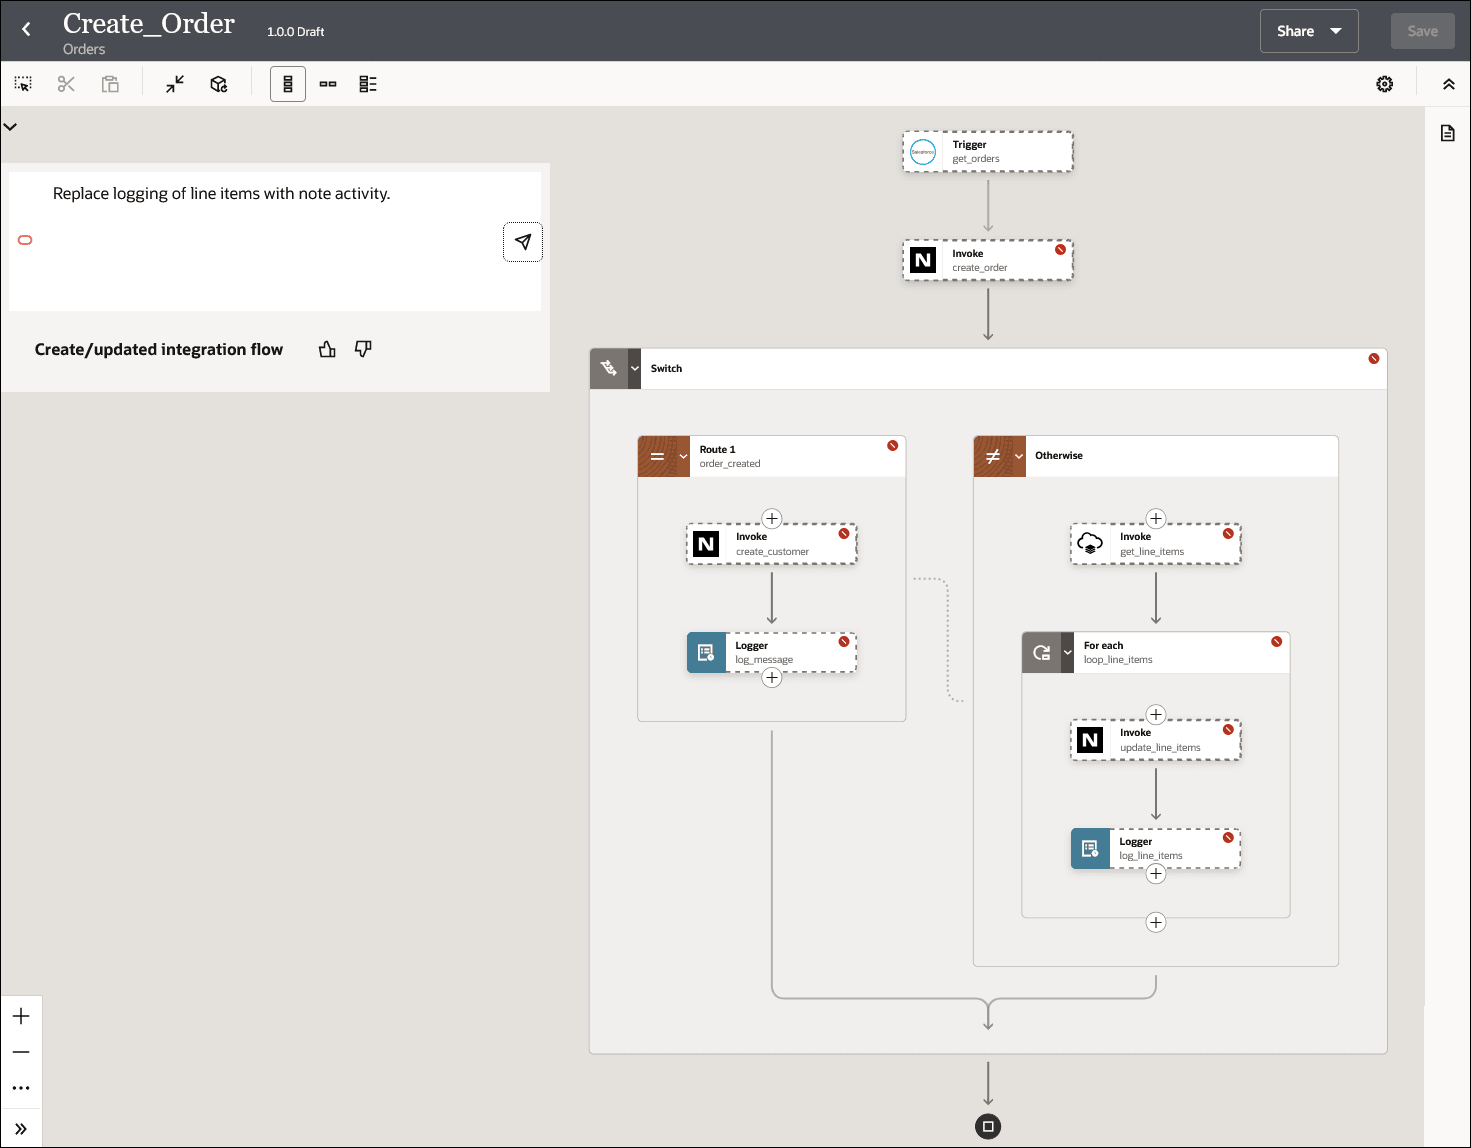
- Review and save the integration.
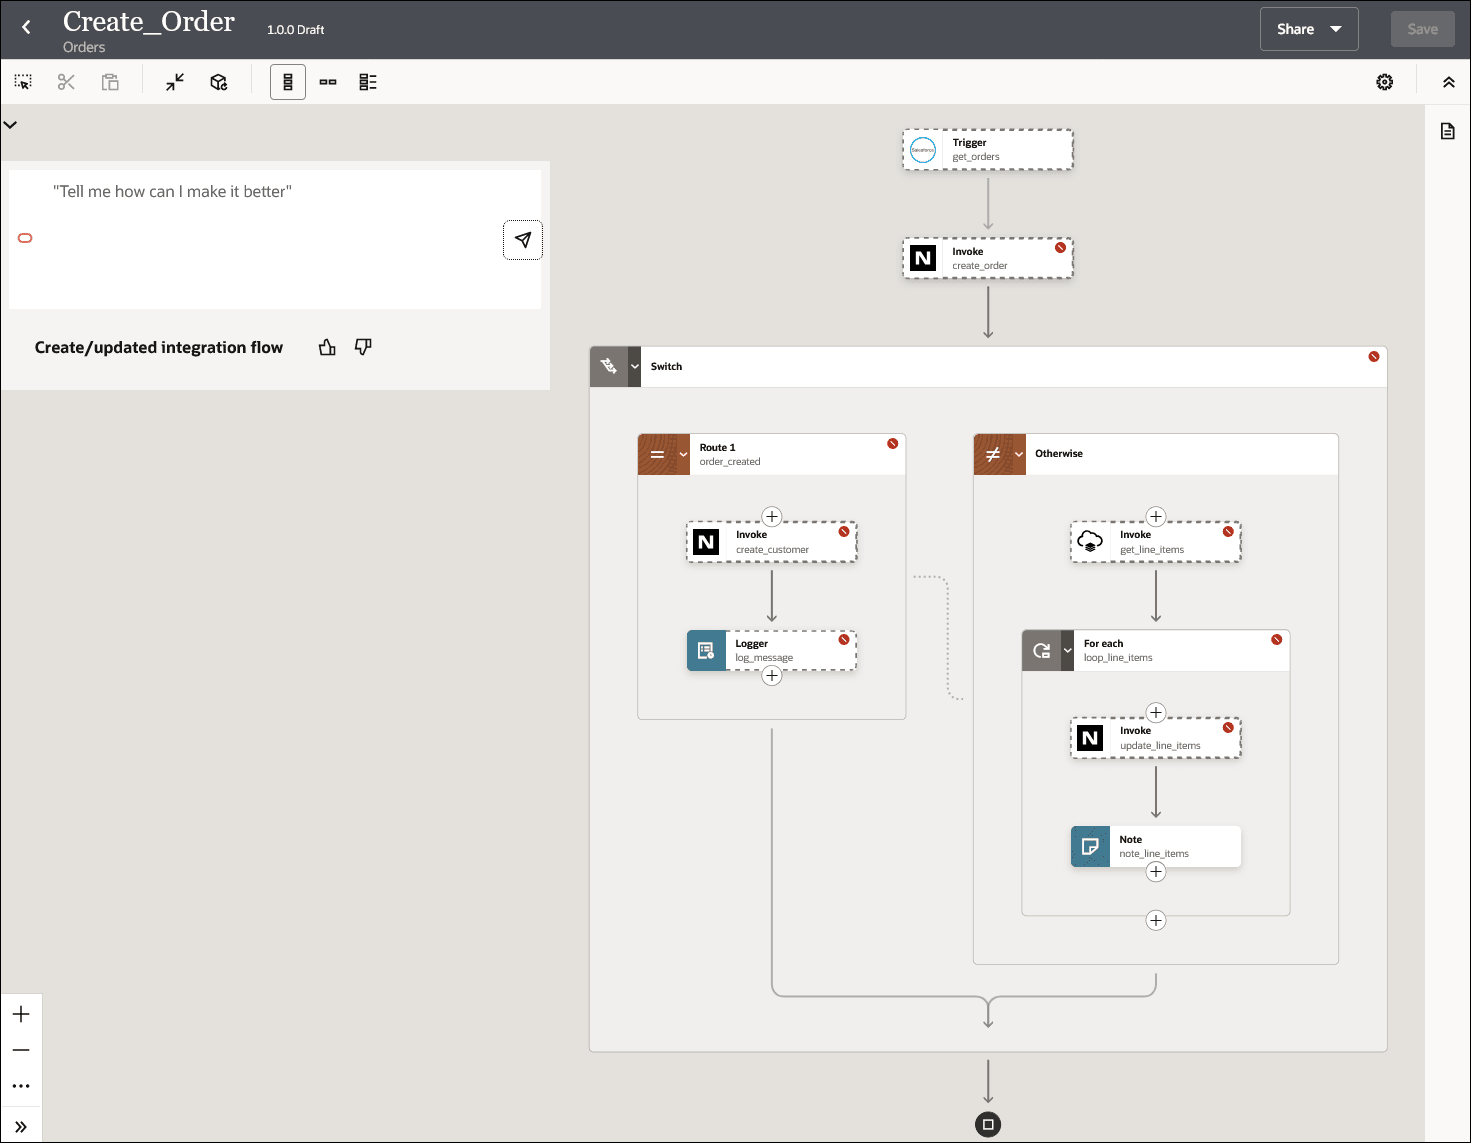
- In the Create/updated integration flow option, click Accept AI generated actions
 to accept the integration flow created by AI.
The integration flow created by AI is retained and displayed on the canvas.
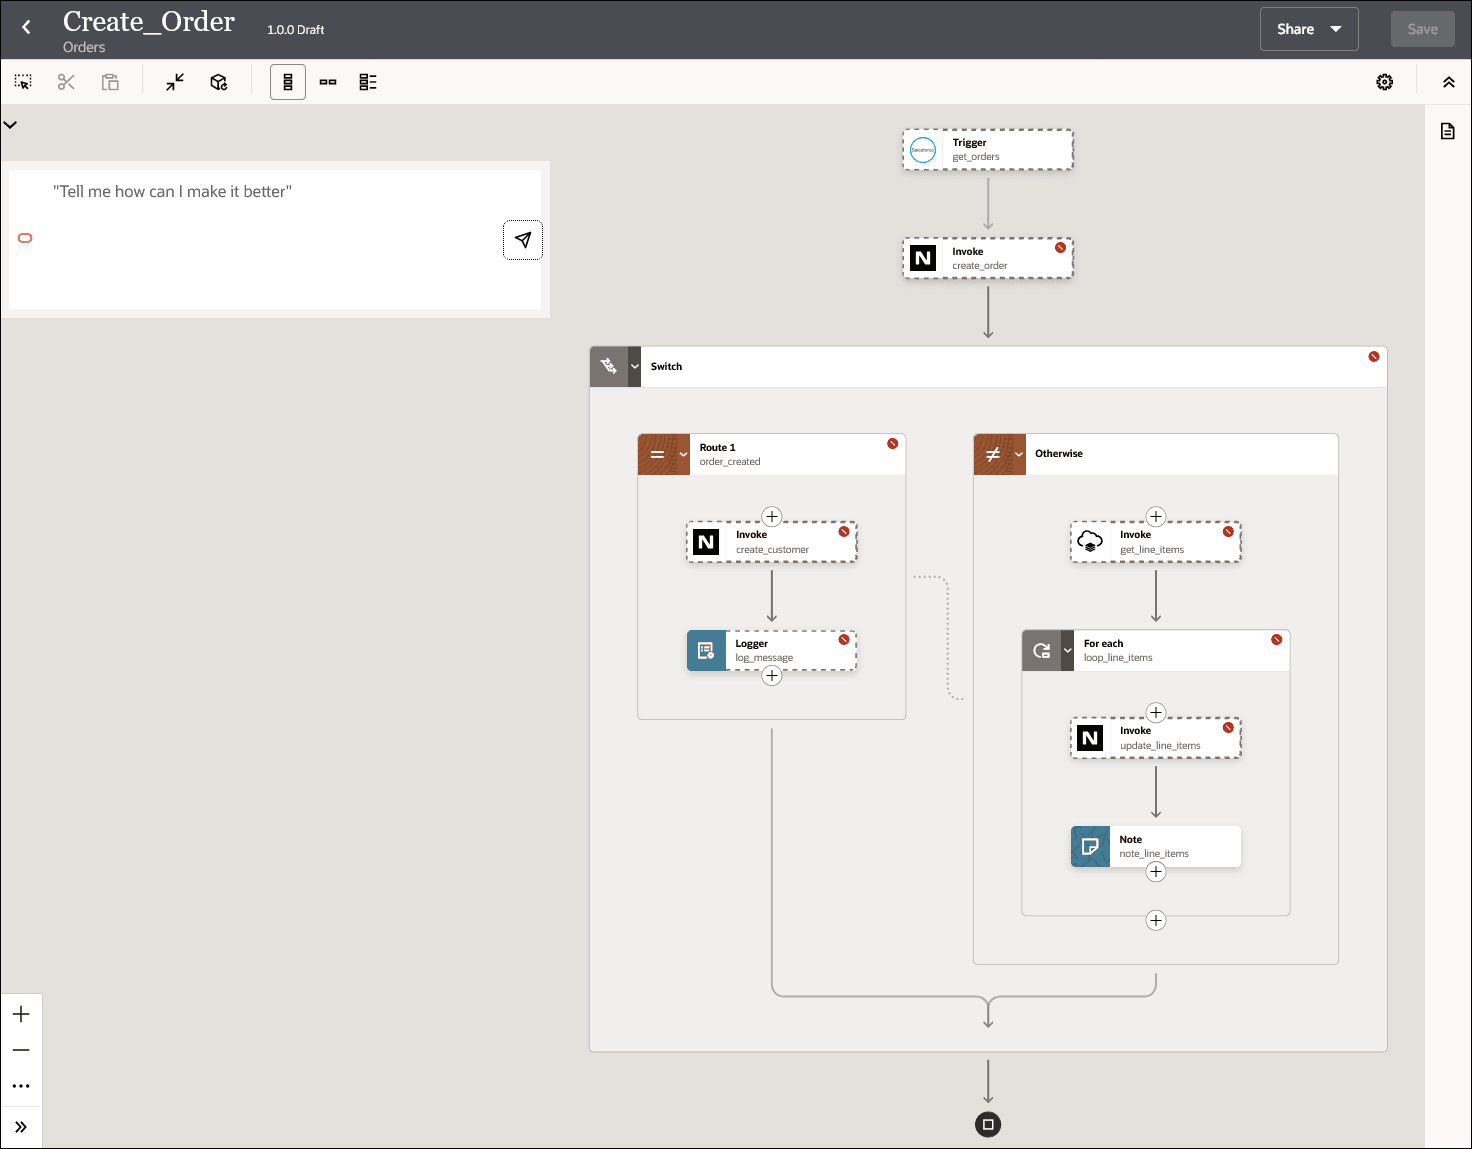
You can modify this skeleton integration further as needed. You can activate the integration after you’ve configured it.