Workflow for Testing a Robot Locally
We will use an example robot designed for deleting an employee record in a HRM system to understand how you can test the robot as you build and correct any errors in the flow before you deploy.
| Step | Task | More information |
|---|---|---|
|
1 |
This example robot is designed to login to a HRM system, search for the employee record provided as the input and execute the switch condition: If the employee record is found, it will confirm and delete the record, else it will display the following message in the robot flow activity stream: "Employee record is not found". |
|
|
2 |
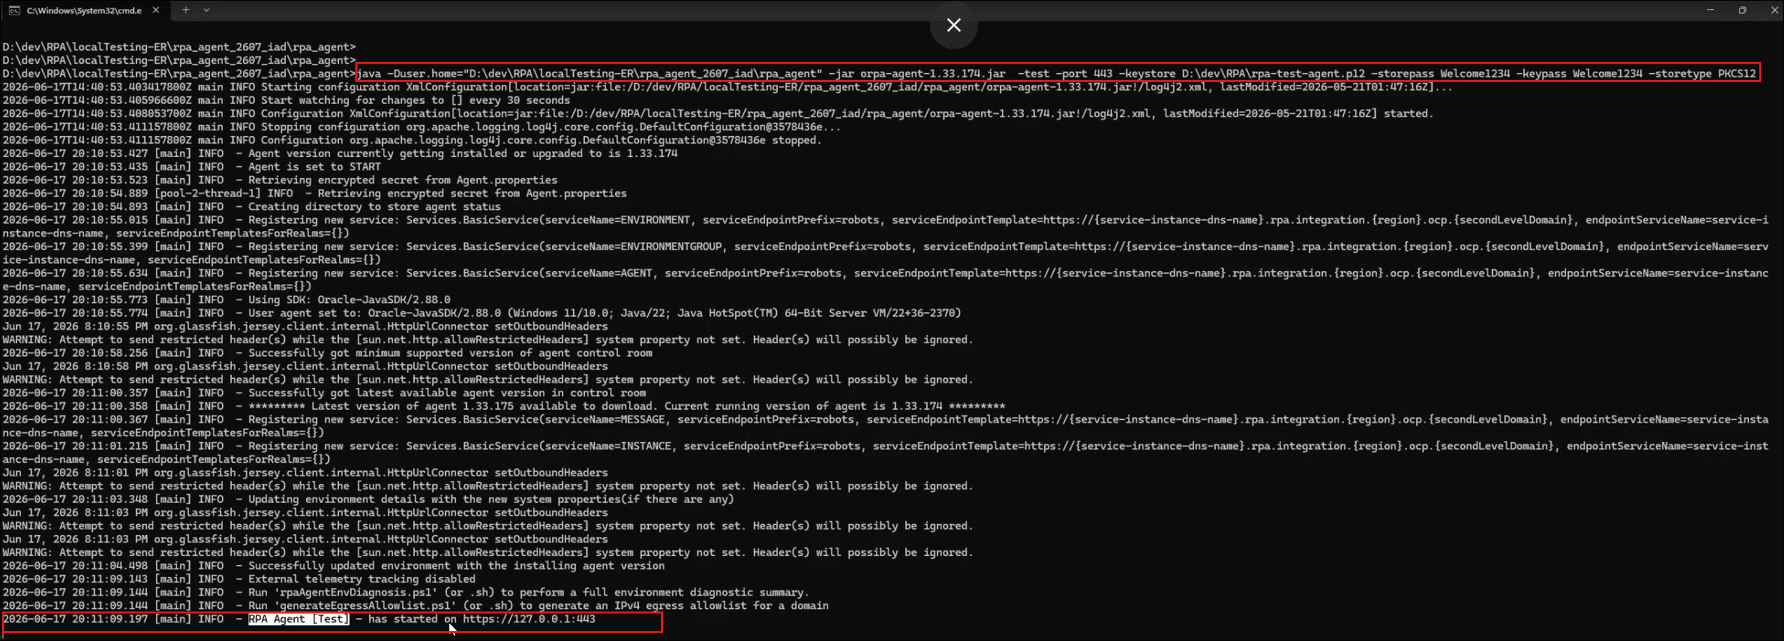
Complete the steps described in Prerequisites for Testing a Robot Locally from the Canvas |
Complete the prerequisite setup steps and start the robot agent. |
|
3 |
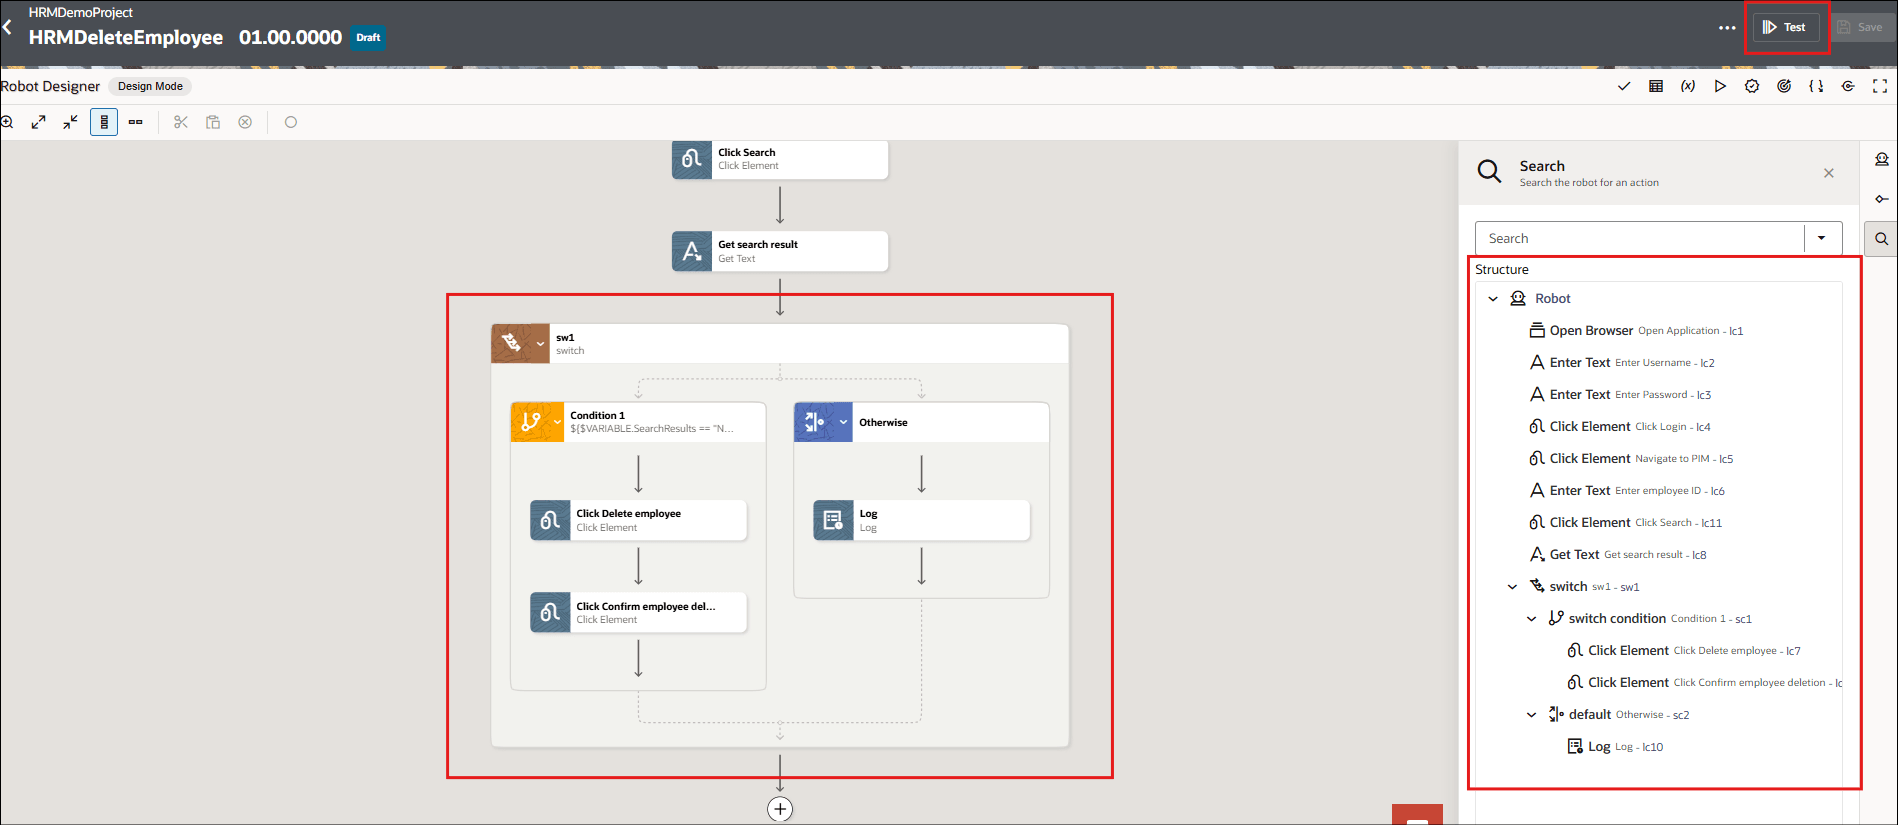
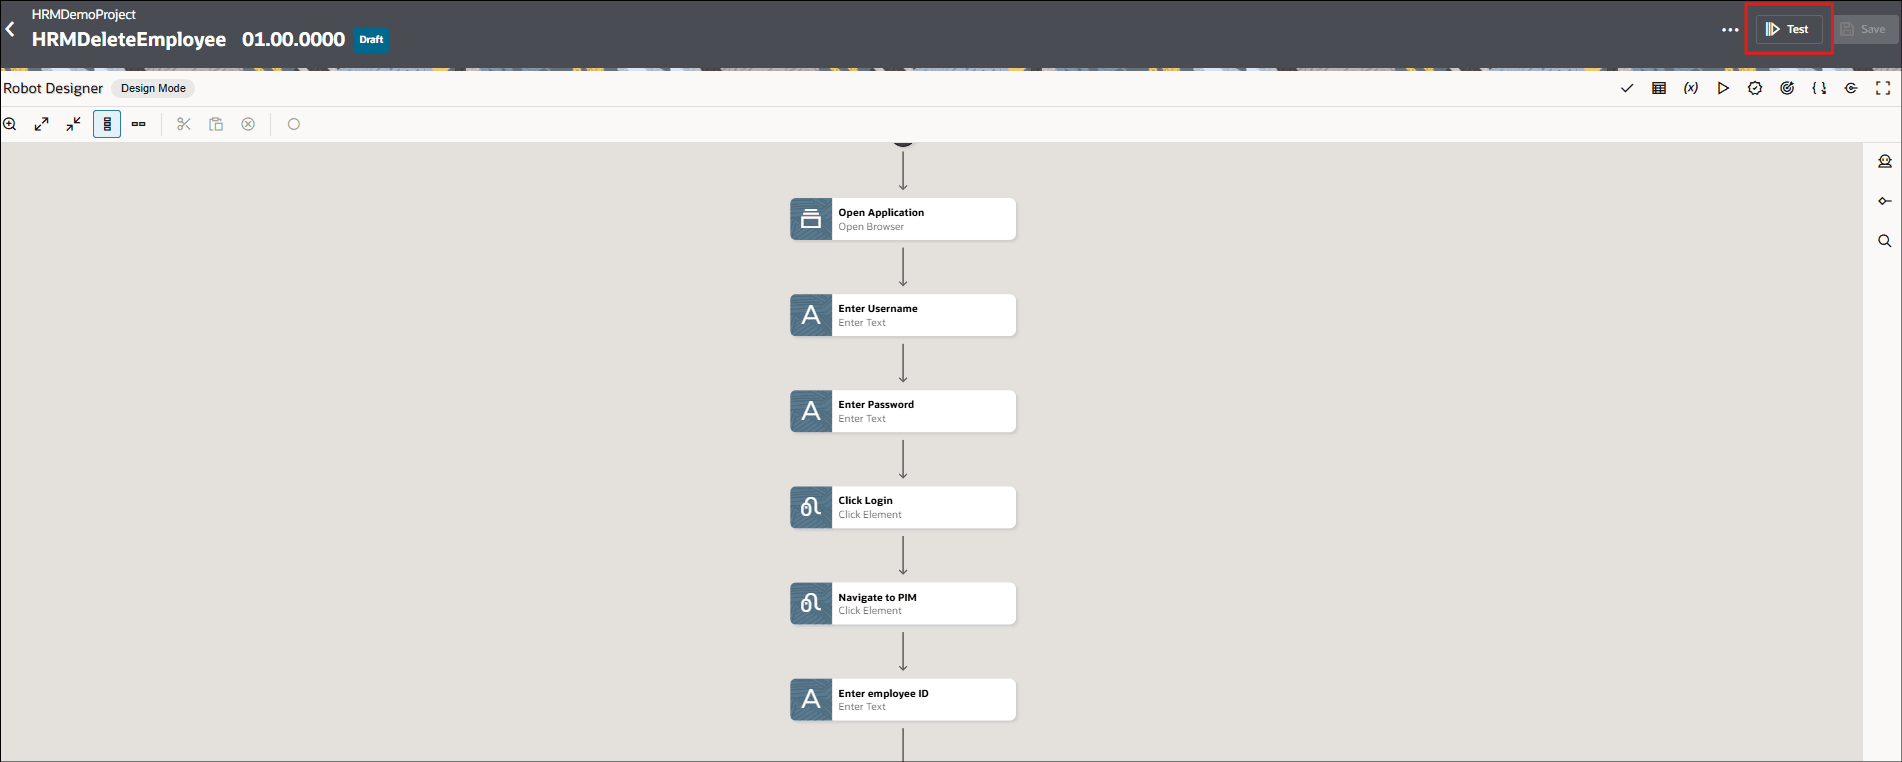
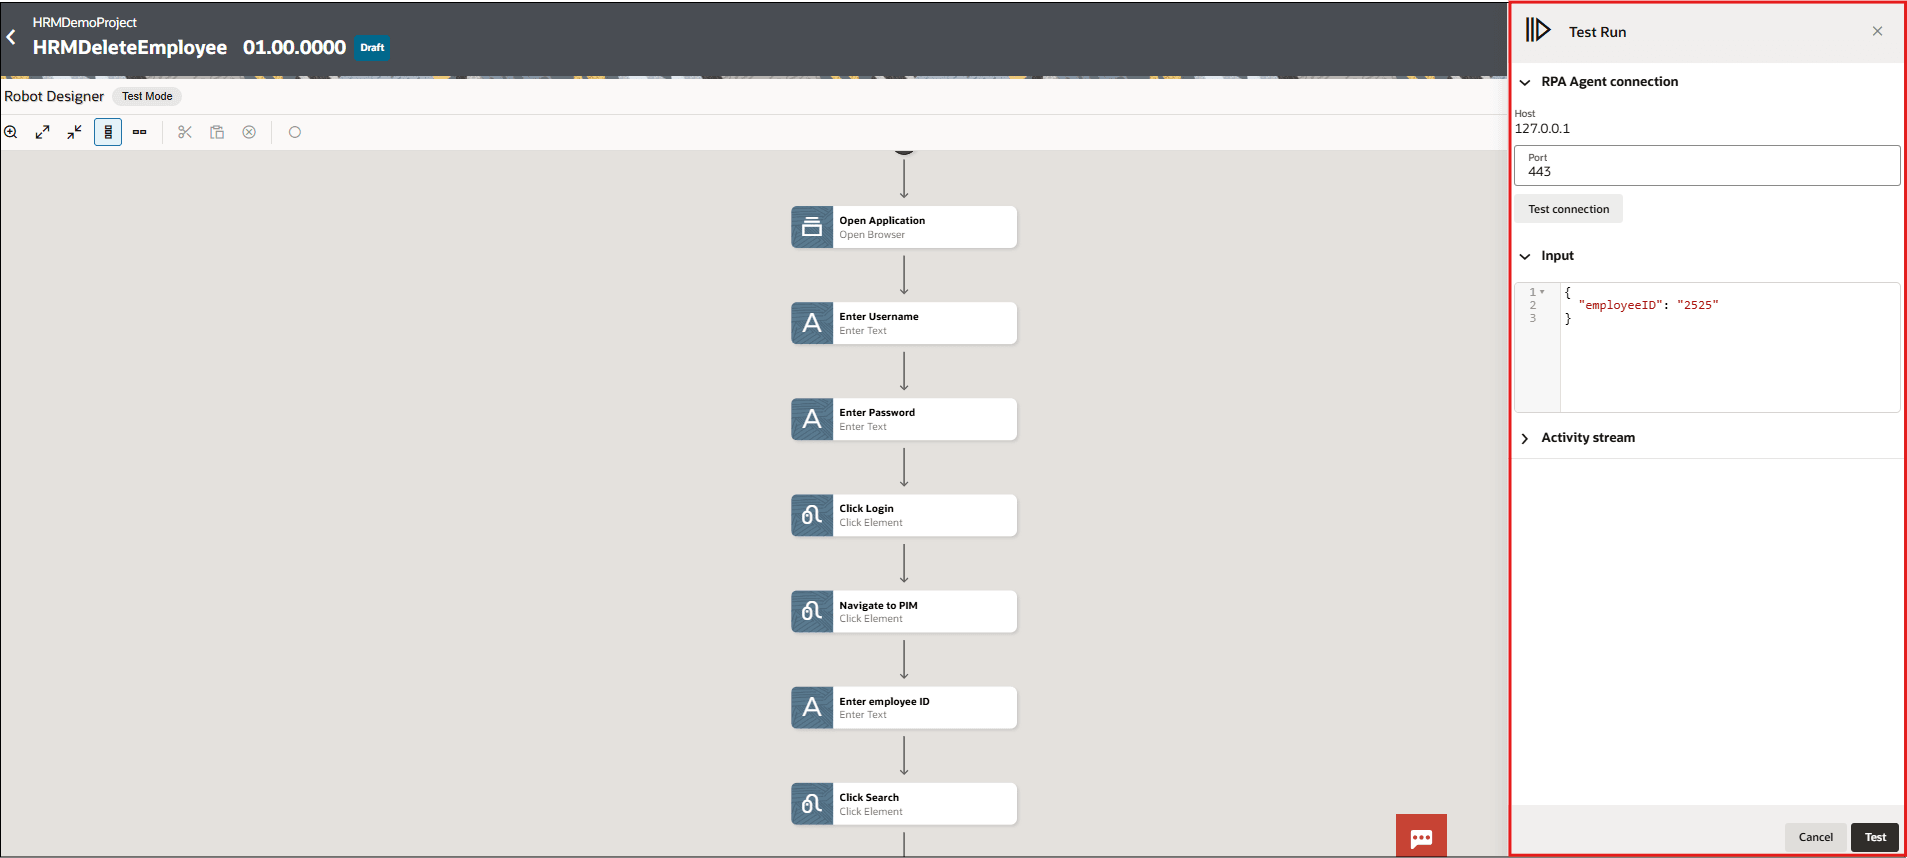
Open the robot and click Test to start the local testing of the robot and correct any errors before deploying. |
|
|
4 |
The Test Run pane is displayed.
|
|
|
5 |
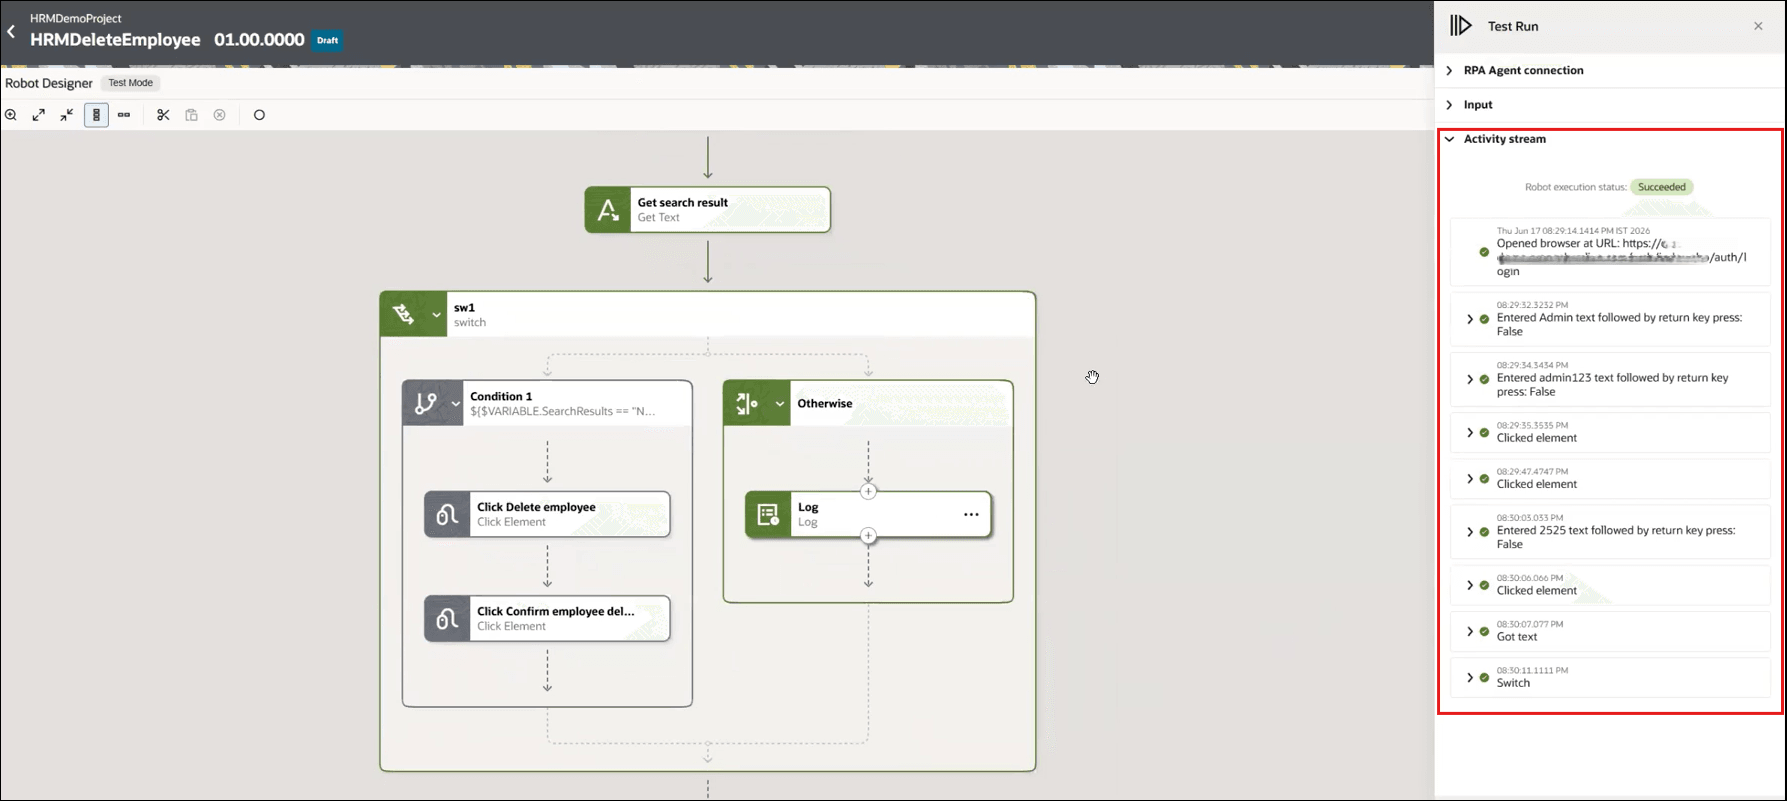
Verify the activity stream details displayed in the right pane. You can also check the execution status from the command prompt. |
Activity stream details. Local test run details from command prompt. |
|
6 |
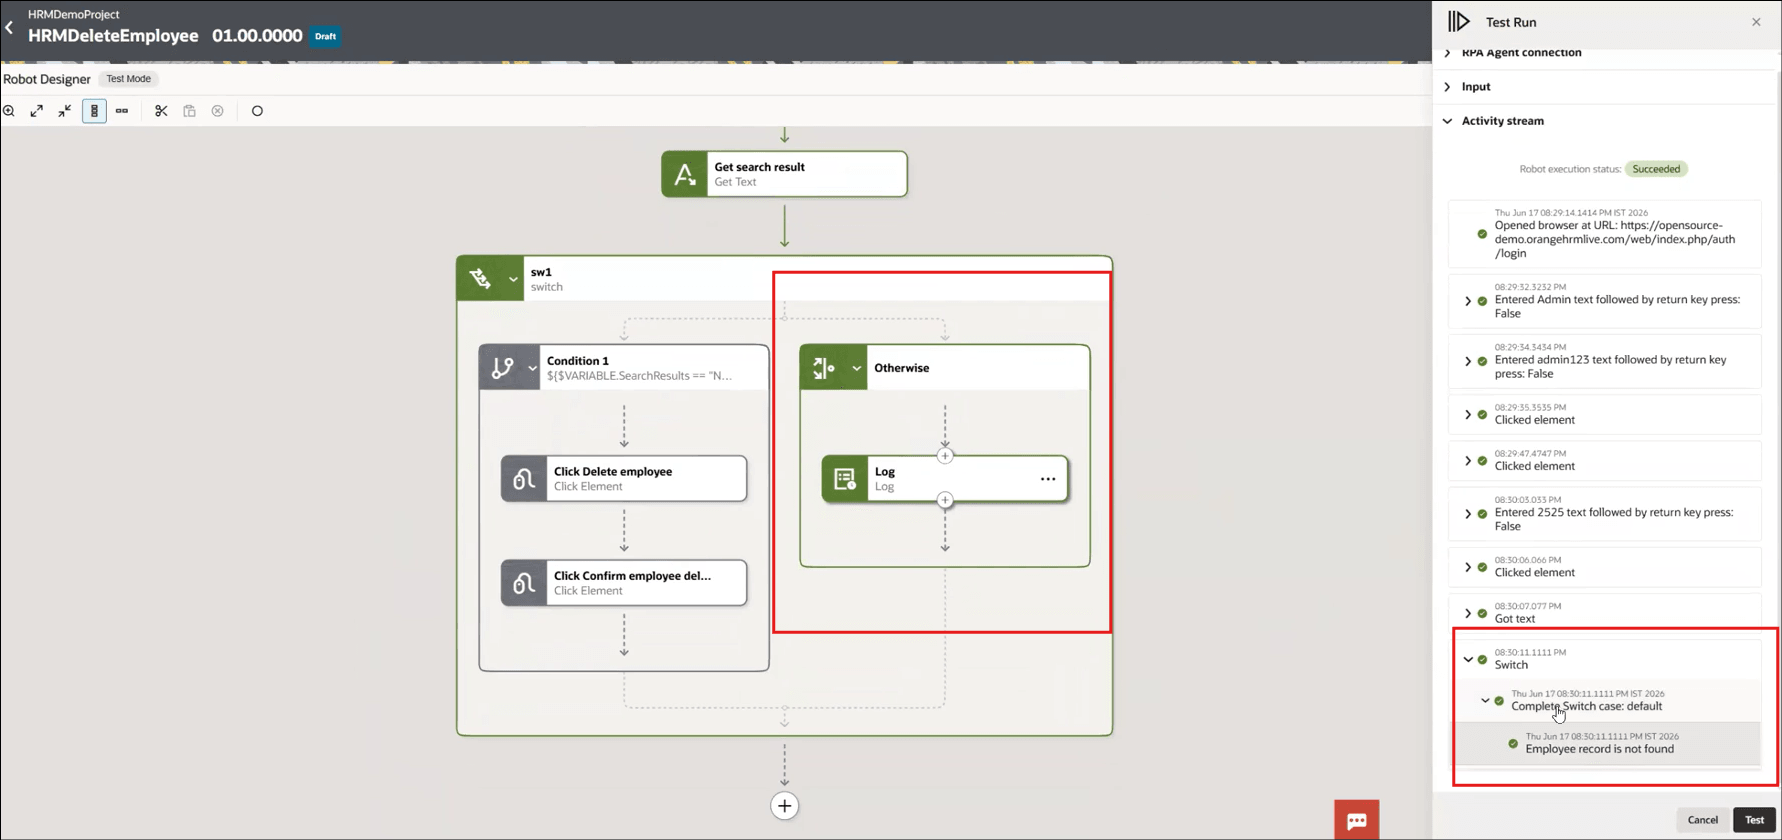
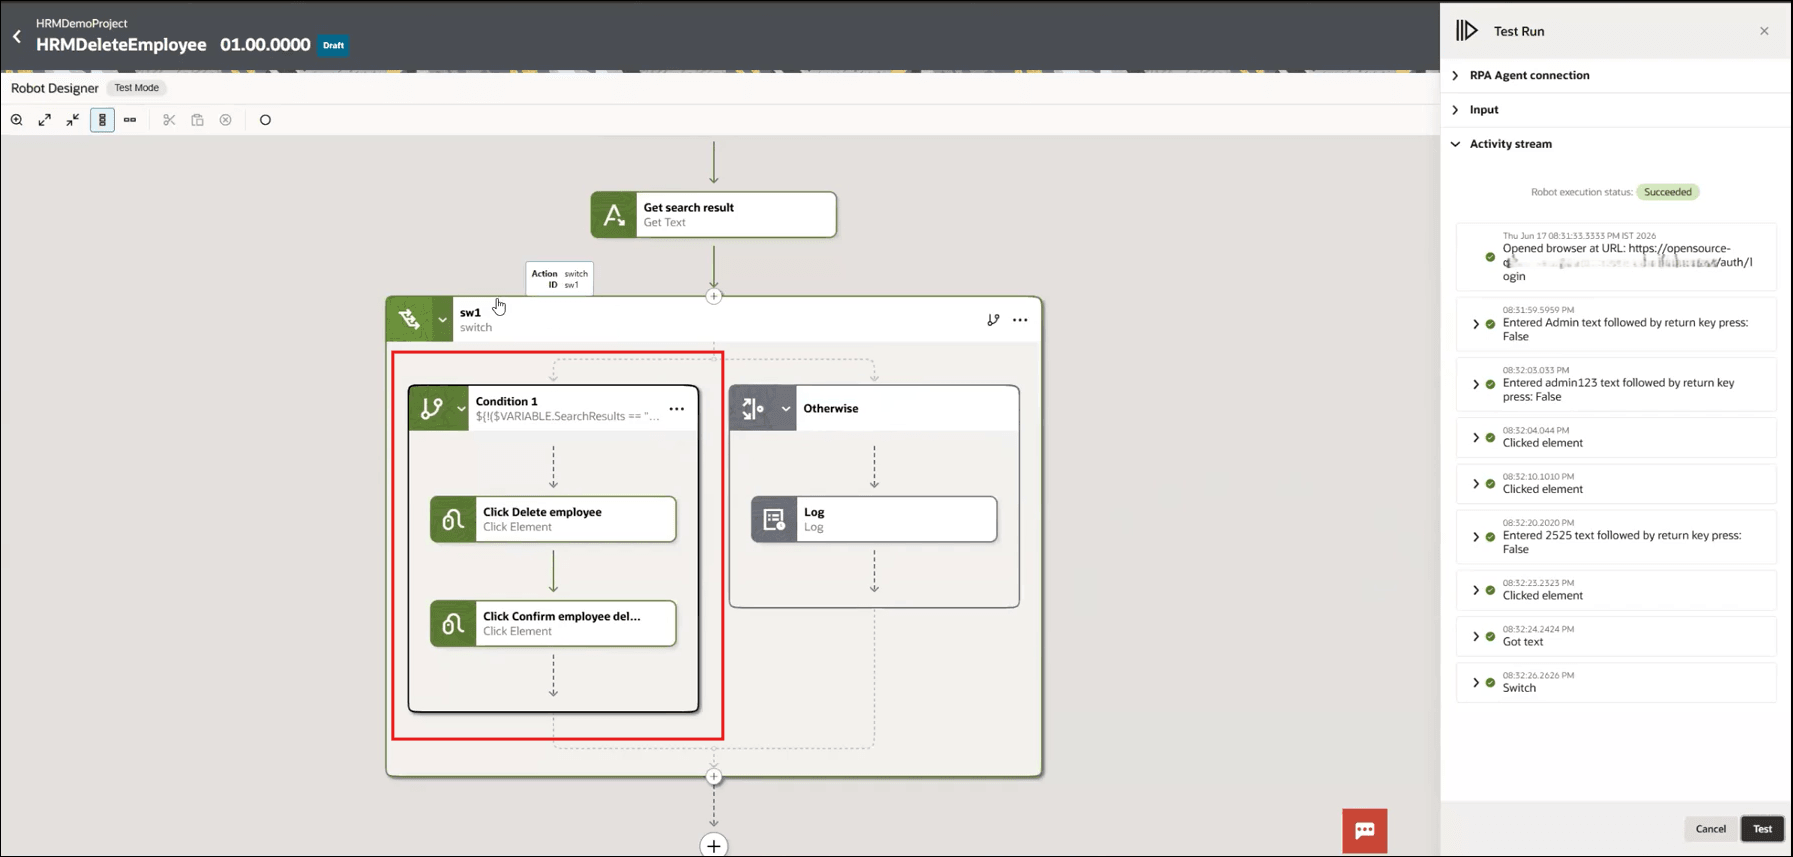
Check if the correct flow has been executed and note that due to the logical error in the robot design, the flow has executed the Otherwise switch instead of Condition 1. |
Incorrect flow executed due to an error in the switch condition |
|
7 |
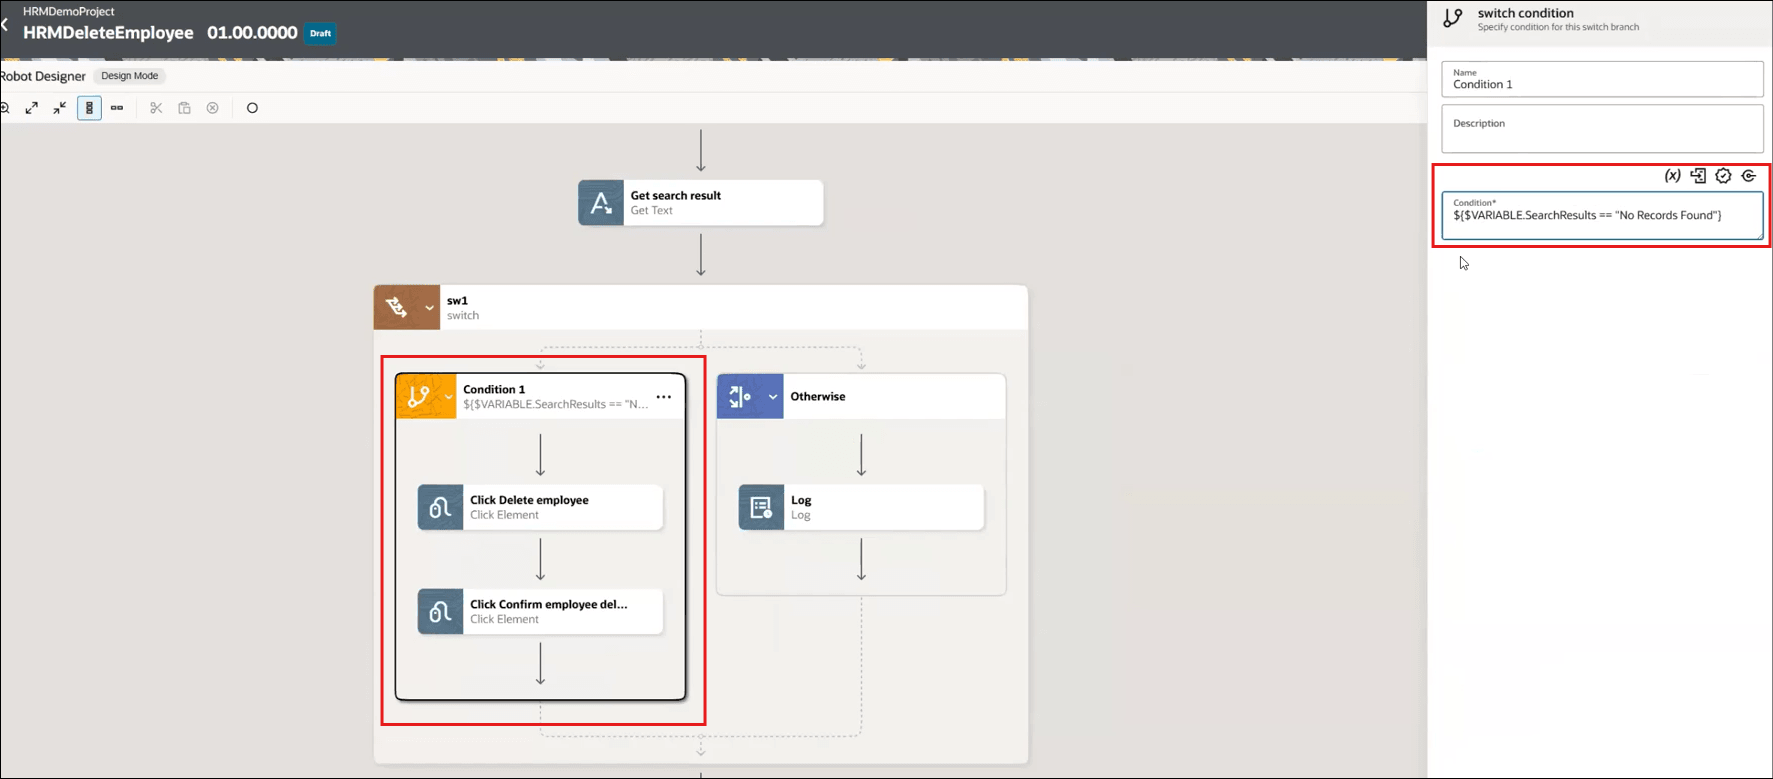
Update the switch condition to include the inversion operator and correct the flow. |
Click OK to save the changes and then click Test to run the local test to see if the flow is executed correctly. 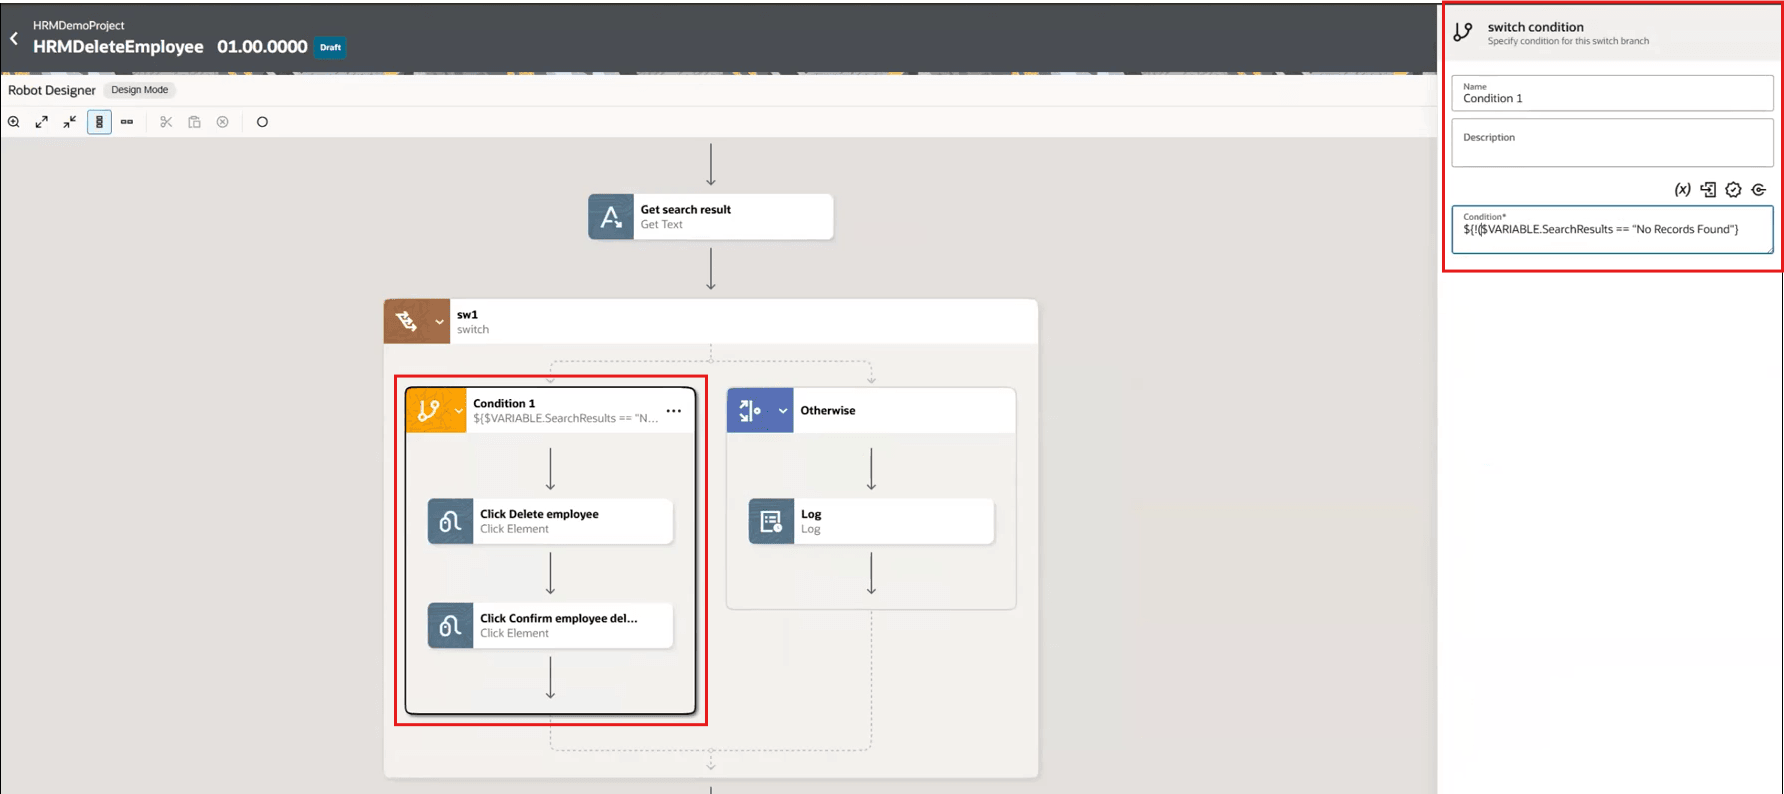 |
|
8 |
Verify if the local test runs correctly and then you can proceed with the next steps to deploy the robot. |
Check the local test execution from the command prompt. Check the local test execution details from the activity stream. |


Next workflow: Workflow for Deploying a Robot.