Expand Vertices Using Smart Expand
Smart Expand allows you to expand vertices based on specified conditions for properties of navigation and destination vertices or edges.
You can configure Smart Expand on a graph visualization as described in the following steps:
- Click Settings on the Visualization panel.This opens the Settings dialog.
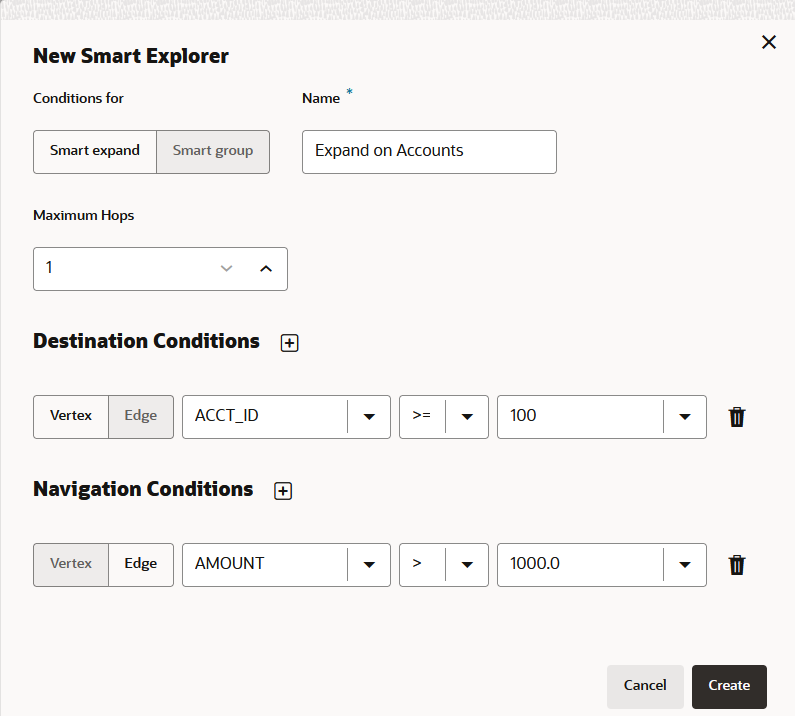
- Click the Smart Explorer tab and click New Smart Explorer.The New Smart Explorer window opens.
- Set the Conditions for field to Smart Expand.
- Enter a Name.
- Optionally, select the Maximum Hops count.This value determines the maximum path length. Smart Expand does not return vertices or edges that are in any path longer than this path length. The default value is
infinite. - Optionally, click
 to add Destination Conditions to identify the destination
vertices or edges when expanding a selected vertex.
to add Destination Conditions to identify the destination
vertices or edges when expanding a selected vertex.Destination conditions are conditions that you apply to the last vertex or edge in the path. It does not apply to the vertices selected for expand.
A row to create a new condition appears as shown:

Description of the illustration smart_expand.pngEach condition includes the following options:
- target vertex or edge element that the navigation condition applies to
- property of the target element
- operator to apply (such as, =, <, >, and so on)
- value to be fulfilled for the operator and property
It uses numeric comparison if the property value is convertible to number and lexicographic comparison otherwise.
Repeat this step to add as many destination conditions as required.
- Optionally, if there are multiple destination conditions, then join your conditions by clicking Match All or Match Any as required.
- Optionally, click
 to add one or more Navigation Conditions that need to be
fulfilled when expanding a vertex.
to add one or more Navigation Conditions that need to be
fulfilled when expanding a vertex.Note the following:
- Navigation conditions are conditions applied to the vertices or edges that are not the origin vertex or the destination vertex, but those that are on a path that connects the origin and destination vertex.
- The conditions that you specify are applied to the vertices or edges that are on the path of your expand. It does not apply to the vertices selected for expand.
The options for adding a navigation condition and joining multiple conditions is same as described in the preceding steps for destination conditions. - Click Create.
- Click X on the top-right to close the Settings dialog.
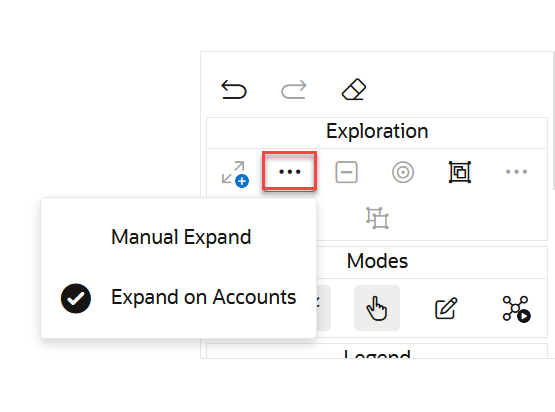
- Click the Expand drop-down list in the exploration toolbar to view the list of Smart Expand names.
- Select the required Smart Expand Name.
- Select a specific vertex or multiple vertices on the graph and
click the Expand action on the graph manipulation toolbar.
Tip:
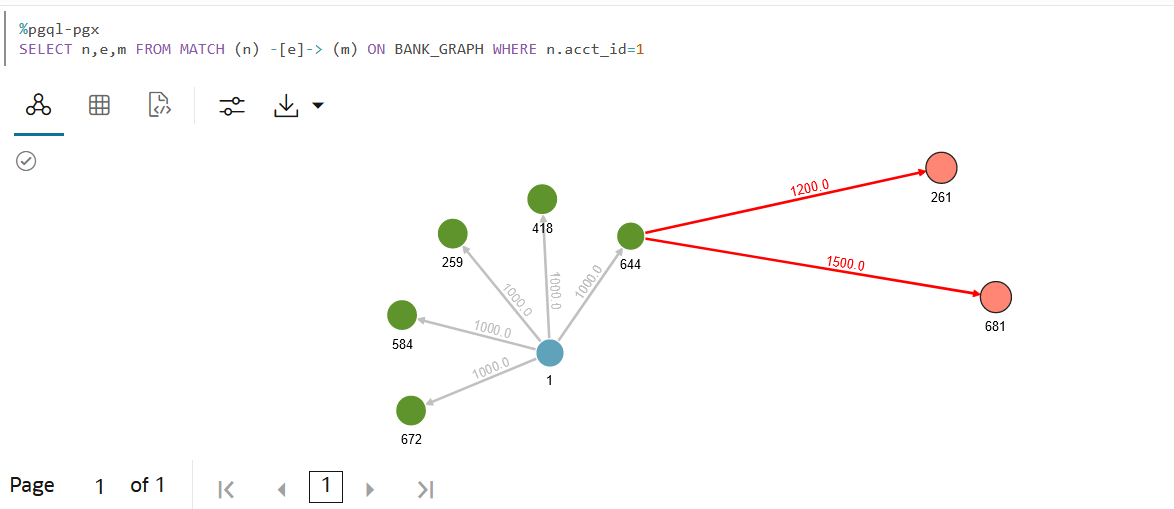
Alternatively, you can apply Smart Expand from the tool tip. You can display the tool tip by using a right-click on the selected vertex.Smart Expand fetches a shortest path to the vertex or vertices that are within the specified maximum path length, fulfilling the navigation and destination conditions for the selected vertex or vertices.The following example shows expanding on an employee vertex which fetches all two-hop neighbors with
employee_id >
                        100
.
Description of the illustration smart_expand_graph.pngNote:
If you do not configure the maximum hop count, navigation or destination conditions for Smart Expand, then the graph expands on the default infinite hop count value.
