Group Vertices Using Smart Group

Smart Group allows you to group vertices based on specified vertex conditions or edge conditions or a combination of both.

There are two ways you can apply Smart Group:

  • Automatic Smart Group: Applies grouping to the entire graph.
  • Manual Smart Group: Applies grouping to the selected vertices that fulfill the specified conditions. But, if no vertices are selected, it applies to the entire graph.

To configure and to apply Smart Group for your graph:
  1. Click Settings on the Visualization panel.
    This opens the Settings dialog.
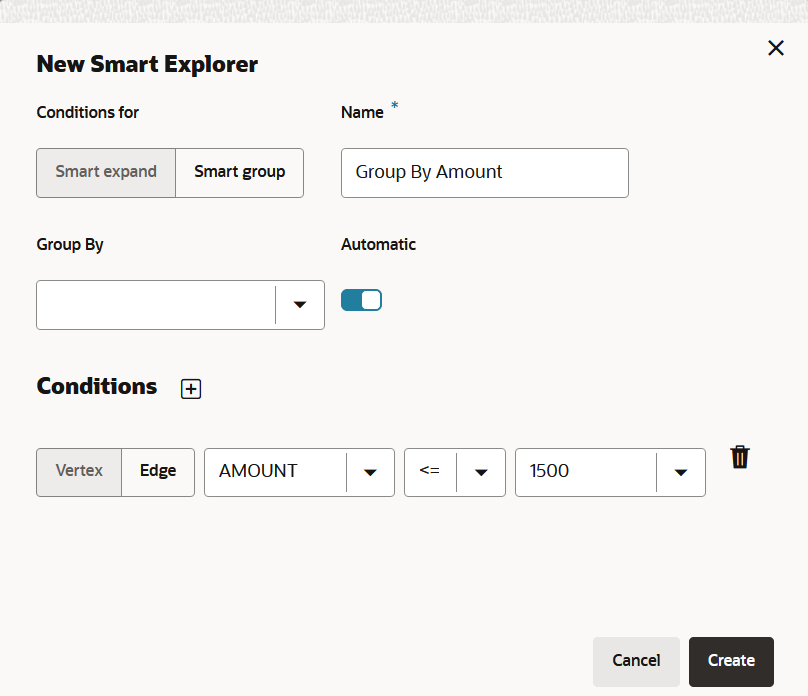
  2. Click the Smart Explorer tab and click New Smart Explorer.
    The New Smart Explorer window opens.
  3. Set the Conditions for field to Smart Group.
  4. Enter a group Name.

    Tip:

    You can use this Group Name in Highlights to customize the appearance of grouped vertices.
  5. Switch on the Automatic toggle.

    Note:

    Switch off the Automatic toggle for manual Smart Group.
  6. Optionally, select property value from the Group By drop-down list.

    If Group By is set, Smart Group creates one group per each available value of the specified property from all vertices fulfilling given conditions. Otherwise, Smart Group results in just one group containing all allowable vertices.

    If Smart Group has any edge conditions, then the created groups are further split into separate parts where all vertices are reachable just through edges fulfilling specified edge conditions.

  7. Click add icon to add a condition for grouping.

    A row to create a new conditions appears as shown:

    Description of smart_group_with_condition.png follows
    Description of the illustration smart_group_with_condition.png

    Each condition includes the following options:

    • target vertex or edge element that the condition applies to
    • property of the target element
    • operator to apply (such as, =, <, > and so on)
    • value to be fulfilled for the operator and property

    It uses numeric comparison if the property value is convertible to number and lexicographic comparison otherwise.

  8. Set the required condition on the target Vertex or Edge element as applicable.
  9. Optionally, join your conditions by clicking Match All or Match Any as required.

    Note:

    The join options are displayed only when you have multiple conditions.
  10. Click Create to add one or more conditions.
  11. Click X on the top-right to close the Settings dialog.
    If the Smart Group is configured as automatic, then the conditional grouping is applied on the whole graph displayed in the visualization panel.
    Otherwise, perform the following steps to apply Manual Smart Group:
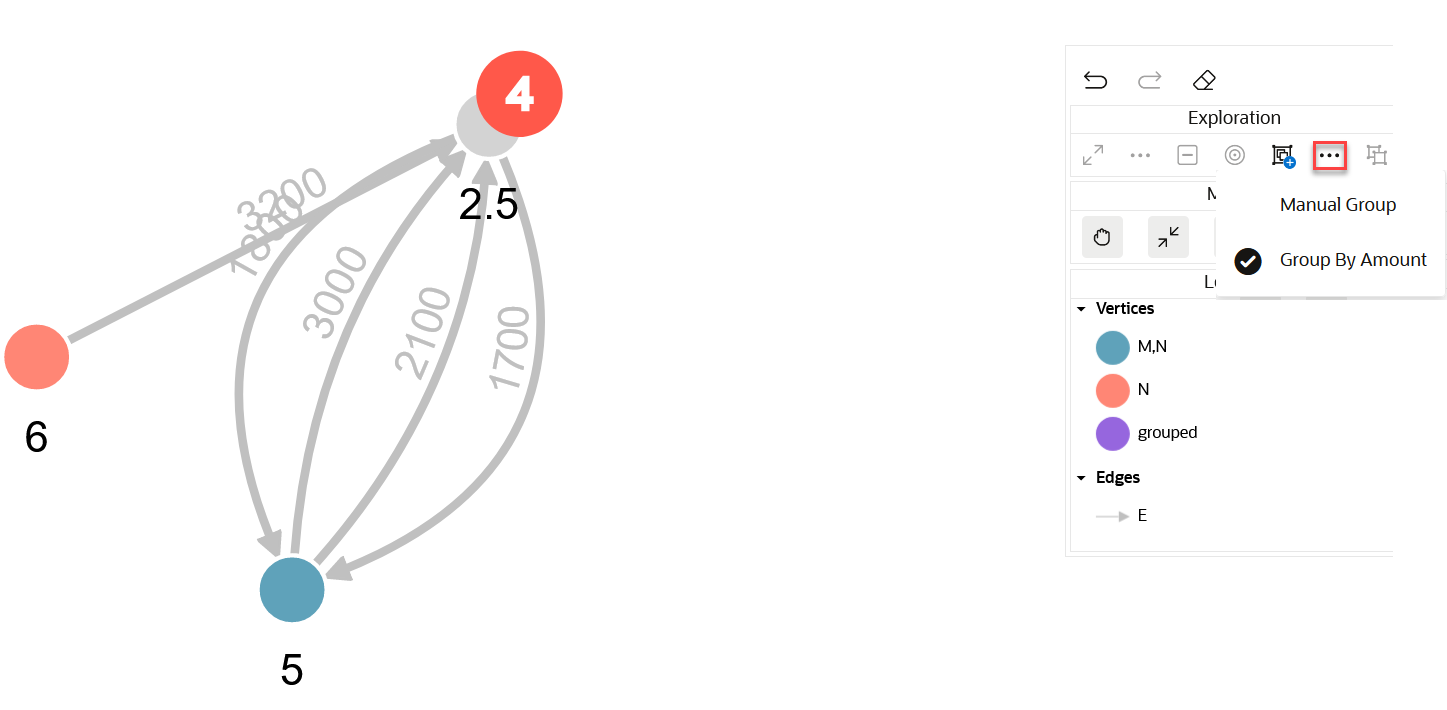
    1. Click the Group drop-down list in the Exploration toolbar.
    2. Select the required Smart Group Name as shown:
    3. Click specific vertices on the graph and click the Group action on the graph manipulation toolbar.
      Vertices fulfilling the configured conditions are grouped together.

      Note:

      • If Smart Group has an edge condition, then you can select vertices that are connected by the edge relationship.
      • If you do not select vertices on the graph, then the manual Smart Group is applied to the whole graph.