Use Live Search in Graph Visualization
Using the Live Search feature in Graph Studio, you can search the currently displayed graph and add live fuzzy search score to each item.
- Click Settings on the Visualization panel.This opens the Settings dialog.
- Switch ON the Enable Live Search toggle in the
General tab.This enables the search, adds the search input to the visualization, and allows you to further customize the search. It is important to note that you can only search the graph that is currently displayed in the visualization panel, and not the entire graph as stored in the database.
- Select whether you want to search the properties of either Vertices or Edges, or both under Enable Search In.
- Select one or more Properties To Search based on what
you selected in the previous step.Note that if you disable search for any graph element (vertices or edges) for which you already had selected the properties, then those properties will be stored and added back when you enable search again for that graph element.
The following figure shows an example of configuring Live Search. As seen, Live Search is enabled for the vertex property,
country_name.
- Optionally, enable Advanced Settings if you wish to fine-tune the search
even more and configure one or more of the following options:
- Location: This determines
approximately where in the text property the pattern is expected to be
found. For instance, location value
0indicates that the pattern is matched from the beginning of the text. Location value1indicates that the pattern will be matched from the second letter of the text and so on. - Distance: This determines how close the match must be to the fuzzy location (specified by location). An exact letter match which is distance characters away from the fuzzy location would score as a complete mismatch. A distance of 0 requires the match be at the exact location specified, a distance of 1000 would require a perfect match to be within 800 characters of the location to be found using a threshold of 0.8.
- Min Char Match: The minimum length of the pattern that needs to match.
- Location: This determines
approximately where in the text property the pattern is expected to be
found. For instance, location value
- Close the Settings dialog and rerun the visualization query.
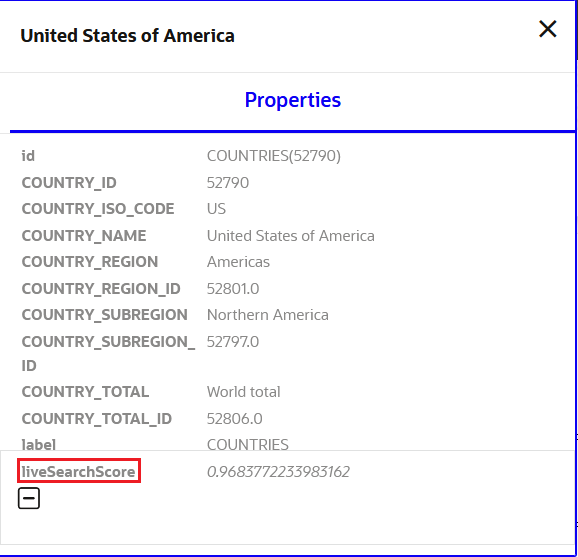
The search input will be displayed towards the right side of the graph visualization. If you start typing the search keyword, the search will add a score to every vertex or edge, based on the settings and the search match. The Live search score can be viewed inside the tooltip, that can be triggered by right-clicking a vertex or edge. For example:

