Create a Cluster
You can create a single cluster from the resources allocated in an Oracle Big Data Cloud Service instance.
Before You Begin
Before you can create a cluster,
-
You must have an Oracle Big Data Cloud Service instance that hasn’t yet been used for a cluster. See Understand the Life Cycle of Oracle Big Data Cloud Service and Create an Oracle Big Data Cloud Service Instance.
-
Optionally, you can create a secure shell (SSH) key pair. See Generating a Secure Shell (SSH) Public/Private Key Pair. Alternatively, you can create it when creating the cluster. See Create a Cluster.
-
Optionally, you can use Oracle Cloud Infrastructure Object Storage Classic for storing data. To a associate an Oracle Cloud Infrastructure Object Storage Classic instance with the cluster, you’ll need the credentials for accessing the storage. See Register Storage Credentials with the Cluster.
Procedure
To create an Oracle Big Data Cloud Service cluster:
-
On the Services page of your console, click the Big Data Cloud Service link at the top of the page.
-
Click the Create Service button to display the Create Service wizard.
-
On the Services page of the Create Service wizard, configure details for your cluster, as described below, and then click Next:
-
Service Name—Enter a name for the cluster that is unique in your identity domain.
-
Notification E-mail —Enter an e-mail address to be used for notifications about this cluster.
-
Description—Enter a description for the cluster.
-
-
On the Cluster Details page of the Create Service wizard, configure details for your cluster, as described below, and then click Next:
Service Type Subscription Configuration
-
Big Data Appliance System—Select the resource configuration to use for this cluster. The items on this list show the Oracle Big Data Cloud Service instances that are available for creating clusters.
-
Node Roles—If you have five or more nodes available in your instance, you can specify how many are to be configured as permanent Hadoop nodes and how many as edge nodes. The first four must always be permanent Hadoop nodes. If you don’t set these options, all the available nodes will be used as permanent Hadoop nodes.
Cluster Parameters
-
SSH Key—The SSH public key is used for authenticating the
opcuser when using an SSH client to connect to a node that is associated with this cluster. Click Edit to open a dialog box for entering SSH key information. Use any of the following options and then click Enter.-
Key File Name—Click the button to open a dialog box to select an existing SSH public key file.
-
Key Value—Paste in the value of an SSH public key. Make sure the value doesn’t contain extra spaces or line breaks and doesn’t have a line break at the end.
-
Create a New Key—Select this option to create a new key. You will be prompted to download the key after it’s created.
-
-
Cloudera Administrator Password —Enter a string for the password for accessing Cloudera Manager and other Cloudera tools. Don’t use a dollar sign ($) in your password. It may be accepted, but it can cause problems later on. Be sure to record the password and store it securely.
-
Secure Setup — Select Enabled to activate security services for the cluster or Disabled to leave them inactive. When you enable secure setup, you enable:
-
MIT Kerberos
-
Apache Sentry
-
HDFS Encryption—Key Trustee Servers are installed on the master nodes
-
Network Encryption
-
Auditing
Note:
If you don’t enable security now, when creating the cluster, you cannot enable security later.
When you create a cluster with security enabled, you can’t disable any of these features for the lifetime of the cluster.
-
Oracle Cloud Infrastructure Object Storage Classic Configuration
-
Storage URL — Enter the URL for a container in your storage service instance. This is the URL for a container in your storage service instance, for example,
https://storage-a123456.storage.oraclecloud.com/v1/storaage-a123456/myContainer4. It is not the storage authentication URL. Storage service URLs are constructed in a variety of ways. See Accessing Oracle Cloud Infrastructure Object Storage Classic. -
User Name — Enter the user name that is associated with the storage service, for example the administrators e-mail (if that was specified as the user name for the service).
-
Password — Enter the password associated with the storage user name.
Note:
When you specify storage details on this page, the storage provider name “BDCS” is created by default.If you’ve entered incorrect credentials or if the storage service is unavailable, you will receive an error when you click Next to move to the next page in the wizard.
-
-
On the Confirm page of the Create Service wizard, check your configuration details. If you are satisfied, click Create to create the cluster.
-
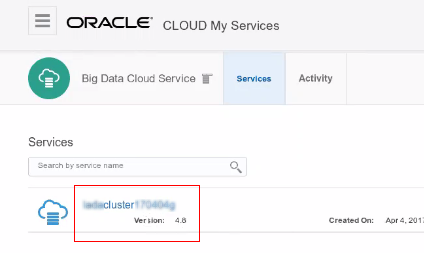
When the cluster is ready, the new cluster is shown on your Services page. (You may have to refresh the page to see the status of the new cluster.)
-
To see details about your new cluster, click the name of the cluster.

Description of the illustration svc-created.png
-
Review the details on the Service Overview page.