Use Projects
After signing in to Oracle Developer Cloud Service (DevCS), you can create a project, open a shared project, or open a project you are a member of.
Create a Project
From the Organization page, you can create an empty project, a project with a Git repository, import a project from an OCI Object Storage or an OCI Object Storage Classic container, or create a project from a template.
Empty Project
If you haven’t decided which applications you want to upload, or want to start afresh, create an empty project. An empty project is a project with no pre-configured Git repository or any other artifact.
With an Initial Git Repository
To upload application files soon after creating a project, create a project with an initial Git repository. You can choose the Git repository to be empty, populated with a readme file, or populated with data imported from another Git repository.
From an Exported Project
If you’ve created a project before and backed up its data to an OCI Object Storage bucket or an OCI Object Storage Classic container, you can create a project and import the data from the backed up project.
To import project data from an OCI Object Storage bucket or an OCI Object Storage Classic container, you need the these details:
| OCI Object Storage | OCI Object Storage Classic |
|---|---|
| Name of the target bucket | Name of the target container |
| Name of the exported archive file | Name of the exported archive file |
Private key and fingerprint of a user who has the BUCKET_INSPECT (or BUCKET_READ) and OBJECT_READ permissions of the bucket
|
Credentials of a user with the Storage.Storage_Administrator or Storage_ReadOnlyGroup identity domain role. |
| Details of the compartment that hosts the bucket
Contact the OCI administrator for the details and get the required input values. See Get the Required OCI Input Values. |
Service ID and the authorization URL of OCI Object Storage Classic
Contact the identity domain administrator or the OCI Object Storage Classic administrator for the details and get the required input values. See Get OCI Object Storage Classic Input Values. |
After you have the required input values, import the project.
If the import fails, an empty project is created. You can try to import the data again without creating a project. To check the import log, see the History tab of the Data Export/Import page under Project Settings.
From a Project Template
Using a project template, you can quickly create a project with predefined and populated artifacts such as Git repositories and build jobs. When you create a project from a project template, the defined artifacts of the project template are copied to the new project. If you don’t want to use a copied artifact, you can delete it. Note that after you create a project from a template, any updates made to the project template aren’t reflected in the created project.
These types of project templates are available.
| Project Template | Description |
|---|---|
|
Public templates |
The DevCS team creates and manages the public templates. They are available to all users across all identity domains and are marked by a Public Template label. |
|
Shared templates |
Your organization users create and manage shared templates. They are listed by name and are available to all users of the organization. |
|
Private templates |
Not listed by name to general users, but accessible only through their private keys. To create a project from a private project template, you must’ve its private key. The templates are visible by name only to the members of the project template. |
In the new project, these artifacts are copied from the project template:
| Artifacts | Description |
|---|---|
|
Git repositories |
Defined Git repositories of the project template are copied to the new project. You can use the copied Git repositories and change their files for your use, or delete them. In the navigation bar, click Git |
|
Build jobs and pipelines |
All build jobs and pipelines of the project template are copied to the new project. You can change these jobs, create their copies, or delete them. In the navigation bar, click Builds |
|
Deployment configurations |
All deployment configurations of the project template are copied to the new project. You can change the deployment configurations or delete them. In the navigation bar, click Deployments |
|
Wiki pages |
All wiki pages of the project template are copied to the new project. You can change the wiki pages or delete them. In the navigation bar, click Wiki |
|
Announcements |
All active project announcements of the project template are copied to the new project. You can’t edit the copied announcements as they are read-only, but you can activate or deactivate them. In the navigation bar, click Project Administration |
|
Links |
All link rules of the project template are copied to the new project. Link rules enable you to convert plain text to links when the text is entered in the commit and merge request comments. In the navigation bar, click Project Administration |
From IDEs
You can create a DevCS project from JDeveloper and NetBeans IDE.
See Create a DevCS Project in JDeveloper and Create a DevCS Project in NetBeans IDE.
Open a Project
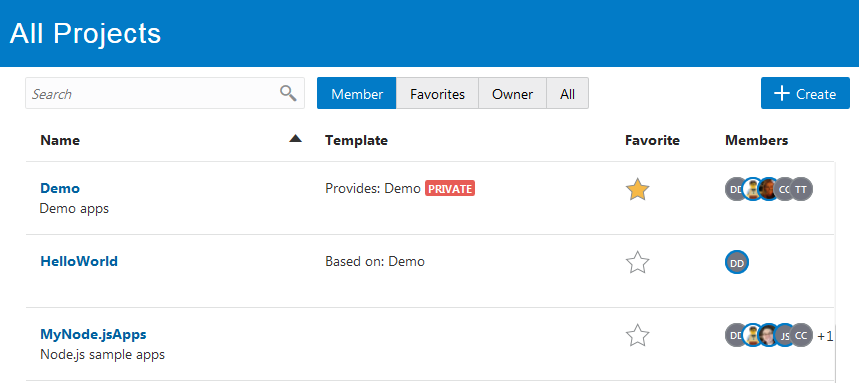
You can open a project only if you're a member or an owner, or if the project is shared. To open a project, on the Organization page, click its name. To search for a project, use the filter toggle buttons or the search box.
To quickly access a project, click Favorite ![]() and add it to your favorites list. To see your favorite projects, click the Favorites toggle button.
and add it to your favorites list. To see your favorite projects, click the Favorites toggle button.
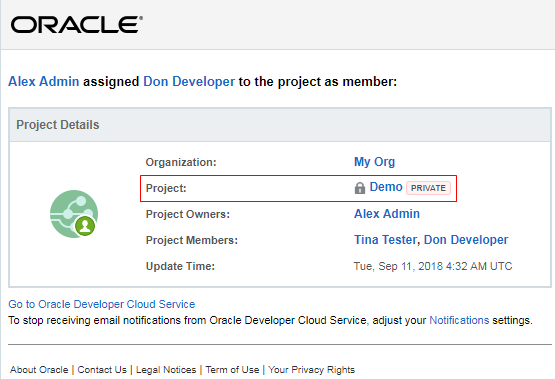
If you’re invited to join a project, you’ll find the project link in the email you received when you were added to the project.
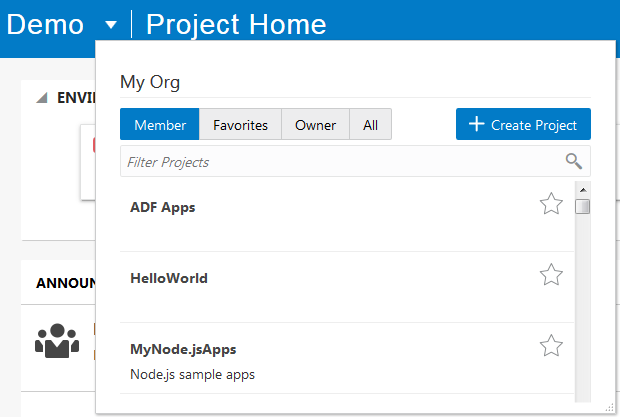
To switch to another project from an open project, click ![]() next to the project name. From the menu, click the project name to open.
next to the project name. From the menu, click the project name to open.
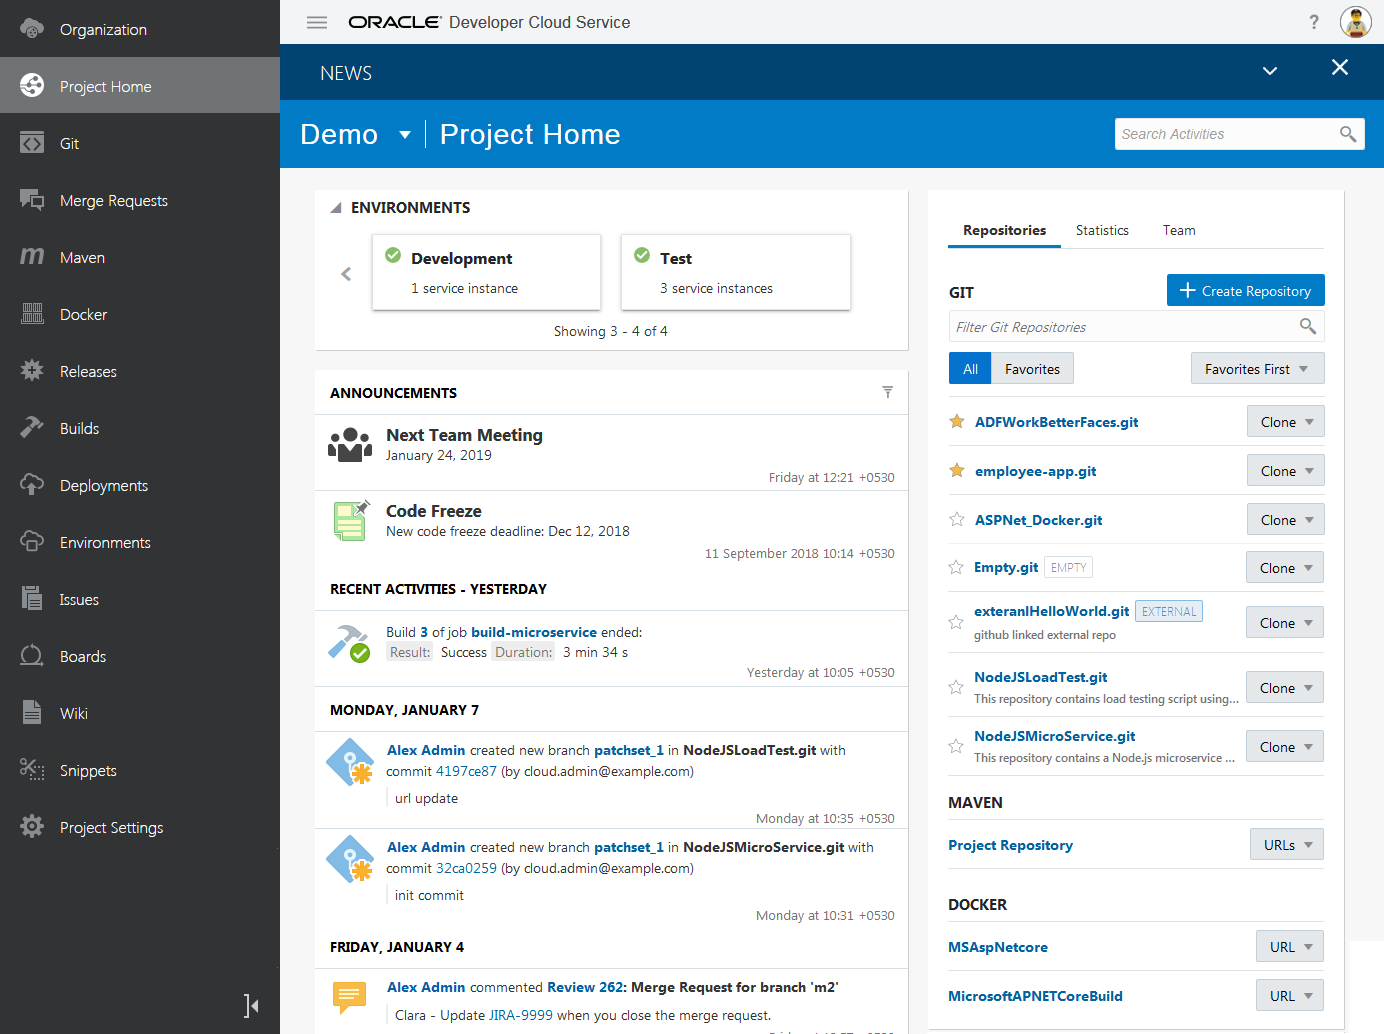
After opening the project, you land on the Project Home page.
Review a Project’s Summary
From the Project Home page, you can view a summary of the project's actions, repositories, team members, and statistics.
| Action | How To |
|---|---|
|
Navigate between different pages of DevCS |
Use the project navigation bar on the left side of the page |
|
See your project’s software development environments |
Expand Environments. Click an environment to view its service instances. |
|
Check the latest activities of the project |
Use the recent activities feed. To filter the feed, click Select activity categories |
|
See the Git, Maven, and linked Docker repositories of the project |
Click the Repositories tab. |
|
See issues and merge requests that require your attention |
Click the Graphs and Statistics tab. |
|
Know your team members |
Click the Team tab. |
The Project Home page remembers the last opened tab (Repository, Graphs, or Team) in the current browser session and opens it automatically next time you open the Project Home page. If you sign out or close the browser and then sign in and open the Project Home page, the Repositories tab opens by default.


