JavaScript must be enabled to correctly display this content
Before you Begin
This 30-minute tutorial shows you how to use the embedded JavaScript editor in Oracle Digital Assistant to create and deploy an entity event handler component for a composite bag entity.
Background
You can use Apache FreeMarker expressions to support the composite bag's prompting, error, and validation functions, or you can use entity event handlers. When any of these functions require advanced Apache FreeMarker expressions, you might want to opt instead for entity event handlers because they are easier to write, maintain, and debug. For this tutorial, you're going to add event handlers to the composite bag entity that belongs to an expense reporting skill. These event handlers enable the skill to prompt for values, validate these values, and output confirmation messages.
While you can create entity event handlers using external SDKs (the subject of this advanced tutorial), you can instead create them within Oracle Digital Assistant using the embedded JavaScript editor.
What Do You Need?
Familiarity with JavaScript and Node.js
Access to Oracle Digital Assistant
The EEH_Materials.zip file, which
includes the starter skill and a finished
version of the skill. Download this file and then
unzip it to your local system.
Explore the Starter Skill
The first thing you need to do is import the starter
skill into your Oracle Digital Assistant instance so that you
can see what you're working with.
The entity event handler that you are creating for the composite bag entity provides the following functionality:
Shows an acknowledgement message whenever a user updates an expense type, amount, or date.
Validates amounts to prevent users from expensing amounts below $5.
Validates a date to prevent user from submitting an expense that has a future date.
Sends expense data to a backend server and publishes the expense submission status.
Publishes expense details provided by the user in a confirmation message.
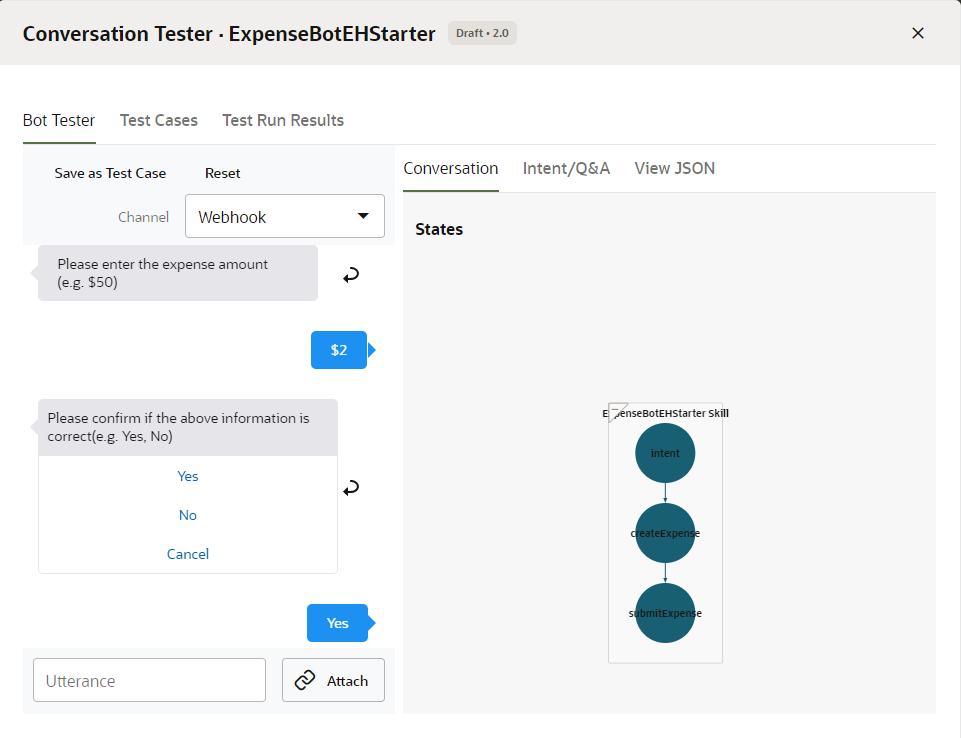
In this step, we're going to chat with skill using the Conversation Tester (accessed by clicking Preview
at the top right). In the context of guiding you through the expense submission conversation, this part of the tutorial will call out the behavior that you will be changing by creating an entity event handler.
Description
of the illustration skill_tester_top_margin.png
Enter I want to create an expense report.
When prompted for the expense type, select Meal.
When prompted for expense date, enter tomorrow. Note that the skill doesn't prevent you from entering a future date.
When prompted for an amount, enter $2. Again, the skill doesn't perform any validation and doesn't prompt you to enter a higher amount.
Click Yes. The skill replies with a simple confirmation message. Note in the Skill Tester's Conversation tab that the dialog flow transitions to the SubmitExpense state.Description of the illustration
initial_conversation.png
Click Reset to clear the conversation, then click Close to dismiss the Conversation Tester.
Create the Entity Event Handler Service
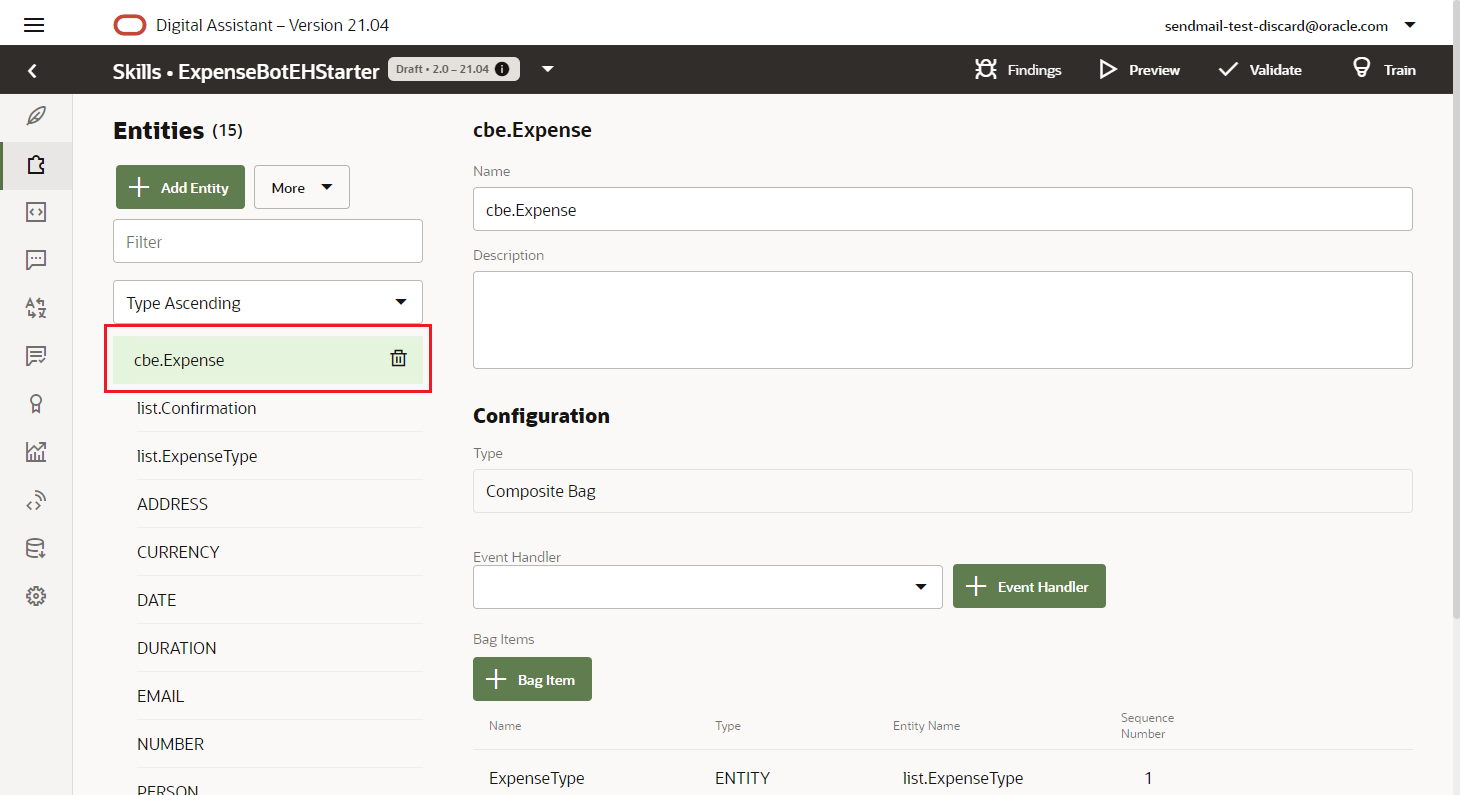
In this step, you're going to use the embedded editor to create an entity event handler for the skill's composite bag entity, cbe.Expense.
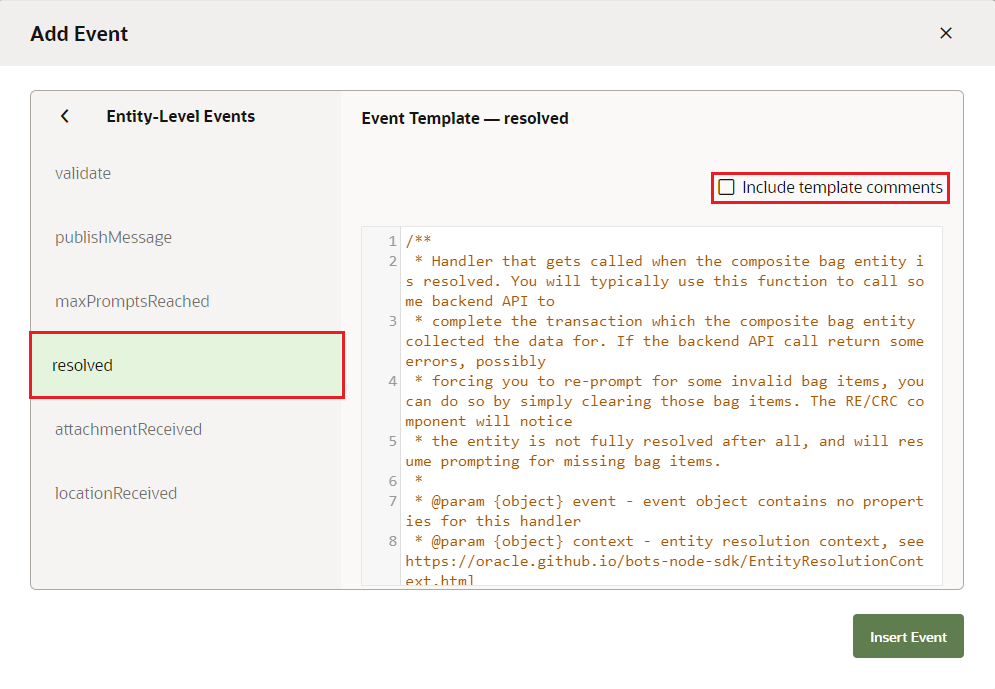
The handler code can include both entity and items objects, but by default, the starter code is populated with the entity object only. The editor generates the items object when you add a template for an item-level event (the next step in this tutorial). An entity event handler exports two objects:
metadata that provides the name of the component (resolveExpense).
handlers that contain the entity-level, item-level, or custom handler functions.
The starter code also includes a completed entity-level event, publishMessage. This event, like all event handlers, is an asynchronous JavaScript function that has two arguments:
event: A JSON object of the the event-specific properties.
context: An object providing a set of convenience methods that inspect and change the composite bag items and their resolution status, manage the entity queue when multiple bag entities need to be processed, and sends messages to the user.Description of the illustration default_editor.png
Click Close (located at the upper right of the editor). The service and handler names appear in the Event Handler menu list in the Entities page. The page also displays the deployment status (Ready).
Description of the illustration eeh_status.png
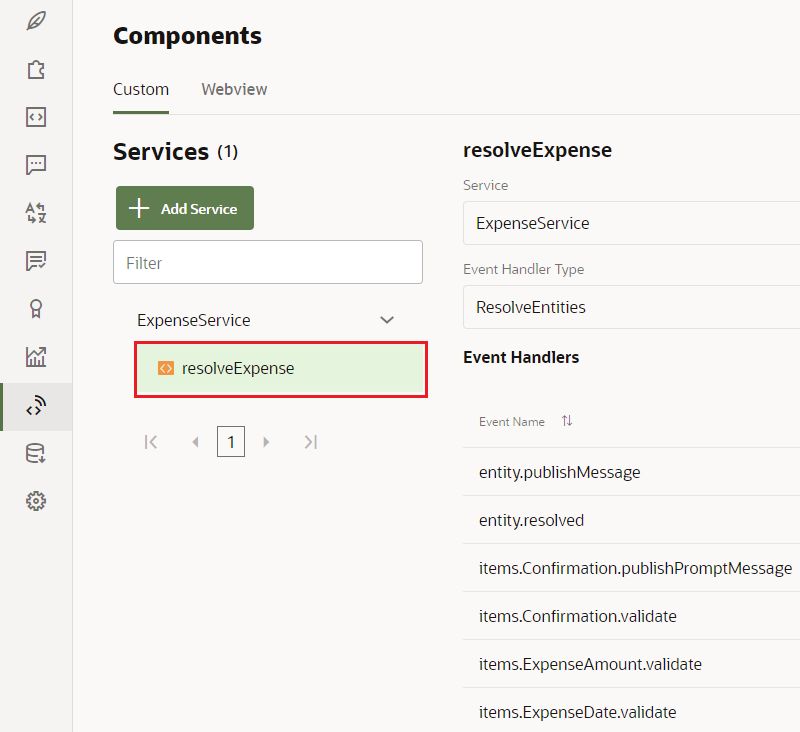
To take a look at the deployment, click Components in the left navbar. Then click resolveExpense to see the list of published events. There is one (so far, that is -- you'll be adding others later on). It's the publishMessage event that's created by default.
Description of the illustration publishmessage.png
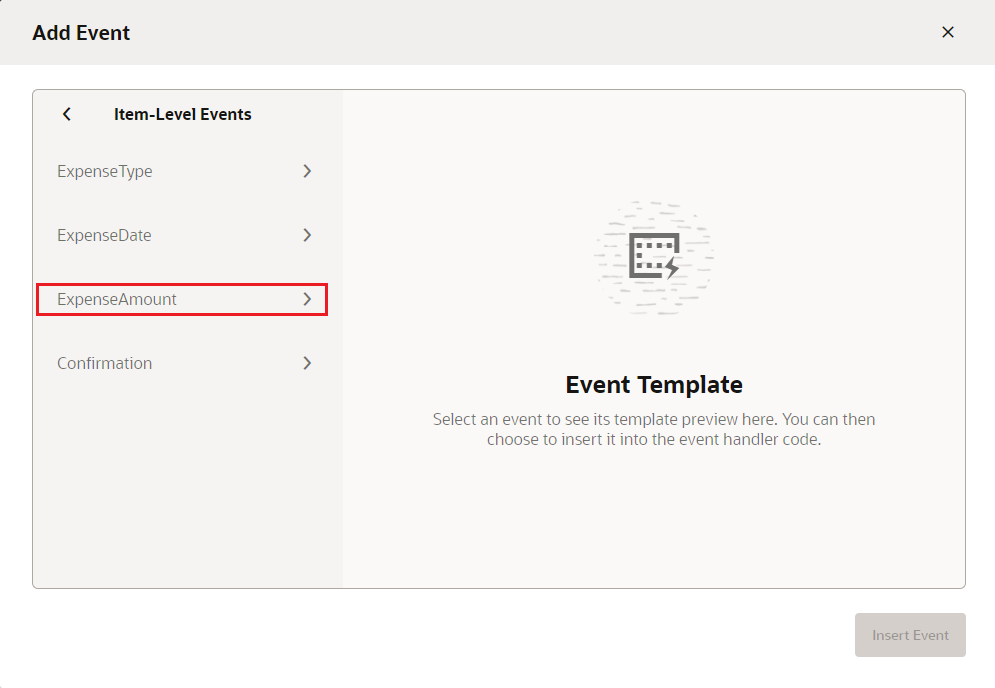
Add Item-Level Validator Events
In this step, you'll add validate functions for the expense amount and the expense date.
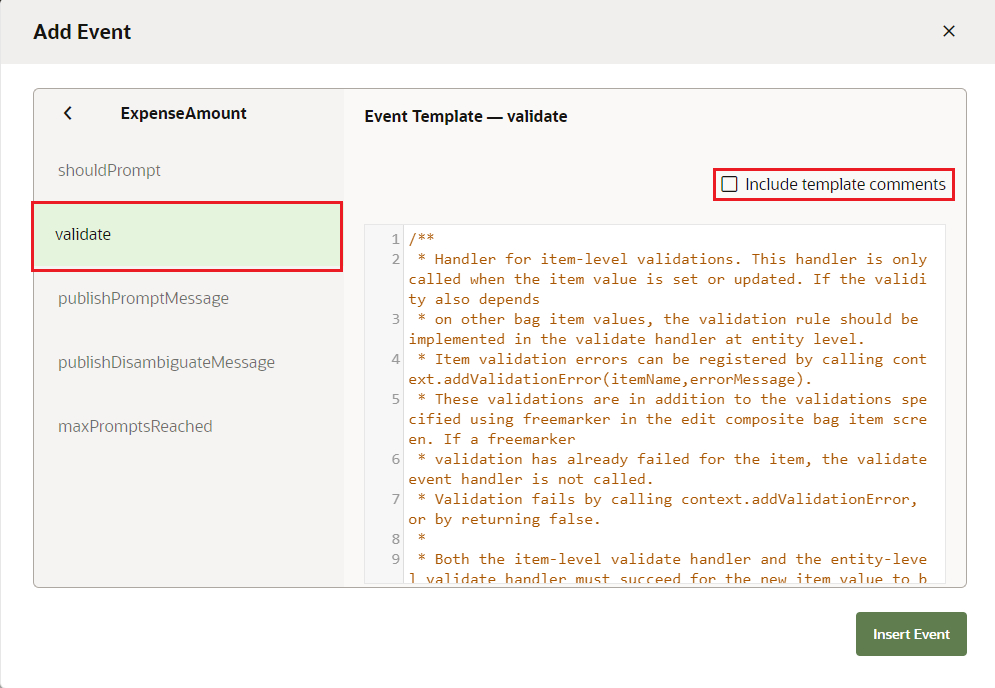
In ExpenseAmount, add the following code to the validate event:
          let amount = event.newValue.amount;
          let currency = event.newValue.currency;
          let minExpenseAmount = 5;
          if (amount < minExpenseAmount) {
              context.addValidationError('ExpenseAmount', context.translate('ExpenseAmount.text', minExpenseAmount, currency));
              return false;
            }
When you're done, the code should look like this:
           ExpenseAmount: {

        validate: async (event, context) => {
          let amount = event.newValue.amount;
          let currency = event.newValue.currency;
          let minExpenseAmount = 5;
          if (amount < minExpenseAmount) {
              context.addValidationError('ExpenseAmount', context.translate('ExpenseAmount.text', minExpenseAmount, currency));
              return false;
            }
        }
For ExpenseDate, add the following code to the validate event:
          if (new Date(event.newValue.date) > new Date()) {
            context.addValidationError("ExpenseDate",context.translate('ExpenseDate.text'));
            return false;
          }
When you're done, the code should look like this:
      ExpenseDate: {

        validate: async (event, context) => {
          if (new Date(event.newValue.date) > new Date()) {
            context.addValidationError("ExpenseDate",context.translate('ExpenseDate.text'));
            return false;
          }
        }
Here are a few things to note about the code:
The context object, which is passed to the event handler function, provides the addValidationError function for the entity and outputs the validation message that describes both the incorrect input and the expected input ("Expense date cannot be in the future. Please enter 'today' or a date in the past." or "Amounts below 5 dollars cannot be expensed. Please enter a higher amount.").
The translate function accesses resource bundle from the context object. To review or update these strings, click Resource Bundles in the left navbar. For example, click the ExpenseDate.text key to see the string for the error message that's displayed when you entered tomorrow in the Skill Tester.Description
of the illustration resource_bundle_keys.png
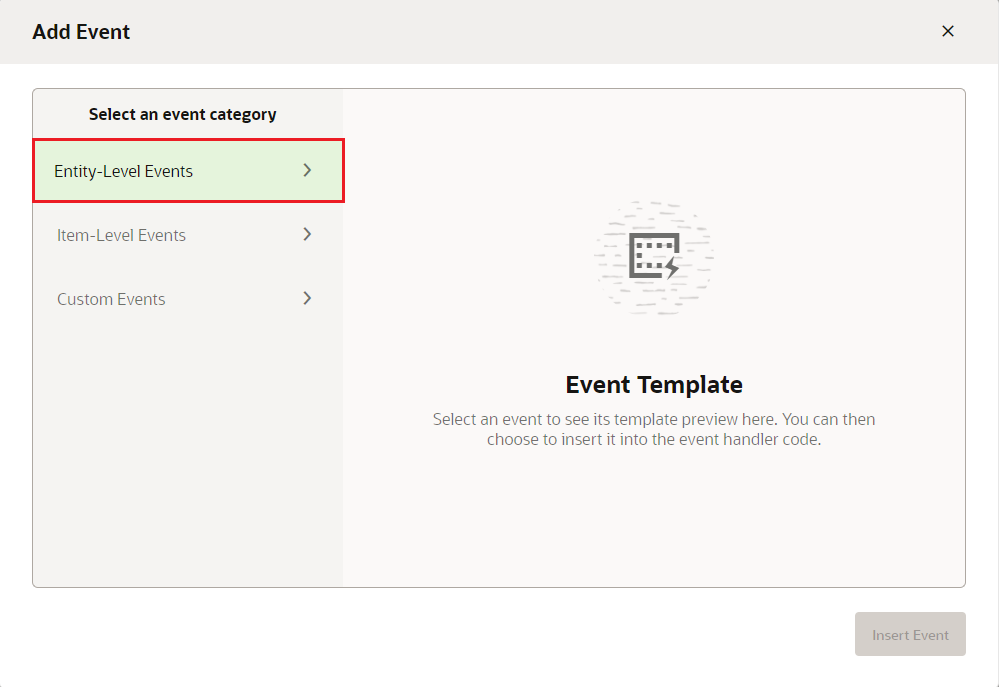
Add Confirmation Events
In this step, you're going to add a confirmation message that allows users to proceed, update a response, or cancel the expense report. You're going to create this message using a combination of the validate event and publishPromptMessage event, which enables you to create a customized prompt.
Add the following code just below const fetch = require("node-fetch");
          if (event.newValue.value ==='No') {
            context.setCustomProperty('valSelected',confirmValues.NO);
            return false;
          }
          if (event.newValue.value === 'Cancel') {
            context.setCustomProperty('valSelected',confirmValues.CANCEL);
            return false;
          }
          if (event.newValue.value === 'Yes') {
            context.setCustomProperty('valSelected',confirmValues.YES);
            return true;
          }
          return false;
This code sets a custom property variable, 'valSelected', to NO, CANCEL, or YES based on the user's choice. The custom property is saved in the context, not as a dialog flow variable, which means that it is only available for when the composite bag entity is resolved.
Now that you have completed the item-level validations, you're ready to add the code that resolves the entities, submits the expense report request to a backend service and returns the expense report status message. A real-world skill would submit the expense details to a backend service through a REST call, but for the purposes of this tutorial, we're just going to simulate this REST call.
The node-fetch API makes the REST call. This API is pre-installed with the bots-node-sdk, so you don't need to add any additional libraries. The
context.addMessage function creates the message that reports the status of the expense report submission.
Since the entity-level event handler manages the expense report submission message, the dialog flow definition no longer requires the submitExpense state. In this step, we're going to remove this state and update the createExpense state with a new transition that ends the conversation and resets all of the variable values.
Open the dialog flow editor by clicking Flows in the left navbar.
Delete the submitExpense state.
In the createExpense state, replace the next: "submitExpense" action with the following:
return: "done"
Note:
This action must be six spaces from the left margin so that it aligns with actions.
When you're done, the dialog flow definition should look like this:
Now that you've completed the event handlers, you're ready to see how they help the skill to respond.
Click to open the Conversation Tester.
Enter create meal expense.
When prompted for an expense date, enter tomorrow. The skill should respond "Expense date cannot be in the future. Please enter 'today' or a date in the past."
Enter yesterday.
When prompted, enter $50.
Enter can you please update amount to $60. The skill responds with a confirmation.
Enter yes to proceed. The skill should respond with the submission status (which is handled by composite bag entity defined for the CreateExpense state), ending the conversation.
Shows you how to create an entity event handler for a composite bag entity using the editor in Oracle Digital Assistant.
This software and related documentation are provided under a license agreement containing restrictions on use and disclosure and are protected by intellectual property laws. Except as expressly permitted in your license agreement or allowed by law, you may not use, copy, reproduce, translate, broadcast, modify, license, transmit, distribute, exhibit, perform, publish, or display any part, in any form, or by any means. Reverse engineering, disassembly, or decompilation of this software, unless required by law for interoperability, is prohibited.
If this is software or related documentation that is delivered to the U.S. Government or anyone licensing it on behalf of the U.S. Government, then the following notice is applicable:
U.S. GOVERNMENT END USERS: Oracle programs (including any operating system, integrated software, any programs embedded, installed or activated on delivered hardware, and modifications of such programs) and Oracle computer documentation or other Oracle data delivered to or accessed by U.S. Government end users are "commercial computer software" or "commercial computer software documentation" pursuant to the applicable Federal Acquisition Regulation and agency-specific supplemental regulations. As such, the use, reproduction, duplication, release, display, disclosure, modification, preparation of derivative works, and/or adaptation of i) Oracle programs (including any operating system, integrated software, any programs embedded, installed or activated on delivered hardware, and modifications of such programs), ii) Oracle computer documentation and/or iii) other Oracle data, is subject to the rights and limitations specified in the license contained in the applicable contract. The terms governing the U.S. Government's use of Oracle cloud services are defined by the applicable contract for such services. No other rights are granted to the U.S. Government.
This software or hardware is developed for general use in a variety of information management applications. It is not developed or intended for use in any inherently dangerous applications, including applications that may create a risk of personal injury. If you use this software or hardware in dangerous applications, then you shall be responsible to take all appropriate fail-safe, backup, redundancy, and other measures to ensure its safe use. Oracle Corporation and its affiliates disclaim any liability for any damages caused by use of this software or hardware in dangerous applications.
Oracle and Java are registered trademarks of Oracle and/or its affiliates. Other names may be trademarks of their respective owners.
Intel and Intel Inside are trademarks or registered trademarks of Intel Corporation. All SPARC trademarks are used under license and are trademarks or registered trademarks of SPARC International, Inc. AMD, Epyc, and the AMD logo are trademarks or registered trademarks of Advanced Micro Devices. UNIX is a registered trademark of The Open Group.
This software or hardware and documentation may provide access to or information about content, products, and services from third parties. Oracle Corporation and its affiliates are not responsible for and expressly disclaim all warranties of any kind with respect to third-party content, products, and services unless otherwise set forth in an applicable agreement between you and Oracle. Oracle Corporation and its affiliates will not be responsible for any loss, costs, or damages incurred due to your access to or use of third-party content, products, or services, except as set forth in an applicable agreement between you and Oracle.
 in the top left corner to open the side menu.
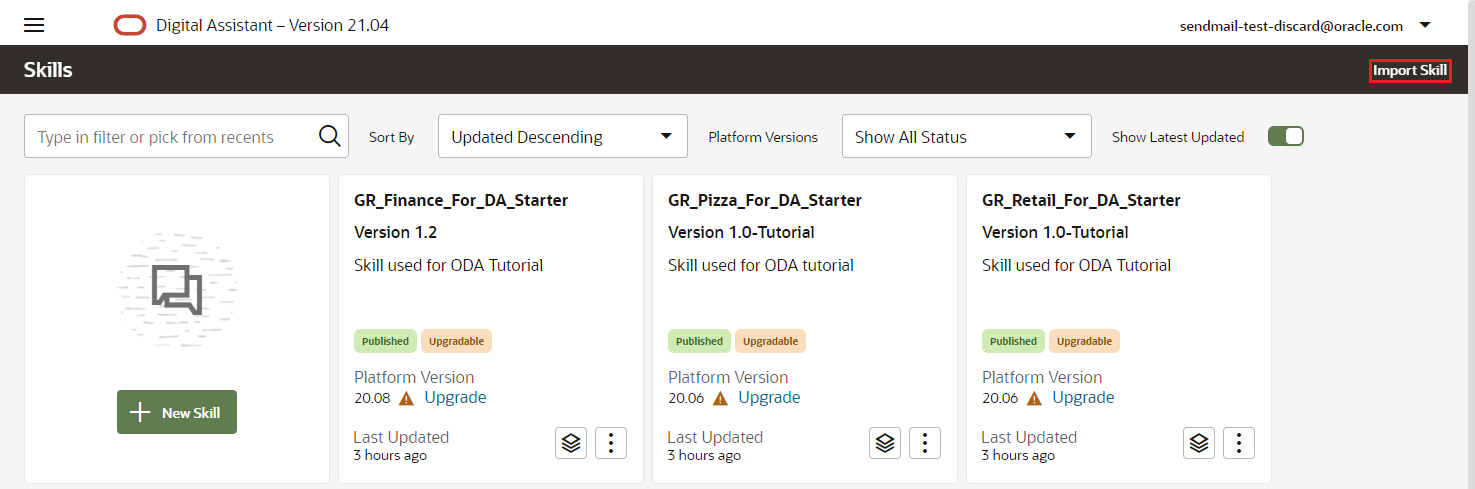


 to dismiss the Conversation Tester.
 in the left navbar.


 in the left navbar. Then click resolveExpense to see the list of published events. There is one (so far, that is -- you'll be adding others later on). It's the
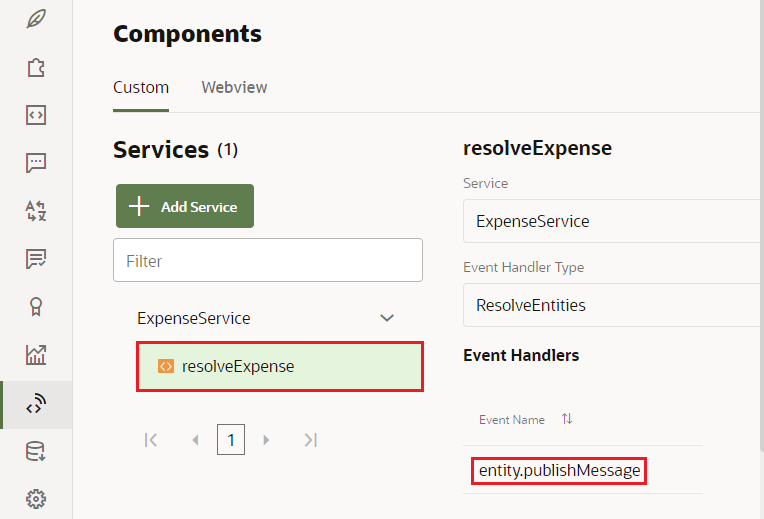
 .
.


 in the left navbar. For example, click the ExpenseDate.text key to see the string for the error message that's displayed when you entered tomorrow in the Skill Tester.
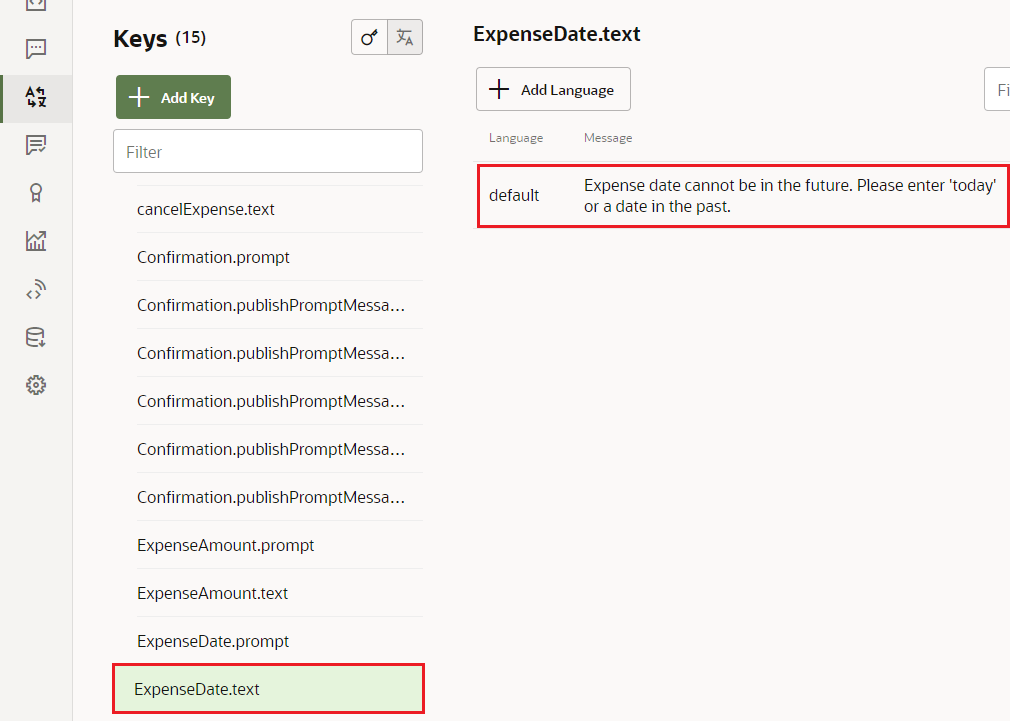


 in the left navbar.
 to open the Conversation Tester.