Creating Custom Metrics for MySQL and SQL Server Databases
To create a Custom Metric based on a SQL query for MySQL and Microsoft SQL Server databases, you can use the OS Command collection method with a specific OS Command that includes the SQL query. This is discussed in detail below.
- From the Oracle Management Cloud console navigation menu, select Monitoring, then
Monitoring Admin, and finally Custom Metrics.
The Custom Metrics page displays.
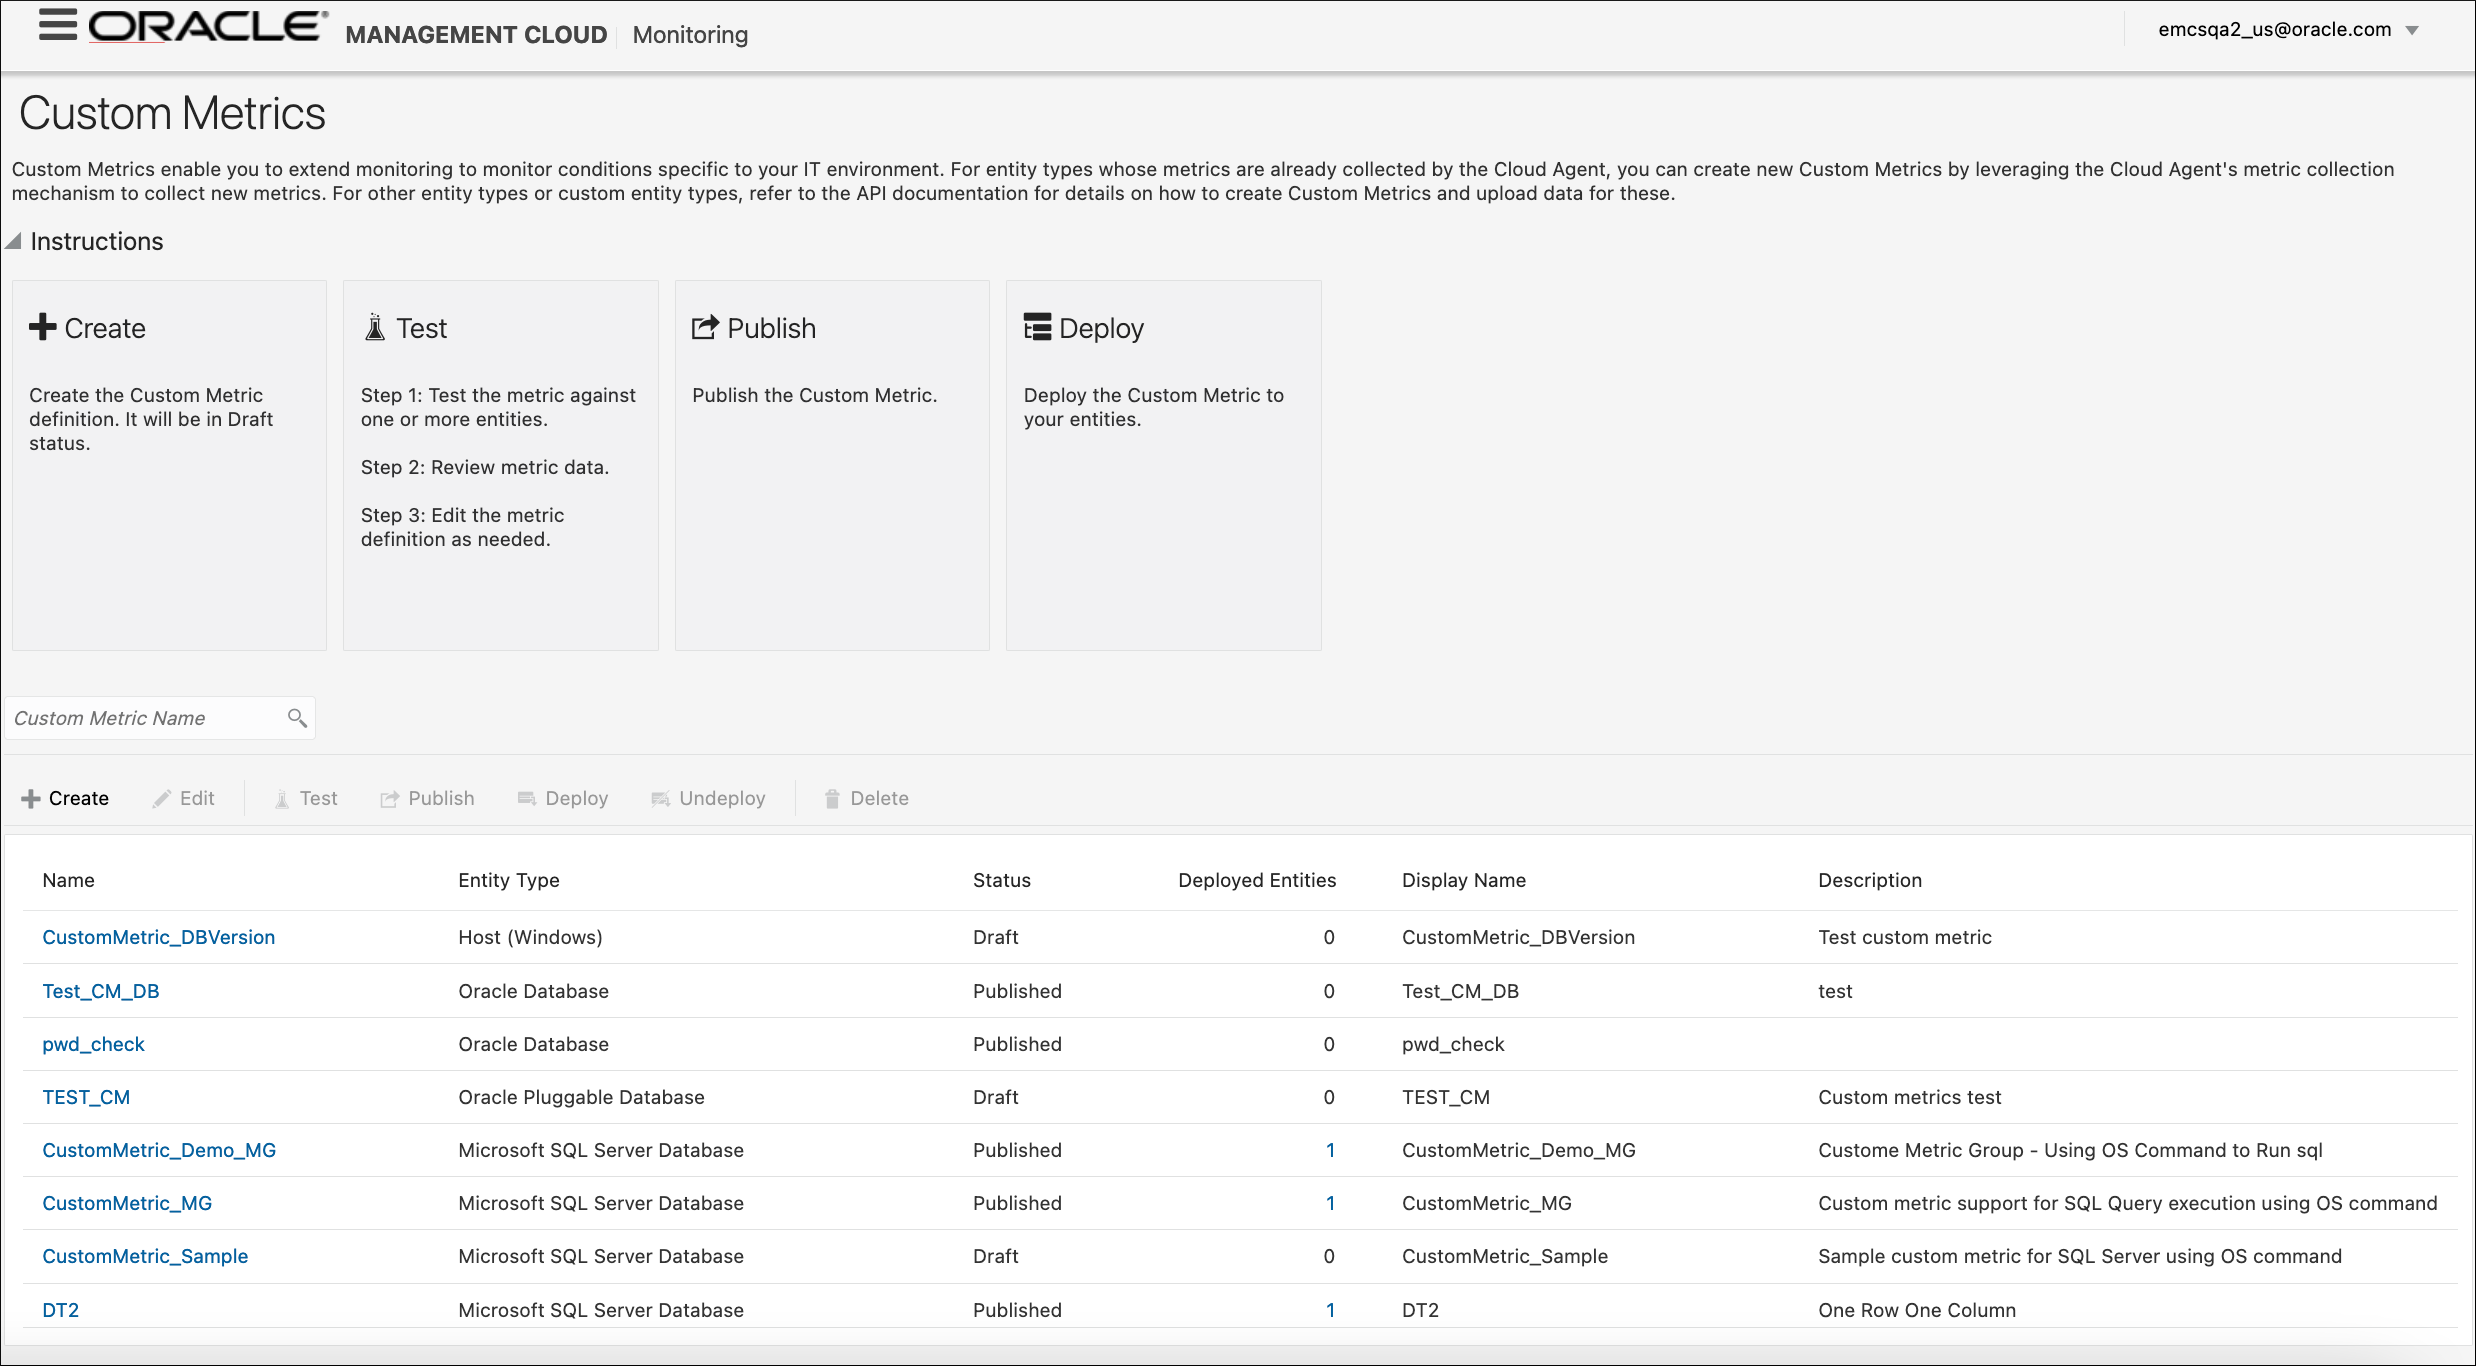
- Click Create. The Create Custom Metric: Basic
Properties page displays with the following
properties:
- Metric Group Name
- Description
- Metric Type (Performance or Configuration)
- Entity Type (MySQL or Microsoft SQL Server)
- Collection Method - OS Command (Only available option)
- Collection Frequency
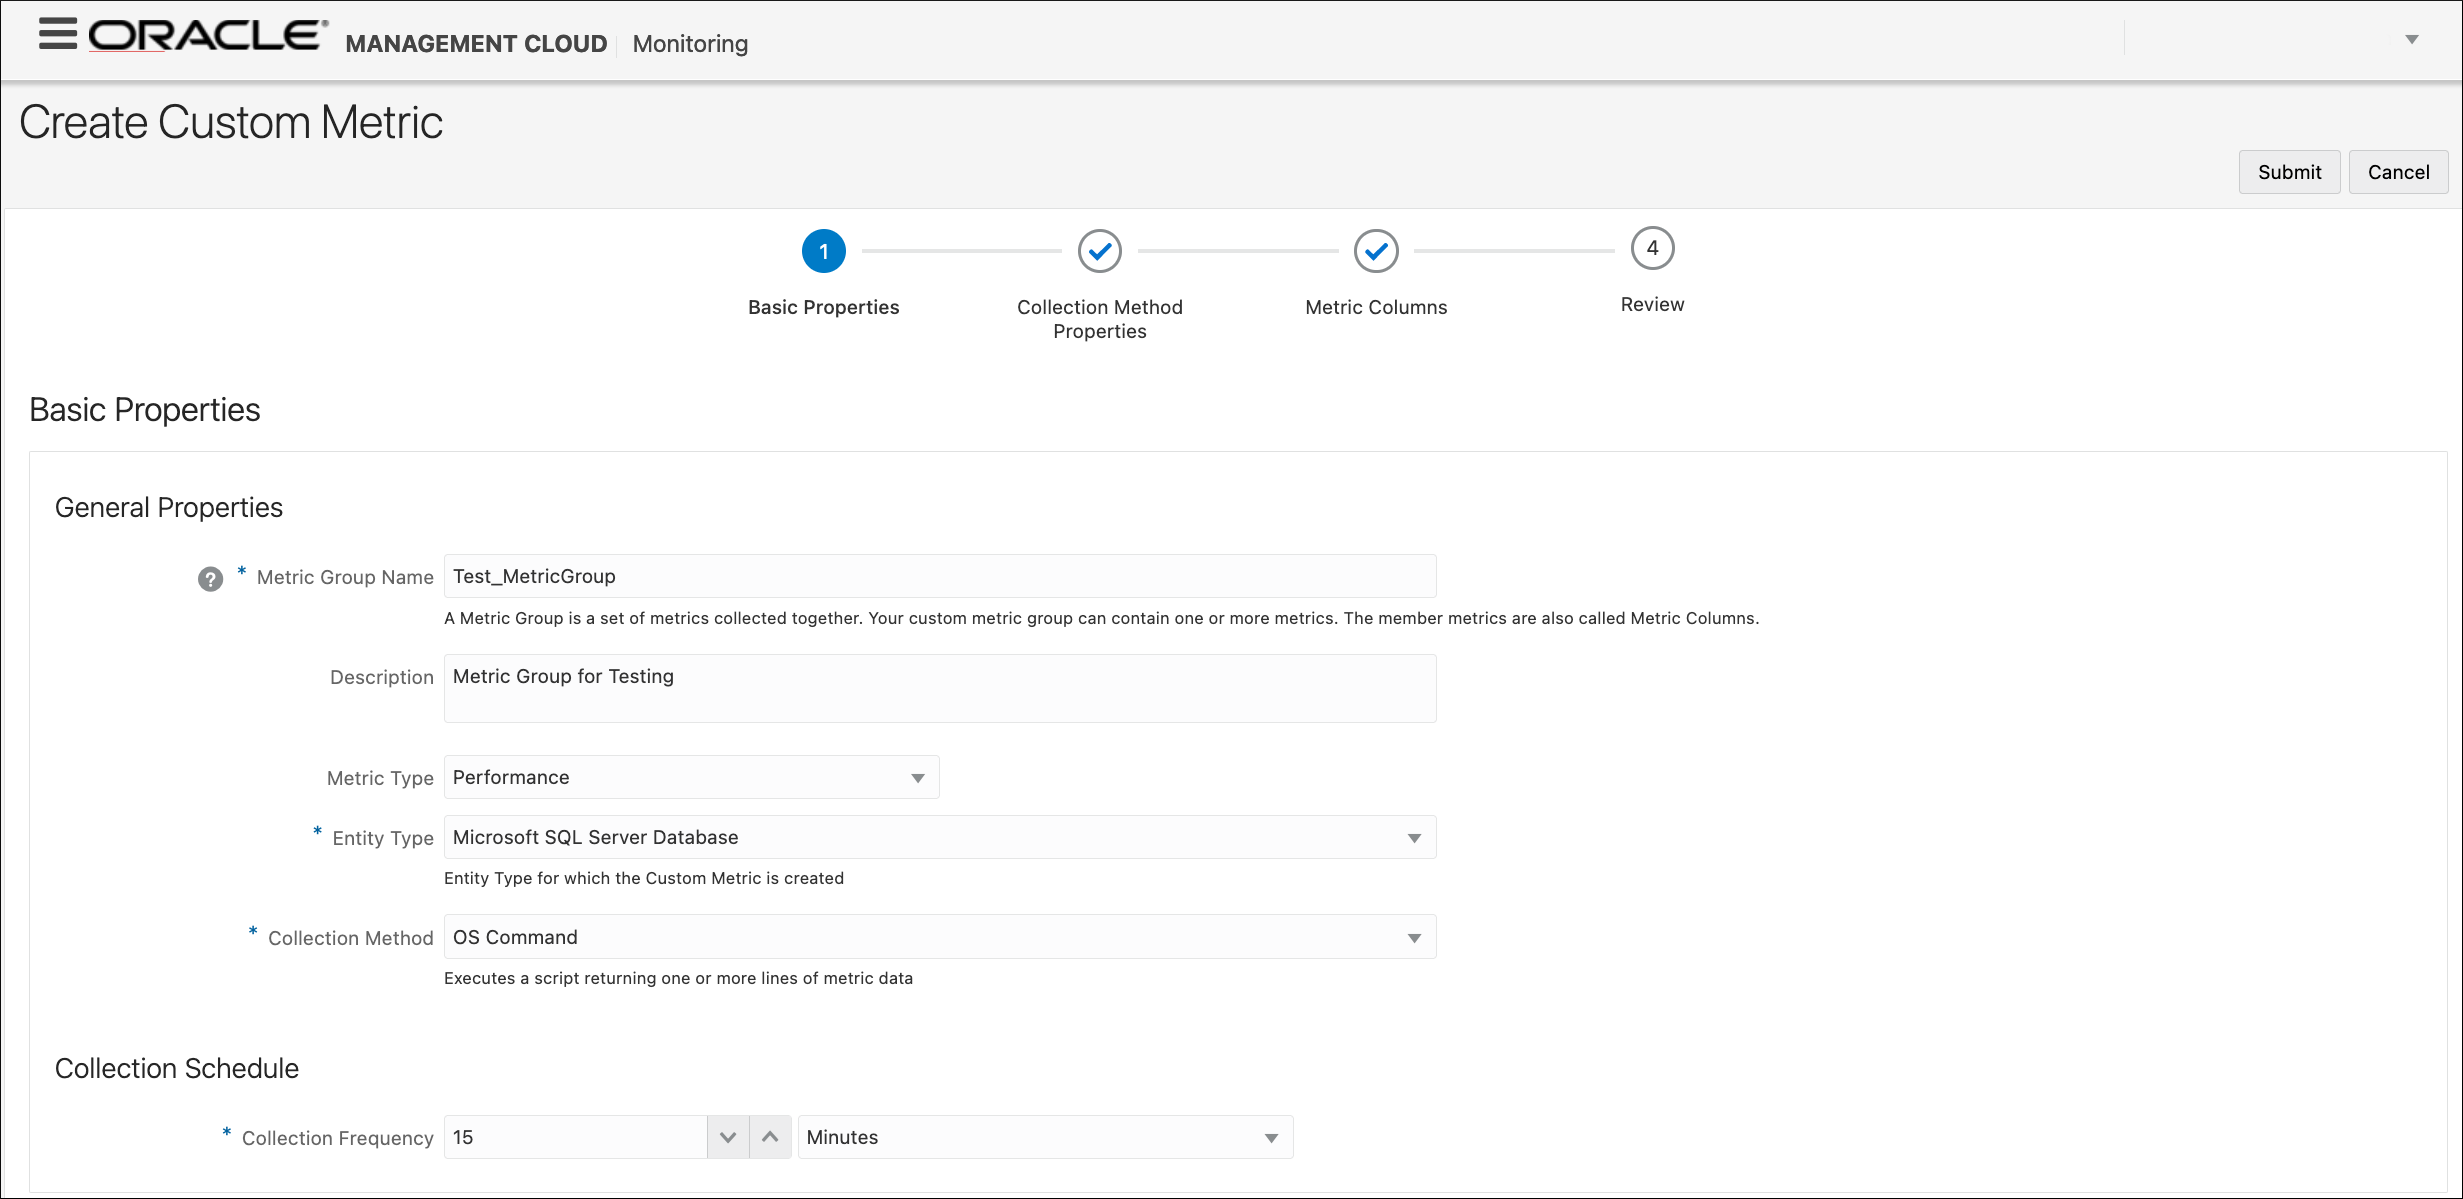
- Select Entity Type as MySQL or Microsoft SQL Server and enter/select the Basic Properties parameters:
- Click Collection Method Properties to go to the next page of the wizard.
- In the Collection Method Properties page, in the
Command field, you'll need to enter this specific
command. (substitute
%STATEMENT%with your SQL query for the Custom Metric).%JAVA_HOME%/bin/java -classpath %PLUGIN_ROOT%/archives/* oracle.sysman.emd.custommetric.CustomMetricQueryHelper "url=%url%" "driver=%jdbcdriver%" "stmt=%STATEMENT%"Note:
PL/SQL is not supported at this time.Examples: SQL statements for SQL Server:
SELECT 'Microsoft', 'Microsoft SQL Server', CONVERT(VARCHAR(50), SERVERPROPERTY('productversion'));SELECT create_date FROM sys.databases WHERE database_id= DB_ID();SET NOCOUNT ON DECLARE @DBInfo TABLE(DatabaseName VARCHAR(100), SpaceAllocated FLOAT, SpaceUsed FLOAT) DECLARE @command VARCHAR(5000) SELECT @command = 'Use [' + '?' + '] SELECT ' + '''' + '?' + '''' + ' AS DatabaseName, CAST(sysfiles.size/128.0 AS FLOAT) AS SpaceAllocated, CAST(CAST(FILEPROPERTY(sysfiles.name, ' + '''' + 'SpaceUsed' + '''' + ' ) AS FLOAT)/128.0 AS FLOAT) AS SpaceUsed FROM dbo.sysfiles' INSERT INTO @DBInfo(DatabaseName,SpaceAllocated,SpaceUsed) EXEC sp_MSForEachDB @command SELECT DatabaseName,SUM(SpaceAllocated)/1024 as [SpaceAllocated],SUM(SpaceUsed)/1024 as [SpaceUsed] FROM @DBInfo GROUP BY DatabaseName ORDER BY DatabaseName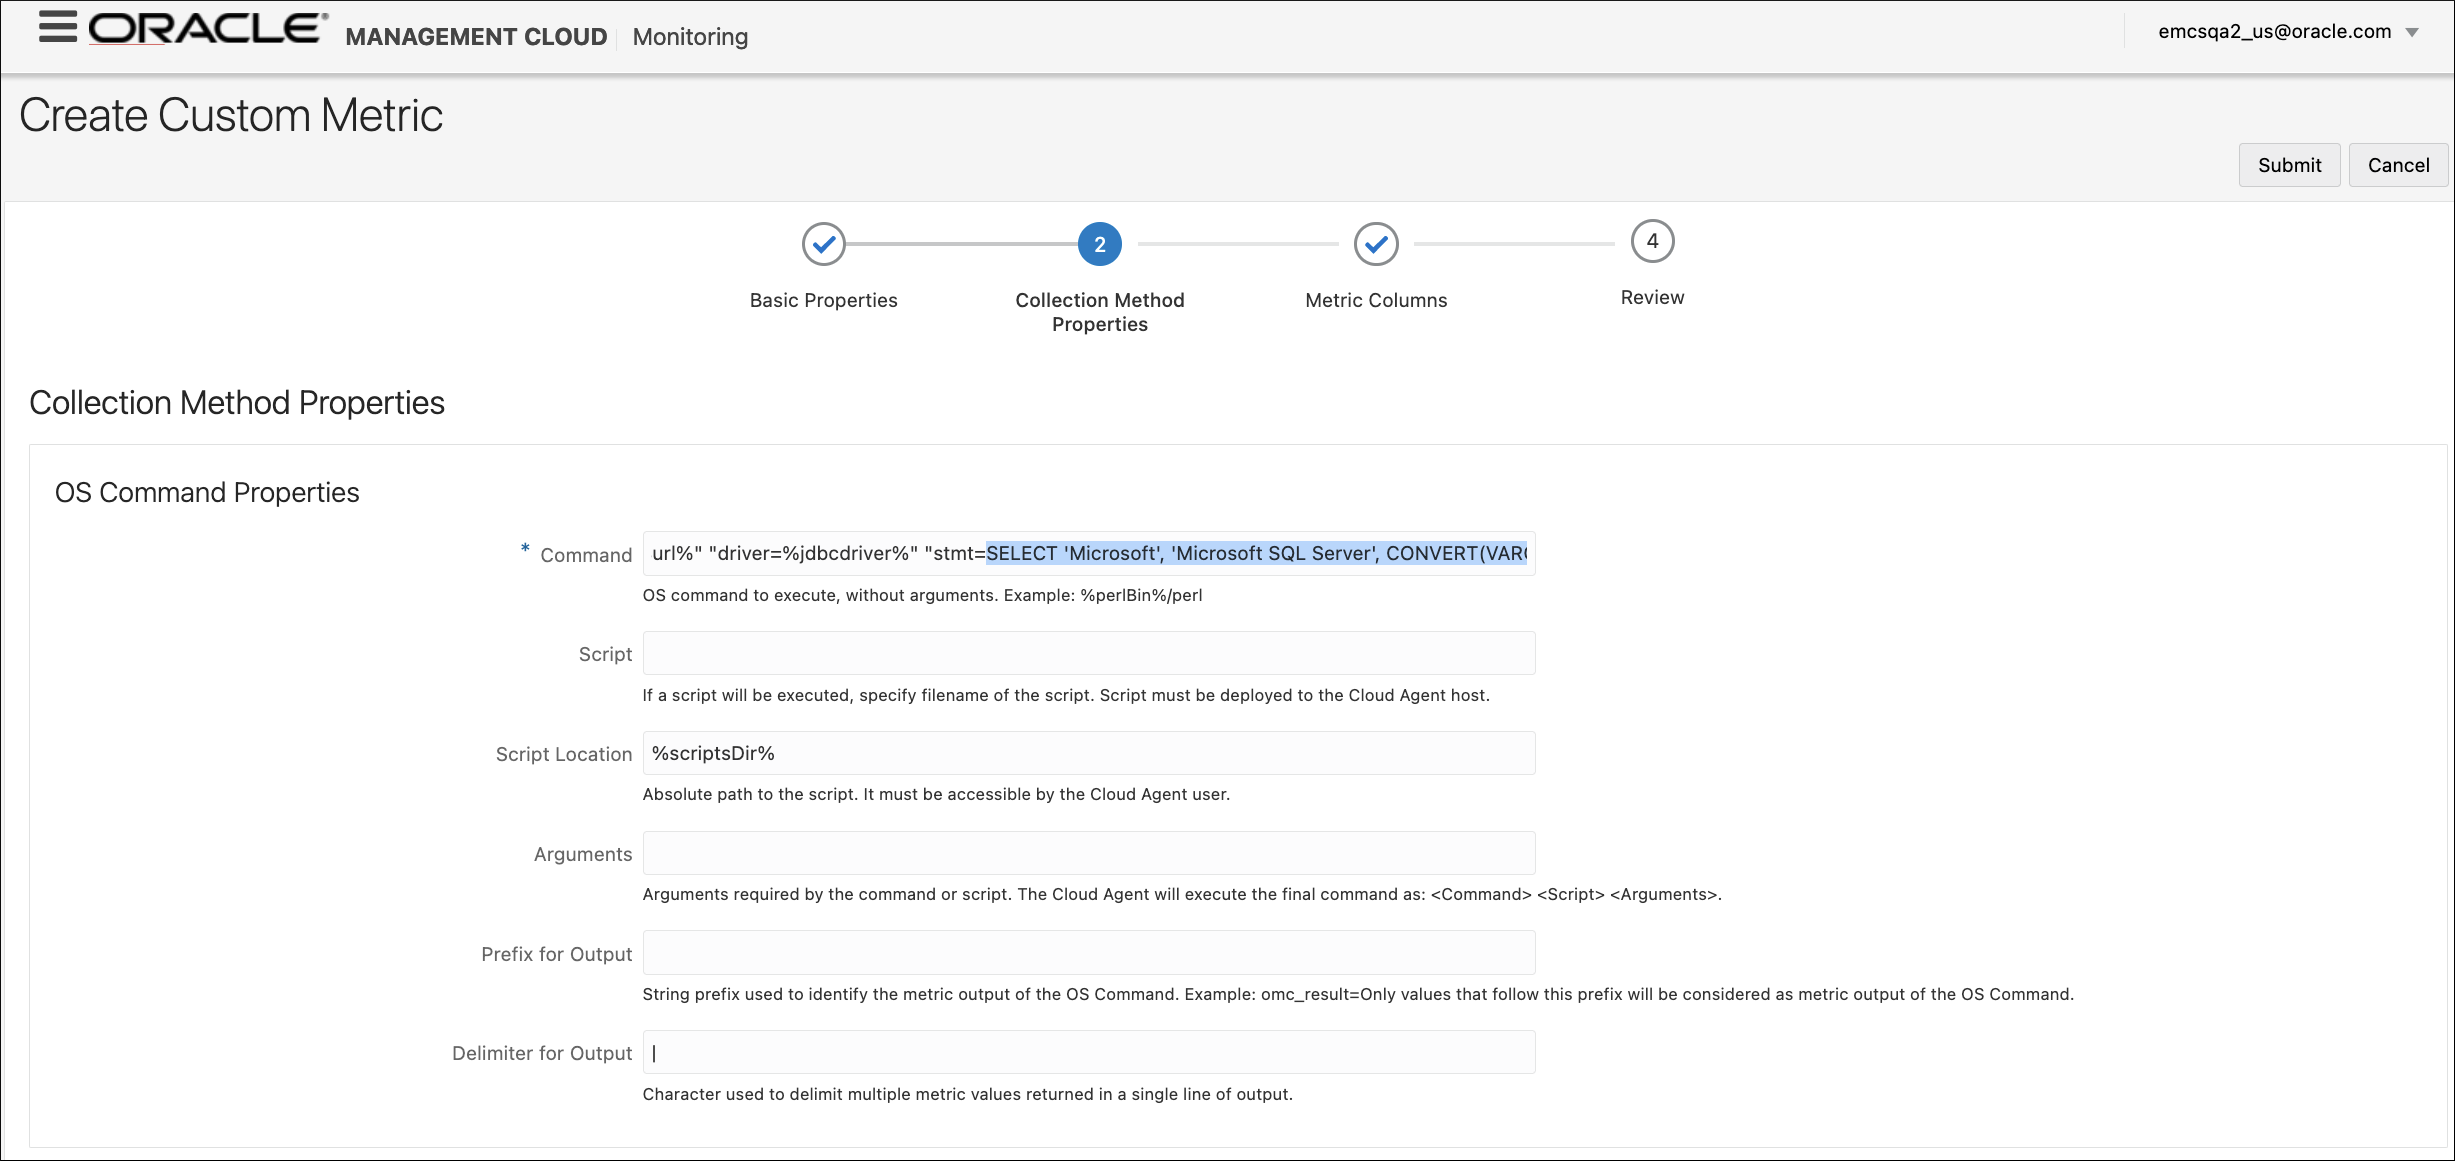
- Click Metric Columns at the top of page to go to the next page.
- On the Metric Columns page, define the metric columns for
each of the columns in the SQL query. To define each metric column,
click Add. The Add Metric Column dialog displays.
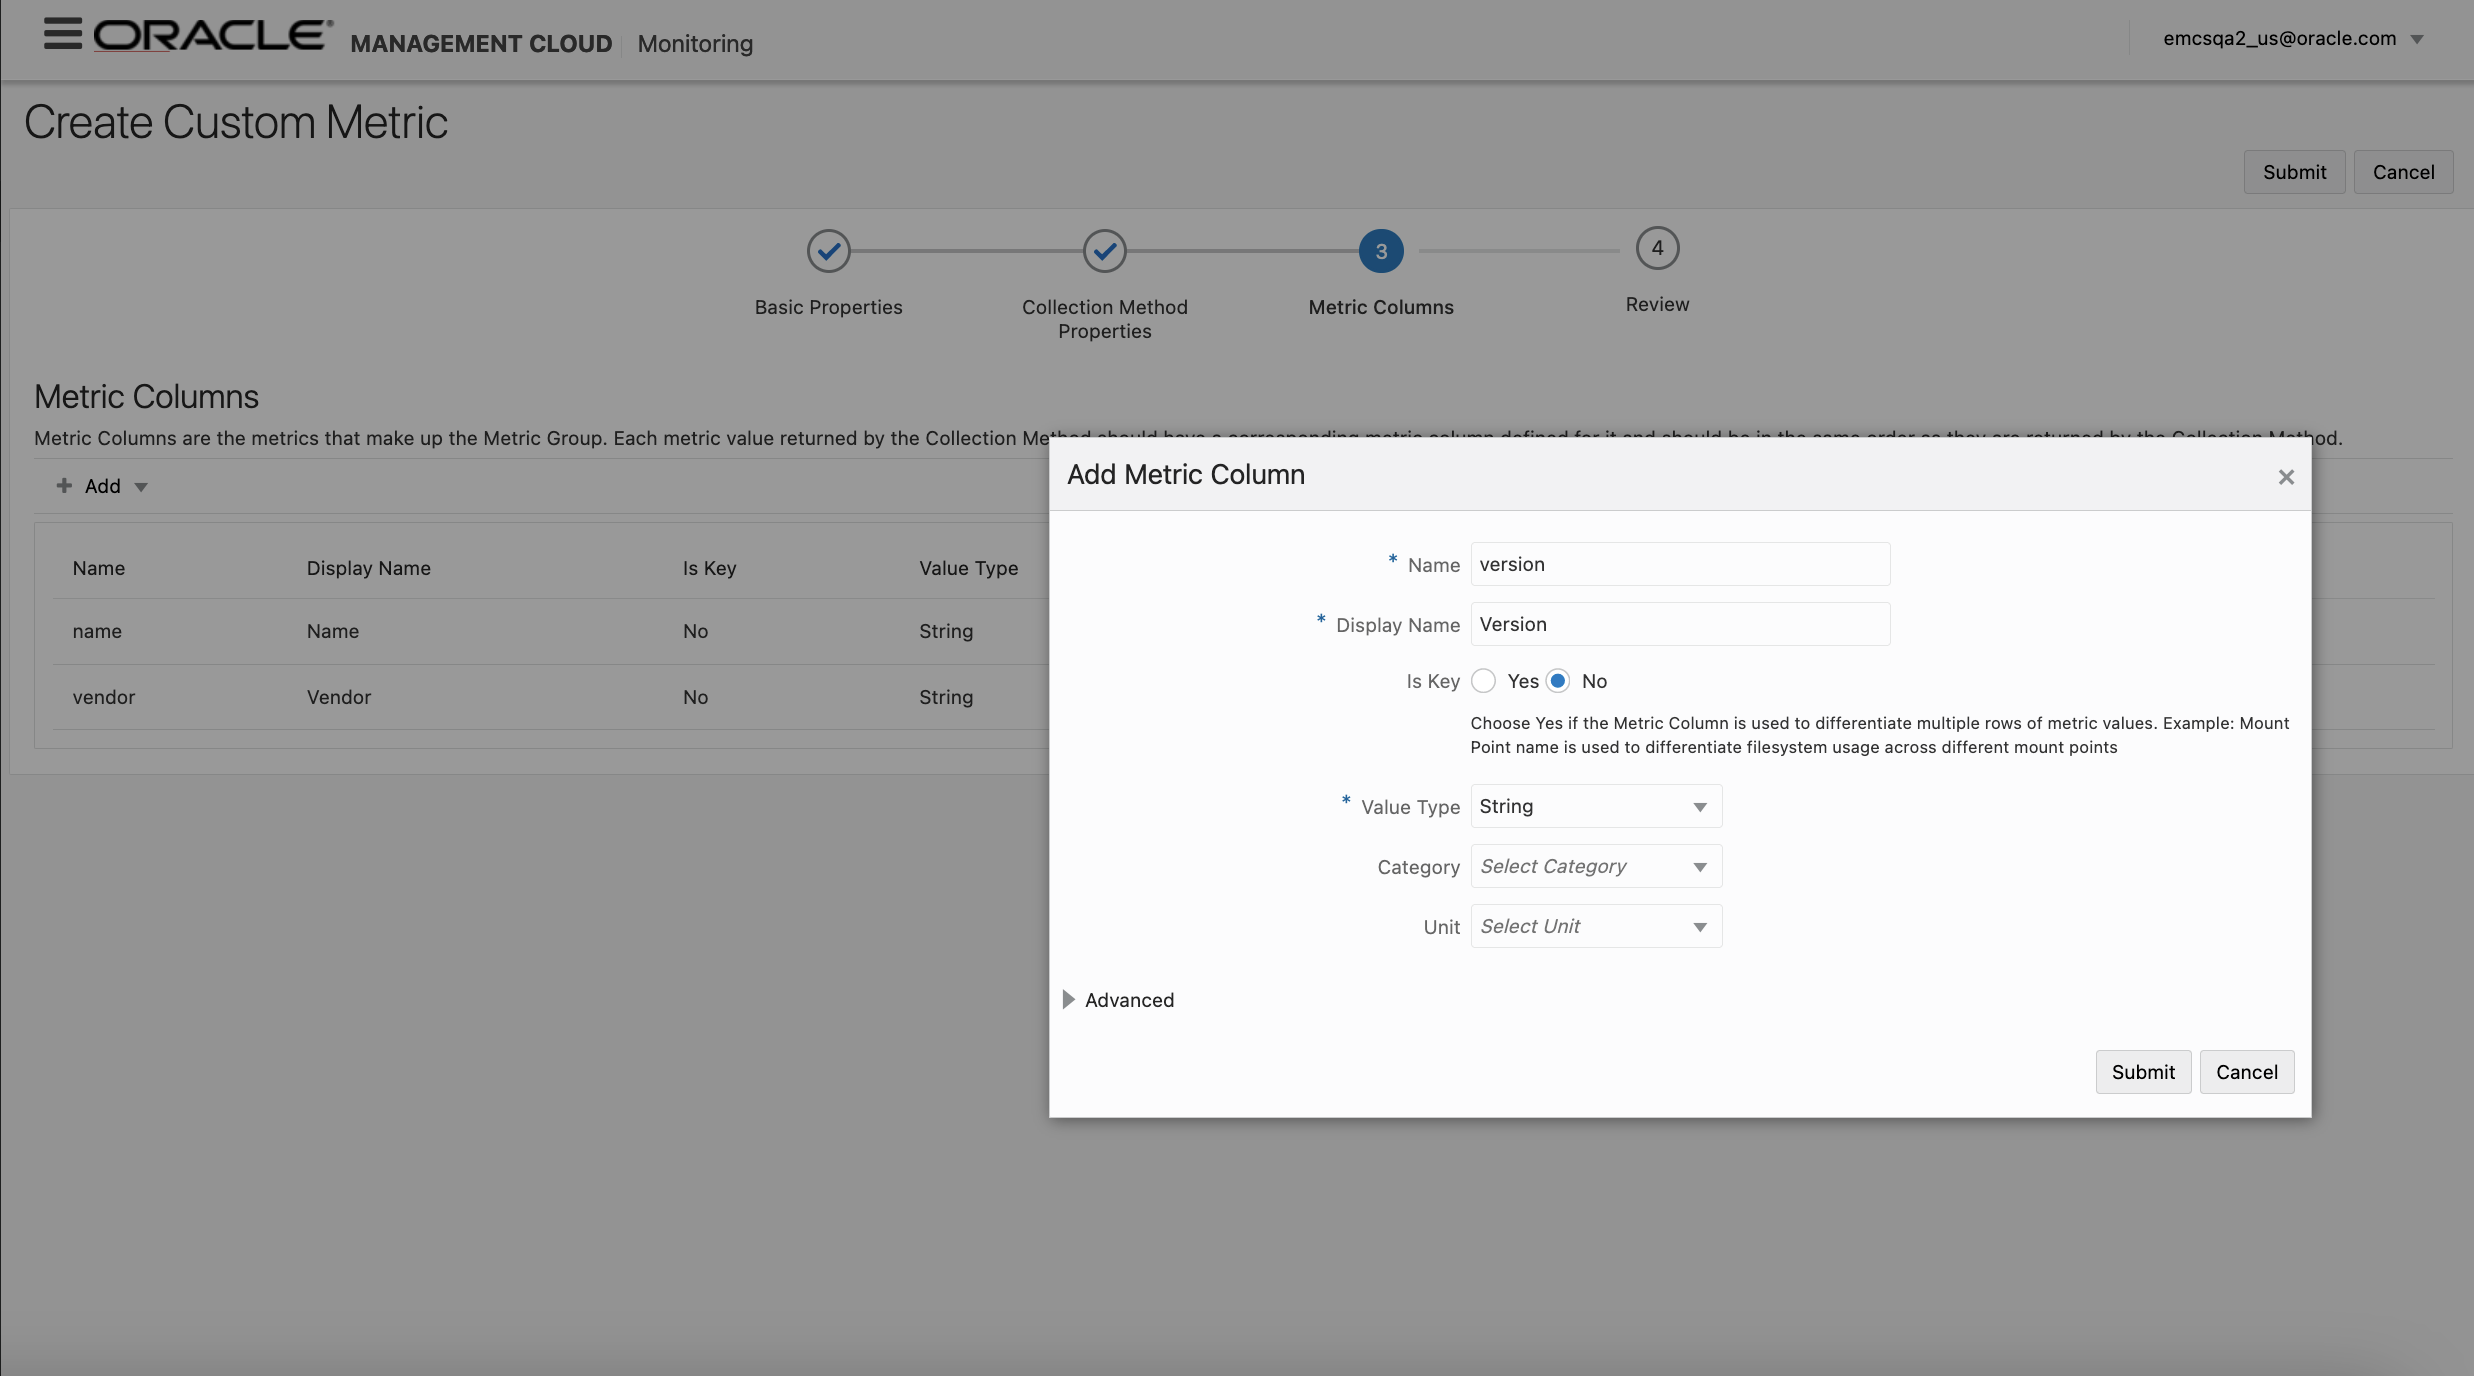
Enter the required metric column parameters and click Submit. All columns added will appear in the Metric Columns table. For more information about metric column creation, see Working with Custom Metrics and Custom Metric Collection Methods and Metric Columns.
- Click on Review at the top of the page to go to the next page.
- On the Review page, review the General Properties,
Collection Schedule, Collection Method Properties and Metric Columns
you defined in the previous step and, when ready, click
Submit.
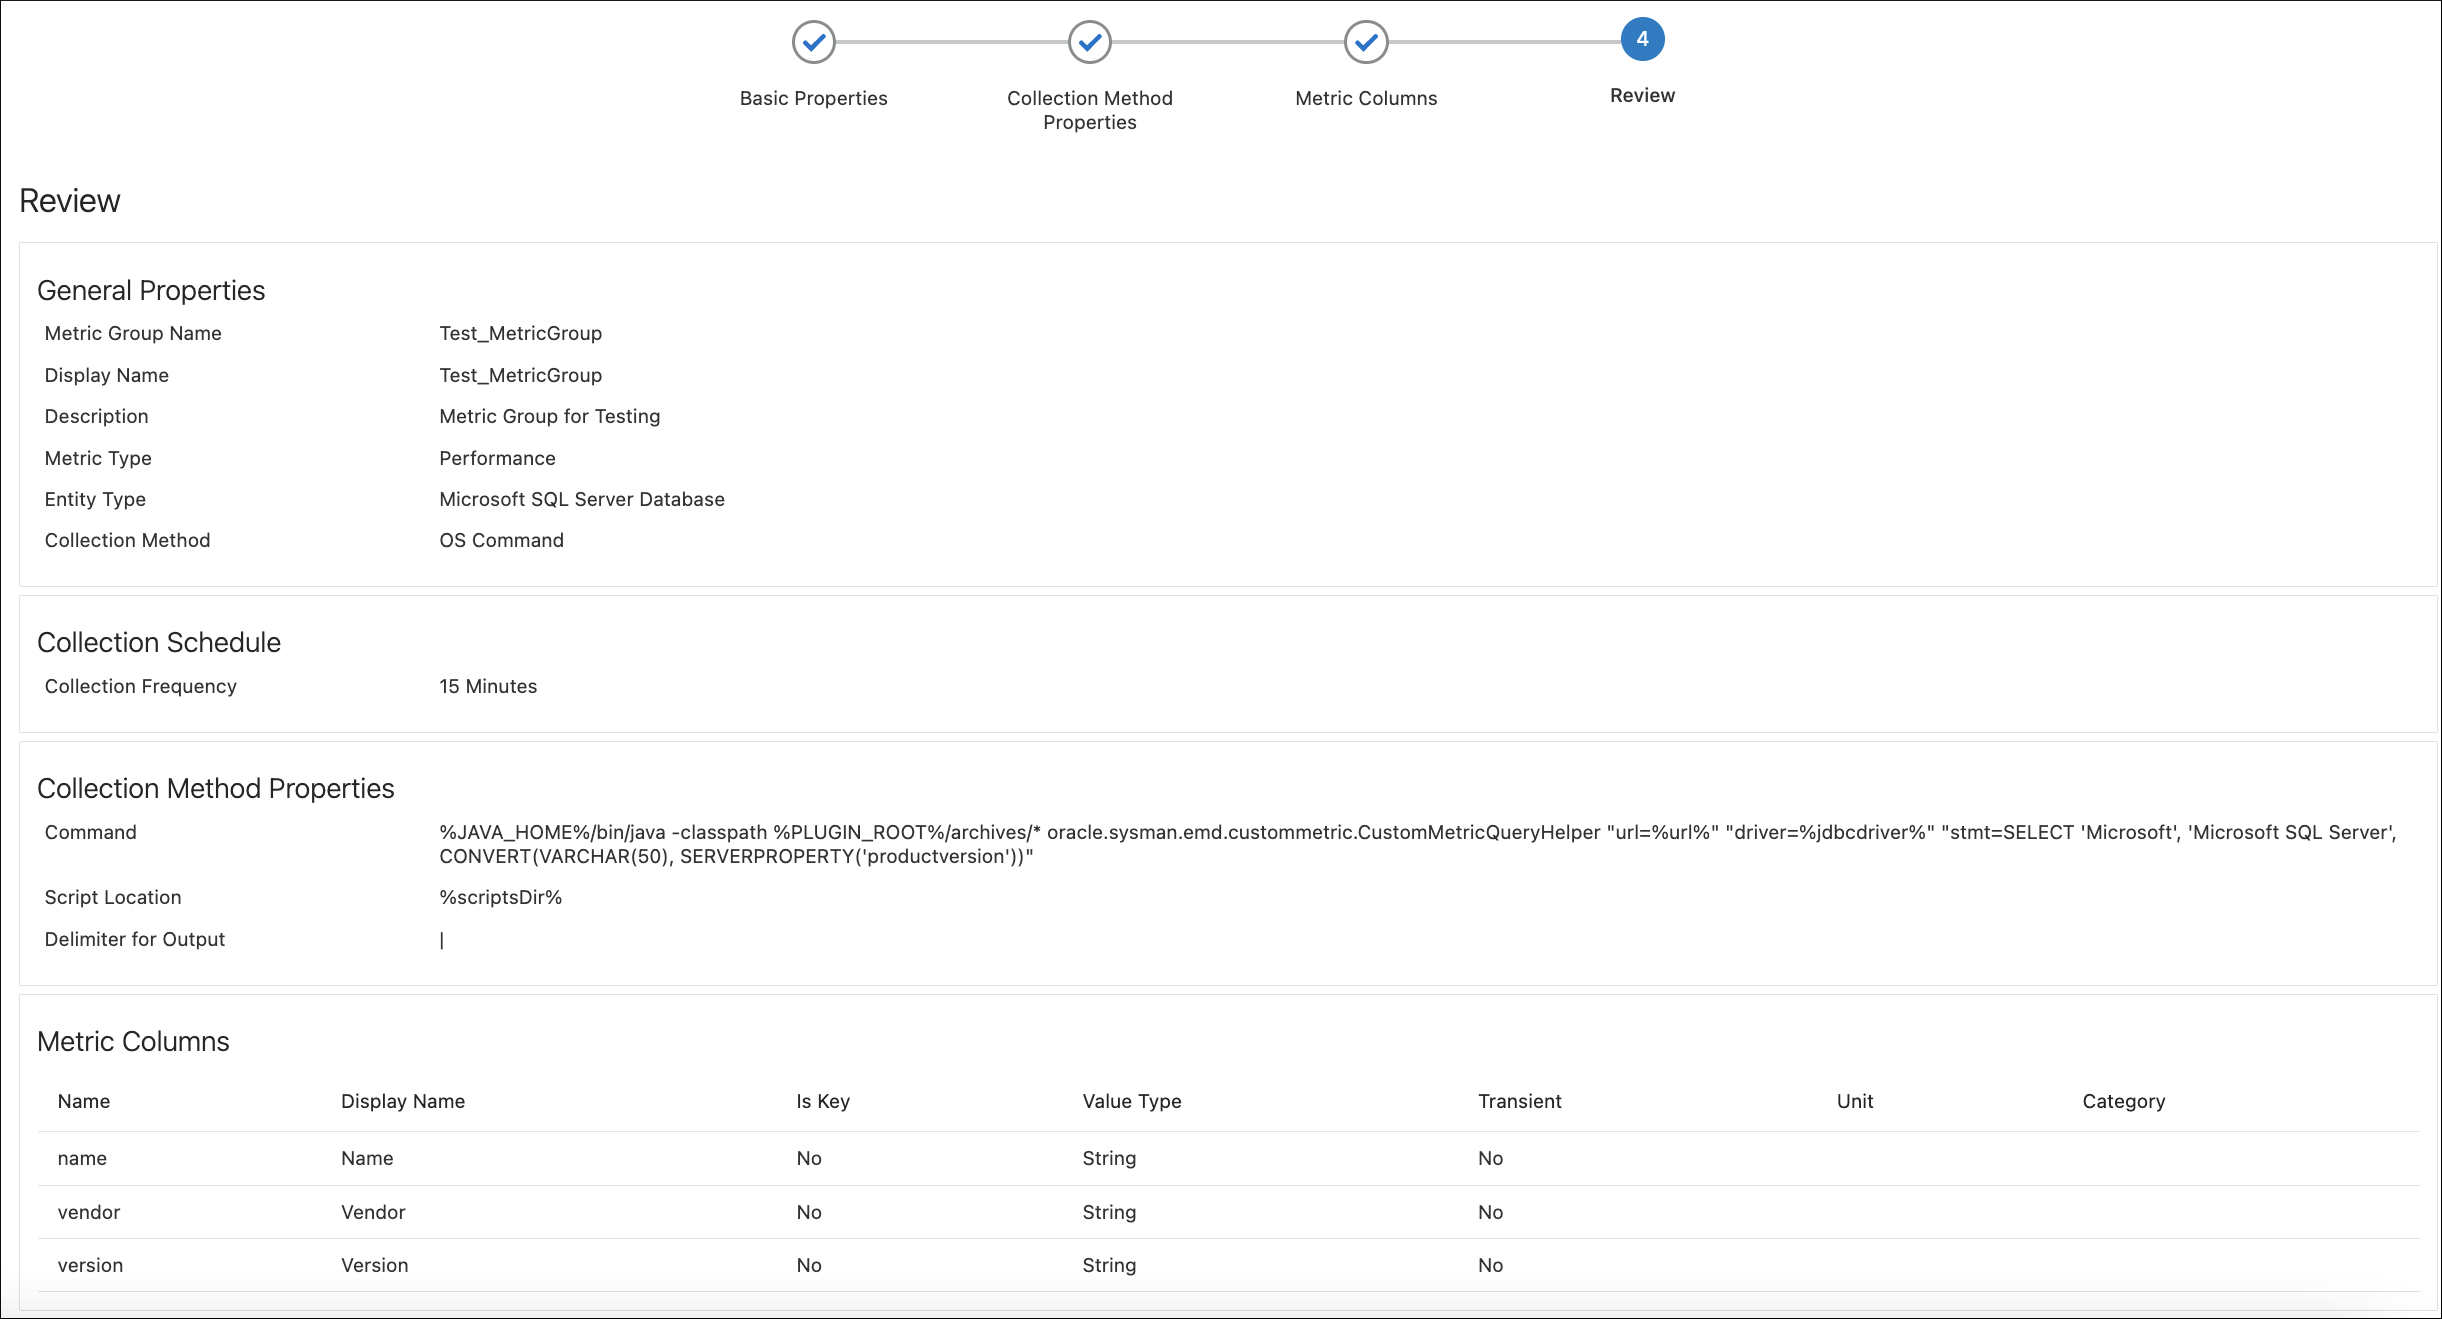
- Test the newly defined Custom Metric against existing
Microsoft SQL Server or MySQL Entity before Publishing and
Deploying.
- Choose a custom metric in draft status from the list on the Custom Metrics page.
- Click Test. The Test Custom Metric
page displays.
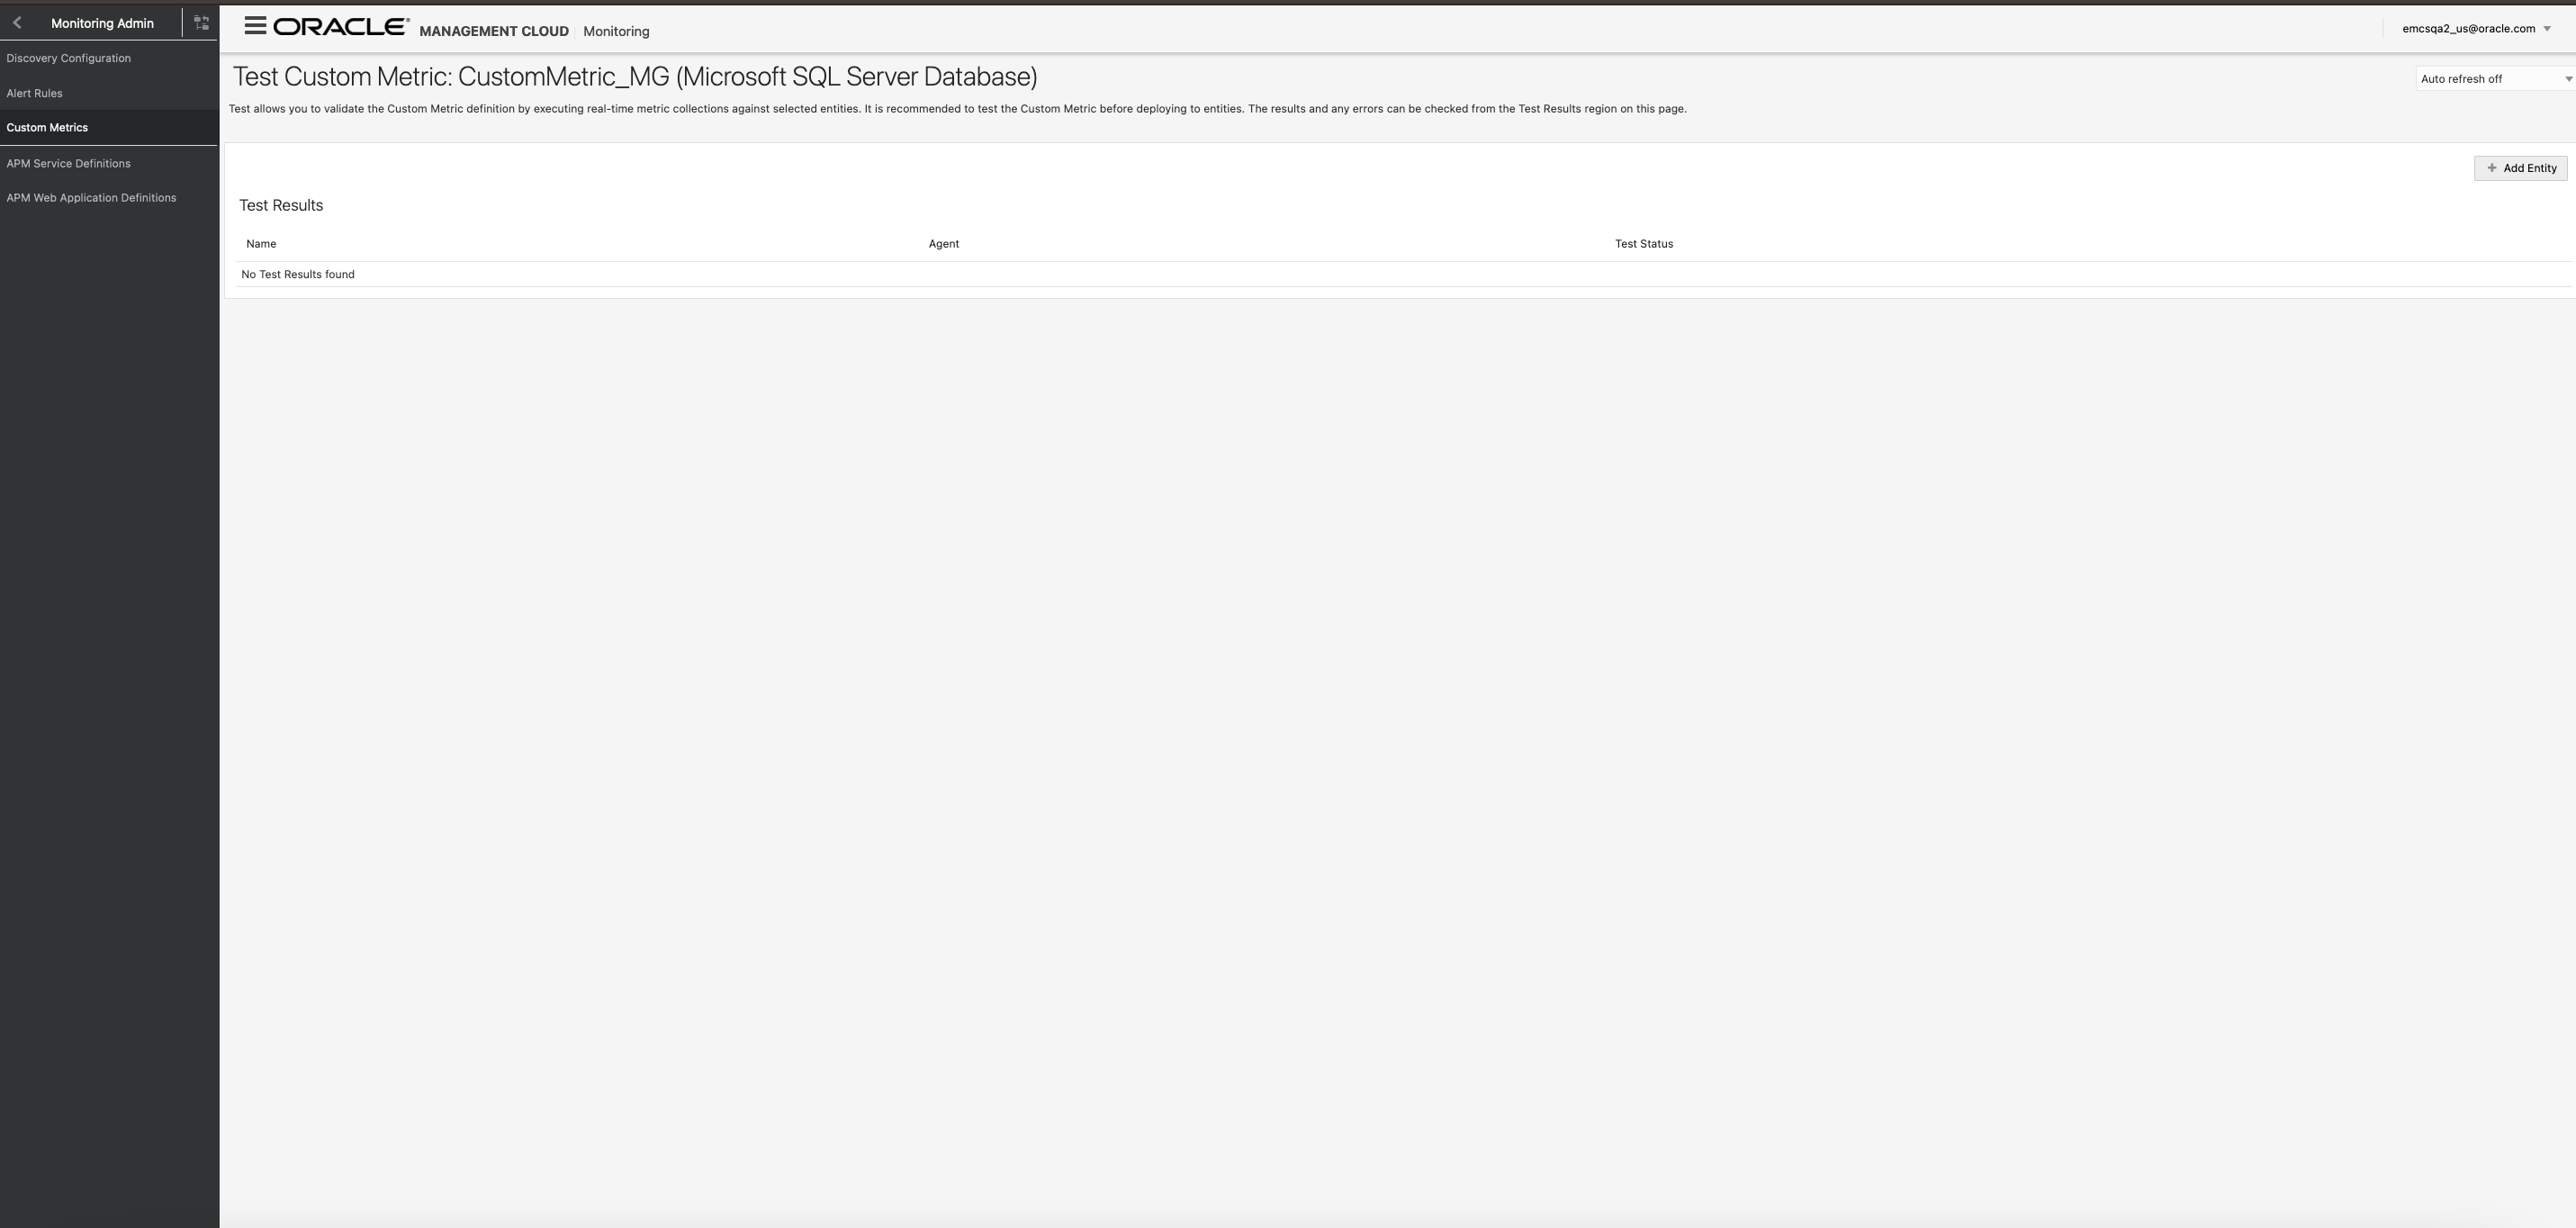
- Click Add Entity. The Select
Entities dialog displays. Select a Microsoft
SQL Server or MySQL entity.
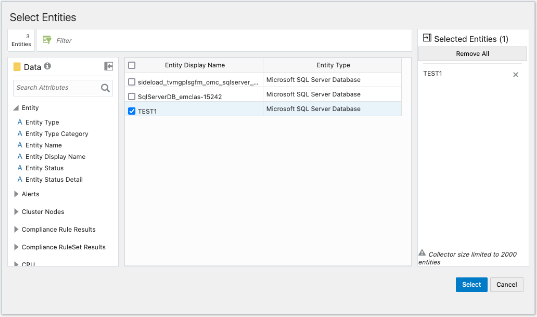
- Add one or more Microsoft SQL Server or MySQL entities then click Select.
- Click Test to begin the test
deployment process. While the test deployment job is
running, test status will be updated in the Test
Results region.
IMPORTANT: DO NOT use your browser's refresh/reload function or navigate away from this page. Doing so will erase the test result data. You can set the auto-refresh rate by using the refresh drop-down menu.
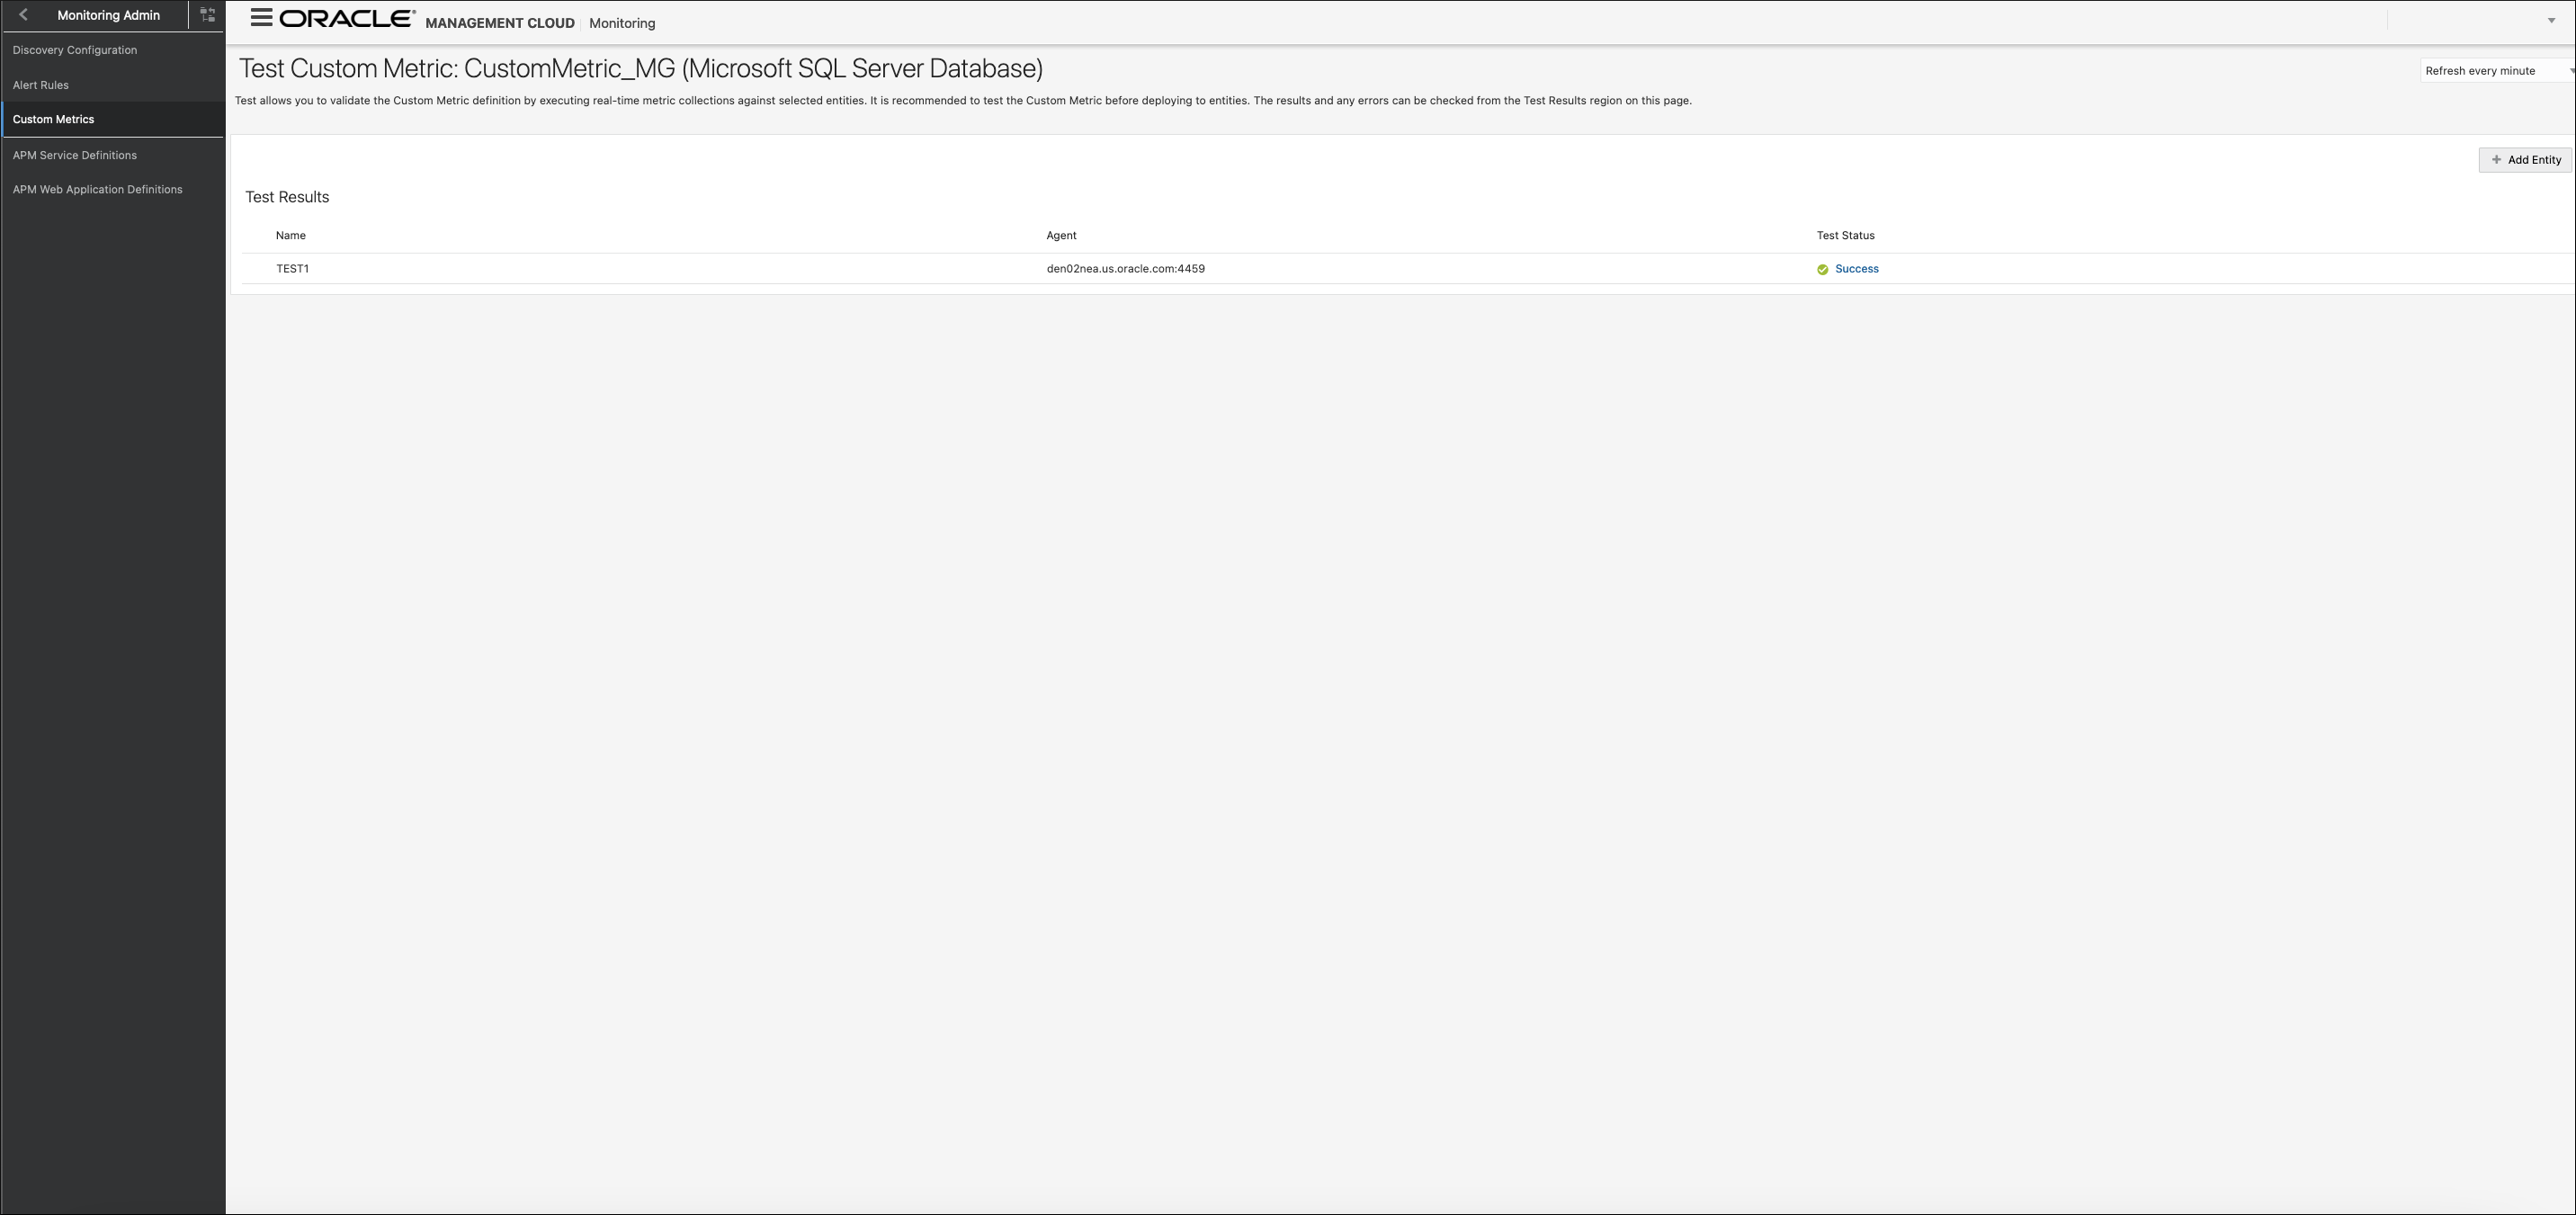
- If the Test succeeds, publish the custom
metric..
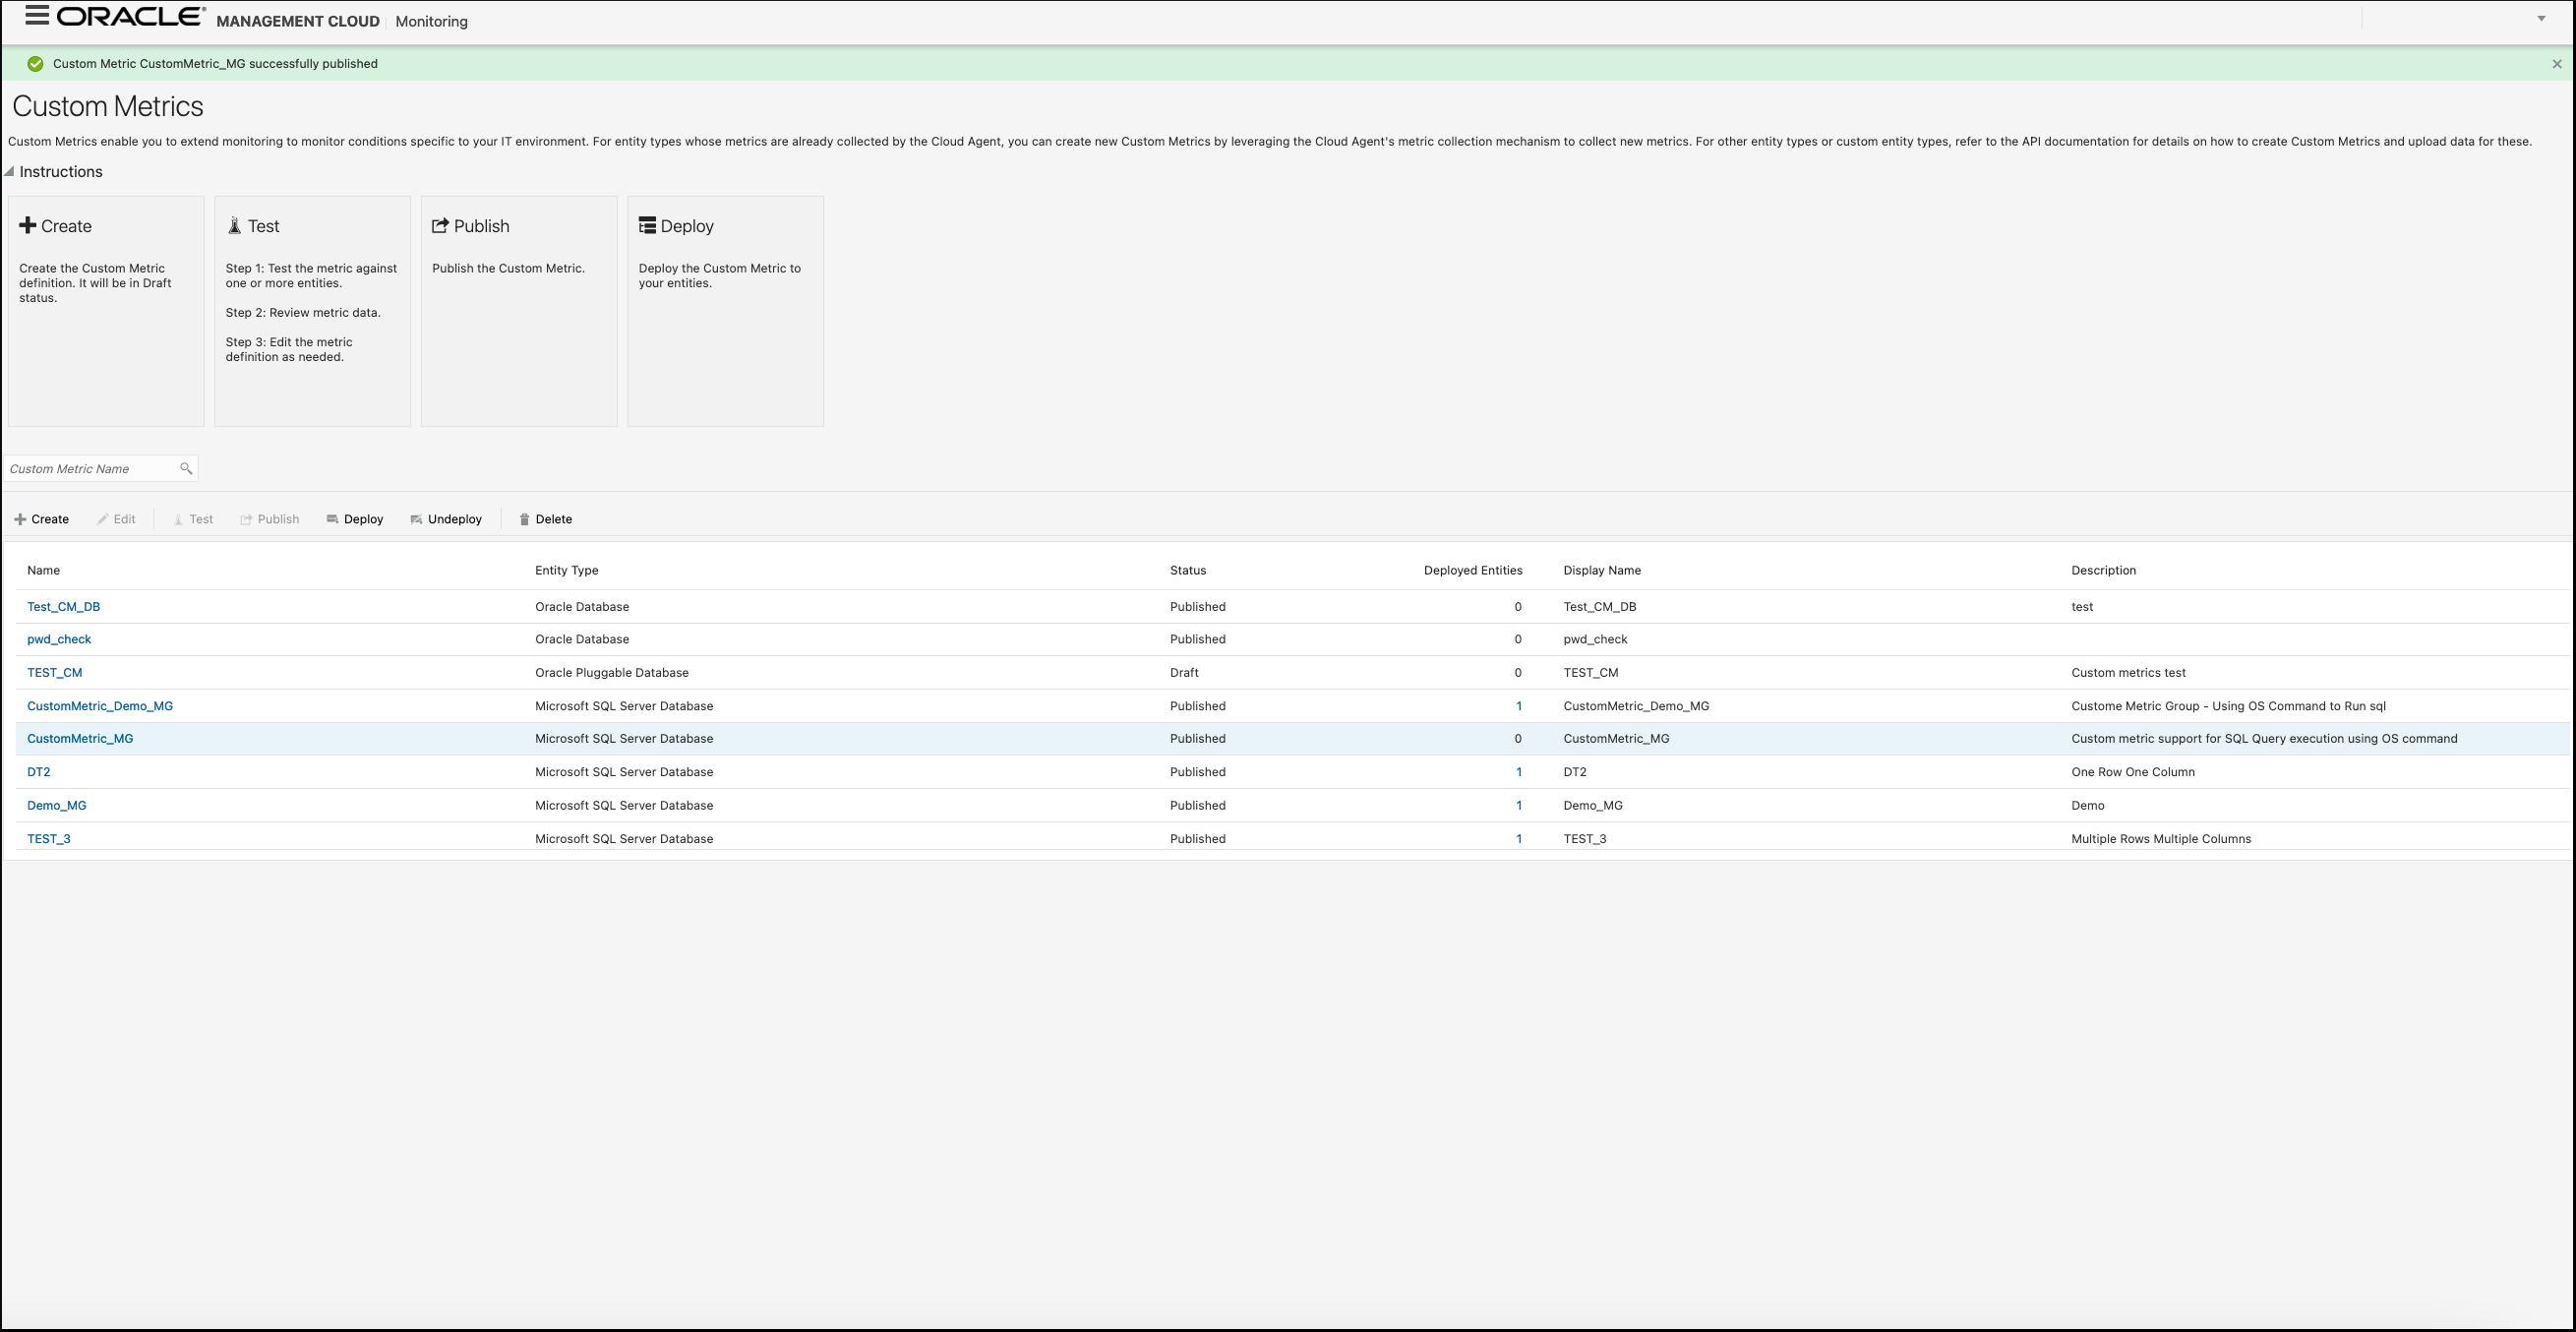
- Deploy the Custom Metric against the Microsoft SQL Server or MySQL
entities.
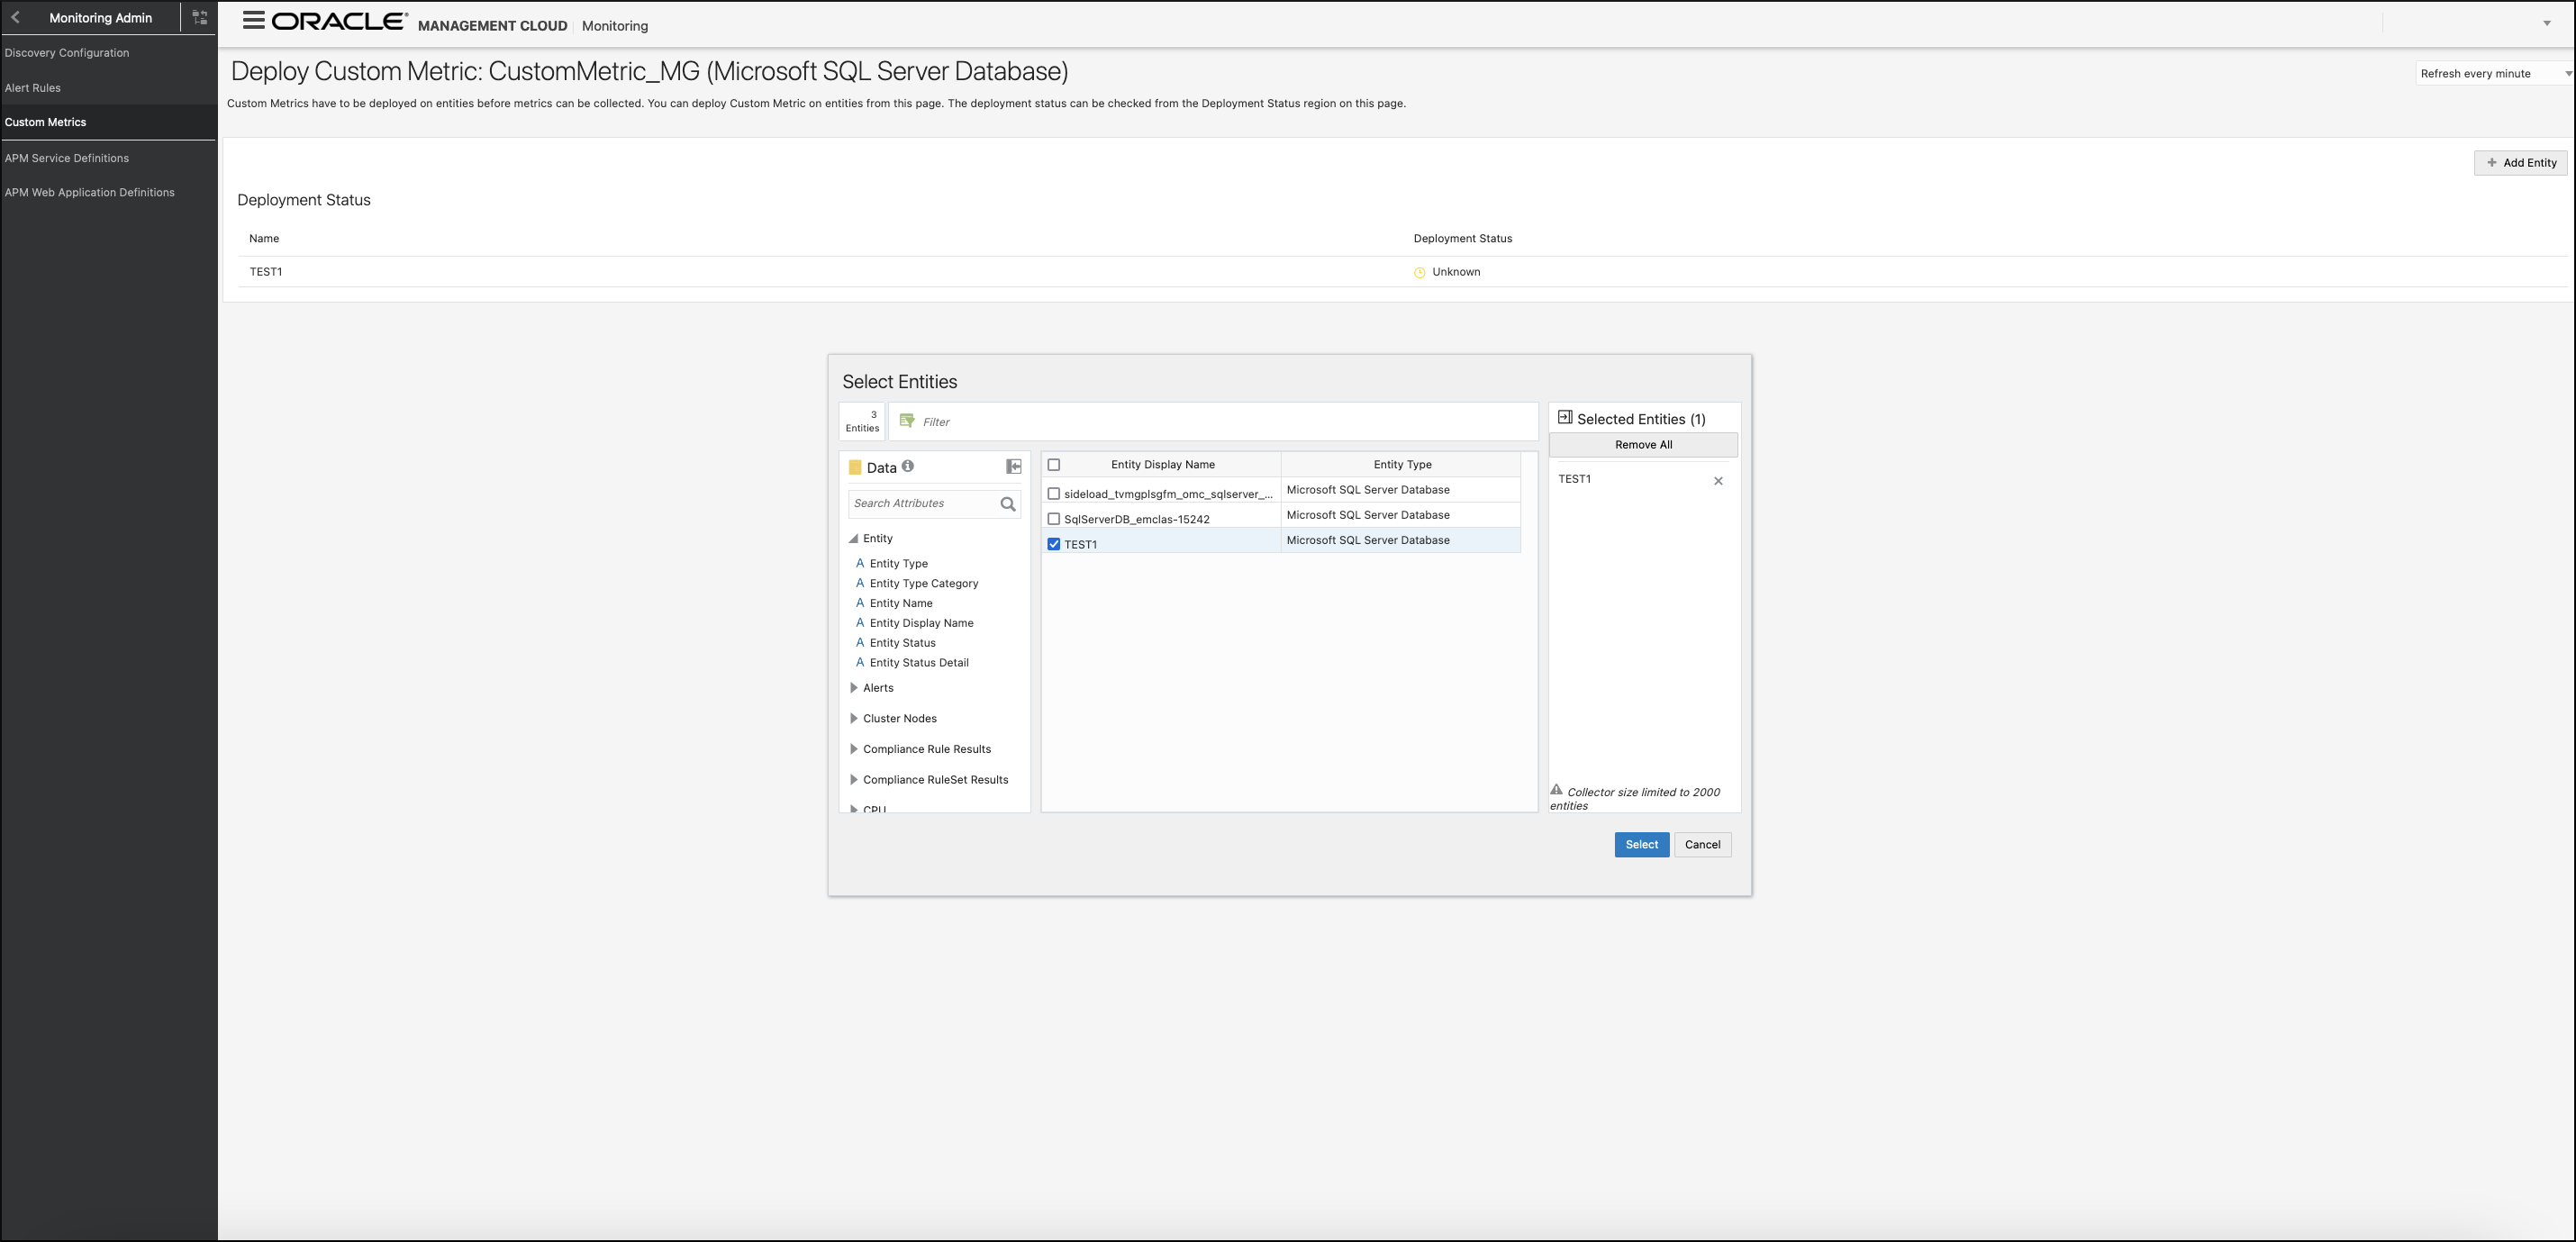
- Verify that the deployment of the custom metric is
successful.
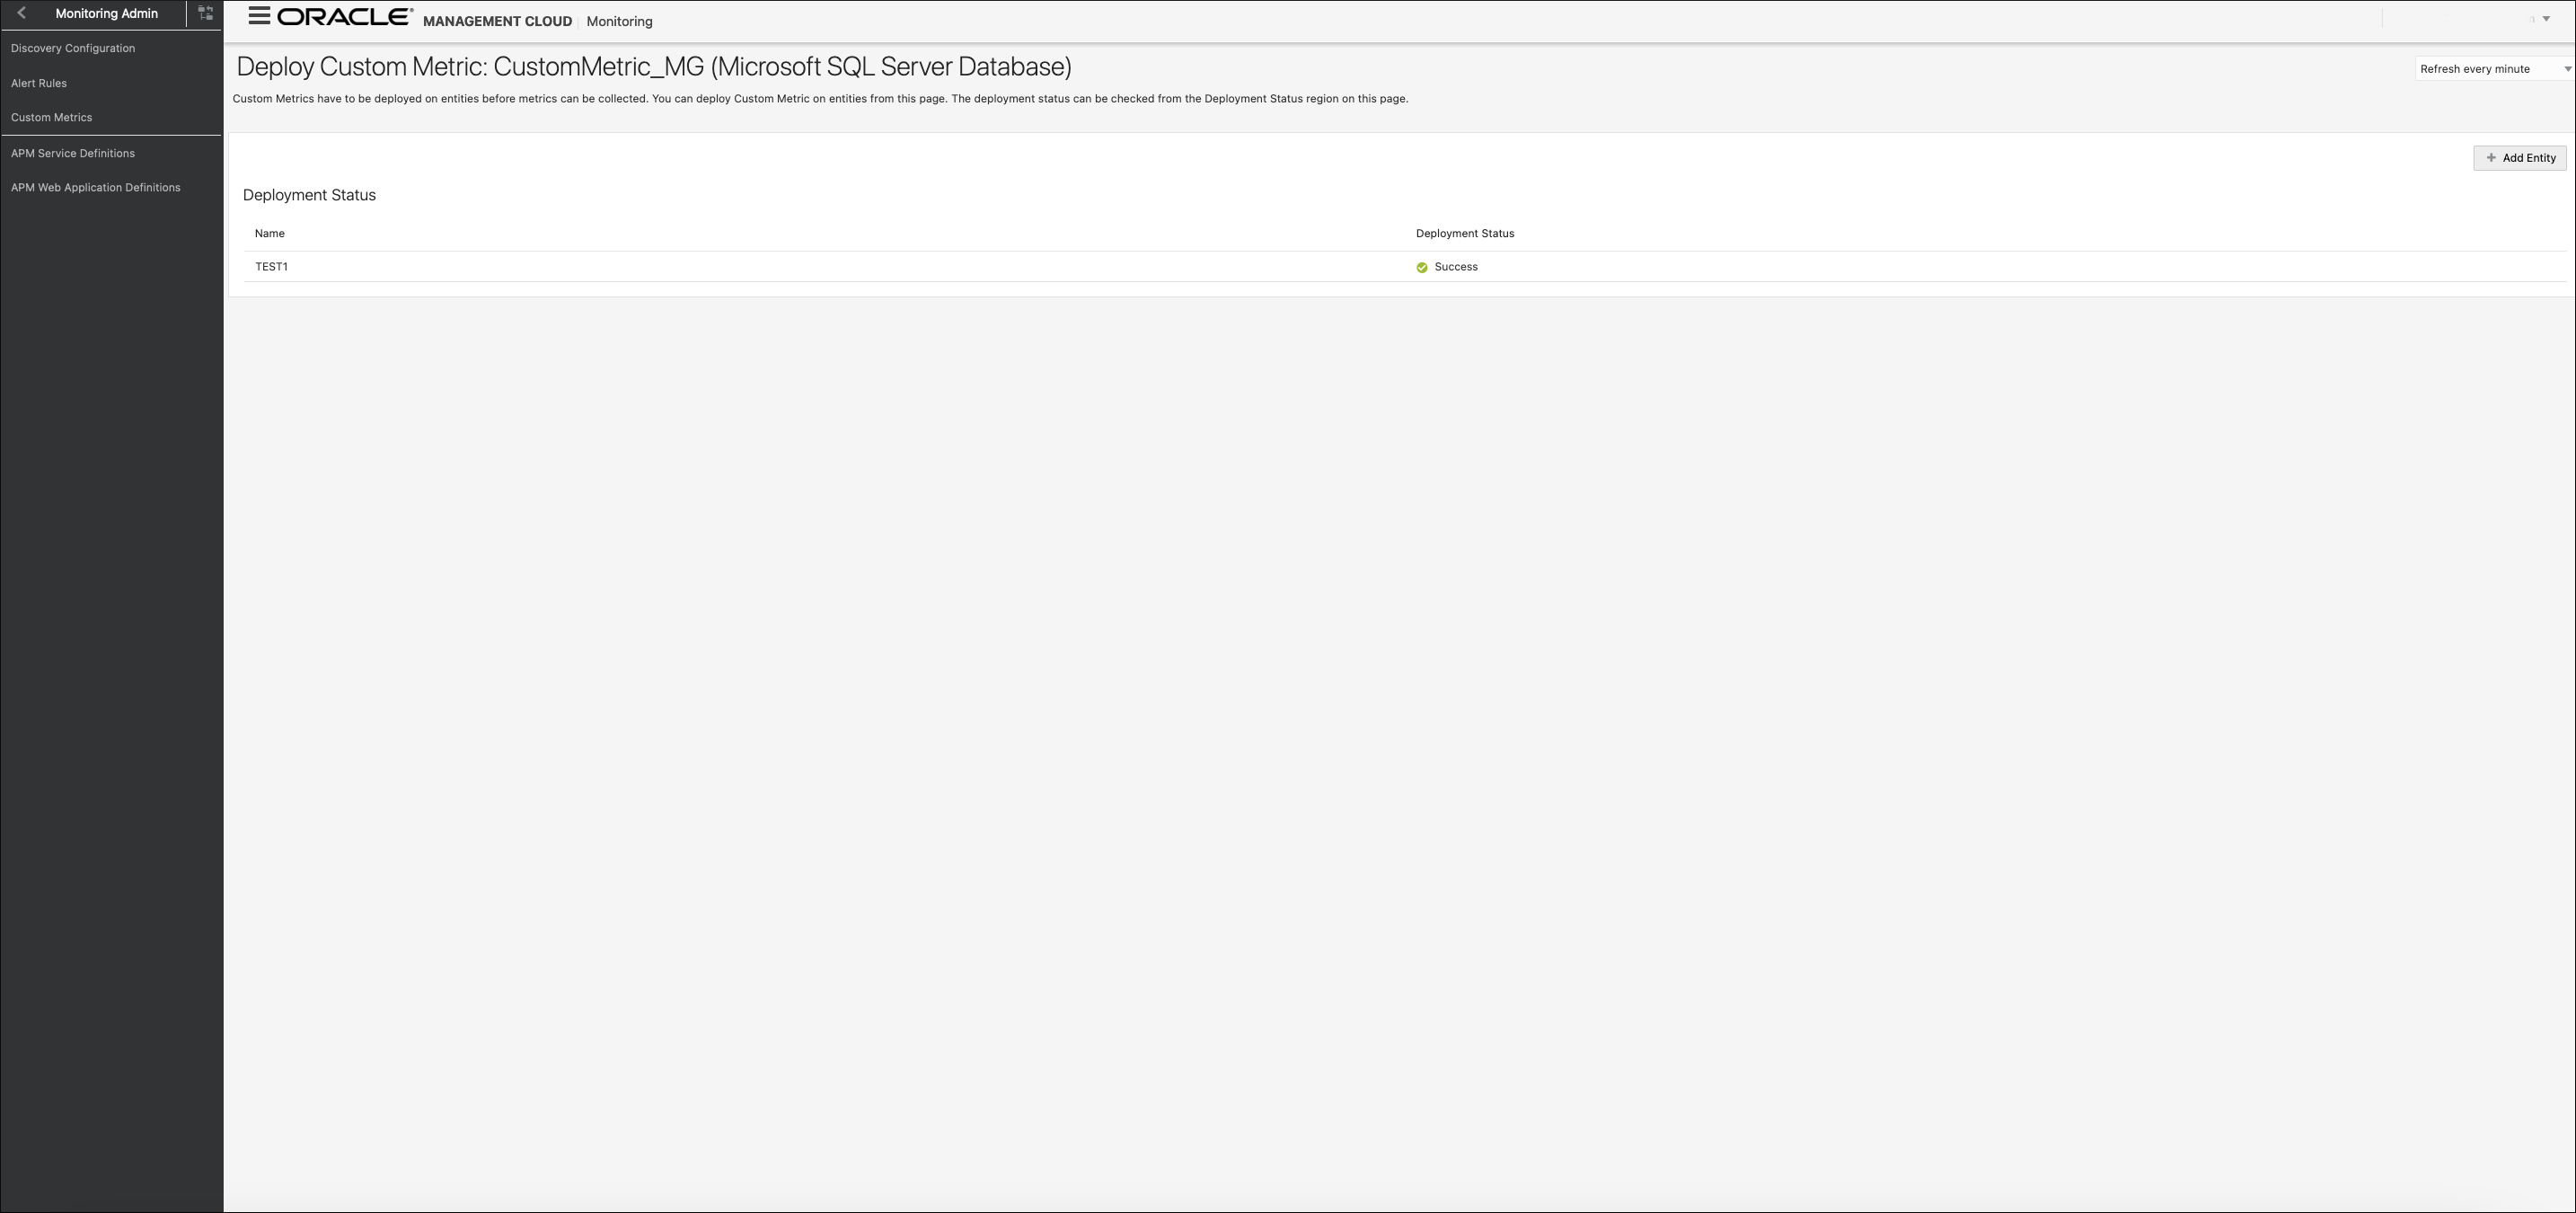
- After the deployment is completed, go to the homepage of the entity on which the custom metric has been deployed, where you will be able to add the Custom Metric to the charts in the homepage.