8 Localization
Even though NLP support is in English, you can still add multi-language support for your bot. Using resource bundles and autotranslation services, your bot can automatically translate the users messages that it receives and its own prompts and replies to and from English.
Resource Bundles
Resource bundles allow you to localize your bot based on the language set for messaging channel currently in use. They not only allow your bot to output messages in the user’s language, but in the user’s dialect as well. When you don’t want to rely on the text provided by the translation service, and instead want to control the wording for your bot’s responses in one or several languages, you can opt for resource bundles.
Create a Resource Bundle
You define a single bundle for each bot that’s made up of various keys that identify the output text that needs to be translated.
-
Click Resource Bundle in the left navbar (
 ).
).
-
Click Add Bundle.
-
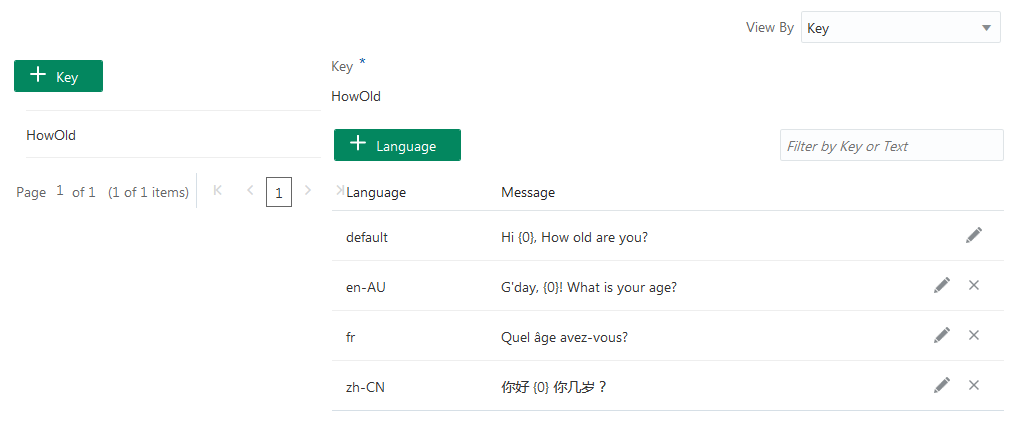
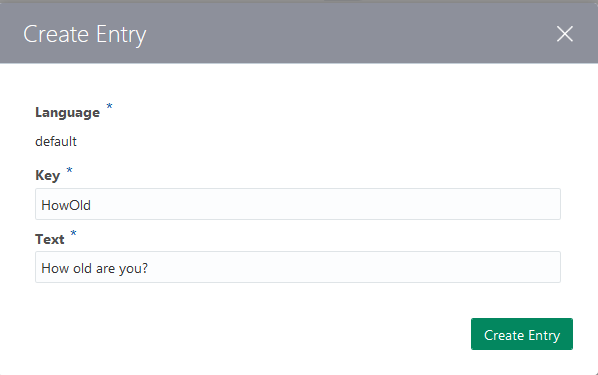
Enter the key and the and its text . For example, to localize the user prompt, How old are you?, you’d enter HowOld in the Key field and then How old are you? in the Text field .
-
Click Create Entry.
-
By default, the language for your first key is English. To add a foreign language version of the string, click. Add Language.
-
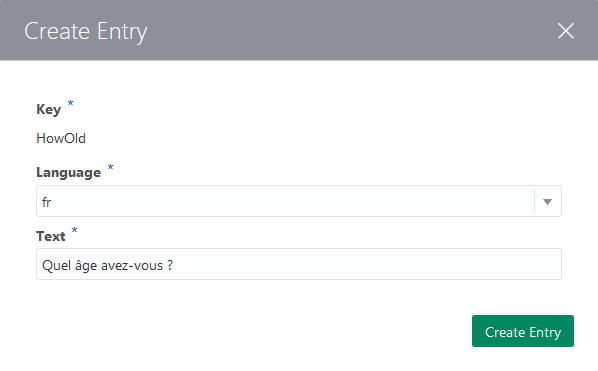
Complete the Create Entry dialog:
-
Language—Add an IETF BCP 47 language tag like
frfor French,defor German, oren-USfor U.S. English. -
Text—The output string. For example, for a French translation (
fr) of the HowOld key, you’d add a string like quel âge avez-vous ?Note:
If the bot can’t match the language set for the browser with a language tag defined in the bundle, it defaults to a less-specific tag (if one is available). For example, it usesfr(a subtag) if the bundle has no entry forfr-CA. If none of the entries match the browser’s language, the bot uses the default entry, English. For more information on this fallback to the most generic entry, see Resource Bundle Entry Resolution
-
-
If you want to translate other strings, click Add Key to create another entry in the resource bundle.
-
Reference the resource bundle in the in the dialog flow.
Tip:
You can define the entity prompts as a resource bundle. See Create Entities.
Reference Resource Bundles in the Dialog Flow
rb, in the context section. Further down, value expressions define the text property for the System.Output components reference the rb variable and the keys, WhatType and OnTheWay. The first outputs a simple string and the other uses dynamic values. context:
variables:
rb: "resourcebundle"
...
pizzaType:
component: "System.Output"
properties:
text: "${rb('WhatType'}" # rb refers to the variable, WhatType is the key to the message in the resource bundle.
transitions: {}
...
done:
component: "System.Output"
properties:
text: "${rb('OnTheWay',size.value,type.value)}" # size.value and type.value are the arguments for the 'OnTheWay' message code.
transitions:
return: "done"
${rb.WhatType}).
Tip:
To test your resource bundles using the Tester, set your browser to another language.Enabling Complete Translation When Using Resource Bundles
rb context variable is set, but in this PizzaBot, it’s accompanied by another variable called translated. Because both the System.DetectLanguage and System.TranslateInput components are positioned before the System.Intent component, they enable the initial user input to be translated into English before it can be used by the System.Intent component and resolved to one of the intents.metadata:
platformVersion: "1.0"
main: true
name: "PizzaBot"
parameters:
age: 18
context:
variables:
size: "PizzaSize"
type: "PizzaType"
crust: "PizzaCrust"
iResult: "nlpresult"
rb: "resourcebundle"
translated: "string" # holds the user's text that's translated into English.
states:
# add DetectLanguage and TranslateInput components
  detect:
    component: "System.DetectLanguage"
    properties: {}
    transitions: {}
# translate the user text and store it in the translated variable
  translate:
    component: "System.TranslateInput"
    properties:
      variable: "translated"
    transitions: {}
intent:
component: "System.Intent"
properties:
variable: "iResult"
sourceVariable: "translated" # this variable now would holds the translated text
confidenceThreshold: 0.4
transitions:
actions:
OrderPizza: "resolvesize"
CancelPizza: "cancelorder"
unresolvedIntent: "unresolved"
...
Resource Bundle Entry Resolution
${profile.locale} to the dialog flow definition. Intelligent Bots will look up the right message based on the user’s locale. For example, if the ${profile.locale} returns en-AU-sydney as the value for the languageTag variable that’s set in the context section, Intelligent Bots returns the bundle entry by first searching for an exact match. If it can’t return a match, it broadens its search. In this case, Intelligent Bots does the following to localize the output as Australian English:
-
Searches the bundle using a language-country-variant criteria. In this case, it searches for
en-AU-sydney. -
If it can’t find that, it searches the bundle by language and country (
en-AU). -
Failing that, it broadens its search for language (
en). -
If it can’t locate any entries, then it returns the default language, which is English (
en).
Autotranslation
Autotranslation uses services like Microsoft Translator and the Google Translation API to enable the built-in components like System.Text and System.Output to output their prompts in the user’s language.
When a user enters a non-English request or response, the translation service allows the bot to convert this input to English. Once it’s translated, the NLP engine can resolve it to an intent and match the entities. Using both a translation service and an OBotML definition that includes the System.DetectLanguage and System.TranslateInput components, you can enable your bot to automatically detect the user’s language and translate your bot’s messages.
Enable Autotranslation
-
First, configure a translation service for your instance of Intelligent Bots. To do this, enter the URL and Authorization token for the Microsoft Translator service or the Google Translation API in the Translation Services dialog.You can open this dialog from the menu on the landing page or from the Settings page.
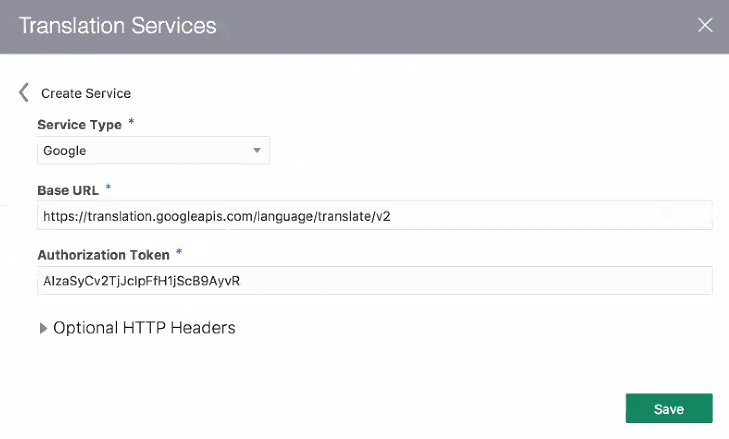
Description of the illustration translation_services.pngRefer to the documentation for Microsoft Translator and Google Translation API to find out how to get the URL and access token.

-
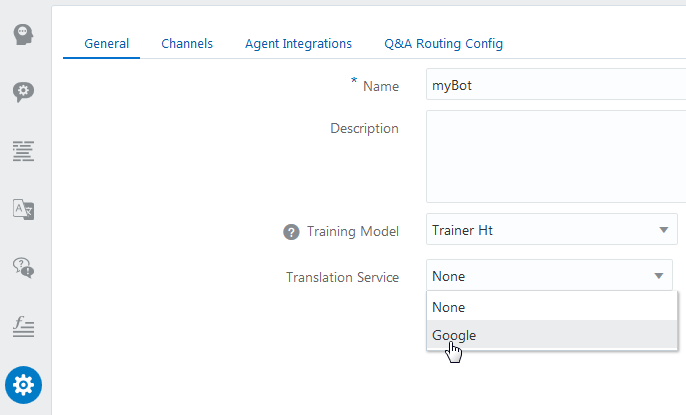
Next, click Settings in the left navbar and then choose a translation service for your bot.
-
Finally, configure the dialog flow:The following segment shows the PizzaBot equipped for autotranslation. Note that along with the
-
Add
autoTranslate: "boolean"to thecontextnode. This variable is common to all bots (or at least the ones that use translation services). As such, you can’t change its name or define it as string, another type of primitive, or an entity. You can override the autotranslated output generated for the System.Output, System.Text, and System.List components when you set theirtranslateproperty tofalse.Note:
Do not set theautoTranslatevariable totrueif you’re translating text using a resource bundle. -
Generally, you’d first add a state with a
System.Intentcomponent at the beginning of thestatesnode. But since the NLP engine can only recognize English, you need to begin the states node with a set of language-specific components and variables to translate the user input so that it can be resolved bySystem.Intentcomponent. The first of these states uses theSystem.SetVariablecomponent. As shown in the following snippet, itsvariableproperty is defined by theautoTranslatecontext variable. To enable translation, it’s set totrue.setAutoTranslate: component: "System.SetVariable" properties: variable: "autoTranslate" value: true transitions: {} -
Next, add the System.DetectLanguage component:
detect: component: "System.DetectLanguage" properties: {} transitions: {} -
Add the System.TranslateInput component:
translate: component: "System.TranslateInput" properties: variable: "translated" transitions: {} -
Finally, add the System.Intent component. Set
sourceVariableto hold the translated input.intent: component: "System.Intent" properties: variable: "iResult" sourceVariable: "translated" # this variable holds the English translation of the user input. confidenceThreshold: 0.4Important:
While the Add Components menu adds template state nodes for these translation components, it doesn’t insert theautoTranslate: “boolean”variable into thecontextnode. You’ll need to add it yourself.
autoTranslatevariable, this definition also includes a variable that stores the translated output calledtranslated(translated: “string”) in the context node. The variable property for theSystem.TranslateInputcomponent names this component, as does thesourceVariableproperty for theSystem.Intentcomponent. For example, theSystem.TranslateInputcomponent would store its English translation (“I want pizza”) in this variable when a user enters “je voudrais commander une pizza.” BecausesourceVariablenamestranslated, it holds “I want pizza,” which theSystem.Intentcomponent can resolve to one of the intents.metadata: platformVersion: "1.0" main: true name: "AutoTranslatePizzaBot" parameters: age: 18 context: variables: size: "PizzaSize" type: "PizzaType" crust: "PizzaCrust" iResult: "nlpresult" autoTranslate: "boolean" translated: "string" states: setAutoTranslate: component: "System.SetVariable" properties: variable: "autoTranslate" value: true transitions: {} detect: component: "System.DetectLanguage" properties: {} transitions: {} translate: component: "System.TranslateInput" properties: variable: "translated" transitions: {} intent: component: "System.Intent" properties: variable: "iResult" sourceVariable: "translated" confidenceThreshold: 0.4 -
