17 Creating APIs Fast with the Express API Designer
What is the Express API Designer?
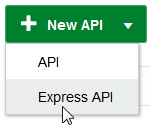
The Express API Designer enables you to create an API using sample data. This data-first approach lets you build an API quickly and with a minimum of effort. This designer is an alternative to the API Designer, where less is generated but you have more control of the API definition. See Which API Designer Should I Use? for a more detailed comparison.
How Do You Get Started?
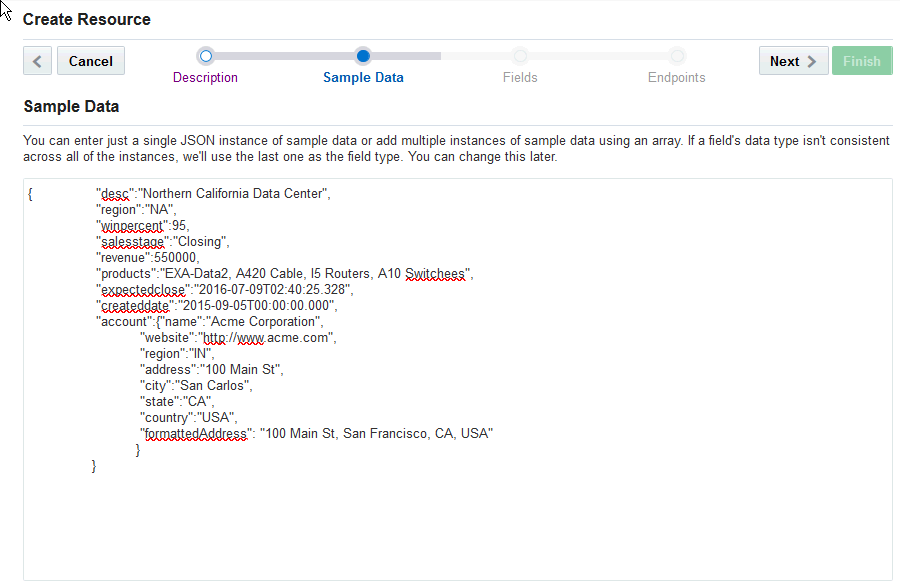
Using the Express API Designer, you get a set of generated endpoints when you paste in a set of sample data that's formatted as a JSON instance. Within the context of the API Designer, this collection of endpoints is known as a resource. Resources are the building blocks of the API.
How Do You Use the API?
With your methods sketched in, you can then start using the API as part of your development effort by testing its endpoints and taking a look at mock data that it returns. Your service developers can implement a service for this API using JavaScript and Node. For more design and customization options, use the API Designer instead. See Custom API Design.
What are Resources?
A resource represents a real world object and the operations that can be performed upon it. In other words, the GET, POST, and PUT operations on the /incidents endpoint would simply be known as an “incident”.
Creating An API
After you’ve created your resource, the Express API Designer opens so you can select the fields and methods you want to use to complete your resource. You can also shape request and response payloads for your methods. See Completing Your Resources.
Completing Your Resources
When you click Resources from the Express API Designer navbar (or when you click Finish from the Create Resource wizard), you end up on the Overview tab in the Express API Designer, where you refine your resources by doing the following:
-
Changing the resource’s display name(s) and description.
-
Creating reference or child relationships. You can learn more about peer and child relationships in Referenced Resources.
-
Toggle the Include Resource Collection option to allow (or prevent) the return of multiple items from a collection. When you select this option, the General tab displays the methods available to a collection: List (GET /items) and Create (a POST call on a collection).
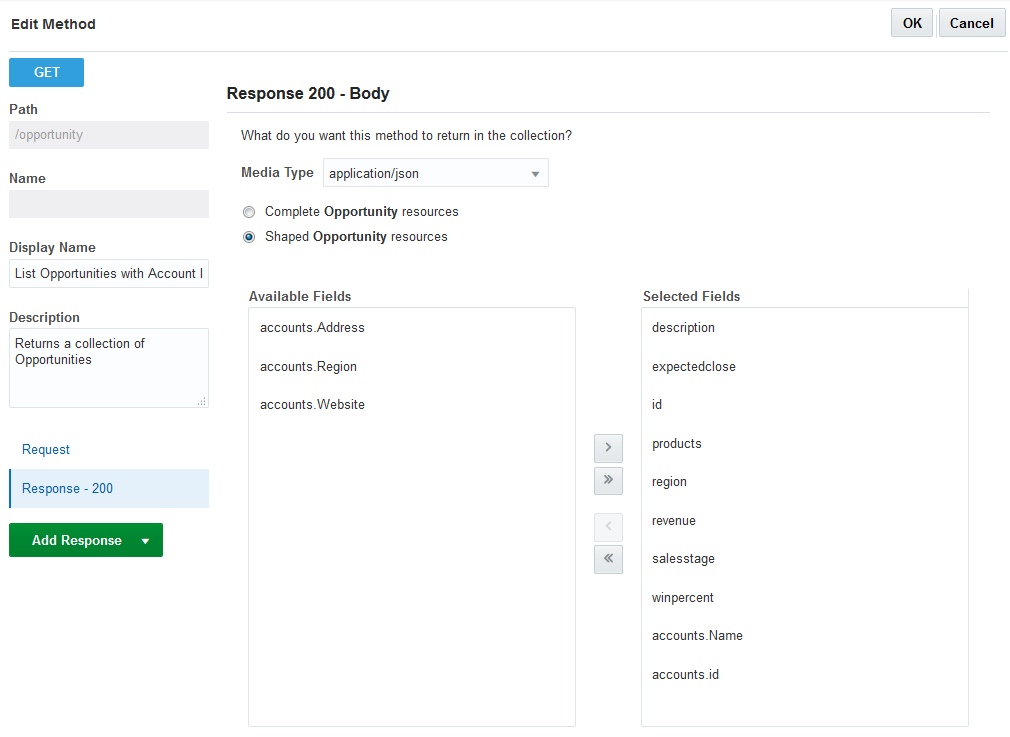
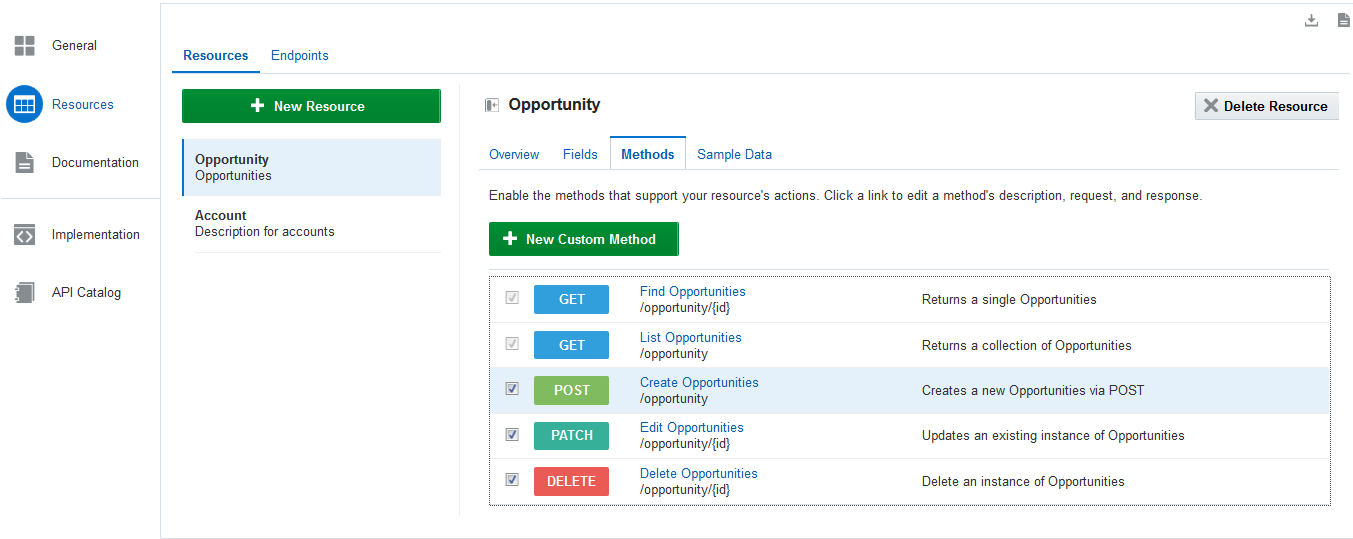
These methods display as hyperlinks that open pages for editing the method’s requests and responses. Shaping Payloads tells you more about editing methods.
Adding Additional Fields
Shaping the Payload for Your Resource
Adding More Sample Data
[
                  {
                      "id": "id0",
                      "amount": "amount0",
                      "name": "name0",
                      "date": "date0"
                  },
                  {
                      "id": "id1",
                      "amount": "amount1",
                      "name": "name1",
                      "date": "date1"
                  },
                  {
                      "id": "id2",
                      "amount": "amount2",
                      "name": "name2",
                      "date": "date2"
                  }
]-
Click New Row.
-
Complete the Create Sample Data dialog.
Because this template lets you enter sample values for all of the fields that you’ve defined for the resource, your sample data stays in step with the field schema definition.
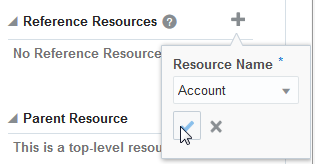
Referenced Resources
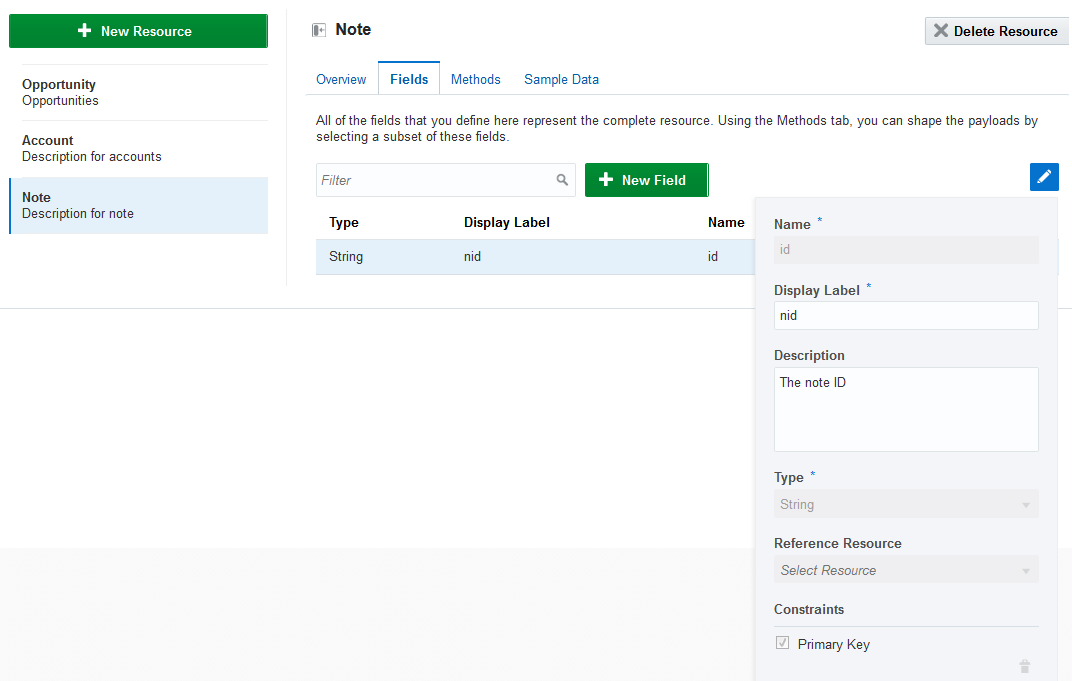
Your resources can reference each other as peers; that is, they occupy the same level. Suppose your API includes two resources that complement each other but are distinct. For example, an API that returns CRM (Customer Relationship Management) data might have two such resources: Accounts and Opportunities. The Accounts resource includes a set of fields that describe different facets of an account, like the company name and location. The information returned for these fields may relate to, but doesn’t overlap, the information returned by Opportunities resource, whose fields return data that allow status meters to measure the opportunity’s win percent. Your API might include resources that reference each other in a different way, as a parent-child relationship. The Accounts resource might have a subsidiary resource called Account Notes, which is wholly dependent on the Accounts resource. If you deleted the Accounts resource, you’d delete the Account Notes resource along with it. 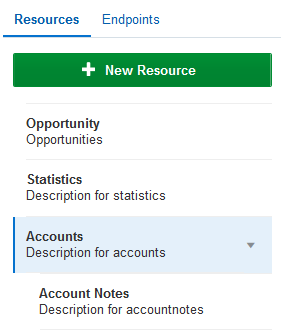
Fields
Note:
The fields that populate list views in MAX are read-only, while the ones used in form-based create and update screens can accept user input.The Fields tab lets you take inventory of the fields for a selected object. It’s where you can create a complete (or canonical) resource by defining all of the possible fields. After you’ve completed the resource, you can decide which methods can accept and return a subset of these fields by shaping the payloads in the Methods tab.
Methods
Selecting Methods
While all of the methods are selected by default, they may not all apply to your resource. You can select the CREATE, POST, or PATCH methods as needed, but because each resource needs at least one GET endpoint (or two if it’s exposed as a collection), you can’t remove the GET methods.Custom Methods
Custom methods (which are always POST methods) allow your resource to perform a task or server-side action that falls outside of the functions enabled by the default set of CRUD methods. For example, you can define a custom method that enables an upload action on an Image component. Using the Fix-It-Fast app as an example, you could define an action to close an incident that’s triggered by a swipe tile. Clicking New Custom Method opens the Create Custom Method dialog that lets you define a custom method on a nested resource (which OMCe adds for you). After you’ve created the method, you can use the Edit Method page to shape the payload of its request body and add its responses for the 200 status code and the 500 status code. See Shaping Payloads.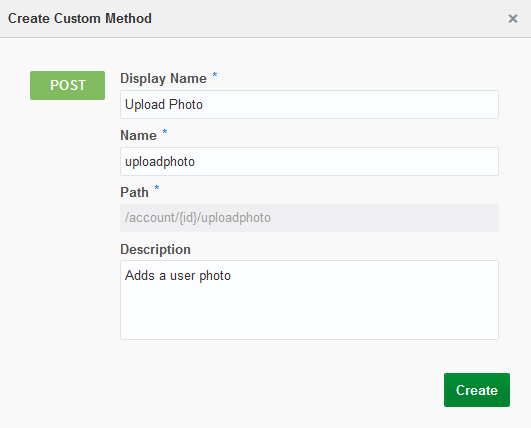
Description of the illustration custom_method_dialog.png
You can delete a custom method, but you can’t delete any of the default set of methods that OMCe creates for you.
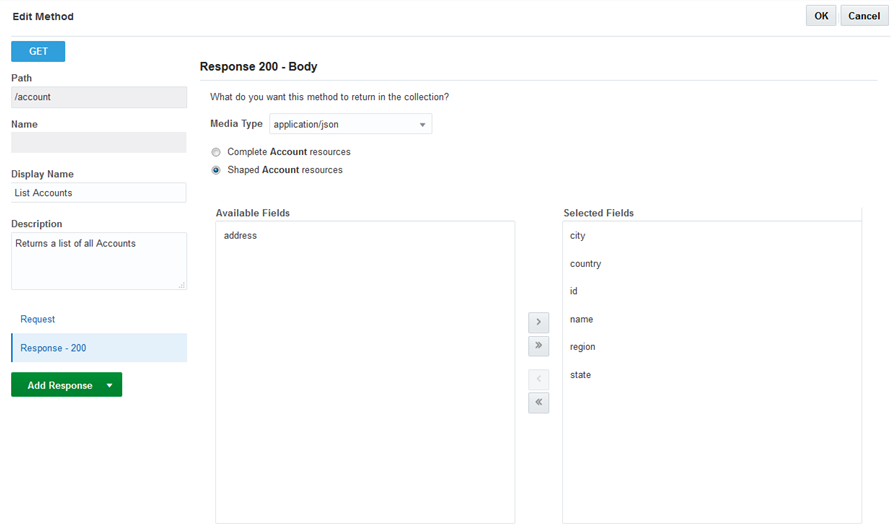
Shaping Payloads
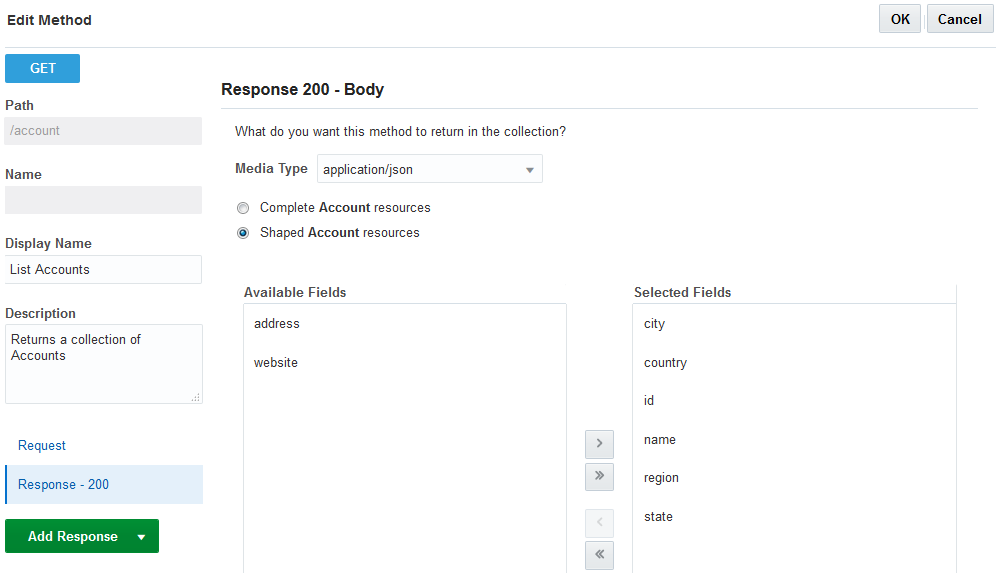
GET Payloads
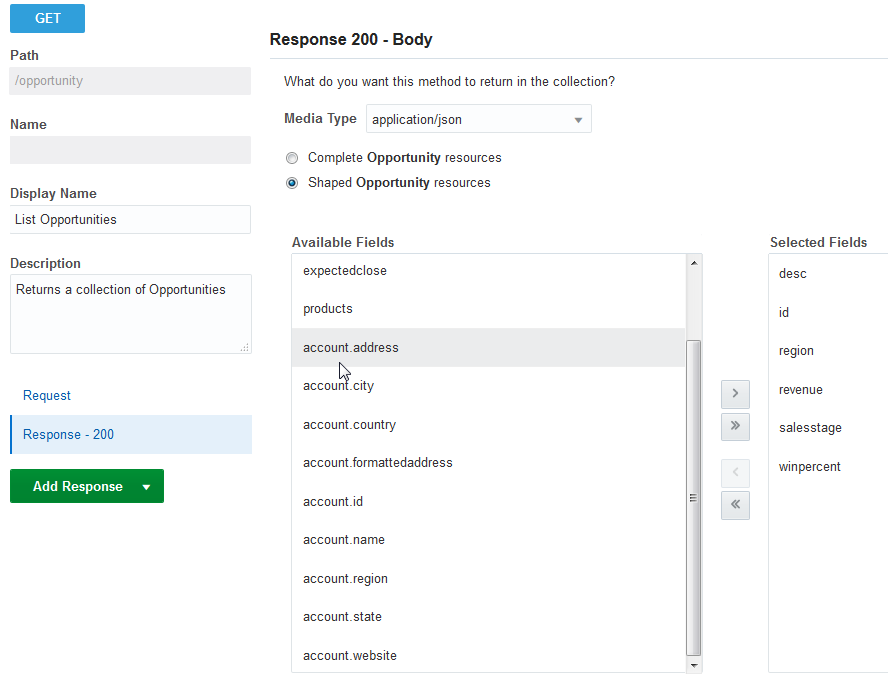
There are no request bodies for GET methods; there are only response bodies. The Edit Methods page lets you select filtering criteria for the data returned for a list or a detail. In MAX, these surface as query parameters.
POST and PATCH Payloads
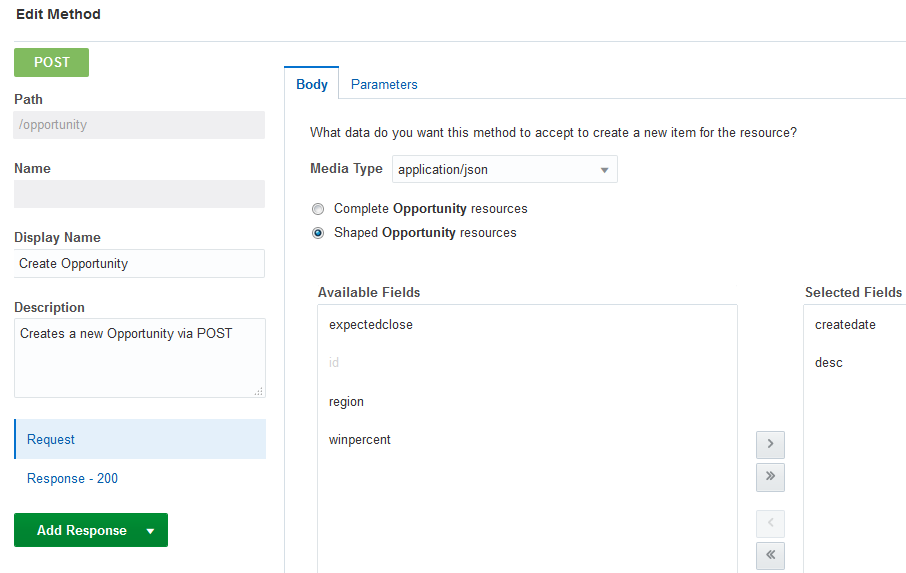
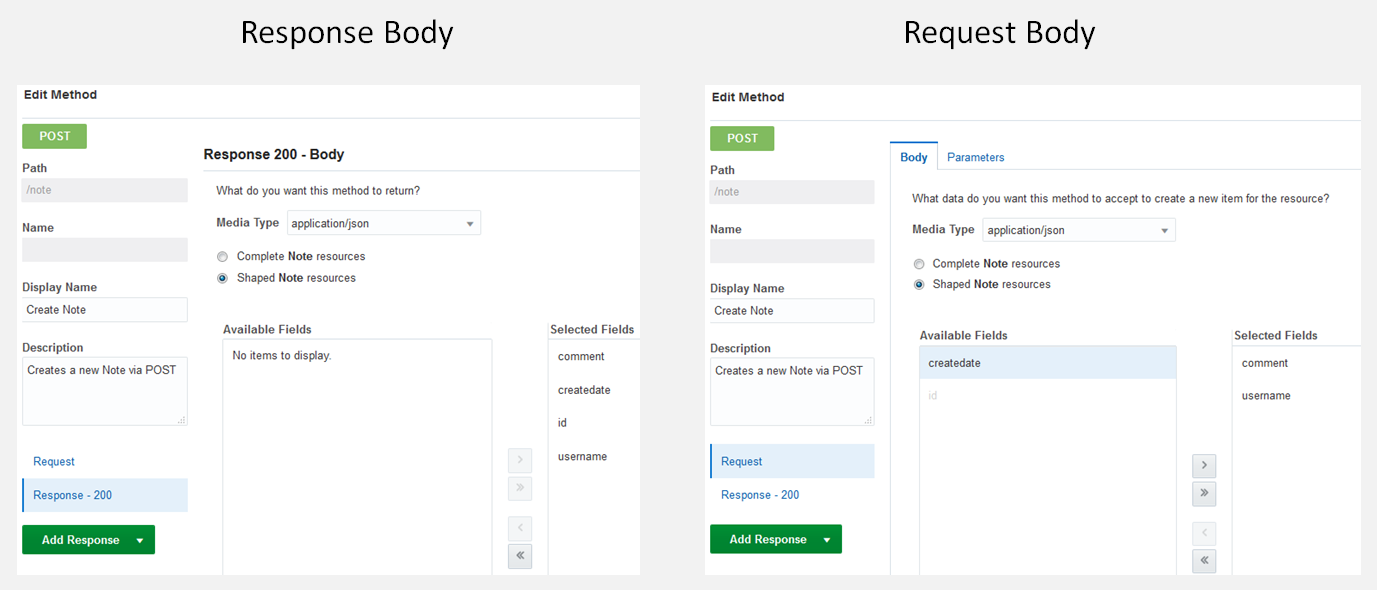
For POST and PATCH requests, you shape the payload with the fields that are sent to these methods to create or update an item.Media Types for Request and Response Bodies
As part of the payload configuration, you can set the content type as application/json, application/octet-stream, or image/*. For binary streams, choose application/octet-stream. See Enabling Uploadable Images .
Read-Only Fields
For POST and PATCH fields, you can create read-only fields by shaping the request and response bodies. By including a field in both the request and response payloads, you allow it to accept user input. By including it in the response body only, you confine the field to read-only display.
Sample Data
{                "desc":"Northern California Data Center",
                 "region":"NA",
                 "winpercent":95,
                 "salesstage":"Closing",
                 "revenue":550000,
                 "products":"EXA-Data2, A420 Cable, I5 Routers, A10 Switchees",
                 "expectedclose":"2016-07-09T02:40:25.328",
                 "createddate":"2015-09-05T00:00:00.000"
                 }
Tip:
Because OMCe creates theid field for each resource, you don’t need to include it your JSON.
“revenue”: 550000, key-value pair in the above sample, for example, OMCe can interpret the field type as an integer rather than as a string.
{                "desc":"Northern California Data Center",
                 "region":"NA",
                 "winpercent":95,
                 "salesstage":"Closing",
                 "revenue":550000,
                 "products":"EXA-Data2, A420 Cable, I5 Routers, A10 Switchees",
                 "expectedclose":"2016-07-09T02:40:25.328",
                 "createddate":"2015-09-05T00:00:00.000",
                 "account":{"name":"Acme Corporation",
                            "website":"http://www.acme.com",
                            "region":"IN",
                            "address":"100 Main St",
                            "city":"San Carlos",
                            "state":"CA",
                            "country":"USA",
                            "formattedAddress": "100 Main St, San Francisco, CA, USA"
                           }
}[
{
"desc": "Anvils",
"region": "NA",
"winpercent": 30,
"salesstage": "appointment",
"revenue": "35000",
"expectedclose": "2016-07-09T02:40:25.328",
"account": {
"name": "Acme"
}
},
{
"desc": "Horns",
"region": "SA",
"winpercent": 90,
"salesstage": "closing",
"revenue": 25000,
"expectedclose": "2016-07-09T02:40:25.328",
"account": {
"name": "Road Runner"
}
},
{
"desc": "Bank Vaults",
"region": "EU",
"winpercent": 25,
"salesstage": "prospect",
"revenue": 15000,
"expectedclose": "2016-07-09T02:40:25.328",
"account": {
"name": "Coyote"
}
}
]Note:
You can only create top-level resources with sample data, so you can’t add a child resource by nesting an array. Referenced Resources tells you how to add child resources.As noted in Completing Your Resources, you can add or remove fields, or change the field display name and data type using the field editor. Because you need to define a value for each key, your resource’s GET methods will always return a full set of data. In cases where this may not reflect real-world scenarios, you can edit your data using the Sample Data tab. To find out more, see Adding More Sample Data.
Using the Express API Designer with MAX
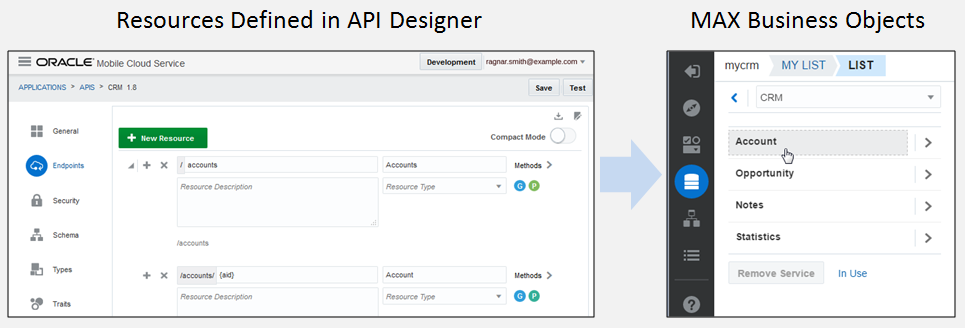
While the Express API Designer can help you jump-start your API development, it’s also the quickest way for you to develop APIs for use with Mobile Application Accelerator (MAX).
MAX is a web-based development environment for mobile apps that caters to business users. Resources developed in the Express API designer can be treated as business objects that can be easily incorporated into MAX apps.
Tip:
You can learn more about the MAX App along with information on building, testing, and distributing apps in Designing Your App. If you want hands-on experience with using business objects to build a mobile app, follow the Create a Mobile App in Record Time with MAX! tutorial.How Do I Surface My API in MAX?
Note:
Take a look at Exploring Services to find out about more about the role of business objects in the MAX Designer.Who Uses MAX?
-
Mobile Cloud developers (mobile app developers and service developers), who use MAX as part of their testing
-
Business users, who create line-of-business (LoB) apps.
BusinessUser role, so they never see OMCe (and can't log into it).
Enabling Uploadable Images
-
Click Add New Custom Method. The path for this custom method points to a backend action. For example, the path for the POST might be something like
/opportunity/{id}/uploadpicture. -
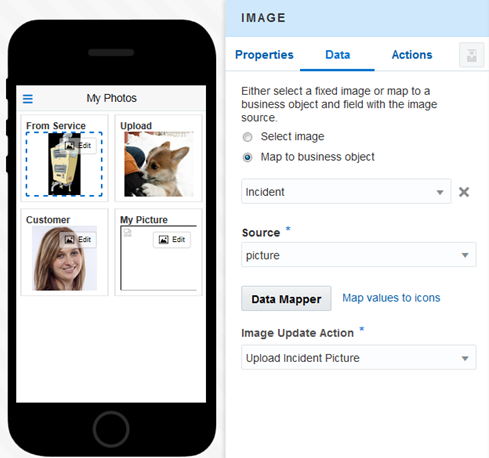
Because you’re sending binary streams through this API, you need to select application/octet-stream as the media type for this method’s request in the Edit Method page. This media type signals MAX that this action supports binary streams.
-
In MAX’s Data Mapper, populate the Image component’s Source field with the appropriate business object field.
-
To enable the action on the mapped field, clear the Read Only option in the Image component’s Properties page. When you clear this property, MAX superimposes an edit overlay (
 ) on the image component in the Preview. It allows MAX to populate the Data tab’s Image Update Action menu with actions that support binary streams.
Tips for User-Friendly Business Objects in MAX
You can help business users pick services and map data by adding metadata in OMCe.
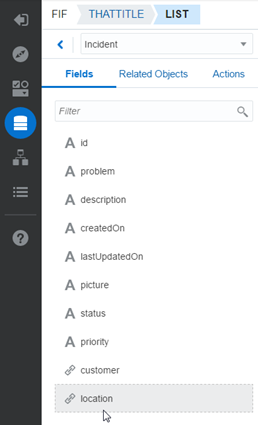
| The metadata that you enter in OMCe... | ...Is surfaced here in MAX |
|---|---|
|
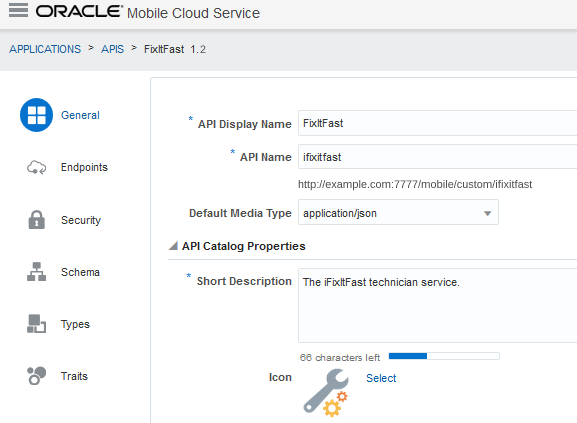
The API metadata entered in the General Page of the API Designer:
|
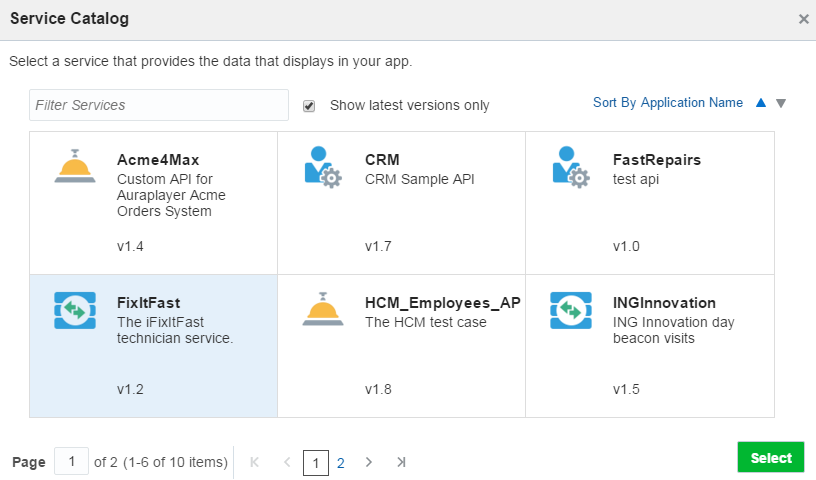
The service name and description in the Service Catalog: |
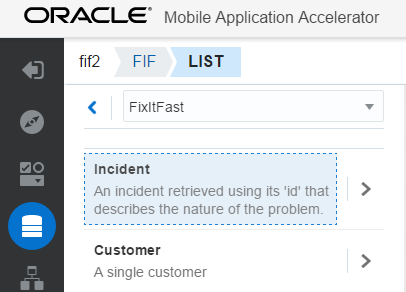
| The endpoint description and display name for top-level resources entered in the Endpoints page of the API Designer: |
|
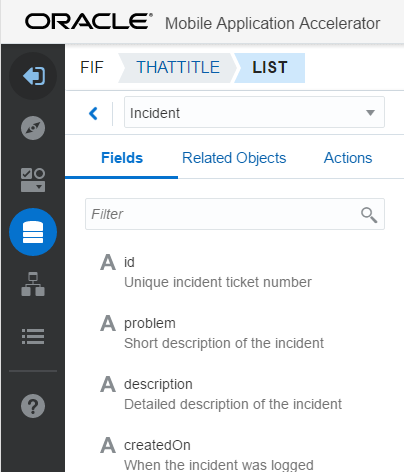
The property members of the schema definition (including the description key) that are defined for the GET response: |
|
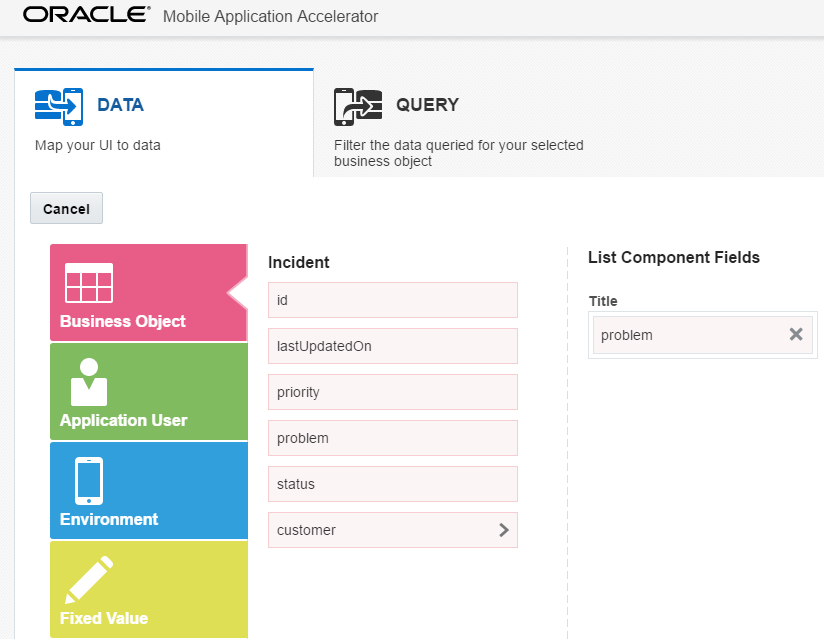
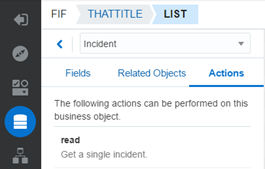
| The display name and description for endpoint methods entered in the Endpoints page of the API Designer: | The Actions tab of the Data Palette: |
The title key in the schema: |
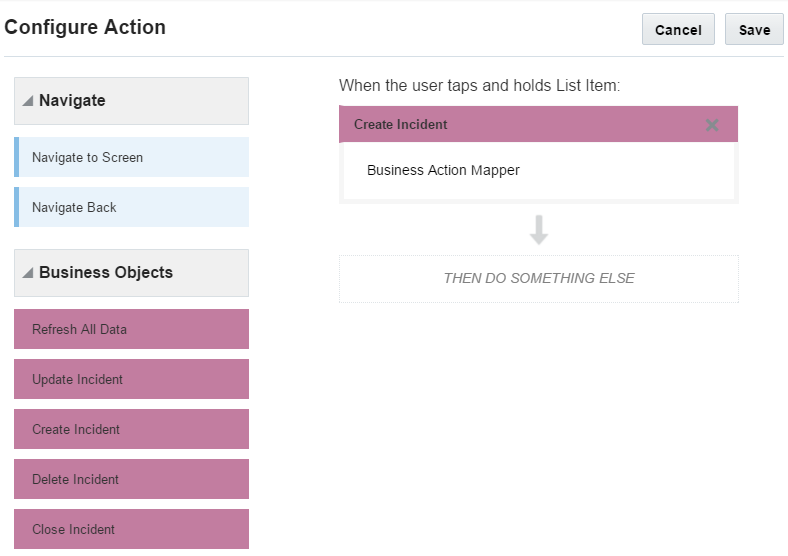
The Configure Action page of the Properties Inspector: |
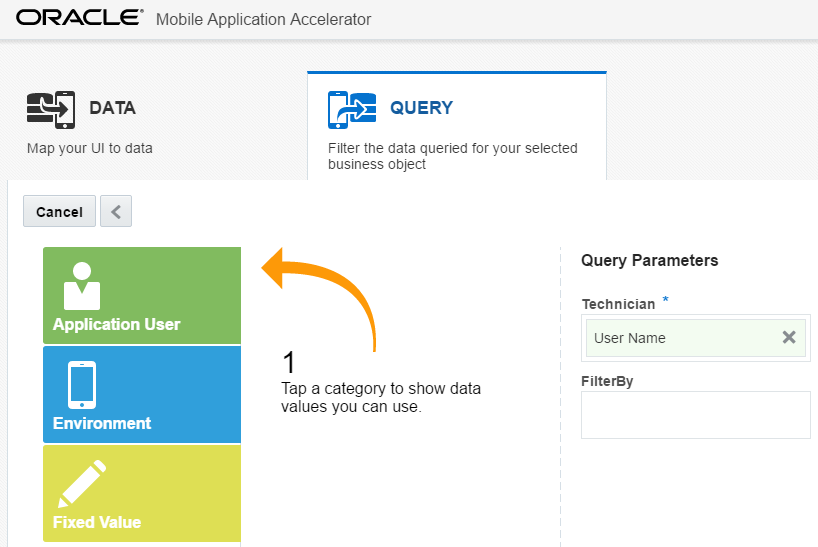
| GET method Query definitions for the request parameters entered in the Endpoints page of the API Designer: | The Query page of the Add Data QuickStart and the Data Mapper: |
The $ref definition that point to other top-level resources in the GET response schema definition. |
|
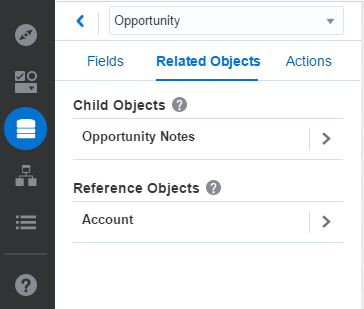
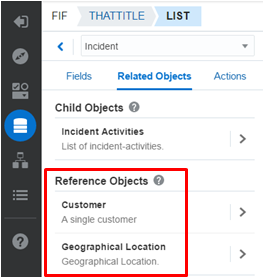
| The display name and description for endpoint methods entered in the Endpoints page of the API Designer: | The Related Objects tab of the Data Palette (under Reference Objects): |
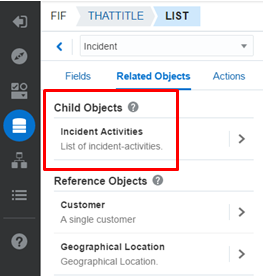
| The display name and description for nested resources that are entered in the Endpoints page of the API Designer: | The Related Objects tab of the Data Palette (under Child Objects): |
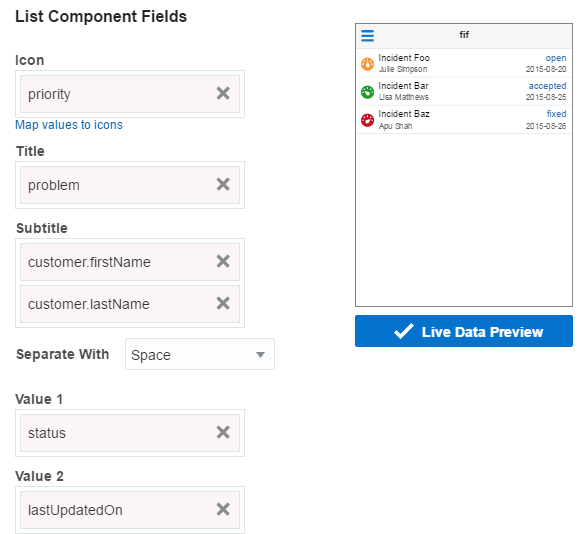
The property members of the schema definition (including the title key) that are defined for the GET response for a nested object. |
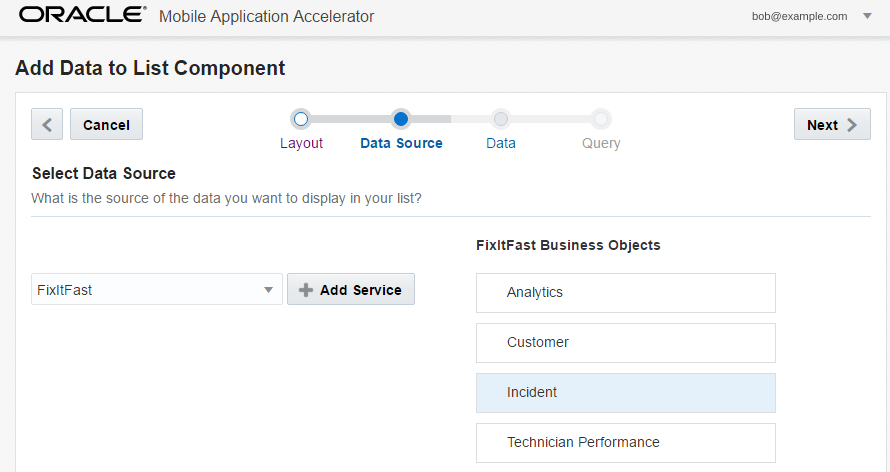
The Data Source page Data pages of the Data Mapper and the Add Data QuickStart for a detail screen. |
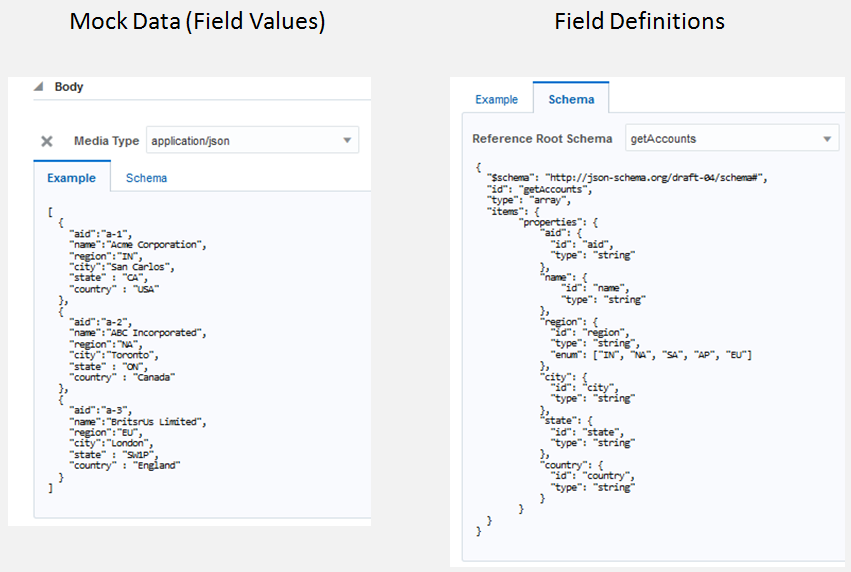
Mock data defined for requests and responses in the API Designer: |
|
Creating Resources with JSON Schemas
As an alternative to the Express API Designer, you can build an API with resources using the API Designer.
Tip:
Before you read on, take a look at the JSON schema specification.Defining Fields in a Schema
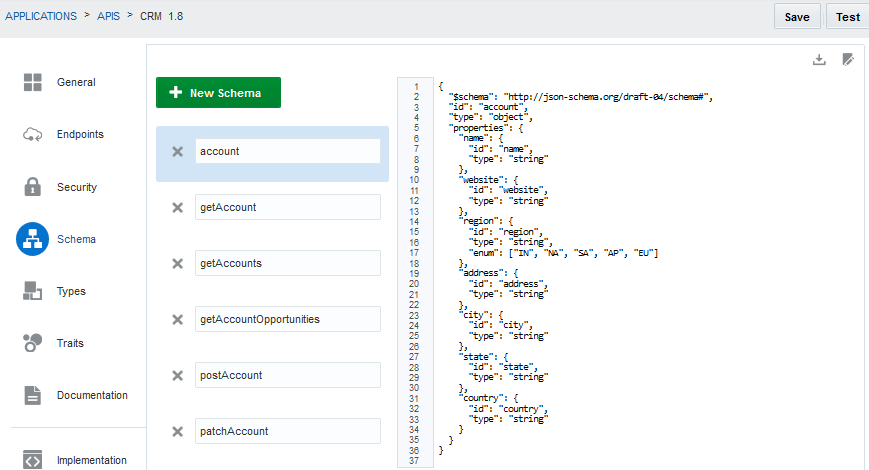
To create fields, you need to define JSON schemas for the endpoint requests and responses.
name and website in the following example:{
"$schema": "http://json-schema.org/draft-04/schema#",
"id": "account",
"type": "object",
"properties": {
"name": {
"id": "name",
"type": "string"
},
"website": {
"id": "website",
"type": "string"
},
…
}
Defining Field Types, Formats, and Enums
Define the kind of data that your field holds by using combinations of the JSON schema type, format, and enum keywords.
-
Define enumerated values (enums) in the schema so that business users won’t have to enter them as fixed values in the MAX Designer. For example:
"region": { "id": "region", "type": "string", "enum": ["IN", "NA", "SA", "AP", "EU"] -
When defining the field format for a date, we recommend UTC (Coordinated Universal Time):
"properties": {
          "lastUpdatedOn": {
            "type": "string",
            "format": "date-time",
            "description": "When the incident was last updated"
          },
Field Formats
required, minlengnth, maxLength, minimum, and maximum to the property:{
"$schema": "http://json-schema.org/draft-04/schema#",
"id": "postOpportunity",
"type": "object",
"allOf": [
{"$ref": "opportunity"}
],
"required": [
"desc",
"region"
]
}
pattern keyword and then define a regular expression:"pattern": "^(\\([0-9]{3}\\))?[0-9]{3}-[0-9]{4}$"Example 17-1 Taking a Look at Properties in the JSON Schema
In the following example, a schema called account that defines of the base fields for a business object. Notice the type keyword defines the kind of data allowed in each field (string).
{
  "$schema": "http://json-schema.org/draft-04/schema#",
  "id": "account",
  "type": "object",
  "properties": {
    "name": {
      "id": "name",
      "type": "string"
    },
    "website": {
      "id": "website",
      "type": "string"
    },
    "region": {
      "id": "region",
      "type": "string",
      "enum": ["IN", "NA", "SA", "AP", "EU"]
    },
    "address": {
      "id": "address",
      "type": "string"
    },
    "city": {
      "id": "city",
      "type": "string"
    },
    "state": {
      "id": "state",
      "type": "string"
    },
    "country": {
      "id": "country",
      "type": "string"
    }
  }
} aid in the following example). IDs aren’t present when POST calls create records. Instead, the ID is assigned by the server. The following schema defines a field for the account ID called aid, which allows data to be returned by a GET call. In addition to the account ID, this schema allows all of fields defined for the account schema as well, because it includes the allOf keyword and assigns account as the pointer to the ref keyword.{
"$schema": "http://json-schema.org/draft-04/schema#",
"id": "getAccount",
"type": "object",
"allOf": [
{"$ref": "account"}
],
"properties": {
"aid": {
"id": "aid",
"type": "string"
}
}
}Defining Child Objects
By defining a schema for a nested resource, you can create a child object. Unlike a reference (or peer) resource, a child object can’t exist on its own. It only has meaning within the context of its parent resource.
/accounts/{aid}/opportunities. In this example, the canonical (or base) link returns the child object’s resource (opportunities). The links keyword gives the location for the child resource, opportunities.{
"$schema": "http://json-schema.org/draft-04/schema#",
"id": "getAccountOpportunities",
"type": "array",
"items": {
"$ref": "getOpportunities"
},
"links": [
{
"rel": "canonical",
"href": "/opportunities?aid={aid}"
}]
}Tip:
You can have different links defined in an array./opportunities/{oid}/notes to return the notes for a specific opportunity. In this case, the nested resources defines a grandchild object using the ID (oid) as part of the canonical link:{
"$schema": "http://json-schema.org/draft-04/schema#",
"id": "getOpportunityNotes",
"type": "array",
"items": {
"$ref": "getNotes"
},
"links": [
{
"rel": "canonical",
"href": "/mobile/custom/CRM/notes?oid={oid}"
}]
} Defining Fields for List, Details, Create, and Update Screens
Field behaviors can be described as summary, creatable, and updatable, that is, whether fields can accept user input, like those in a create or update screen, or appear as a read-only field in a list component.
These behaviors – and their related collection, create, read, update, and delete actions – are based on endpoints. By defining schemas for an endpoint’s request and response, you tell MAX how it can use these fields to populate the different types of screens created by the QuickStarts.
/employees). Its GET method allows users to return all of the fields defined in the schema for the response. The schema defined for the POST method’s request defines the fields that can be used to create an item. To return a specific item, define a GET method on a nested resource (/items/{id}).
Note:
In MAX, POST methods are always used for fields used for create actions. Read actions are always GET methods.| Field Behavior | Description | Used in These MAX Components | Method | Tips |
|---|---|---|---|---|
| Collection | Returns multiple items (or records) of the object. Calls GET on the collection resource (/items) to return all fields. See Collection Actions.
|
|
GET | Specify the fields that you want to include in the schema for a collection endpoint. Add mock data field values for the request and the response. |
| Read | Gets a single item of the object. Calls GET on the item resource (/items/{id}) to return the properties for an item. An object can be a singleton, in which case this calls GET on the item resource (/item). See Collection Actions.
|
Detail Screen (read-only fields in a Form component) | GET | |
| Create | Creates a single item of the object. Calls POST on the collection resource (/items) with a request body that contains all of the creatable fields (which can be either required or optional), along with the user-provided values. This returns the new object with its new unique ID (which can be used subsequently in a read action). See Create Actions.
|
Create Screen (form fields) | POST | Specify the fields that should be included in Create screens in the schema. Add mock data field values in the request and response. |
| Update | Updates a single item of the object. Calls PATCH on the item resource (/items/{id}) with one or more updatable properties. See Update Actions.
|
Edit Screen (form fields) | PATCH (and sometimes, PUT) | Specify the fields that users can update in the schema. Provide mock data for the field values for the request and response. You should consider using the PATCH method because it updates the server with only the fields that have been modified. See Using the PUT Method for Update Actions. |
| Delete | Deletes a single item of the object. Calls DELETE on the item resource (/items/{id}). See Delete Actions.
|
DELETE |
Collection Actions
Typically, collection actions are based on two different GET methods.
/accounts.{
"$schema": "http://json-schema.org/draft-04/schema#",
"id": "getAccounts",
"type": "array",
"items": {
"properties": {
"aid": {
"id": "aid",
"type": "string"
},
"name": {
"id": "name",
"type": "string"
},
"region": {
"id": "region",
"type": "string",
"enum": ["IN", "NA", "SA", "AP", "EU"]
},
"city": {
"id": "city",
"type": "string"
},
"state": {
"id": "state",
"type": "string"
},
"country": {
"id": "country",
"type": "string"
}
}
}
}/accounts/{aid}):{
"$schema": "http://json-schema.org/draft-04/schema#",
"id": "getAccount",
"type": "object",
"allOf": [
{"$ref": "account"}
],
"properties": {
"aid": {
"id": "aid",
"type": "string"
}
}
}Defining a Collection Using a Single Resource
/stats). However, it does not use an endpoint that points to a specific resource (like GET /stats/{sequence}) to return an individual metric. The JSON response can be an array or an object. Objects include information about the data set, such as the number of items in the set, a token for the next set of items, and so on.{
"$schema": "http://json-schema.org/draft-04/schema#",
"id": "stats",
"title": "Analytics",
"type": "object",
"properties": {
"metrics": {
"type": "array",
"description": "Metrics are individual measurements related to incident activity, techncian performance",
"items": {
"type": "object",
"properties": {
"month": {
"type": "string",
"description": "Date Dimension for which a data point is provided"
},
"technician": {
"type": "string",
"description": "Technician for whom the data is provided."
},
"radius": {
"type": "number",
"description": "radius in miles from the technician location, where incidents were reported."
},
"incidentsAssigned": {
"type": "number",
"description": "Incidents Assigned to Technician"
},
"incidentsClosed": {
"type": "number",
"description": "Incidents Closed by Technician"
}
}
}
}
}
}
Note:
MAX can only detect objects that have one top-level array. MAX can't detect the primary collection when an object has more than one top-level array likemetrics2 in the following snippet. In cases like this, the MAX can't make this collection available for data mapping.{
"count": 2,
"metrics1": [
{...}
],
"metrics2": [
{...}
]
}
Create Actions
You can add a create action by defining a POST method.
You can define the creatable fields in the JSON schemas for both the POST request and response.
postAccount that defines creatable fields from the referenced account schema. Some of the fields returned from the account schema are optional, but in this schema, the name and region are designated as required fields; app users can’t create a new item without defining them.{
"$schema": "http://json-schema.org/draft-04/schema#",
"id": "postAccount",
"type": "object",
"allOf": [
{"$ref": "account"}
],
"required": [
"name",
"region"
]
}allOf keyword allows app users to add values into any of the fields defined in the account schema (shown below) to create new items. While the name and region fields (which are also defined in the account schema) are required, the other fields are optional. {
"$schema": "http://json-schema.org/draft-04/schema#",
"id": "account",
"type": "object",
"properties": {
"name": {
"id": "name",
"type": "string"
},
"website": {
"id": "website",
"type": "string"
},
"region": {
"id": "region",
"type": "string",
"enum": ["IN", "NA", "SA", "AP", "EU"]
},
"address": {
"id": "address",
"type": "string"
},
"city": {
"id": "city",
"type": "string"
},
"state": {
"id": "state",
"type": "string"
},
"country": {
"id": "country",
"type": "string"
}
}
}
Note:
In MAX, the POST method is the only way to enable create actions. Having a POST method enables MAX to populate create screens with fields that allow user input (creatable fields). If a business object doesn’t have a POST method, then app users won’t be able to create items.Read Only Fields
getAccount schema, which is defined for the POST response, includes the aid field, which holds the server-generated ID for an account. Because this is a read-only value, one which app users shouldn’t update, it’s not included in the field definitions of the POST request schema, postAccount, or the account schema that it references.
| Response Schema | Request Schema |
|---|---|
|
|
Content Types for Creatable Fields
At runtime, mobile apps return the content types specified in the POST endpoint, which can be application/json or application/x-www-form-urlencoded. You can specify application/x-www-form-urlencoded as the content type for a creatable field in the POST request, but also specify application/json as the content type for the read only fields returned by the response.
Update Actions
You can allow users to update a field's value by defining a JSON schema on a PATCH endpoint.
Note:
When you define your PATCH endpoint, always specify the content in the request body as type asapplication/json instead of the JSON patch format (application/json-patch+json).
Using the PUT Method for Update Actions
In addition to the PATCH method, you can make fields editable by defining a JSON schemas for the requests and responses of a PUT method.
Although you can use both PUT and PATCH for update actions, keep in mind that the PUT method replaces all of the fields defined for a schema object (even if none of them have been modified). That means that the request payload must include the entire object. The request payload for the PATCH method, on the other hand, includes only the fields that have changed. Because of this, we recommend using PATCH (if the service supports it, that is).
Delete Actions
The delete action is defined for an object. It enables users to remove an entire record, not just a field.
You can define a DELETE method on a nested resource like /accounts/{aid}, for example.
Custom Actions
In addition to the CRUD actions, resources can also have custom actions that require custom code, transactional semantics, or unique processing on the objects.
In general, custom actions don’t return a payload. Instead, they perform server-side tasks and return success and failure responses.
-
Use POST methods for custom actions.
-
Create the POST method for a nested resource like
/incidents/{id}/closeIncident. -
If needed, define a request body for the POST method.
-
Use a JSON hyper-schema
linksproperty to define the sub-resource. For example:{ "$schema": "http://json-schema.org/draft-04/schema#", "id": "incident", "title": "Incident Detail", "type": "object", "properties": {...}, "links": [ { "rel": "self", "title": "Incident", "href": "/incidents/{id}", "method": "GET", "targetSchema": {"$ref": "incident"} },
Creating Mock Data
Note:
Take care when you define your mock data, because OMCe doesn’t verify mock data against a schema.Which API Designer Should I Use?
When creating your APIs, you can use either the API Designer or the Express API Designer. Which you choose boils down to a few important factors:
-
If you want full control of the development process, choose the API Designer.
-
If you’d rather get going fast with no coding, or you need to develop APIs to use with the Mobile Application Accelerator (MAX), the Express API Designer is your best bet.
This table highlights some of the key differences:
| Category | API Designer | Express API Designer |
|---|---|---|
| Overview | Enables you to define custom APIs in a visual editor that gives you control over endpoint definition and security. You can also define a schema, resource types, and traits. You implement the API by writing a Node.js module. | Enables you to use sample data to quickly create APIs without writing any code. Based on the sample data you provide, the designer generates resources with GET, POST, PATCH, CREATE, and DELETE methods. |
| Who’s it best for? |
The focus is on flexibility and control of the development process. |
The focus is on speed, creating a spec to export to the API Designer for further development, and creating APIs to use with MAX. |
| Can use to set secure access? | Yes. You can add user authentication and role-based access to resources. | No. However, you can export the RAML to the API Designer and add role-based security settings with the tools there. |
| MAX Friendly? | Yes. But you must shape the API to surface in the MAX Designer by defining the JSON schema (one built from scratch, or a RAML file generated by the Express API Designer). | Yes. You create an API with an object-centric focus. This kind of API can be used out-of-the-box to build mobile apps with MAX. |
| Coding needed? | Yes. After you define the custom API’s REST endpoints with the API Designer, you then need to implement internal logic through Node.js. | No, though you can modify the generated implementation. |
