3 Plan Your OMCe Instance
Before you begin setting up an Oracle Mobile Cloud Enterprise(OMCe) instance, you should think about what you are going to use OMCe for and make a number of decisions, such as whether you need a database with Enterprise or High Performance packaging.
When you start to plan your OMCe instance, these are some of the things to consider:
-
Do you want the full OMCe stack, which includes Bots and Analytics, or do you want a Bots-only stack? If you only want to work with Bots, you can create the instance using the Bots-only template.
-
Are you are trying out OMCe to produce pilot applications or as proof of concept, or are you setting up a production environment? The database and OCPU requirements are different for each.
-
How are you going to manage the conversation history that Bots will be writing to the database over time? Do you have a plan to archive and purge the data so that database limits aren’t breached. See Archive and Purge Bots Data.
Provisioning the Database for OMCe for Proof of Concept
If you want to try out OMCe and examine the features available and understand the concepts, and perhaps develop some trial applications, you can use these recommendations.
For a full OMCe stack you need:
-
DB requirements (type and OCPU): Enterprise Package minimum
-
OCPU for Oracle Event Hub Cloud Service: 1 for each environment
-
OCPU for Oracle Big Data Cloud Service: 2 for each environment
For Bots-only you need:
-
DB requirements (type and OCPU): Standard Package minimum
-
OCPU for Oracle Event Hub Cloud Service: 1 for each environment
Provisioning the Database for a Production OMCe Environment
When you are confident that you want to create an OMCe environment suitable for a production environment, use these recommendations.
For a full OMCe stack you need:
-
DB requirements (type and OCPU): Enterprise Package minimum, although if you’re planning to work with larger sets of analytics data then you should ensure that you start with a High Performance database that can handle analytics queries across larger data sets.
-
OCPU for Oracle Event Hub Cloud Service: 1 for each environment
-
OCPU for Oracle Big Data Cloud Service: 2 for each environment
For Bots-only you need:
-
DB requirements (type and OCPU): Enterprise Package minimum
-
OCPU for Oracle Event Hub Cloud Service: 1 for each environment
Logging In to Oracle Cloud Services
You use the Oracle Cloud MyServices applications dashboard to create and manage the OMCe stack and the services associated with it.
- In the email with the subject, Your Oracle Cloud Services Are Ready - Get Started Now, click the My Services Administration link. This is the one that starts with
https://myservices-cacct-…. - Sign in using the credentials in the email with the subject Welcome to Oracle Cloud – Infrastructure and Platform Free Promotion. If this is the first time you have signed in, you must set up a new password and the new password must match the password criteria that you’ll see listed.
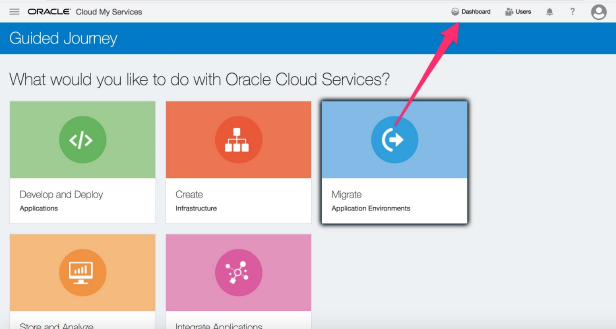
Description of the illustration guided-journey.png
Do These Tasks First
Before you begin setting up an Oracle Mobile Cloud Enterprise (OMCe) instance, you have to provision the database and storage instances and carry out a few other tasks.
Important:
There are some tasks you must perform before you can create an OMCe stack:-
If this is the first time you've created a service on Oracle Public Cloud, choose a georeplication policy.
-
Create a Storage Service admin user.
-
Provision Database Cloud Service, if needed.
Important Pre-Provisioning Tasks
Use this workflow as a guide to perform the tasks you must carry out before you can create and provision OMCe.
| Task | Description |
|---|---|
| Set a georeplication policy for the storage service instance | If this is a new Cloud account and you’ve never set up a service, you must select a georeplication policy. If you’ve already set up at least one service, you can skip ahead to provisioning the database. Choose a georeplication policy that defines your primary data center and also specifies that your data should be replicated to a geographically distant (secondary) data center. See Selecting a Georeplication Policy for Your Storage Service Instance |
| Create a storage service admin user and update storage container settings | Create a Storage Service admin user for all the services you create. See Creating a Storage Service Admin User and Update Settings for the Storage Container |
| Create a database service and a storage service | From the Oracle Cloud My Services application, create a database service and specify the storage service to be used for backup. See Provisioning the Database Cloud Service |
After you have carried out these tasks, the next step is to create the OMCe stack.
Selecting a Georeplication Policy for Your Storage Service Instance
If this is a brand new Cloud account and you’ve never set up a service, you must select a georeplication policy.
About Georeplication
You must choose a georeplication policy that defines your primary data center—which you can find in your Welcome email—and also specifies that your data should be replicated to a geographically distant (secondary) data center. Data is written to the primary data center and replicated asynchronously to the secondary data center. In addition to being billed for storage capacity used at each data center, you’ll also be billed for bandwidth used during replication between data centers.
Note:
Once you select a replication policy, you can’t change it, so select your policy carefully.Selecting a Georeplication Policy
-
From the MyServices page, first select Customize Dashboard, then select Show for the Storage Classic service:
-
On the Dashboard, look for Storage Classic, and from
 select Open Service Console.
This takes you to the Storage Services console. If you haven’t set a georeplication policy yet, you will be prompted to do so.
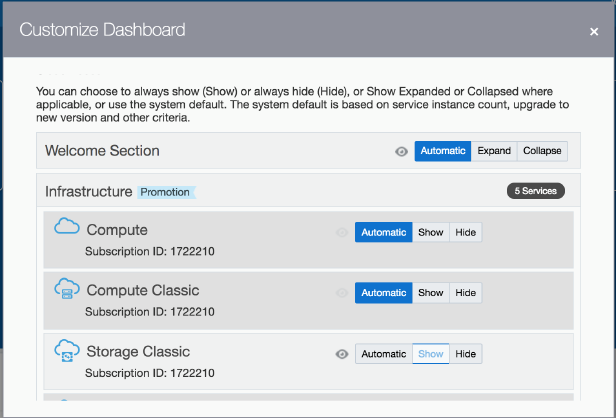
Description of the illustration customize-dashboard.pngFor trials, the default value is sufficient. For paying accounts, see About Replication Policy for Your Account in Using Oracle Cloud Infrastructure Object Storage Classic for an explanation of the policies. You may not see all the policies described in the documentation, as availability is based on account type and service location. Selecting a policy can be confusing, but the main decision point is whether you need data replication (replication of files between data centers in the same region) or not. Only the policies that are available for your account type and service location are shown.
Choose the replication policy based on your needs.
-
When you see the Storage Classic overview page, you’ve finished this procedure.
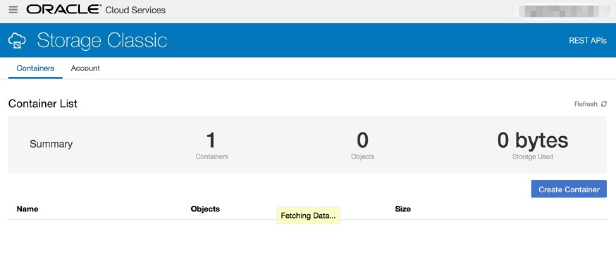
Description of the illustration storage-overview.png
At a later date, you can see the georeplication policy that’s selected for your storage service instance. Sign in to the MyServices Dashboard. Expand Account Information. The details of your account are displayed in the Account Information pane. Look for the Georeplication Policy field.
Creating a Storage Service Admin User
Because storage service admin credentials are requested every time a service needs to access storage, we recommend that you create a dedicated storage admin to use across all services. The admin user’s credential is accessed very frequently—in fact, any time any service needs to access storage, the credential is required to authenticate. The credential (token) is also cached, so if you change this user’s password, storage access will actually fail, and the account will be locked.
WARNING:
After you use this storage admin user to create a service, do not change the password! Doing so will lead to runtime failures for these services.To create a dedicated storage service admin user:
-
Click Users on the upper right corner of the MyServices Dashboard:

Description of the illustration users-link.png -
On the Dashboard, look for Storage Classic, and from
 select Open Service Console.
This takes you to the Storage Services console. If you haven’t set a georeplication policy yet, you will be prompted to do so.
-
In the User Management page, click Identity Console.

Description of the illustration user-management-page.png -
On the Identity Console’s User tab, click Add.
-
Fill out the User Details. You need to use a different email address from your admin ID. Click Finish when complete.
-
Click the Applications tab.
-
In the search box, type Storage, then click Enter.
You should now see the Storage service entry.
-
Click the storage service entry, then click the Application Roles tab.
-
Click the hamburger icon in the Storage_Administrator role entry, then click Assign Users:
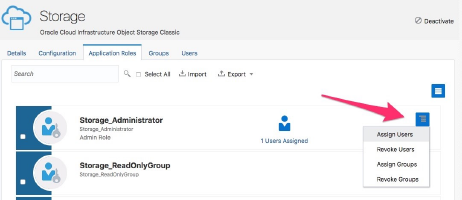
Description of the illustration assign-users.png -
Select the checkbox next to the newly created user, and click Assign.
The new user is assigned the Storage Service administrator role, and they will receive an email with instructions to activate the account. Make sure the account is activated before you proceed. You can test this by simply logging in using this account.
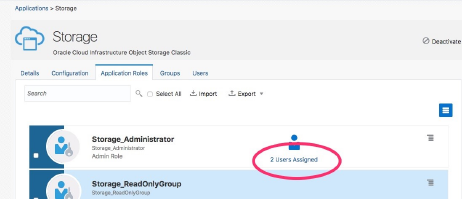
Description of the illustration assigned-roles.png
Update Settings for the Storage Container
After you create the OMCe stack you must run commands to set the replication policy for storage account and set the storage container to allow anonymous read.
Use the cURL command-line tool to run commands to update settings for the storage container.
Install cURL
These steps describe the procedure on a Windows 64-bit system.
-
In your browser, navigate to the cURL home page at http://curl.haxx.se and click Download in the left navigation menu.
-
On the cURL Releases and Downloads page, locate the SSL-enabled version of the cURL software that corresponds to your operating system, click the link to download the ZIP file, and install the software.
-
Navigate to the cURL CA Certs page at http://curl.haxx.se/docs/caextract.html and download the ca-bundle.crt SSL CA certificate bundle in the folder where you installed cURL.
-
Open a command window, navigate to the directory where you installed cURL, and set the cURL environment variable, CURL_CA_BUNDLE, to the location of an SSL certificate authority (CA) certificate bundle. For example:
C:\curl> set CURL_CA_BUNDLE=ca-bundle.crt
There are four commands that need to be run. Run them in the order shown.
Storage Container - Setup Replication Policy
Run these commands to set the replication policy for storage account.
get token
curl -v -X GET -H 'X-Storage-User:Storage-<Cloud Account>:<User>' -H 'X-Storage-Pass:<Password>' <Storage URL>/auth/v1.0Example
curl -v -X GET -H 'X-Storage-User: Storage-mjondcm208:mary.jones@greencorp.com' -H 'X-Storage-Pass: welcome1' https://foo.storage.oraclecloud.com/auth/v1.0set policy
curl -v -X POST -H 'X-Auth-Token: <AUTH_Token>' -H 'X-Account-Meta-Policy-Georeplication: <Data Center>' <Storage URL> /v1/Storage-<Cloud Account>Example
curl -v -X POST -H 'X-Auth-Token:AUTH_tka2f992ca45781566f48f7e7332a92c77' -H 'X-Account-Meta-Policy-Georeplication: dc1' https://foo.storage.oraclecloud.com/MyService-barStorage Container - Set Anonymous Read
The storage container needs to set the anonymous read flag
set read flag
curl -v -X POST -H 'X-Auth-Token: <AUTH_Token>' -H 'X-Container-Read: .r:*,.rlistings' <Storage URL> /v1/Storage-<Cloud Account>Example
curl -v -X POST -H 'X-Auth-Token:AUTH_tka2f992ca45781566f48f7e7332a92c77' -H 'X-Container-Read: .r:*,.rlistings' https://foo.storage.oraclecloud.com/MyService-barProvisioning the Database Cloud Service
If you have already provisioned a Database Cloud Service and wish to use the same instance for OMCe, skip ahead to Set Up the OMCe Service. You’ll need to supply some database-related details when you get to the OMCe provisioning step, so make sure you have that information handy.
Database Cloud Service creation typically takes 1 to 2 hours.
Once provisioned, you will see the service overview for DBCS. It should be started and ready to go.
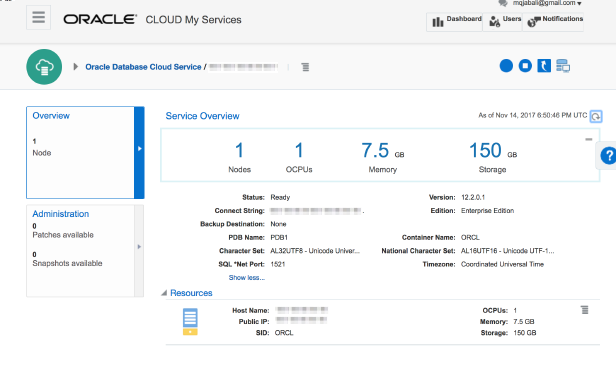
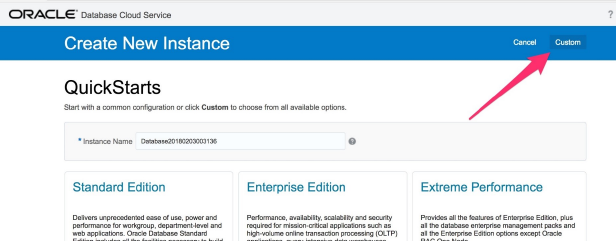
Description of the illustration dbcs-overview.png
