Define Activity Properties
You can customize an activity to suit your requirements by specifying markers, conditions, and other properties.
You set properties for an activity in the activity's Properties pane. Double click an activity or select an activity and click Edit Properties ![]() that appears to open the Properties pane. Optionally, select an activity and click the Properties icon
that appears to open the Properties pane. Optionally, select an activity and click the Properties icon ![]() on the right of the process editor to open the Properties pane.
on the right of the process editor to open the Properties pane.
- Edit the name of the activity. Click the field with the name to modify it.
- Enter a suitable description in the Description field. Click the field to enter a description.
- Enable markers for the activity, and if required set conditions for markers. See Enable Markers for an Activity.
- For Human Task Activity, specify some additional details.
- For Process Activity, specify implementation details.
- For Service Activity, specify implementation details.
- For Connectors, specify implementation details.
Enable Markers for an Activity
Use markers to control transition of an activity between states.
Select the check box next to the marker to enable it. When a marker is enabled, a corresponding decorator appears on the activity.
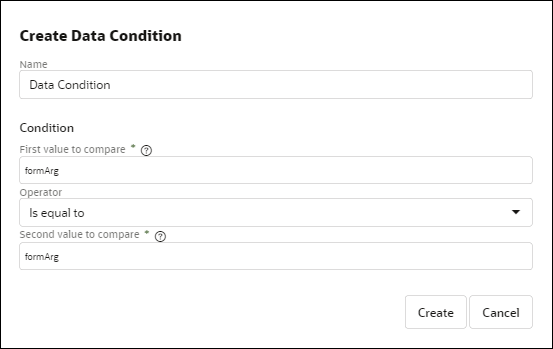
When you enable a marker without conditions, it applies to a stage by default. However, you can also enable markers based on data conditions defined using process variables.
To enable a marker based on data conditions:
The condition is set for the activity's marker. The marker gets enabled for the activity only when this condition is satisfied.
The following table lists all markers available for an activity.
| Marker | Description |
|---|---|
|
Repeatable |
Enable the Repeatable marker to repeatedly execute an activity.
|
|
Required |
Enable this marker to make execution of an activity obligatory for the stage/process to complete. For a new activity, this marker is enabled by default. |
|
Manually Activated |
Enable the Manually Activated marker if you require an activity to be started by a process participant.
|
Implement a Human Task Activity
For a Human Task Activity, in addition to the name, description, and markers, you have to configure some implementation details such as specify the task type, assign the task, associate a form with the activity, and so on in the Properties pane.
Select the Task Type
- Select Submit to create a submit task where a user has to complete and submit a form.
- Select Approve to create an approve task where a user has to view or/and complete a form, and then perform actions such as approve or reject the form, or perform a custom action that you define.
Assign Tasks
In the Assignees section, click the Assign to field and assign the task to users (Members), roles (Roles) or users specified through expression (Expressions). You can also search for a user or role by typing the first few characters of the name in the Search field.
Specify how the Task appears to users in Workspace
- Enter a title in the Title filed, and a summary to describe it in the Task Summary field. These help users to identify the task in Workspace without having to view the details.
-
Associate a form with the task to display information to users and perform certain actions such as submit, approve, or reject. Select the form from the UI field, and then select a presentation for the form in the Presentation field. Optionally, select an external UI connector from the UI field.
Select the Bind to process data check box to automatically bind form payload and outcome.
The Action field gets auto populated depending on the type of task. If the selected task type is Submit, then the field has a SUBMIT action. If the selected task type is Approve, then the field has APPROVE,REJECT actions.
Specify the Task's Priority
In the Priority section, you can specify a priority and the due date for the task. From the Priority drop-down field, select a priority level - High, Normal, and Low.
In the Due Date field, enter an interval to specify the amount of time an assignee has to complete the instance after the human task is triggered. You can select one of the following options:
- Literal: Use the format ##M##d##h##m. For example:
- One hour and thirty minutes: 1h30m
- One day: 1d
- Four months, two days, eleven hours and thirty minutes: 4M2d11h30m
- Expression: Specify an expression to calculate the due date of the human task.
These options enable you to sort the Workspace task list based on the task priority.
Implement a Process Activity
For a process activity, associate the structured process that you would like to invoke from within the dynamic process.
In the Implementation section of the Properties pane, select the structured process that you want to associate from the Process field.
Note that only structured processes with None start events are supported.
In Workspace, when a user starts a dynamic process containing a process activity, the structured process corresponding to this activity is automatically instantiated even if the user doesn’t have permissions to instantiate it. However, in such cases, the user is only able to view the structured process instance and its associated tasks. To perform actions in the structured process instance, the user must have the correct permission level or has to be a Process Application Administrator.
Implement a Service Activity
For a service activity, associate a REST connector you'd like to invoke from within the dynamic process.
- Select the REST connector from the Service field.
- Specify the resource of the connector in the Resource field.
- Select the operation to perform for it in the Operation field.
