Perform Actions in an Action Table Layout
You can use an Action Table layout to create multiple pending action requests and send them with a single click.
To do this, create rows and enter action field values into each one as you would for a Table layout. If the workbook creator configured the action table to create action request rows from existing data, you can also use a ribbon command to append pending action request rows automatically. As with a Table layout, an Action Table layout can include validation rules and list of values, as well as data type and required field enforcement. Any issues you encounter are displayed in the Status Viewer. See Understanding Data Validation.
As you edit each row, it is converted into a pending action request and the Change column is set to the custom action title, such as Apply Prepayments. Once you have finished entering all required values, the row is set to Pending action: <action title> in the Status Viewer.
To help you create action request rows and upload them, the Oracle Visual Builder ribbon tab includes a couple of icons:
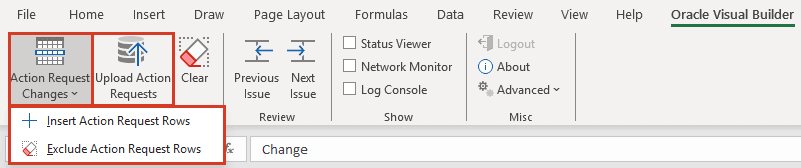
Description of the illustration action-table-icons.png
The Action Request Changes menu includes these commands:
- Insert Action Request Rows: Use this command to insert rows into the layout as you would in a Table layout with the Table Row Changes > Insert Rows command. See Create New Rows to Upload to the Web Application.
- Create Action Request Rows from Data Source: If available, use this command to create action request rows based on existing data. You may be prompted to log in or provide search criteria. The add-in appends pending action request rows to the action table. Review the rows and make edits as needed before uploading.
- Exclude Action Request Rows: Use this command to exclude a row from the upload. This command is handy if a row fails during upload and you want to exclude it from subsequent uploads until you’ve fixed the issue.
When you are ready to upload your pending action requests, click Upload Action Requests to send all the pending rows to the web application. As with Table layouts, the result of each action request is shown in the Status cell in the corresponding table row. When this row is selected, detailed information is shown in the Status Viewer.