Create and Configure Deployment Build Jobs and Pipelines
To deploy extensions to other Oracle Cloud Applications instances, you can use the Manage Extension Lifecycle page. If you'd rather use a CI/CD pipeline for deployment, you'll need to set up or create a packaging job, one or more deploy jobs, and a pipeline. Specifically:
- A packaging job packages the extension and creates a build artifact. Instead of creating new packaging jobs, you can use the
extensionName-Package job that was created with the project. (If you created this project manually, the package job is called Application-Extension-Package.) This job packages the extension and creates a build artifact from the same branch your team members used to deploy to the primary Oracle Cloud Applications Development instance. Remember, this packaging job is configured to trigger a build on every SCM commit. - Create one deploy job for each Oracle Cloud Applications instance you plan to deploy to. You'll also need a user's credentials who can deploy to each Oracle Cloud Applications instance. To create the job, see Create a Deployment Build Job.
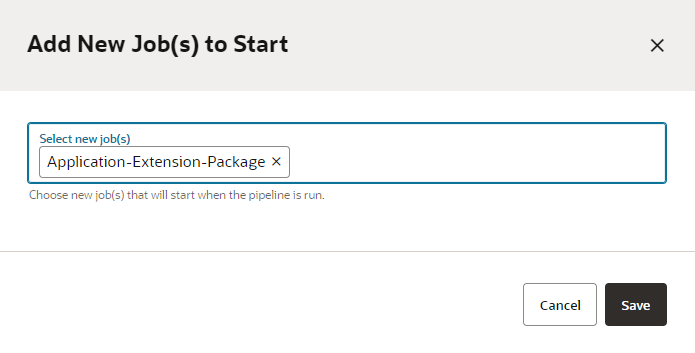
- After you've created deployment jobs, create pipelines to run the package job and deployment jobs in sequence. You can create either of these pipelines:
- A pipeline to deploy the extension to the primary and other Oracle Cloud Applications instances.
Instead of creating a new pipeline, configure the existing
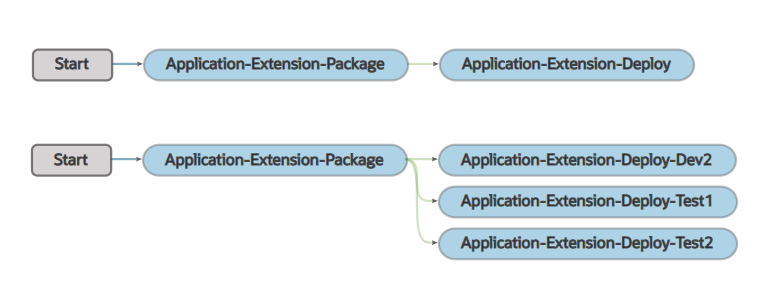
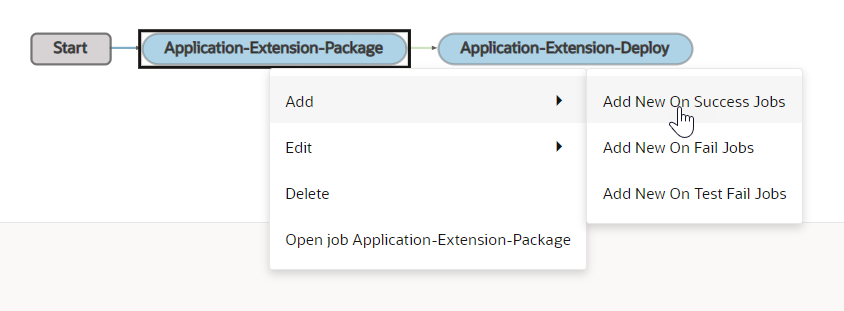
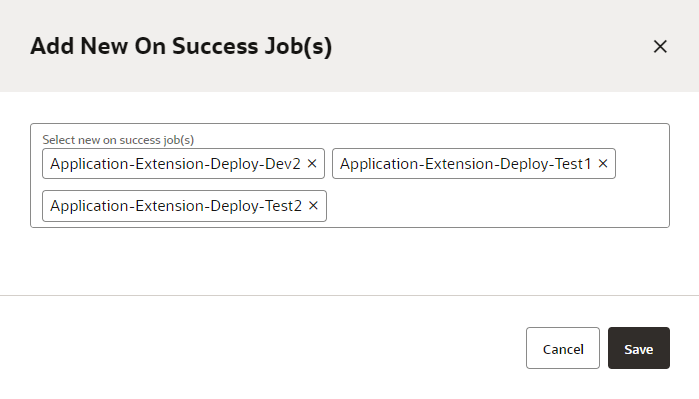
extensionName-Package and Deploy pipeline to deploy to other instances as well. (If you created this project manually, this pipeline's name is Application-Extension Package and Deploy.) See Configure the Default Pipeline to Deploy to Other Oracle Cloud Applications Instances. Remember, the default pipeline runs automatically when a code change is pushed to themainbranch. After you've configured the pipeline, it deploys the extension to all development and test instances on every SCM commit to themainbranch.After creating this pipeline, you'll have one pipeline in your project that deploys to all DEV and TEST instances.
Here's an example of what this pipeline could look like:
- A pipeline to deploy the extension to other DEV and TEST Oracle Cloud Applications instances manually. See Create and Configure a Pipeline to Deploy to Other Oracle Cloud Applications Instances.
Create this pipeline if you don't want to deploy the extension to other instances on every SCM commit, but only after your team members have validated the extension on the primary development instance.
After creating this pipeline, you'll have two pipelines in the project: 1) Your primary pipeline, which deploys to the primary development instance, and 2) this pipeline, which deploys to other DEV and TEST instances.
Here's an example of what these pipelines could look like:
- A pipeline to deploy the extension to the primary and other Oracle Cloud Applications instances.
Create a Deployment Build Job
The deployment job deploys the extension's artifact that was generated in the default packaging job to the Oracle Cloud Application's instance. Before you create the job, make sure you have credentials that VB Studio can use to access the instance.
Configure the Default Pipeline to Deploy to Other Oracle Cloud Applications Instances
If you want to deploy to other DEV and TEST instances along with your primary Oracle Cloud Applications instance, you can configure the default pipeline to deploy to other instances as well.
Deploy Changes from a Different Branch
At some point, you'll likely want to create a separate branch to host your new feature development work. You can package those changes from your new branch and deploy them to an Oracle Cloud Applications instance for testing.
To deploy to the Oracle Cloud Applications instance in the environment associated with your workspace, you can select the new branch when you publish your changes. Or, if your changes already exist in the new branch, you can use the Deploy option in the Designer. See Deploy Changes From the Remote Branch in Extending Oracle Cloud Applications with Visual Builder Studio.
To deploy to a different Oracle Cloud Applications instance, such as TEST or PROD, you'll need to set up some build jobs and a CI/CD pipeline.
Tip:
VB Studio can create the build jobs and pipeline for you, if you prefer. In the extension's Settings editor, under Building and Publishing, select the new branch, and then create and enable a CI/CD pipeline for the branch. (If you're deploying to a different instance that's not the one associated with your workspace, you'll need to change the target environment in the deployment job, after it's created.) See Establish Extension-Level Settings in Extending Oracle Cloud Applications with Visual Builder Studio.Create a Packaging Job for the New Branch
Create a packaging job following the same steps to create a production packaging build job, but when configuring the job, select the new branch instead of the default main branch:
- In the
left navigator, click Builds
 .
.
- Create a job using the System Default OL7 for Visual Builder template.
- Click Configure
 .
.
- Click the Git tab.
- From the Add Git list, select Git.
- In Repository, select the Git repository. In Branch or Tag, select the new branch.
Finish configuring the packaging job as usual. See Create the Production Packaging Build Job.
Create a Deployment Job
Create a deployment job following the same steps to create a production deployment build job, but when configuring the job, select the packaging job that you just created.
Create and Configure a Pipeline for the New Branch
After you've created the packaging and deployment jobs for the new branch, create a pipeline to run the packaging job and deployment jobs in sequence. See Create and Configure a Pipeline to Deploy to Other Oracle Cloud Applications Instances.


