Create and Set Up a Project Using the Visual Application Template
When your VB Studio instance is in the same identity domain as your Visual Builder instance, you can create a project based on the Visual Application template, then make a few configuration settings in the project so that it’s ready for developing visual applications.
Here’s a summary of how to create and set up a VB Studio project for development starting with the Visual Application template:
| To perform this action: | See this: |
|---|---|
| 1. Create a project. {#VBADM-GUID-05660E67-A526-494D-B19C-68E22EEF5817} | Create a Project Using the Visual Application Template Note Before you try to create a project, make sure your VB Studio instance is authorized to access Visual Builder instances that are connected to your OCI account. Without this authorization, these instances won't be available for selection as a deployment target in your project. See Authorize VB Studio to Access Visual Builder and Integration Instances. |
| 2. (Optional) Configure the deployment job to add credentials for connecting to the target development instance. | Create a Project Using the Visual Application Template When you create a project using the Visual Application template, a workspace is created that's configured to deploy your visual application to the development Visual Builder instance via a CI/CD pipeline. If you prefer, you can disable the CI/CD pipeline and instead deploy directly to the development Visual Builder instance. If you disable the CI/CD pipeline for deployment, skip this step. |
| 3. (Optional) Verify your credentials by running the development pipeline. | Run the Pipeline Manually If you disable the CI/CD pipeline for deployment, skip this step. |
| 4. View the deployed visual applications. | View the Deployed Visual Application |
| 5. Add team members to the project. | Add Users to the Project |
Create a Project Using the Visual Application Template
If you’re developing a visual application using a VB Studio instance that’s in the same identity domain as your Visual Builder instance, you can quickly get started by basing your project on the Visual Application project template.
- Sign in to VB Studio. See Access VB Studio from the Oracle Cloud Home Page.
- On the Organization page, click +Create.
- On the Project Details page of the New Project wizard, enter a unique name and description for the project.
- In Security, select the project’s privacy:
-
Select Private to restrict access to project members only.
Select the Discoverable checkbox to allow organization members that aren’t org admins or project members to see basic information, such as name and owner contact information, about your private project. Private projects that aren’t discoverable won’t be exposed to non-members.
-
Select Shared to make the project code, wiki docs, tasks, and builds available to anyone inside your organization.
-
- In Preferred Language, specify the language for the email notifications your project users will receive. You can change the language in which the user interface appears in your user preferences.
- Click Next.
- On the Project Template page, select the Visual Application project template, and then click Next.
- On the Project Properties page:
- In Git Repository Name, change the Git repository’s default name, if required.
- In Region and Compartment, select the OCI region and compartment where your Visual Builder instance is.
-
In Development VB Instance, if not already selected, select the Visual Builder development instance.
If you don’t see the Visual Builder instance you need, go back and revise your selections for the OCI region and compartment.
-
In Visual Application Template, select a visual application template available on the selected development instance.
By default, VB Studio uses the Default VB Application template. To select another template, click Change Template, select the template and click Use Selected.
-
(Optional) In Workspace Name, if required, change your private workspace’s name. By default, it is
Workspace1.A workspace contains all the artifacts that you need to develop visual applications, including a clone of this project’s Git repository–and the branch–containing the source files. To learn more about workspaces, see Create a Workspace in Building Responsive Applications with Visual Builder Studio.
-
(Optional) In Working Branch Name, if required, change the workspace’s working branch name. By default, it is
branch1.When the project is provisioned, the Git repository’s
mainbranch contains your application’s files. While creating the workspace, VB Studio creates a copy of themainbranch, renames it with your specified name and uses it as the workspace’s working branch. - Click Next.
- On the Team page:
- Click Add Members and select users or groups to add to the project, from the list displayed.
-
Select the membership (Project Owner, Developer Full Access, Developer Limited Access, or Contributor) that the members you’re adding will have in the project.
See What Are Project Memberships? for more information about each membership.
- Click Add.
- Repeat substeps a, b, and c for different users and groups with various membership types, if needed.
- Click Finish.
After the project is provisioned, the Project Home page opens where you can see a summary of the project’s provisioning activities; default environment; default workspace; and Git, Maven, and NPM repositories. Review the activities feed and the Environments box for any errors.
When you create a project using the Visual Application template, these artifacts are created for you:
-
A Git repository, which contains the visual application’s source code.
To see the Git repository’s files, go to the Project Home page, click the Repositories tab, then click the Git repository name:
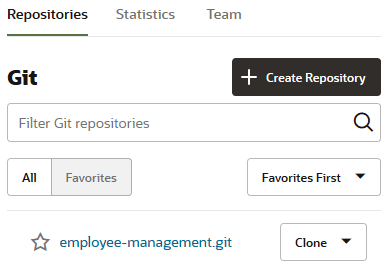
Description of the illustration default-visualapp-repository1.png
-
A Development environment pointing to the Visual Builder development instance.
In the left navigator, click Environments
 to see the Development environment:
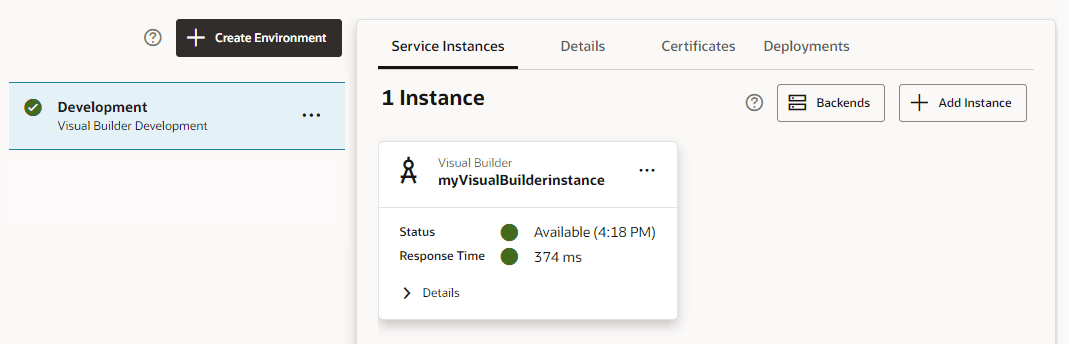
Description of the illustration default-visualapp-environment1.png
-
Build jobs that package and deploy the visual application’s artifact to the Visual Builder development instance.
By default, the Visual-Application-Package and Visual-Application-Deploy jobs are created for you. The Visual-Application-Package job generates the visual application’s artifact file. The Visual-Application-Deploy job deploys the visual application’s artifact file to the Visual Builder development instance.
In the left navigator, click Builds
 and then click the Jobs tab to see the build jobs:
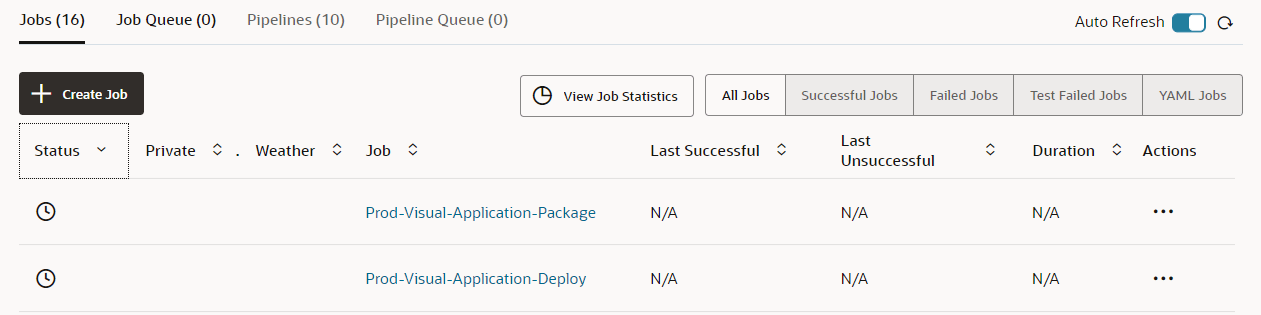
Description of the illustration default-visualapp-buildjobs1.png
To run builds of the package and deploy jobs, you must first allocate VM build executors and make the appropriate deployment configurations. Without the appropriate configuration or VM executors, the builds won’t run.
-
A pipeline to run the build jobs in a sequence.
In the left navigator, click Builds
and then click the Pipelines tab. In the pipeline’s row, click the Actions  menu and select View Layout.

Description of the illustration default-visualapp-pipeline1.png
If you prefer to bypass the CI/CD pipeline and instead deploy directly to your Visual Builder instance, change the CI/CD pipeline setting.
-
A private workspace to edit the visual application in the VB Studio Designer.
In the left navigator, click Workspaces
 to see the workspace:
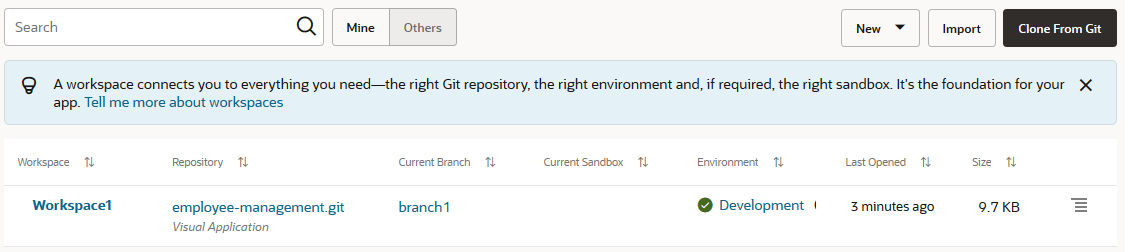
Description of the illustration default-visualapp-workspace.png
- By default, the project uses the organization’s default markup language. Your project’s users use the markup language to format wiki pages and comments. If required, you can change the project’s markup language from the Project Administration page. See Change a Project’s Wiki Markup Language.
-
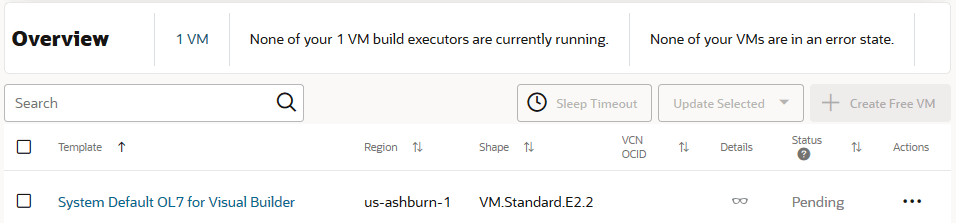
A VM executor is created if this project is VB Studio’s first project and no build VM executors had existed when you created the project. The VM executor uses the System Default OL7 for Visual Builder build executor template. You can use this VM executor to run build jobs that reference the System Default OL7 for Visual Builder template in the current project and other projects as well. See VM Build Executors for more information about VM executors and build executor templates.
In the left navigator, click Organization
 and then click the VM Build Executors tab to see the VM executor.
Configure the Deployment Job
The deployment job deploys the visual application’s build artifact to your Visual Builder development instance. In the deployment job, specify the application’s version and profile, and the credentials required to connect and deploy the build artifact to your Visual Builder development instance.
- In the left navigator, click Builds .
- In the Jobs tab, click the deployment job.
- Click Configure.
- Click Configure .
- Click the Steps tab.
-
In the Authorization section, specify the authorization type to run this build step. With Use OAuth selected by default, you’ll see the
Authorization is requiredmessage, indicating that this build step needs a one-time authorization to handle OAuth requests to your environment’s Visual Builder instance. Click Authorize and enter credentials to access your Visual Builder instance; you can also run the job manually and enter the credentials when prompted.Either way, it is recommended that you authorize your OAuth connection during initial configuration. If you skip this step, you won’t be able to publish your changes from the Designer and will need to complete the required authorization before attempting to deploy changes.
Once authorized, the
Authorization has been providedmessage shows.Note: OAuth is the recommended authorization type. Use Basic authentication only if you run into issues with setting up an OAuth connection. To use Basic authentication, select Use Basic, then enter the credentials of a user who can access the Visual Builder instance in Username and Password.
OAuth tokens (access and refresh) are cycled during regular use. A refresh token is used to obtain an access token whenever a user accesses the target instance. This refresh token is typically valid for seven days. (The token expiration time is set in the IDCS resource app and may be different based on your security requirements.) If the user authenticates with the target instance within the seven-day period, the active refresh token generates a new access token and a new refresh token. This cycle continues indefinitely as long as the refresh token stays valid. If the refresh token expires during extended periods of inactivity (say, when you’re away on vacation), click Renew Authorization (or run the job manually, so you’re prompted to authorize any expired OAuth tokens).
-
(Optional) To overwrite the application’s default version, specify the new version in Application Version. Leave it empty to use the version defined in the application’s
visual-application.jsonfile.Don’t deselect the Include the application version in the URL check box.
-
(Optional) In Application Profile, specify the development application profile. Leave it empty to use the application’s default profile.
Your visual application accesses data from different servers for REST services and may need different security settings for different environments, such as development and production. Using application profiles, you can define different combinations of servers and security settings for each of your environments, and use them when deploying the application to an environment. This simplifies management of the visual application as you move through development to production. To learn more, see About Application Profiles.
-
(Optional) To use the existing application’s database, in Data Management, select Keep existing environment data.
To use a clean database for the application, in Data Management, select Use clean database.
- Click Save.
Run the Pipeline Manually
The development build pipeline runs automatically when a commit is pushed to the Git repository’s branch specified in the packaging job.
If you want to run the pipeline manually:
- In the left navigator, click Builds .
- Click the Pipelines tab.
- In development pipeline’s row, click the Actions menu and select Run Pipeline.
To monitor the pipeline and see each job’s status, click the pipeline’s name. To see a job’s build log, click the job’s name and click View Log.
If you want to run a job’s build manually, open the job’s details page and click Build Now. You can monitor its build on the job’s details page.
View the Deployed Visual Application
After the deployment job has successfully run, you can view the deployed applications in the Deployments tab of the Environments page.
- In the left navigator, click Environments .
- Select the Visual Builder environment.
- Click the Deployments tab.
- If not enabled, click the Visual Applications toggle button.
- If the Visual Builder instance is from a different identity domain, provide its access credentials.
-
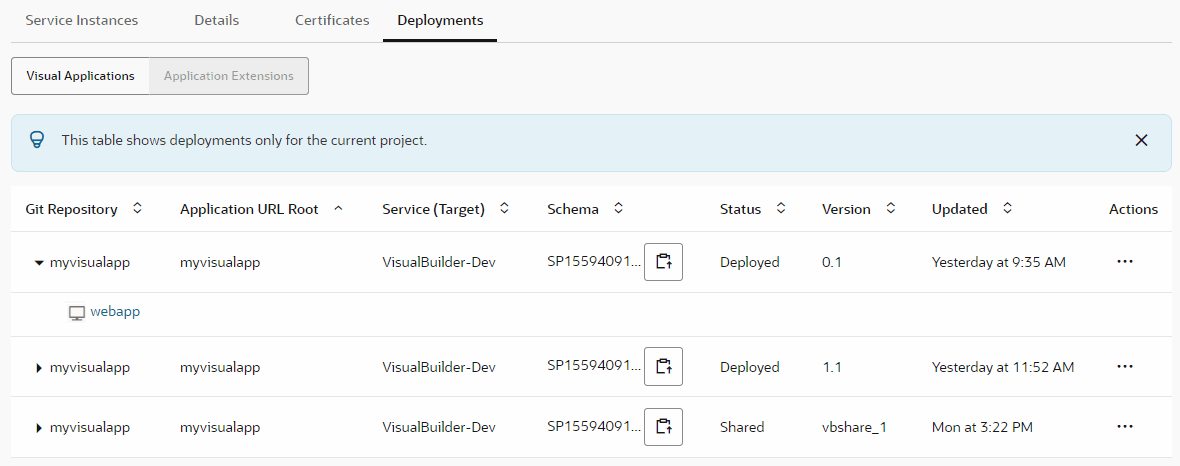
Expand the app’s name to see the deployed app’s link.
The Deployments tab displays the applications you’ve deployed from the current project. It doesn’t show applications deployed by other users of the project, or applications deployed from other projects. Here’s an example:
If you want to undeploy your deployed visual application, you can do so manually or through a job configuration. See Undeploy a Visual Application.