Create and Manage Flows
When you first create an App UI, the main flow is automatically created for you and set as the default flow for the App UI. You can create other flows as needed, even a flow within a flow.
-
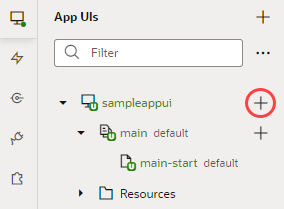
Open your App UI, then click the Create Flow icon (
 ) next to the App UI node:
Description of the illustration create-flow.png -
In the Create Flow dialog box, enter a name for the flow and click Create.
Creating a flow automatically creates a start page for that flow and sets it as the flow's default page.
-
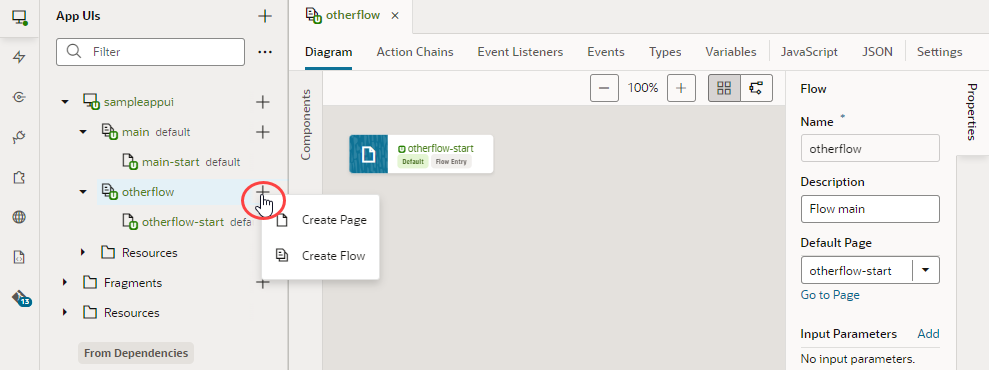
Expand the flow to see pages and artifacts within a flow and make your selection:
Artifact Description Flow artifact Open the flow to edit metadata such as variables, types, action chains, and JavaScript functions that can be used on every page in the flow. If you don't want the starter page created automatically as the default page in the flow, use the flow's Settings editor to change it.
To create a new page in the flow, click the Create Page icon (
 ) next to the flow artifact, then Create Page.
To create sub-flows that let you navigate between pages in the sub-flow without leaving the page containing the sub-flow, see Embed a Flow Within a Page.
Page artifact Open each page to edit the page’s layout and other page metadata.
You can duplicate, rename, or delete a flow if needed by selecting an action from the flow's right-click menu.
Each flow has access to the App UI's
Resourcesfolder containing images and CSS files that can be used in the flow's pages, in addition to the Global Resources folder available to all App UIs in the extension. See Work With Resource Files.
