Create Fields For a Layout

You can create fields in a Layout if you'd like to use a field that isn't defined in your Oracle Cloud Application. You can set the fields to variables, or to expressions that reference other fields available in the Layout.

Note:

Creating a field in VB Studio doesn't create a field in your Oracle Cloud Application. You need to use App Composer to create custom fields in your Oracle Cloud Application. For details, see Add Objects and Fields in Configuring Applications Using Application Composer.

You can't create or modify the fields in your Oracle Cloud Application, or the service definition used by a Layout, but you can override some field properties, such as "Read Only" and "Required". So if a field's Required property is set to False in the service definition, you can override the property to make it more strict and set it to True. This won't change the description in the service definition, where the property will still be set to False. However, you can't override a property to make it less strict, meaning you can't set a Required property to False if it is already set to True in the service definition.

If the fields defined in the service definition don't meet your needs, you can create calculated fields and virtual fields. You would use a calculated field when you want to use an expression, set a default value, modify labels, and set Read-Only and Required properties. You would use a virtual field if you want a field that has editable sub-fields. To create a virtual field, see Create a Virtual Field below.

You can use a calculated field when you want to have a single field in your Layout that, for example, contains some static string or an expression that is computed from the values of other referenced fields or objects. Suppose your data source has separate fields for a user's first name and last name. You could create a calculated field that combines these fields into a single field called fullName, and use that in your layouts instead. The value of this new field is calculated using an expression like [[ 'Name: ' + $fields.firstName.value() + $fields.lastName.value() ]]. In a calculated field, referenced fields defined in the expression are read-only, so they can't be edited in a layout.

To create a calculated field:

  1. Open the Fields tab in the Layout you want to configure.
  2. Click Custom Field.
  3. Type a label for the field (the field's display name). When you type in the label field, a suggested ID is generated for you. The ID can't be changed later.
  4. Select the field type.
    When selecting a type for a calculated field, you should consider the types of the referenced fields you'll include in the expression.
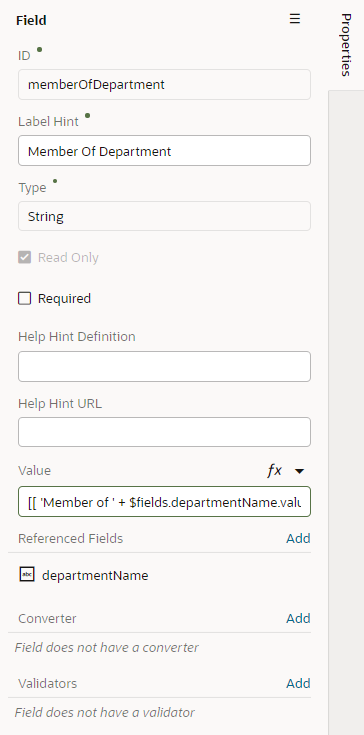
  5. If you want to create an expression and use an existing field, click Referenced Field, then select a field in the list. Click Add to add it.

    You can add any field available in the Layout, including the sub-fields of fields with an object type. If you add one or more referenced fields, you won't see the Default Value property in the Properties pane. Instead, you'll see a Value property, which you use to specify the expression.

    If you set a calculated field to Read Only, you set the field's value or expression in the Value field (there is no Default Value property for read-only fields).

  6. Define an expression in the Value property.

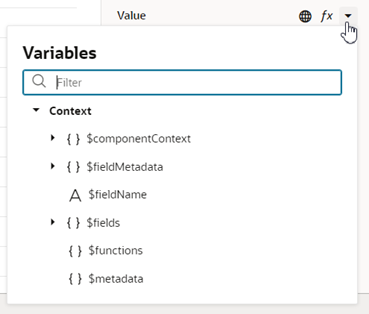
    The expression can include variables, static strings and referenced fields. If you want to use a single variable, you can click Select Variable to open the Variables picker.


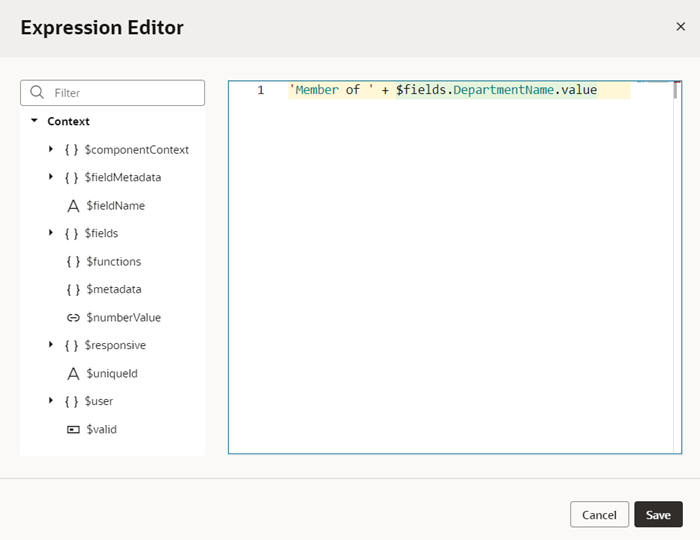
    if you want to use an expression, you can clickfxto open the Expression Editor. In the Expression Editor, variables are grouped by context in the Context pane. For example, fields available in the Layout are listed under $fields, and user metadata is listed under $users. You can select a variable in the Context pane to add it to your expression, or start typing in the editor to use the editor's code completion. You can also add text strings to your expression by typing in the editor. Click Save.


    The expression you create in the editor is added to the Value field, for example, [[ 'Member of ' + $fields.departmentName.value() + $fields.JobName.value() ]].


  7. Optionally, you can click Add to add converters and validators to the field.

    You can add suitable built-in convertors or validators, or create a custom one. If you're using a referenced field, you might want to add converters or validators to make sure, for example, a string in a field is not too long, or so that dates are formatted the way you want, as shown in Add Converters and Validators to Fields.

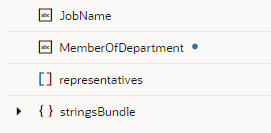
Your custom fields (and any fields that you have modified, for example, in the Properties pane) are indicated by a blue dot to the right of the field name. In this screenshot, you can see the blue dot next to MemberOfDepartment.


Create a Virtual Field

You might want to create a virtual field if you would like to combine multiple fields together into a single field that you can add to your rule set layouts. For example, you can create a single field that combines several contact details that are stored in different fields in your layout. A virtual field is similar to a calculated field, except:

  • the referenced fields can be edited in the layout; and
  • the virtual field is rendered using a field template.

When you add a virtual field to a layout, you'll need to define a field template to display it. You'll need to create the field template if it doesn't exist. The template will contain components for each of the referenced fields that you want to display in the layout.

To create a virtual field:
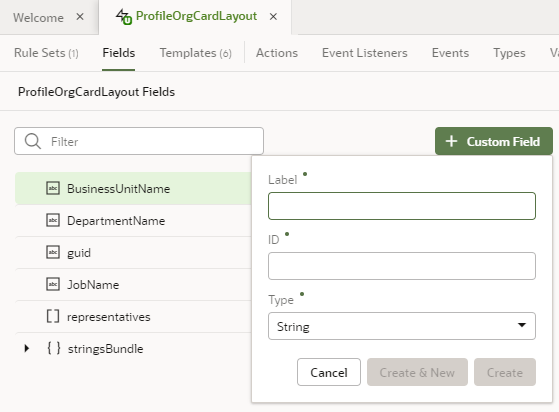
  1. Open the Layout's Fields editor.
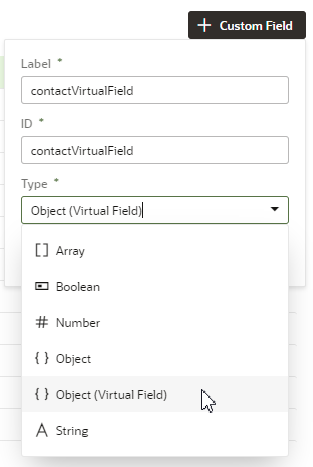
  2. Click Custom Field and type a label for the field (the field's display name).

    When you type in the label field, a suggested ID is generated for you. The ID can't be changed later.

  3. Select the Object (Virtual Field) type. Click Create.
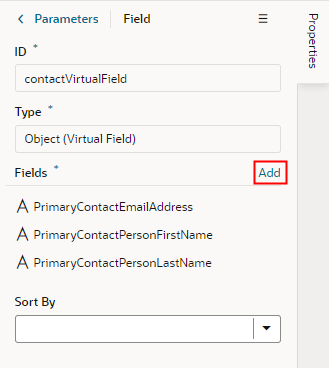
  4. In the Properties pane, click Add and select the fields you want to include as reference fields.

    You can add any of the available fields as reference fields, including sub-fields of objects.


  5. Select a field in the Sort By dropdown list to define the field that should be used for sorting when the virtual field is used in a table.

    Only one field in a virtual field can be used for sorting. For example, if the virtual field FullName consists of a FirstName and LastName field, select LastName if you want it to be used when the table is sorted by FullName. The Sort By field will be used for sorting regardless of how the virtual field is rendered in the table by the template. (Remember, you need to use a field template to display a virtual field).

    The table won't be sortable by the virtual field if you don't select a Sort By field.

  6. In the Rule Sets editor, open the rule set layout of the dynamic form where you want to add your field.
  7. Add the virtual field to the layout.
    You can drag it from the Fields palette into the center pane, or select it in the list and then adjust its position in the center pane.
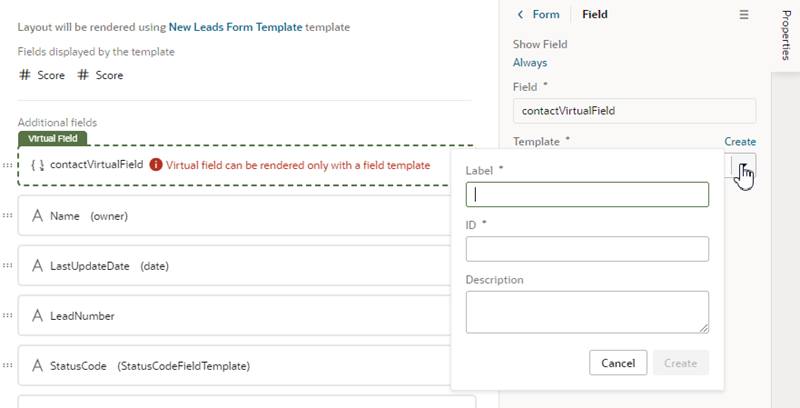
  8. While your virtual field is selected, click Create in the Properties pane and type a name for the template in the Label field. Click Create to open the new template in the editor.


    You need to define a field template for the virtual field when you add it to a layout. If a suitable field template for the virtual field already exists, you can select it in the dropdown list. You'll need to create one if no template exists.

  9. In the template editor, add a component and define the properties for each referenced field in the virtual field that you want the template to display.
  10. Click Return to layout when you're finished.
    The new template is applied to your virtual field.
You can add the virtual field to other rule set layouts in the Layout. When adding the virtual field, you can apply the same field template, or create additional field templates to apply to the virtual field.