How Do Sandboxes Relate to Git Branches?
There is no strict association between an Oracle Cloud Applications sandbox and a particular Git branch in your local repository. In fact, you can associate any sandbox to any Git branch in your repo while you're working on your extension in your private workspace.
- In your Oracle Cloud Application, you create a sandbox to make a change to the data model, like adding a new column to a database table.
- When you create a workspace in VB Studio, you specify the sandbox you want to access while making UI changes in your extension. If you jump over to VB Studio using the Edit Page in Visual Builder Studio option, your workspace will be set to your Oracle Cloud Application's active sandbox.
- Also while creating your workspace, you can create a new Git branch to house the UI changes you plan to make. Or, if you've previously made UI changes on a branch and want to continue with that branch, you can select it here.
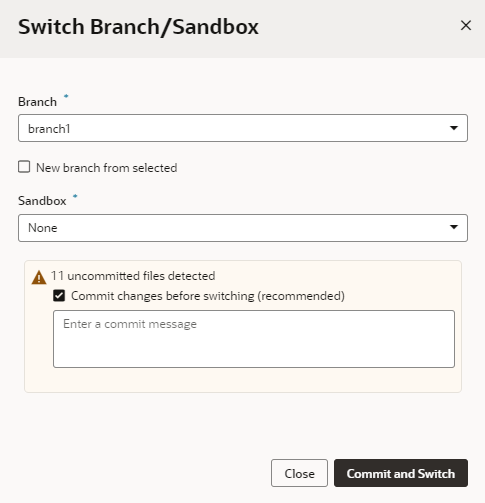
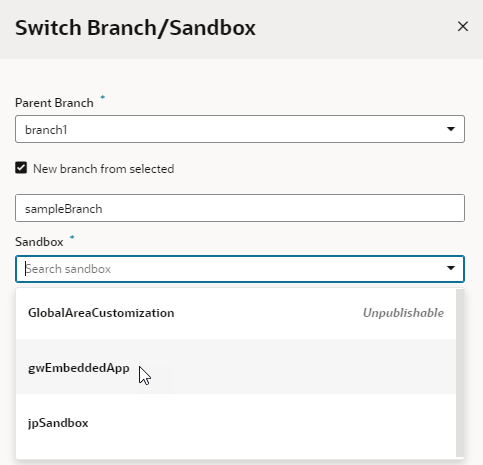
Switch a Sandbox
You might need to switch sandboxes in your workspace if the one you're using was deleted or published. You can also switch when you want a sandbox that defines an alternative data model, or if yours is using the mainline data model (indicated by the None sandbox in the header).
Before you switch a sandbox, see How Do I Use My Sandbox in Visual Builder Studio? for best practices on working with sandboxes.
Refresh a Sandbox
You might need to refresh a sandbox associated with your workspace to pick up the latest changes from other published sandboxes. VB Studio will notify you if this is required, for example, as shown here:
Clicking Refresh in the message will refresh your sandbox. You can also do this using Refresh in the Sandbox menu:
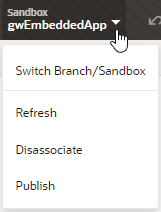
- Click the Sandbox menu in the header:
- Select Refresh. This option is enabled only when your sandbox needs to be refreshed.
Disassociate a Sandbox
You can remove the sandbox currently associated with your workspace if you no longer need it. Removing a sandbox breaks the relationship between the Git branch and the sandbox and will likely impact your app's logic as well as the user interface. Proceed with caution.
- Click the Sandbox menu in the header:
- Select Disassociate.
- In the Disassociate Sandbox dialog, click Disassociate to confirm your action.
Publish a Sandbox
After you're done making changes to your extension, publish the sandbox to make your changes available to all users. Remember that you can't make changes to a sandbox once it's published, so make sure you adequately test and verify your extension's code before publishing your changes.
- Click the Sandbox menu in the header:
- Select Publish.
- In the Publish sandbox dialog, click Publish to confirm your action.
Any workspaces associated with the published sandbox must be switched to another sandbox.


