Display Messages in a Form
You use a validation rule to display a message when certain conditions are met. When you create a rule, you define the conditions for when the rule should be applied, and define the message that should be displayed.
Validation rules are set at the object level, rather than for a specific page. This means that when you define a validation rule for a form—for example, a form for editing the BudgetDetails business object—the rule is applied on every page where that form is used and the conditions are met.
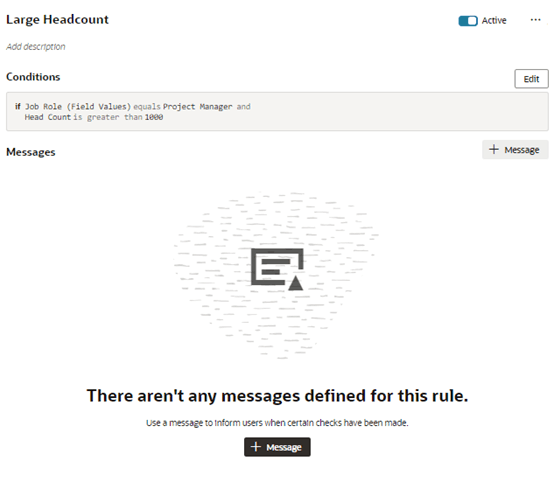
Validation rules are particularly useful when you want to display some type of warning message based on data entered in a form. Suppose you want to display a message reminding the user to update the Budget Amount when the Head Count is more than 1000. You can create a rule that checks the value entered in the Head Count field, and display a message like this in the form:
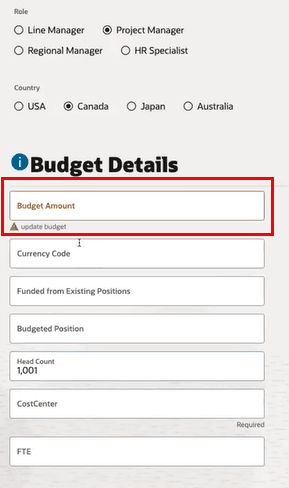
Description of the illustration metadata-validate-messagesinform.png
Note Validation rules only display messages in forms rendered using the oj-dyn-form form component. If your application has any forms rendered using the older version of the form component (oj-dynamic-form), validation rules won’t work correctly in those forms.
To check which version of the form component is used in a page, you need to view the page in Advanced mode:
- Click Advanced in the header to open the page in Advanced mode.
- Select the form component to open the component’s details pane in the Properties pane.
-
Hover your cusor over the component’s name to view the Info icon (
 ), then move your cursor over the icon to open the component’s Info popup.
Description of the illustration metadata-validate-forminfo.png
In the example above, the popup shows this form is rendered using the
oj-dyn-formform component. - Click Express in the header to return to Express mode.
Create a Rule to Validate a Field
Let’s take a look at how to create a rule that works like the example above, displaying a message in a form when the value for the Head Count field is over 1000.
To create the validation rule:
-
Open the page containing the form, and then click Validate Field Values under Business Rules in the Properties pane.
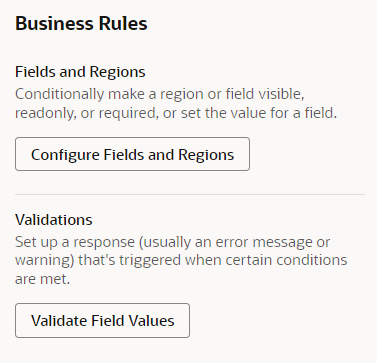
Description of the illustration metadata-validate-fieldvalues.png
If you see a dynamic component’s details pane like this in the Properties pane instead of the Business Rules pane, click …, and then select Validate Field Values in the menu:

Description of the illustration metadata-validate-openmenu.png
-
Create a new rule.
-
If some rules are already defined, click
 to open the Create Validation dialog box.
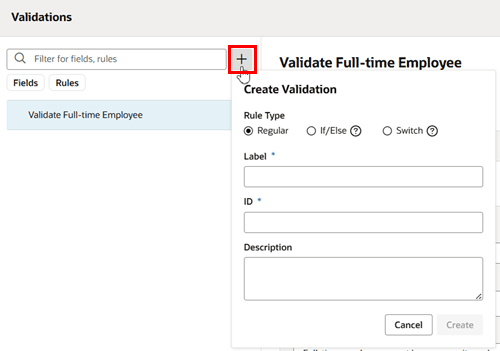
Description of the illustration metadata-validate-existingrules.png
Rather than creating a rule from scratch, you can duplicate an existing rule and use it as the basis for a new rule. To duplicate a rule, right-click the rule in the list, and then click Duplicate.
Note When duplicating rules defined in extension dependencies (the rules with the Built-in label):
- You cannot duplicate a rule if it uses advanced expressions, for example, in the rule’s condition or to override a field’s value.
- You cannot duplicate a rule if it uses any global functions that cannot be referenced in the extension. If the global functions are referenceable, when the rule is duplicated they are automatically imported, and the references to the function are updated in the rule.
- When duplicating nested rules, you can only duplicate the top-level rule. When you duplicate the rule, the child rules are also duplicated.
-
If there are no rules yet, click + Validation.
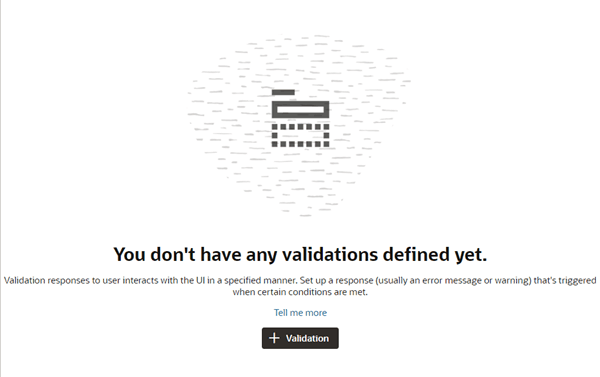
Description of the illustration metadata-validate-norules.png
-
-
Select the Regular Rule Type in the dialog box, and then enter a label, id, and description. Click Create.
In the Create Validation dialog box, you can select a validation rule using the Template dropdown list (if any are defined in the app), or choose a rule type (Regular, If/else, or Switch). For more, see Add an If/Else Rule and Add a Switch Rule.
-
Click Edit, then specify the rule’s conditions. Click Done when you’re finished.
You create conditions for validation rules using the standard condition builder, or you can click Use Advanced Expressions to use the advanced expression builder if you want to create more complex conditions.
For this rule, we want to create two conditions: the Job Role must be ‘Project Manager’, and the value for Head Count must be greater than 1000. The rule will be applied when both these conditions are met:
Description of the illustration metadata-validate-condition.png
-
Specify the message details.
When the conditions are met, we want the warning message "Update budget" displayed under the Budget Amount field in the form.
-
Click + Message.
-
Type the message texts in the Summary and Details fields.
You use these two fields to enter the text for the message.
- Summary. The Summary text is displayed in the title of a message dialog. The text in the Summary field is not displayed on the page if you are using an inline warning, but it’s still a required field.
- Detail. The Detail text is the actual text message. This text is displayed inline in the form if you are displaying an inline warning, and in a message dialog if it’s not displayed inline.
Your message text can be a simple string, like "This number is invalid", or you can write more targeted messages by passing field values and context parameters into the message. For example, you could add something like this in the Detail field:
[[ 'Restricted feedback applies to ' +$fields.PersonName.$value()+ ' who is part of ' +$objectContext.Department+ '. Select someone from the department without feedback restrictions.']]To create a message that includes different types, such as variables or objects, you need to surround the message with
[[ ]], so that it’s treated as an Object and evaluated, and not treated as plain text. To construct the message, any static text has to be enclosed in quotes, and you need to use a+operator to concatenate the static text, variables, and other entities:
Description of the illustration metadata-validate-advmessage.png
To generate translations of the Summary and Detail texts, you can hover over the text field and then click
 to open the Translatable String popup:
Description of the illustration metadata-validate-translate.png
It’s not possible to add parameters in the Translatable String popup, but you can click
 to open the Expression Editor, and then manually edit the translation object if you want to use parameters.
 -
Select the Warning in the Severity dropdown menu.
The Severity menu contains the following options:
- Error. Choose this when there is some data that the user must correct before they can submit the form. This is the highest severity level.
- Warning. Choose this to call attention to a field, for example, if you want to let a user know to check data that was entered. A warning message won’t prevent the user from interacting with the page.
-
Select the field where you want the inline message displayed in the Target Fields dropdown menu.

Description of the illustration metadata-validate-targetfield.png
If you do not select a target field, and the form contains only one editable field, the message is automatically applied to it.
Note A message is not displayed inline when:
- You do not select a target field, and the form has multiple fields.
- You select more than one target field.
If you want messages displayed in a dialog box instead of inline, a message component in the page needs to be manually configured to handle the messages.
-
To add a different message to the rule, say a message with different text displayed under a different field, click + Message to create a new message and specify its details.
To check if your rule is working, view the page in Live view and test the form by entering values to trigger the rule.
Description of the illustration metadata-validate-messagesinform.png