Defining Auto Match Rules
Define one or more auto match rules in a match process. Auto match rules are processed in the order in which they appear.
To create auto match rules:
- Navigate to the Match Process tab of the match type in which you want to add a match rule.
- Click the Match Rules tab. See Defining the Match Process.
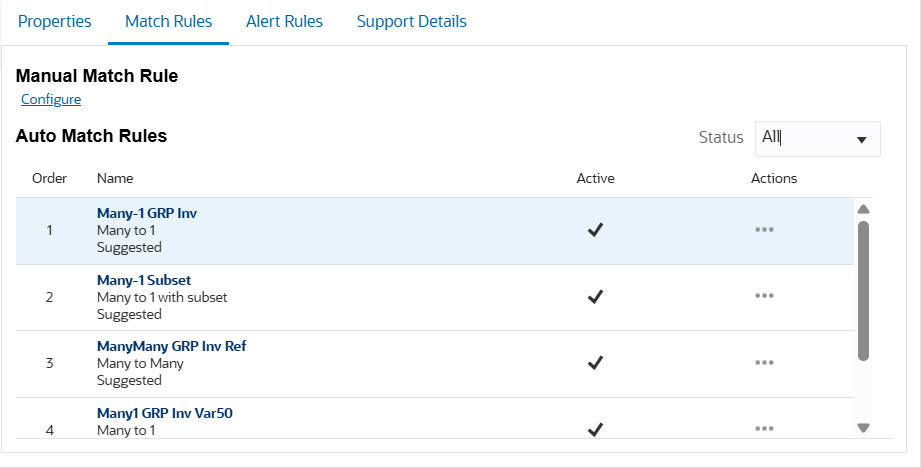
The Match Rules tab contains two sections, Manual Match Rule and Auto Match Rules. In the Status filter, select one of the following options to filter the Auto Match rules that are displayed: All, Active, or Inactive.
- In the Auto Match Rules section, click Add (+ sign). The New Rule dialog appears.
- Assign a unique ID, and then a
Name to the rule. A description is optional.
Note:
The ID field may contain up to 25 alphanumeric characters and cannot include any special characters except a period (.), dash (-), or underscore (_).The Name field may contain up to 50 alphanumeric characters and cannot include any special characters except a period (.), dash (-), or underscore (_). - Specify the Rule Type. This determines the number of
transactions selected on each side of the match.
The options available are: 1to1, 1 to Many, Many to 1, Many to Many, and Adjustment.
- For 1 to Many, Many to 1, and
Many to Many rule types only: Select With
Subset to create a subset rule.
See Using a Subset Rule During Creation of 1 to Many and Many to 1 Rules and Using a Subset During Creation of Many to Many Rules.
- Select the Match Status. This is the status assigned to the match when the specified match rule condition is met.
- Unselect Active if you want the rule to be inactive. By default, auto match rules are set to Active.
-
Click Save.
- In Filters and Groups, you can
group transactions based on the specified attributes (including group member
attributes) in the Groups section.
Grouping applies to the "Many" side of the rule and is supported for the following rule types, when Subset is not selected: One to Many, Many to One, and Many to Many rules. The Use Business Calendar option is available only for attributes of data type Date.
See Filtering and Grouping Transactions in Auto Match Rules.
-
Expand Rule Conditions and create one or more match rule conditions that must be met for this match rule to be satisfied and the transactions to be considered a match.
For each rule condition:
- Select the attributes from the source system and subsystem that must be
matched
Group member attributes can also be used in match rule conditions.
- In Match Tolerance, specify how the attributes
must be matched by selecting one of the following: Matches
Exactly, Matches with Tolerance,
or Matches with Contains Operator.
For a rule condition with Match Tolerance set to Matches with Tolerance:
- In Use, select one of the following: Match Process Limits, Custom Limits.
- For Auto Match rules that compare Date attributes only: Select Business Calendar to use the business calendar while comparing date values.
- Select Use percentage tolerance if you want to match attribute values using a percentage tolerance.
- Specify From and To values for the lower and upper tolerance limits when matching attribute values.
If Match Tolerance is set to Matches with Contains Operator, you select the source system attribute, subsystem attribute, and specify whether the source system attribute must contain the subsystem attribute, or vice versa.
Note:
When the Match Tolerance is set to Matches with Tolerance- The data type of the attributes must be Integer, Number, or Date.
- The key attribute of a group attribute cannot be used in a match rule.
- Select the attributes from the source system and subsystem that must be
matched
- (Optional) Set up default adjustment and support values for the match process. See Setting Up Default Adjustment Values
This is an example of the Match Rules tab filled out for an
auto match process. The Active column shows which rules will
run during Auto Match. An X indicates that a rule will not
run and is inactive. Rules can be set to inactive using the Edit
Rule dialog. 