Use Case 9: Create a Subject Area
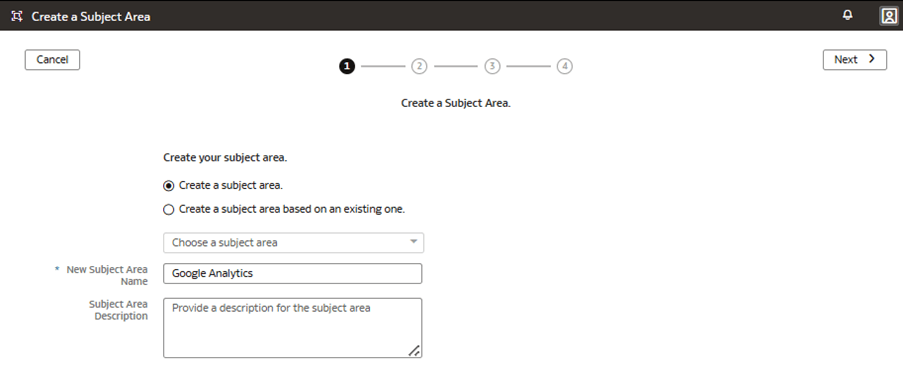
You can create a subject area to present and secure a custom view of a business model to focus on a particular business function.
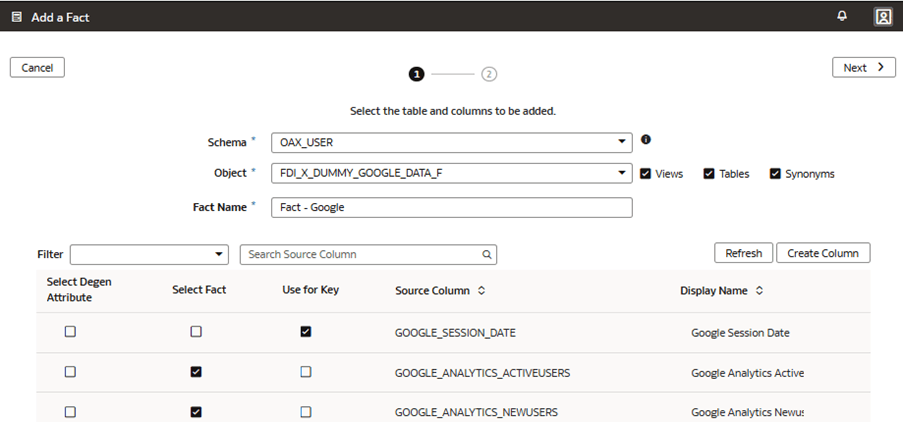
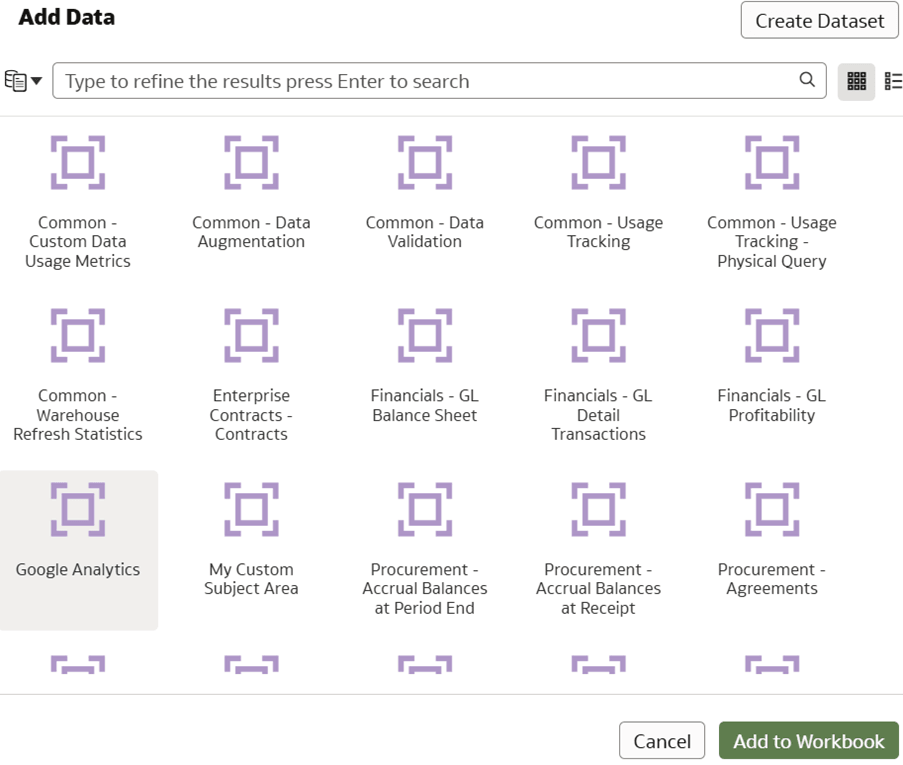
The prebuilt semantic model doesn’t contain the required Google Analytics business model and metrics. In this use case, you create, model, and present the Google Analytics subject area that contains data from an external source such as Google Analytics. To this subject area, add a custom fact Fact – Google and custom dimension Google Date.
You can apply the concepts covered in this use case to any of the Fusion Data Intelligence subscriptions. The use case may reference Autonomous Data Warehouse prebuilt tables and synonyms and mock custom database tables and views. If you’ve activated the specified Fusion Data Intelligence subscription, you may use the samples provided. The recommendation is to substitute the sample objects for your own custom Autonomous Data Warehouse objects such as custom table, materialized view, view, custom synonym, or data augmentation dataset synonym.
- Create a sandbox titled MySandbox5Mar25. See Create Sandbox. Or, edit an existing sandbox on the Semantic Model Extensions page; for example, by clicking the MySandbox5Mar25 sandbox.
- Create the sample fact table, FDI_X_DUMMY_GOOGLE_DATA_F, in the autonomous data warehouse associated with your Fusion Data Intelligence instance using the sample files FDI_X_DUMMY_GOOGLE_DATA_F.xlsx or FDI_X_DUMMY_GOOGLE_DATA_F.sql.
- Grant semantic model access to the table FDI_X_DUMMY_GOOGLE_DATA_F view for the
OAX$OAC schema using this SQL
script:
GRANT SELECT ON "OAX_USER"."FDI_X_DUMMY_GOOGLE_DATA_F" TO "OAX$OAC"; - Create the FDI_X_GOOGLE_DATE_D_V view using this SQL
script:
CREATE OR REPLACE FORCE EDITIONABLE VIEW "OAX_USER"."FDI_X_GOOGLE_DATE_D_V" ("CALENDAR_DATE", "CAL_MONTH_NUMBER", "CAL_YEAR_ID") DEFAULT COLLATION "USING_NLS_COMP" AS ( SELECT CALENDAR_DATE, CAL_MONTH_NUMBER, CAL_YEAR_ID FROM DW_DAY_D ); - Grant semantic model access to the FDI_X_GOOGLE_DATE_D_V view or the OAX$OAC
schema using this SQL
script:
GRANT SELECT ON "OAX_USER"."FDI_X_GOOGLE_DATE_D_V" TO "OAX$OAC"; - Validate that the data is loading from the sample as expected using the
following SQL
script:
SELECT * FROM OAX_USER.FDI_X_GOOGLE_DATE_D_V; - Validate that the data is loading from the sample as expected using the
following SQL
script:
SELECT * FROM OAX_USER.FDI_X_DUMMY_GOOGLE_DATA_F;
Add a Custom Fact to the Semantic Model
You create a logical star to define the autonomous data warehouse objects, fact measures, display labels, keys, aggregation rules, and content levels.
Add a Custom Dimension to the Semantic Model
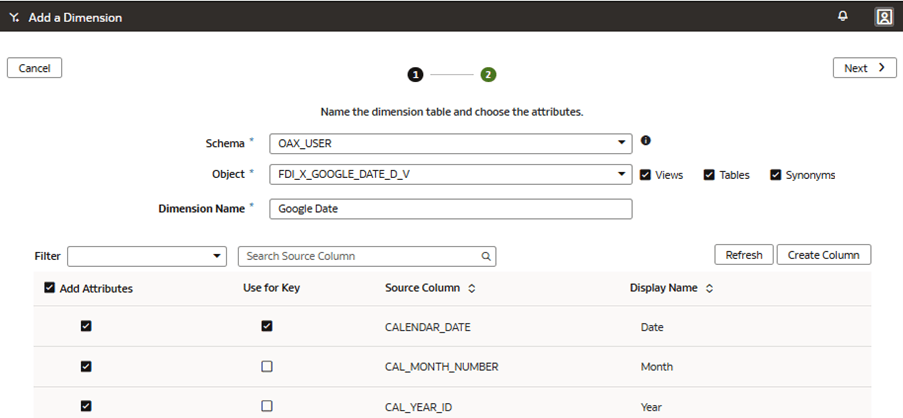
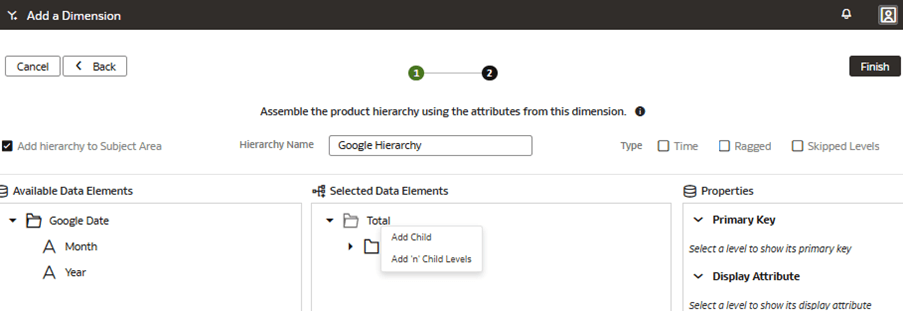
You edit the logical star to define the autonomous data warehouse objects, attributes, display labels, keys, and hierarchy.
Join the Custom Fact to the Custom Dimension
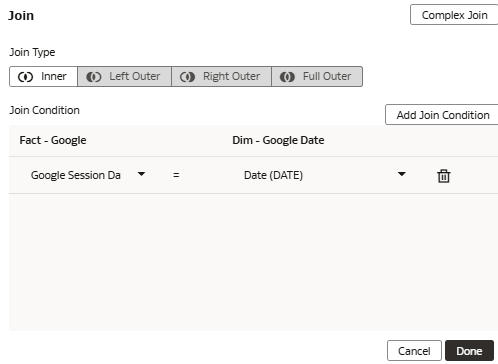
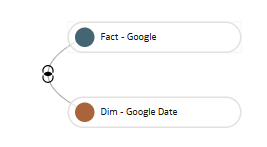
You join the custom dimension hierarchy to the custom fact by defining the join type and join condition. You can define Complex joins; however, it's advised to try and use standard joins where possible.
Present Custom Fact and Custom Dimension in the Semantic Model
You modify the subject area to present the new custom fact and its aggregable metrics, along with the new custom dimension attributes and hierarchy levels.
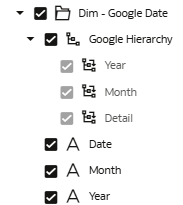
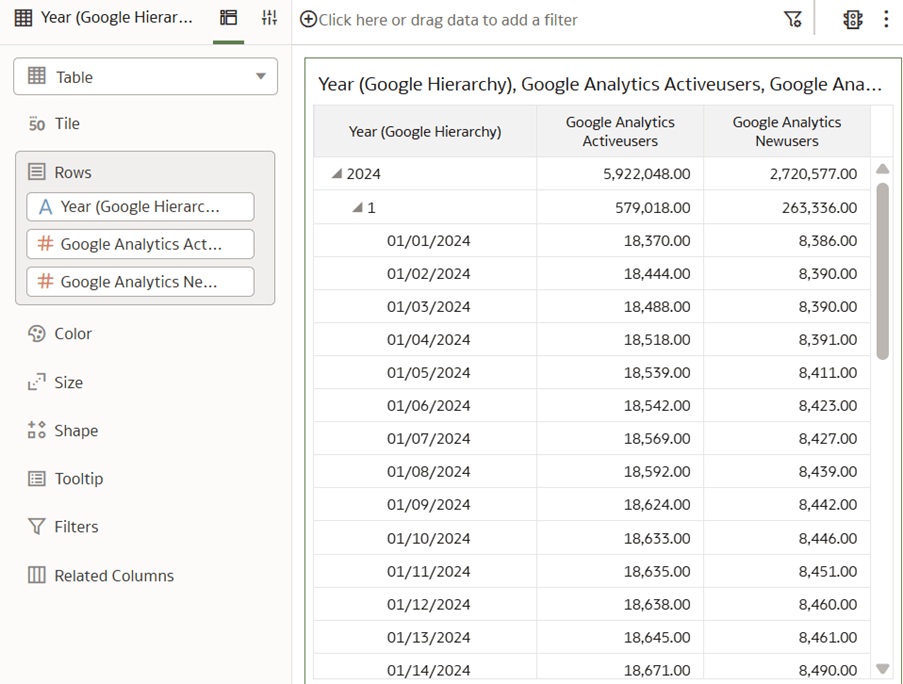
The fact is represented as a folder containing measure columns in the subject area. The dimension is represented as a folder containing columns in the subject area. The hierarchy levels are represented at the bottom of the custom dimension folder. Hierarchy levels used in Workbooks can expand and collapse to reveal or hide detailed rows.
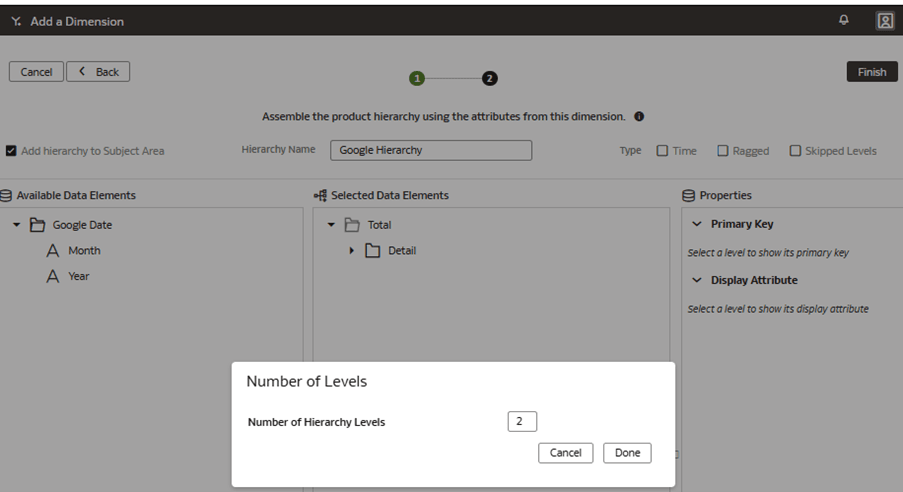
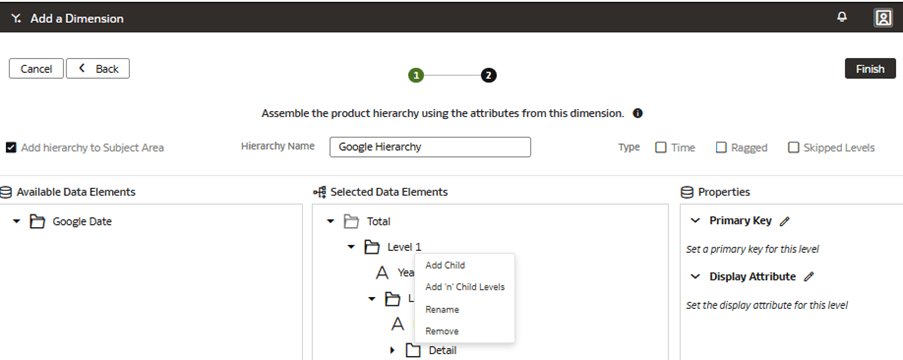
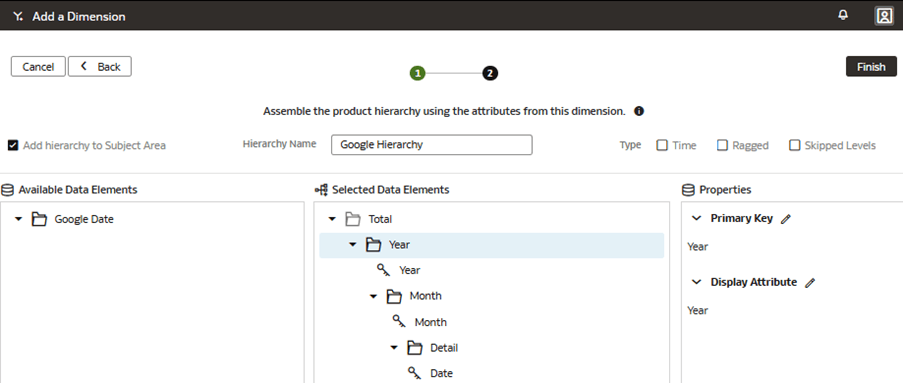
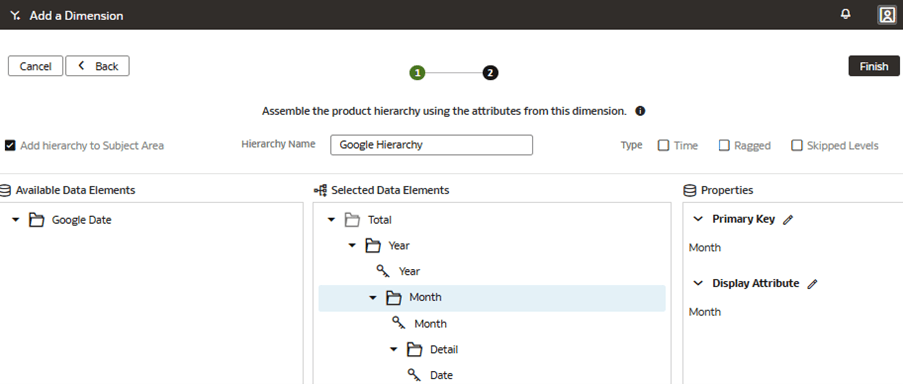
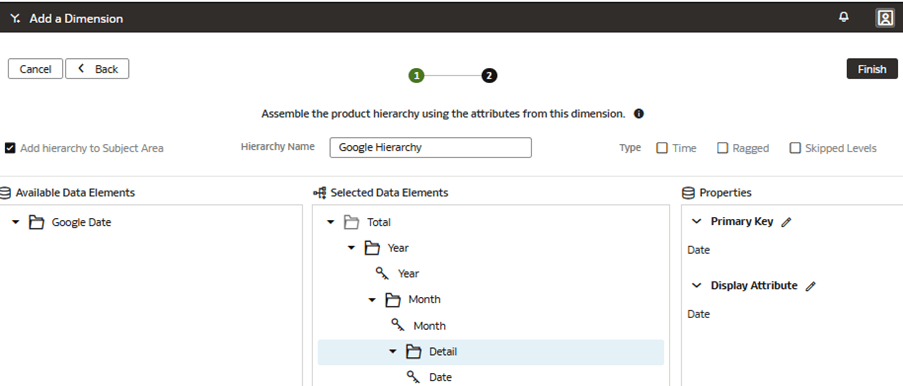
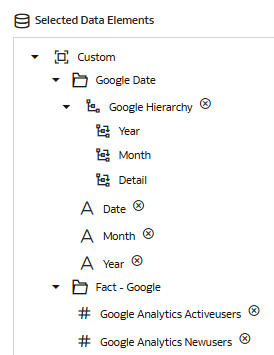
In this step, you create a new subject area Google Analytics to present the new fact folder Fact – Google containing the Google Analytics Activeusers and Google Analytics Newusers measures, along with the new custom Google Date folder containing the custom hierarchy Google Hierarchy with two levels (Year, Month) and lowest Detailed level.
Apply and Publish the Customizations
You apply the changes to compile the sandbox and ensure that the sandbox is error free.
Then, you use the Activity tab to debug, resolve errors, and confirm that the Apply Changes action completes and is successful. Finally, you merge the changes to the main sandbox and publish the main user extensions to share the new extensions with consumers.
In this step, you apply the changes, use the Activity tab to monitor the status, merge the MySandbox5Mar25 sandbox to the Main sandbox, and then publish the main user extension.

